

RESOURCES - PUBLICATIONS
STEEL TANKS FOR STORING AND TRANSPORTING PESTICIDES AND FERTILIZERS
STEEL TANKS FOR STORING AND TRANSPORTING PESTICIDES AND FERTILIZERS
Fred Whitford, Coordinator, Purdue Pesticide Programs
Dennis Nowaskie, Superintendent, Southwest Purdue Agricultural Center
Brad Peas, Sales Representative, AgroChem
Dean Sink, Liquid Production Supervisor, Co-Alliance
Ernie Fuller, retired, Tank Boilermaker
Gerry Bunn, Quality Control Manager, Dilling Group
Chuck Kominski, Director of Technical Services, Tessenderlo Kerley Services
Todd Cobbs, Crew Leader, The Andersons
Gerry Blase, Manager, Asplundch Railroad Division
Andy Schmerge, Sales, Fertilizer Dealer Supply
Kevin Leigh Smith, Editor, Purdue Agriculture Communication
Mild Steel Tanks . . . . . . . . . . . . . . . . . . . . . . . . . 4
Is Mild Steel Right For You? . . . . . . . . . . . . . . . 7
Installing . . . . . . . . . . . . . . . . . . . . . . . . . . . . . . 19
Inspecting and Maintaining . . . . . . . . . . . . . . . 23
Stainless Steel Tanks . . . . . . . . . . . . . . . . . . . . . . 32
Questions for Stainless Transport Tanks . . . . . . 35
Installing Tanks on Trucks and Trailers . . . . . . 43
Inspecting and Maintaining . . . . . . . . . . . . . . . 49
Repairing Tanks . . . . . . . . . . . . . . . . . . . . . . . . . . 52
Purchasing Used Tanks . . . . . . . . . . . . . . . . . . . . 58
Conclusion . . . . . . . . . . . . . . . . . . . . . . . . . . . . . . 68
Acknowledgments . . . . . . . . . . . . . . . . . . . . . . . . 70
Disclaimer . . . . . . . . . . . . . . . . . . . . . . . . . . . . . . 70

Tanks that transport and store pesticides and fertilizers can be made from many different materials, including polyethylene, fiberglass, and steel. It makes a difference which tank material you choose. Each material has unique properties that determine the kinds of products you can safely store and transport in them .
The material that works best depends on how you will use the tank. You need to select your tank’s construction material based on its compatibility with the material it will hold, how long you expect the tank to last, how much preventative maintenance you want to perform, and how much you want to pay up front.
To buy the right storage and transportation tanks, you will need to do some research. That includes asking the right questions and making accurate comparisons of product lines. This publication explores the aspects of purchasing and using mild steel and stainless steel tanks for farms, businesses, and public agencies. It provides important questions you should ask before you buy, offers tips to properly install tanks, and establishes guidelines for inspection and maintenance.
This publication is a companion to Poly Tanks for Farms and Businesses (Purdue Extension publication PPP-77) and Fiberglass Tanks for Storage, Transport, and Application: Designing Your Customized Tank (PPP-93). Both publications are available from the Education Store, www.the-education-store.com. If you are thinking about adding new tanks or replacing existing ones, review these publications. This information should help you decide which tanks are most appropriate for your operations.
MILD STEEL TANKS
You will find steel in many products: from bolts, screws, and nuts, to high-strength cables that hold up suspension bridges. Steel is composed of iron ore blended with a small percentage of carbon. There are many different processes for manufacturing and engineering carbon steel. That is why there is a grading system for steel that differentiates closely related products. The percentage of carbon in the final product determines the steel’s grade.
The grades of carbon steel are: mild, medium, high, and ultra. Mild grade is commonly used for tanks that store fertilizers and fuels. Mild steel contains 0 .2 to 2 percent carbon by weight.
Mild steel is preferred for tanks because of its cost, durability, and versatility, which allows it to be used among diverse industries. All steel tanks are made up of any number of steel rings that have been stacked on top of one another and welded together. The strength of each ring and weld are important features of tank construction.
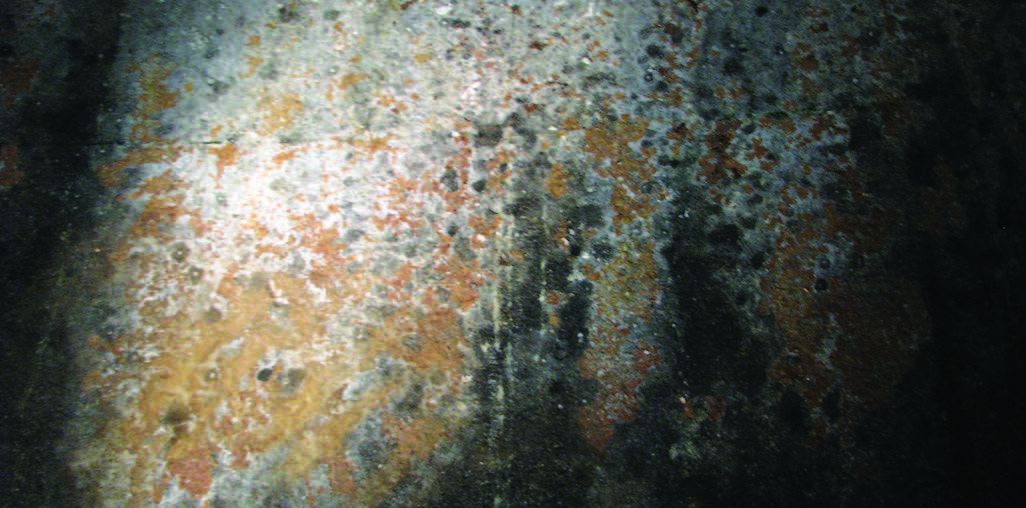
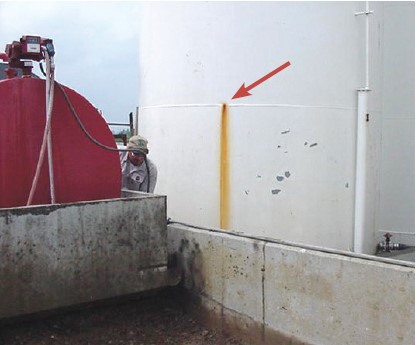
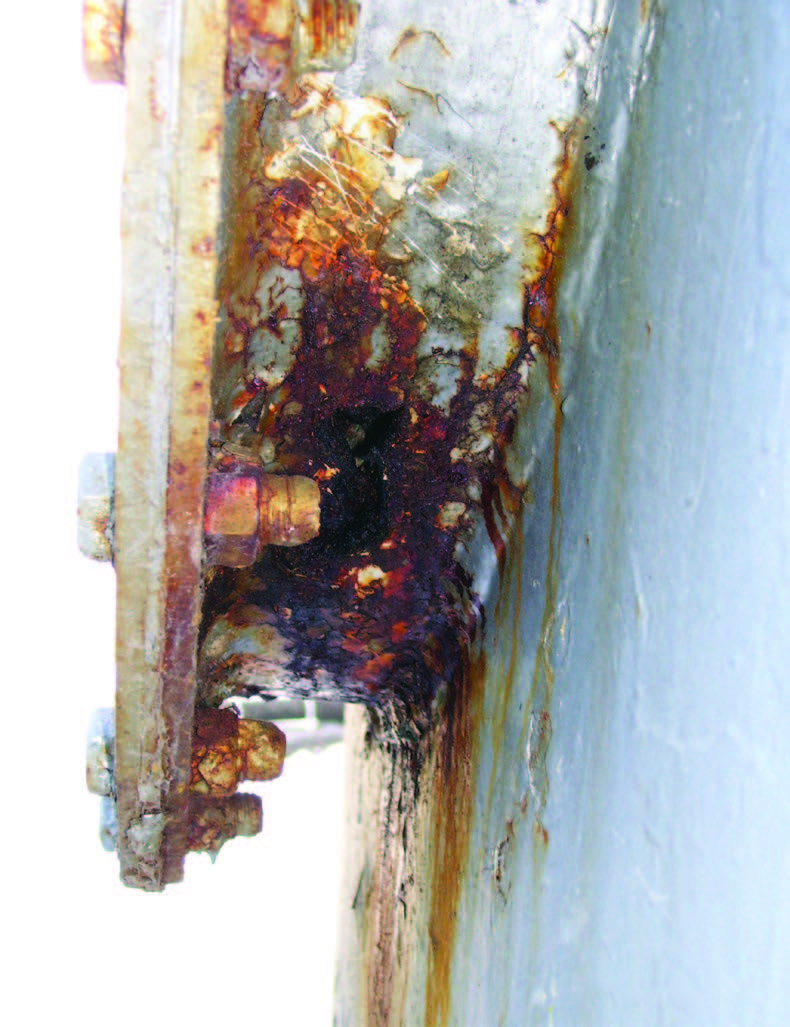
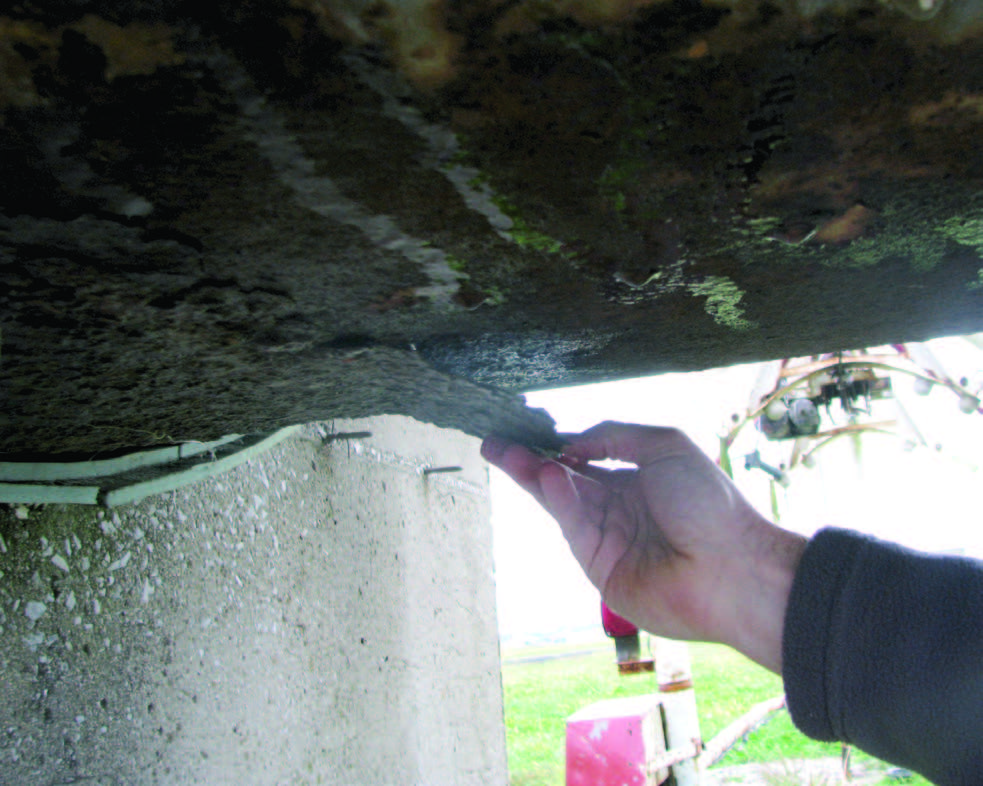
However, mild steel does have a drawback: some materials can easily corrode it. Over time, corrosive materials can cause small, shallow pits in the tank that become wider and deeper as the material continues to damage the steel. Eventually, these corrosive materials eat their way through the tank and result in an unwanted release of the material.


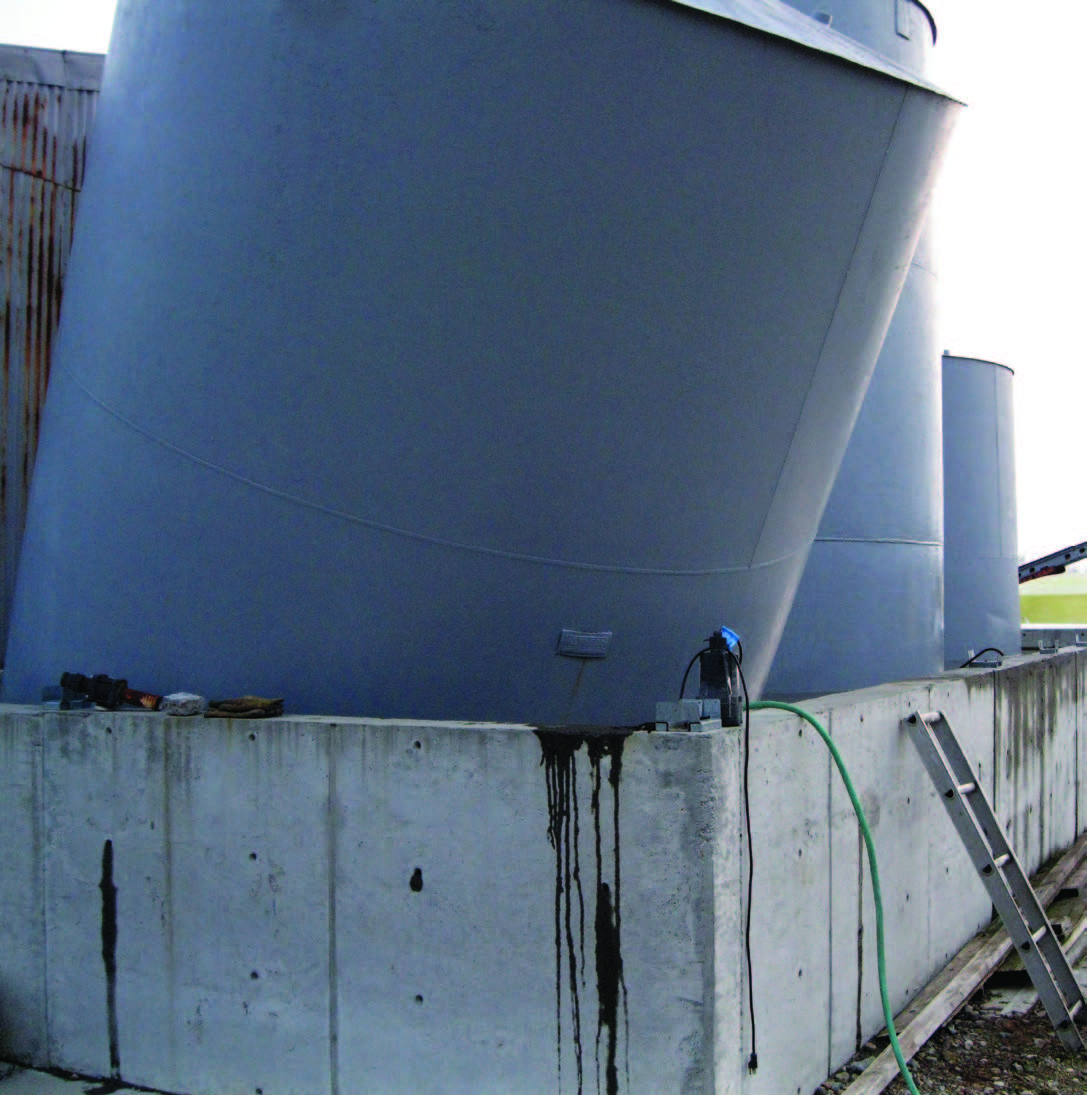
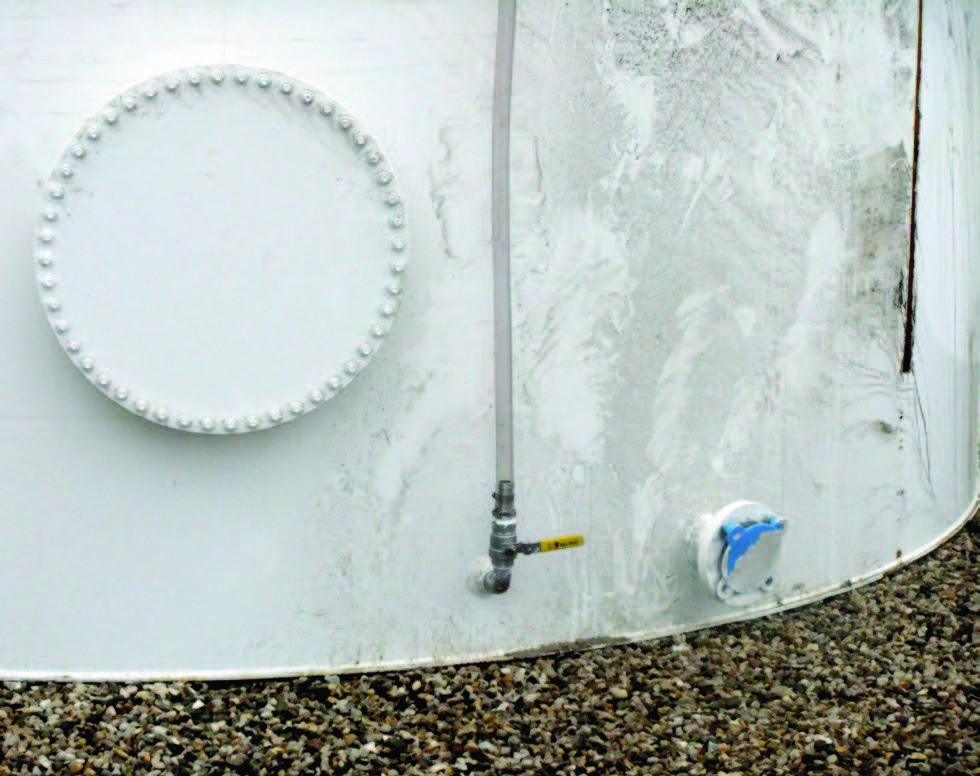
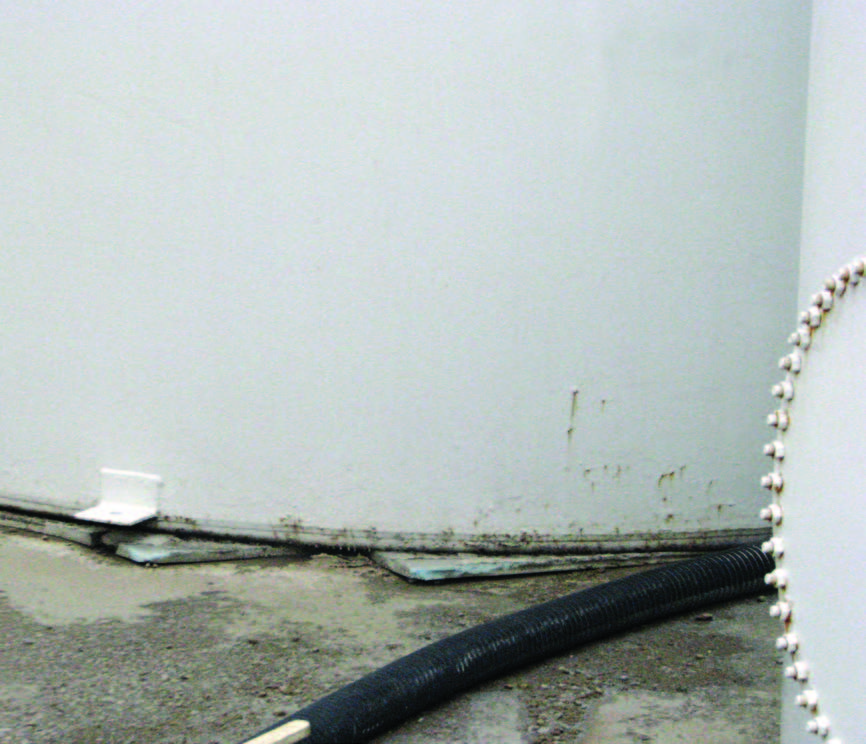
This mild steel tank has pinholes in it that are so small, the fertilizer just weeps out of it. Mild steel is susceptible to damage from corrosive materials.

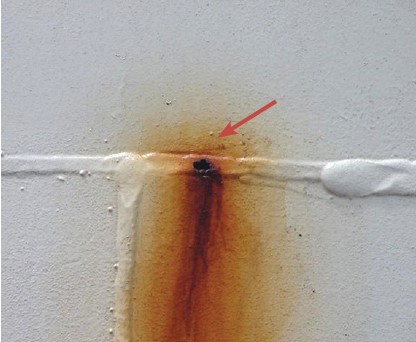
Rust is a form of corrosion commonly associated with mild steel tanks. Rust occurs when unprotected steel reacts with water and oxygen. It leaves an unsightly orange stain on the tank’s exterior and interior. Left unabated, rust damage will weaken mild steel and result in leaks, tank failures, or even tank frame collapses.

This nameplate was attached to the tank before it was painted, so the steel behind it wasn’t painted. Rain and condensation got behind the nameplate and caused the unpainted steel to bleed out rust.

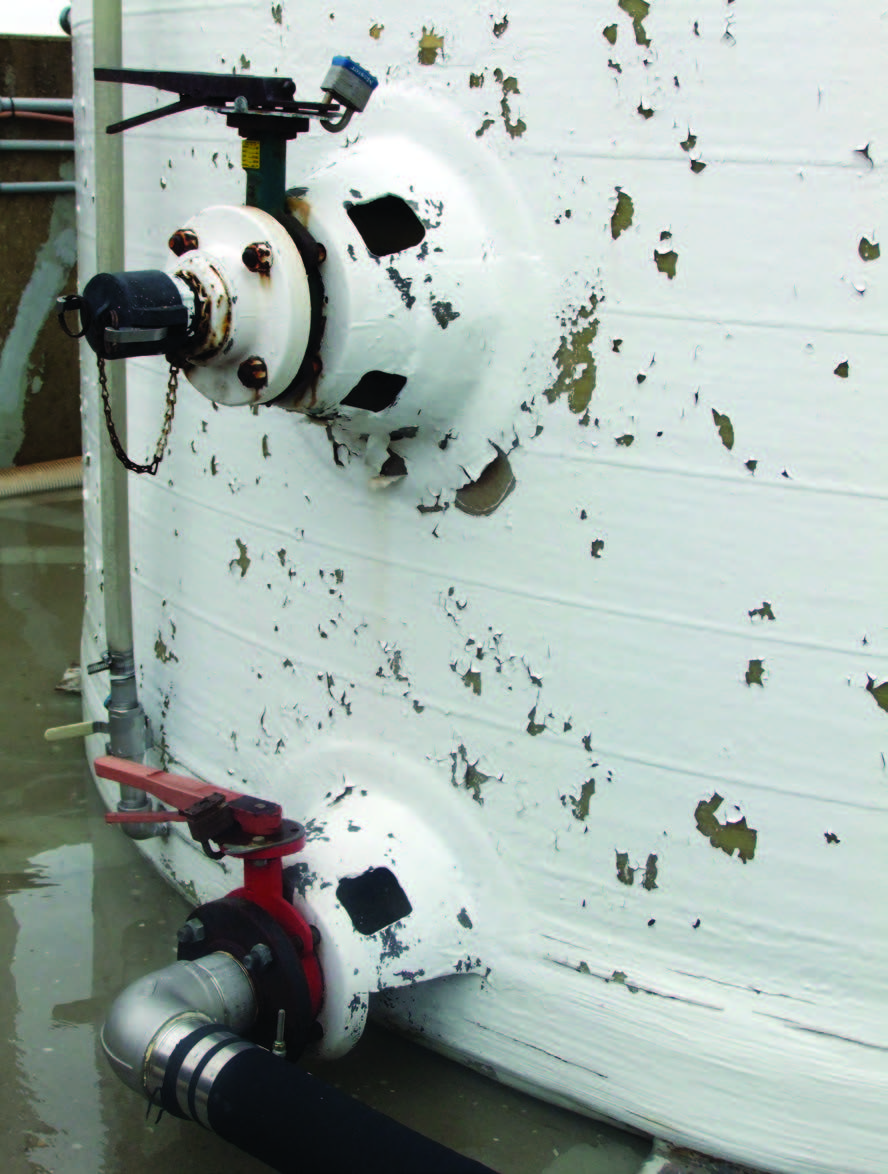
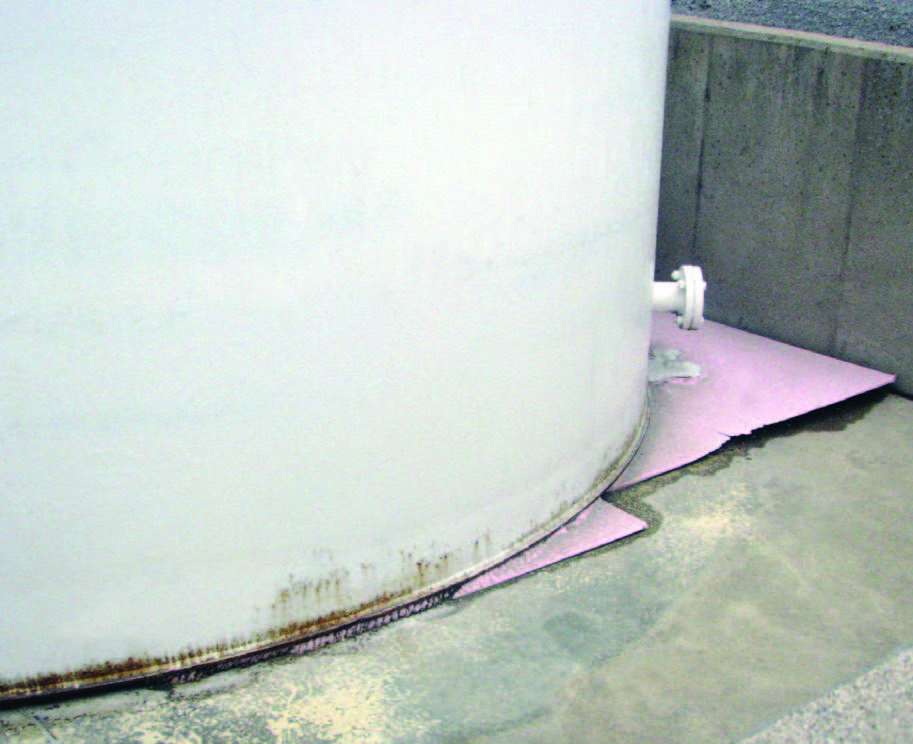
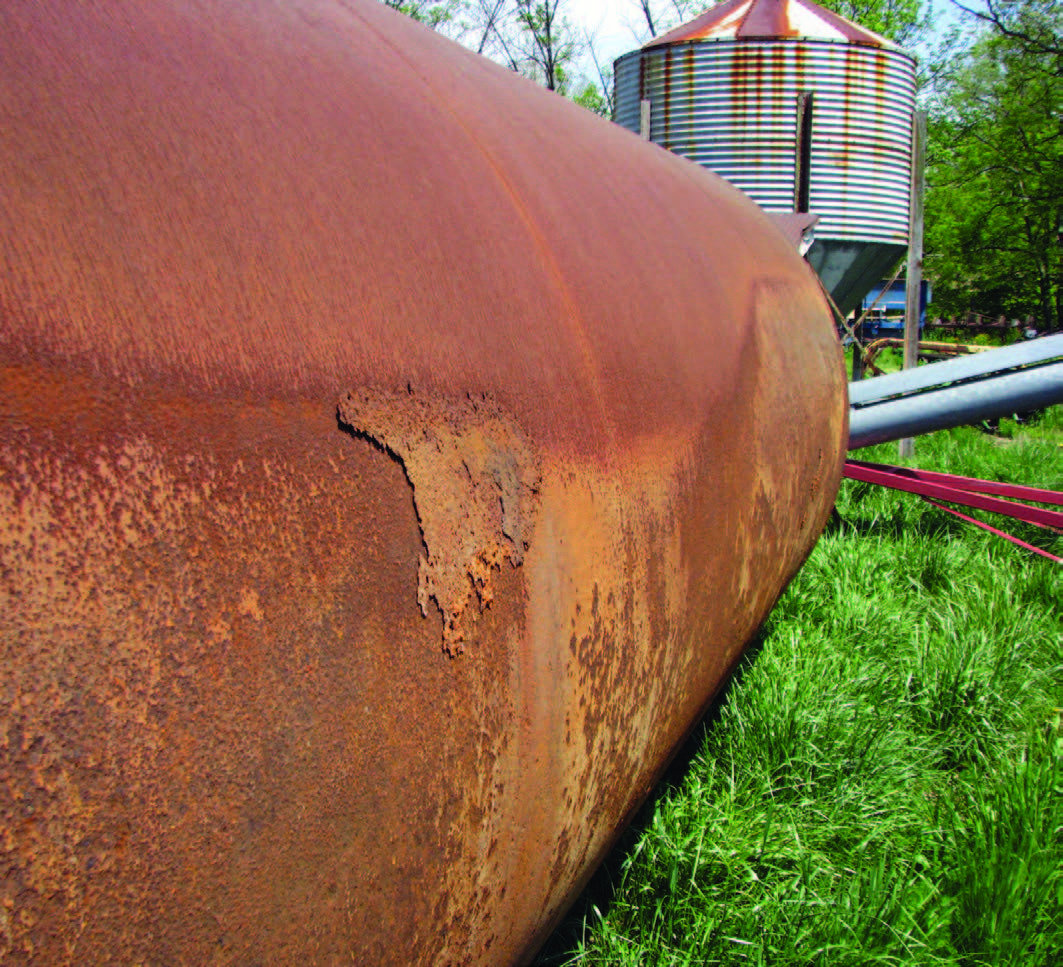
This tank looks like it developed a problem from a leaking line. General corrosion (such as rust) is mainly s cosmetic issue. A tank failure caused by general corrosion is a slow process.
Is Mild Steel Right For You?
When you purchase a mild steel tank, you should always consider the ways you can delay the development and spread of pitting and rust. Here are 16 questions you should always ask before choosing a tank. The first six address pitting and rust.
1. What is the pH of the product you will store in the tank? This is one of the most important questions to ask. Acidic agents like battery acid (with a pH value of 2) are very destructive to steel. The lower the product’s pH, the more acidic and destructive the liquid is to mild steel. The lower the product’s pH, the more acidic and destructive the liquid is to mild steel.
Corrosion will be much worse if the intended product has a pH value of 6 .5 or less. Many commonly stored liquids have a pH value just above or just below 7. For instance, the pH of liquid nitrogen (28-0-0) is 7 .2; ammonium phosphate (10-34-0) is 6 .0; and diesel fuel is 5 .6. However, pH isn’t the only indicator: ammonium thiosulfate (12-0-0, 26% sulfur) is very corrosive to carbon steel and its pH is 7 .2 to 8.0.
Always determine the pH of the product you plan to store before buying any tank. Ask the tank manufacturer about problems that could occur by storing a product with that pH in the tank.
2. How thick do you want the walls and floors to be? A standard mild steel tank has walls and floors that are 1/4 inch thick, but the thickness depends on the tank’s volume and height.
Bigger tanks have thicker walls. For example, a 30,000-gallon mild steel tank with a diameter of 12 feet and height of 35 feet may have a standard 1/4-inch floor, but have first and second rings with walls that are 3/8 inch thick. In other words, the lower parts of the tank wall need to be thicker to support the weight of the rest of the tank. Some manufacturers make their tanks with a 1/4-inch thickness from top to bottom. On very large storage tanks, the lower course rings are 1/2 inch or more thick.
Increasing the thickness of the wall and floor to 3/8 inch can extend the life of a tank. Manufacturers have guidelines for corrosion allowance based on the types of materials and the volumes to be stored in each of their tanks.

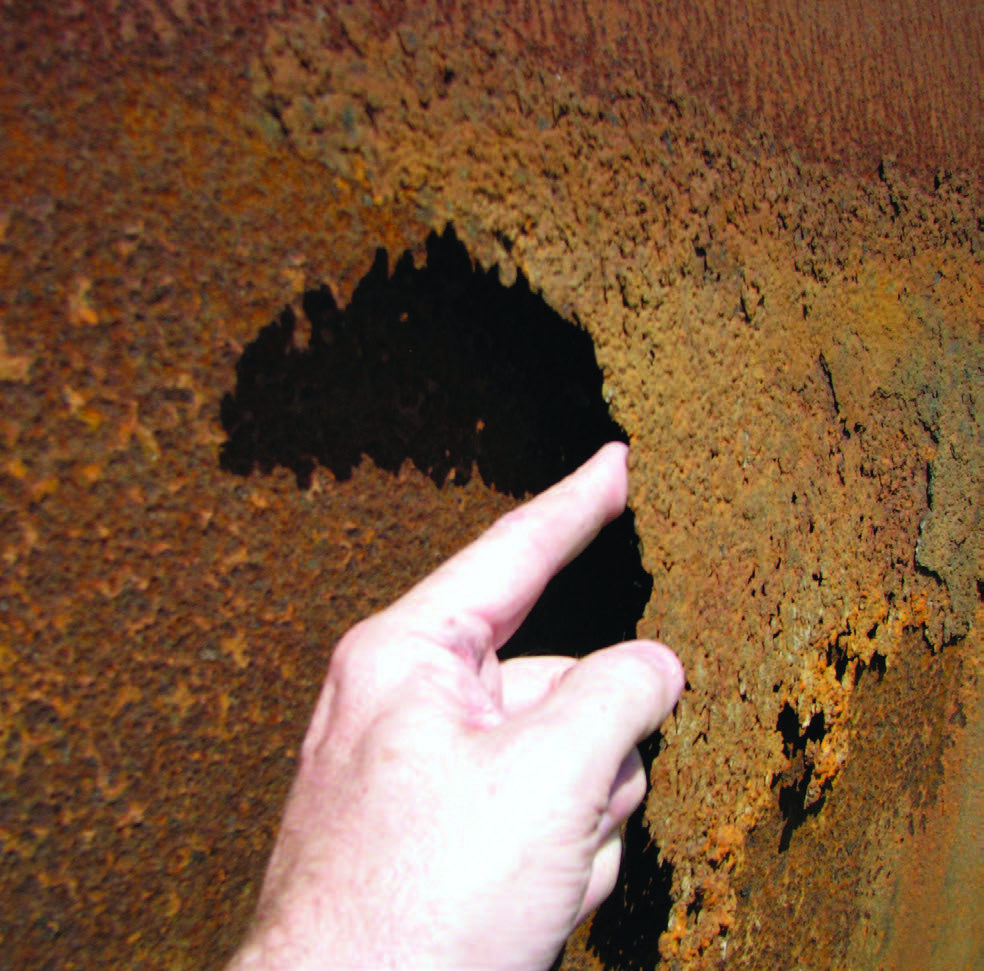
Over time, corrosion can seriously degrade steel.
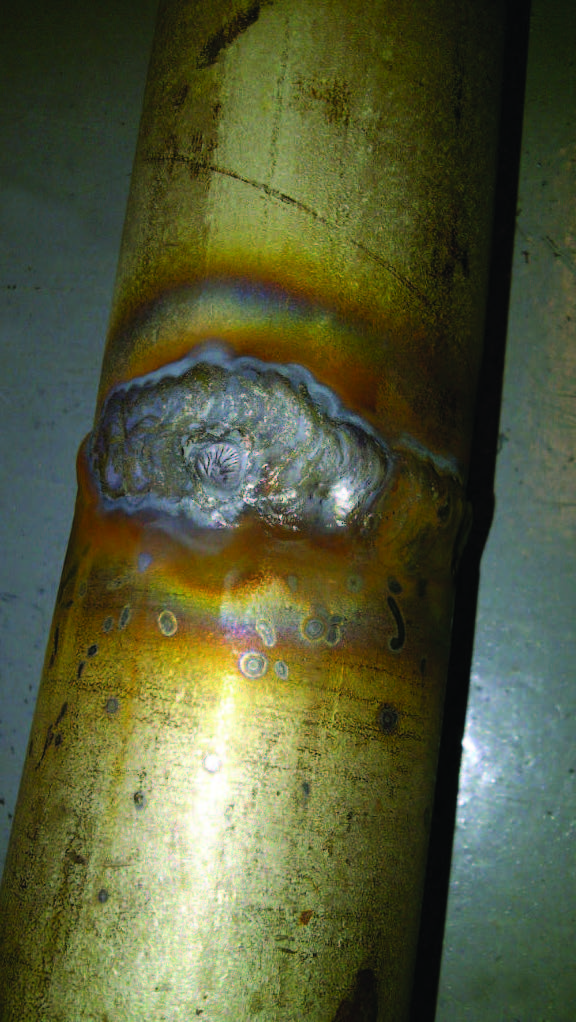
3. How are the internal seams welded? You can easily determine whether the exterior seams on a tank are all welded, but you need to look more closely to see how the tanks are welded from the inside.
Tank manufacturers have different ways to weld internal seams. Some manufacturers weld the entire length of the seam similar to the outside. Other manufacturers keep costs down by placing spot welds every so often around the seam. A tank that has a fully welded seam inside and out better resists corrosive materials and tank failure.

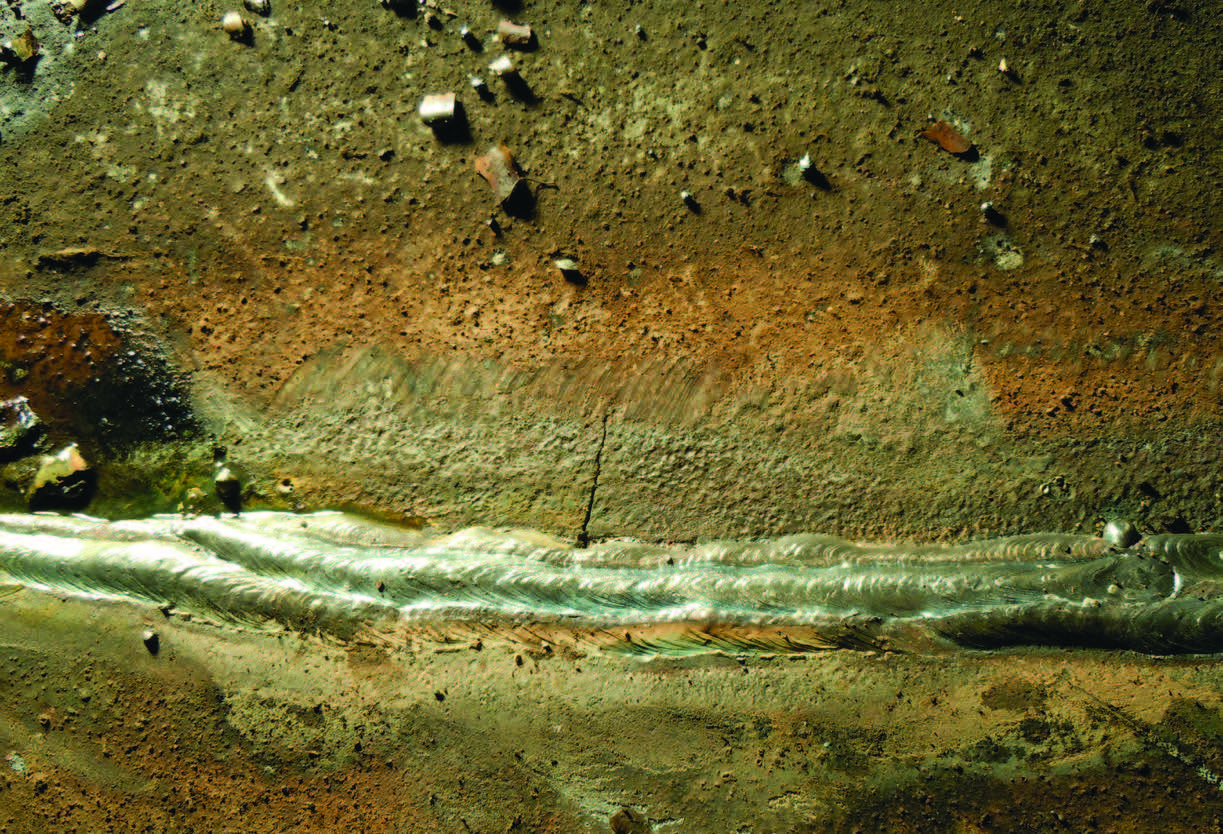
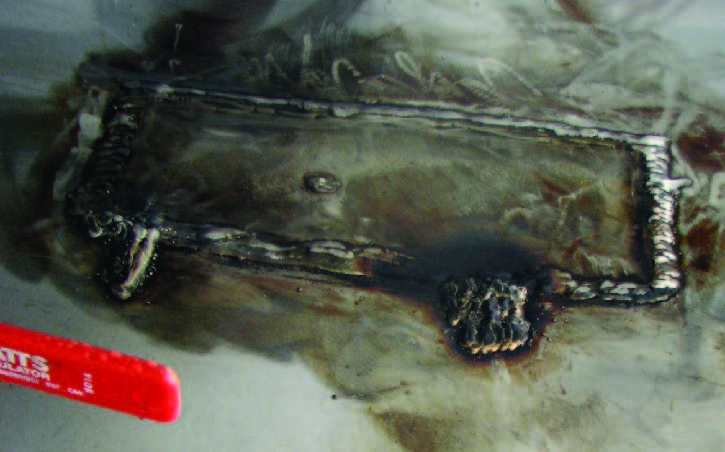
(Above) The entire outside seam of this tank is welded. (Below) Some manufacturers only stitch-weld the internal seam, which is not recommended.
4. Do you want protective coatings added to the interior surface? The inside of a mild steel tank is generally uncoated unless the customer specifically requests it. There are many different coatings that manufacturers can apply to protect the inner surface, including fiberglass and phenolic epoxy.
Coatings protect the inner surface of a tank against the corrosive effects of the stored material. If you plan to store a product for a long time, it may be beneficial to coat the inside of the tank.
When you regularly use a product, its level is changing inside the tank all the time. But when you use a product infrequently, problems can arise. For example, you may have a fertilizer tank that sits all winter almost empty. The fertilizer may salt out, which can cause problems (see Question 5 below). Or if your tank is full for long periods, that could create problems high in the shell.
If you do not plan to diligently manage tank levels, it may be worthwhile to apply a coating to the entire wall surface of the tank. In other cases, you may find it worthwhile to simply coat the tank floor and 2 feet up the sides — that would save you money and protect against some corrosion.
Before you have any coating applied, ask the tank manufacturer if the coating will peel or separate. Some coatings are incompatible with the product you plan to store. The coating could slough off and get into and plug supply lines, pumps, and screens. Also, be certain any coating you apply is compatible with the product you intend to store in the tank.

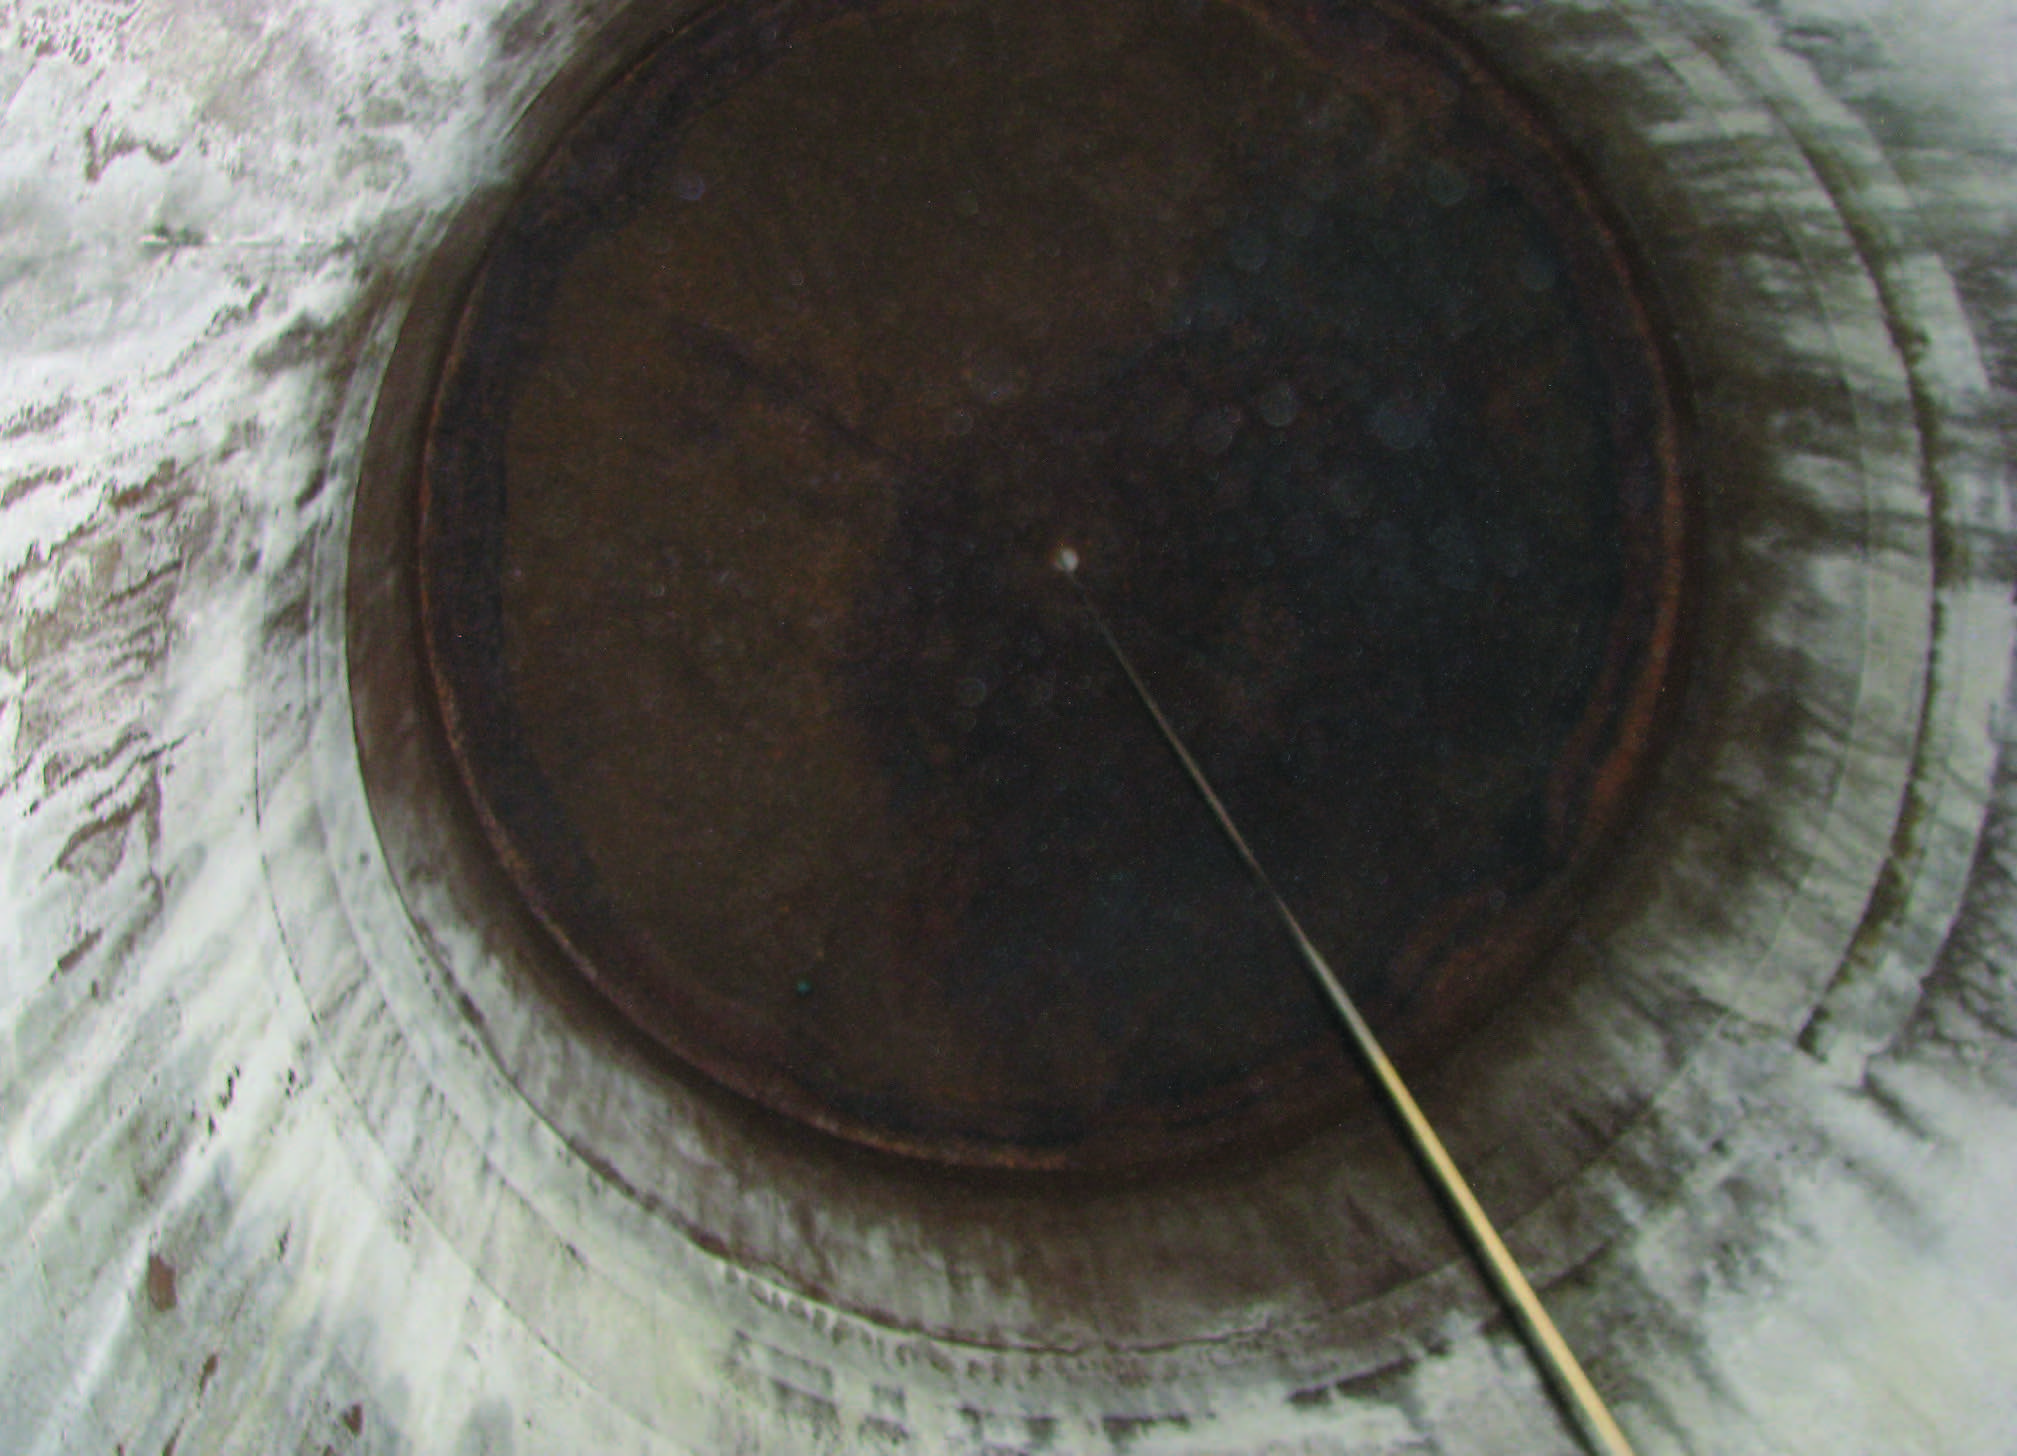
5. Does the product you plan to store require agitation? Some products require agitation to remain effective. For example, fertilizer ingredients can separate (or “salt out”) when it’s cold: 28-0-0 will salt out at -1°F, 32-0-0 at 28°F, and 10-34-0 at 10°F. When a material salts out, it deposits residue on the tank floor. These solids tend to build up around the perimeter of the tank more than the center.
Residue accumulates around the tank’s perimeter because pumping fertilizer into or from a tank agitates the solid product in the center, which gets resuspended by the flowing liquid. Unless you have an agitation system, the residue on the perimeter of the tank will not be resuspended in the liquid. Solid material can accumulate against the walls, floors, and welds, and speed up corrosion. Adding an agitation system helps keep material from salting out along the edges, and reduces corrosion.

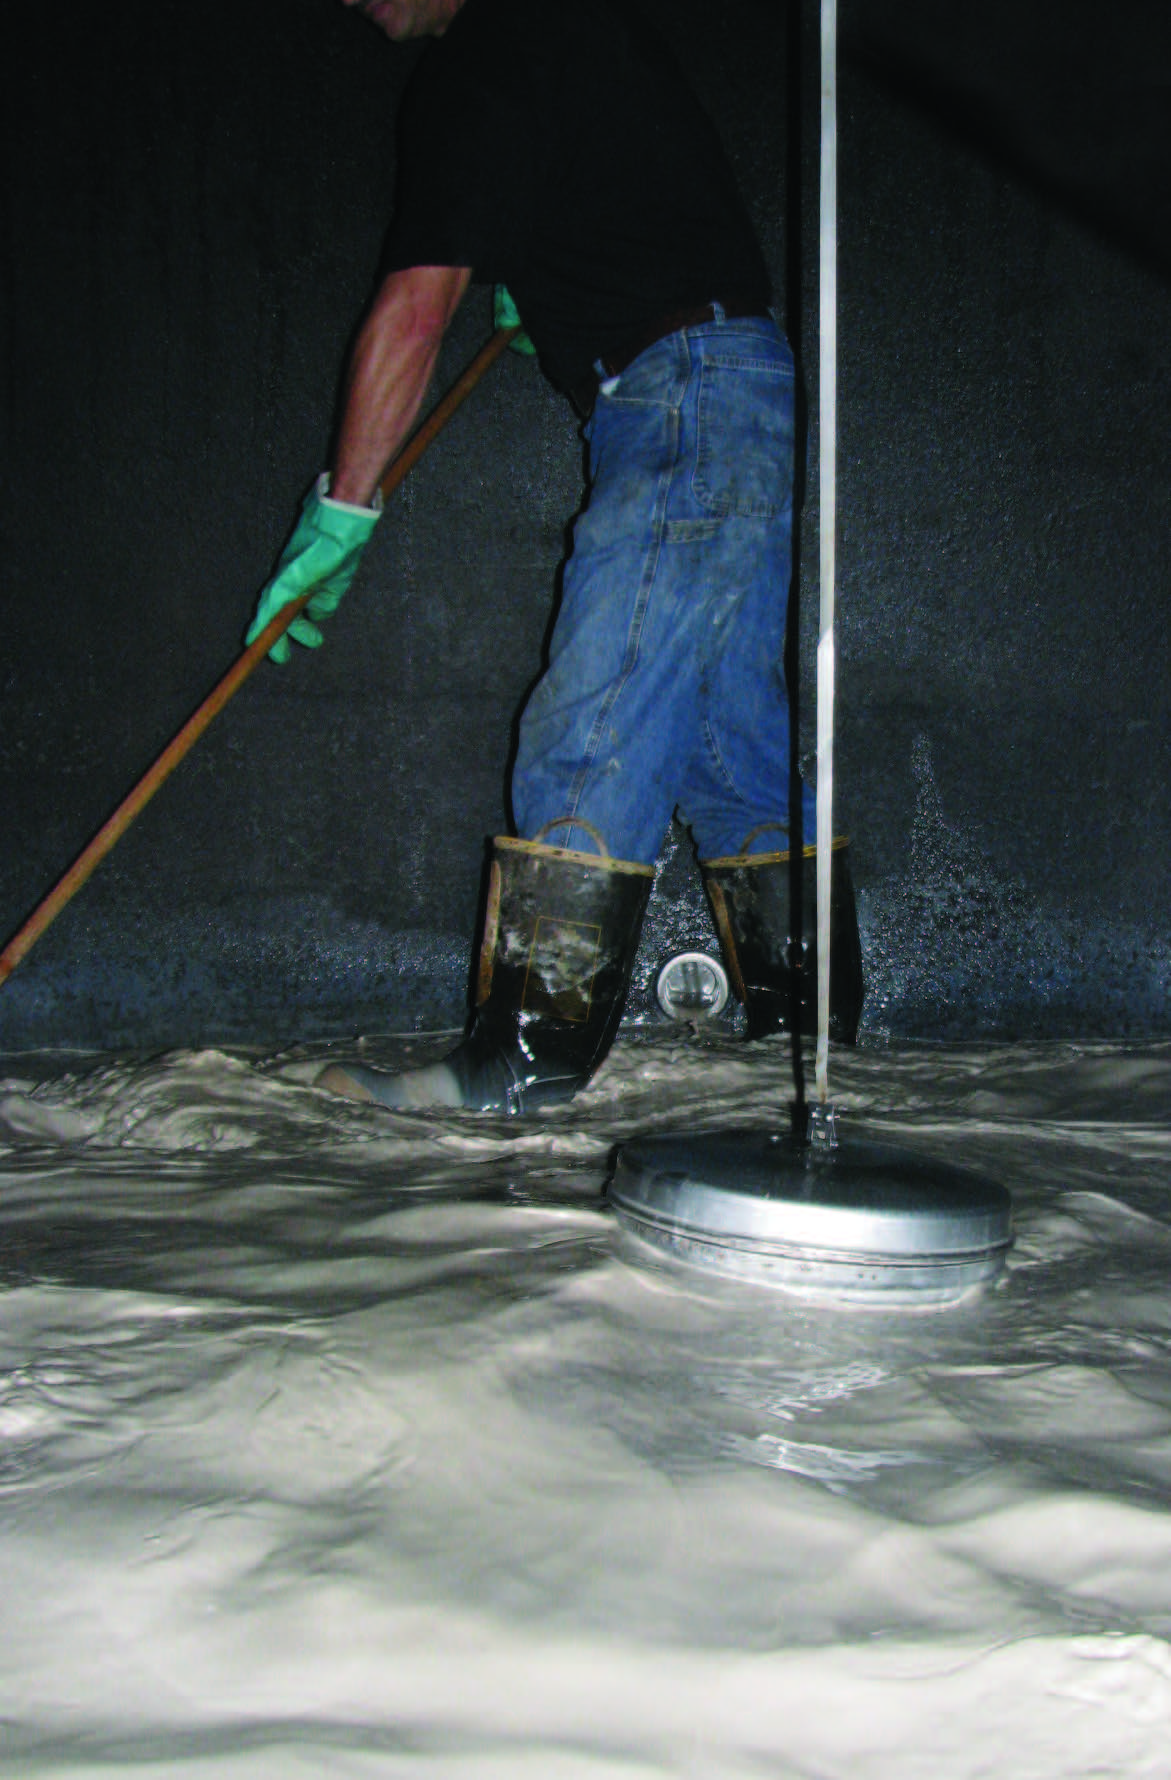
This device agitates the contents of a tank to help prevent buildup of salts and other deposits.
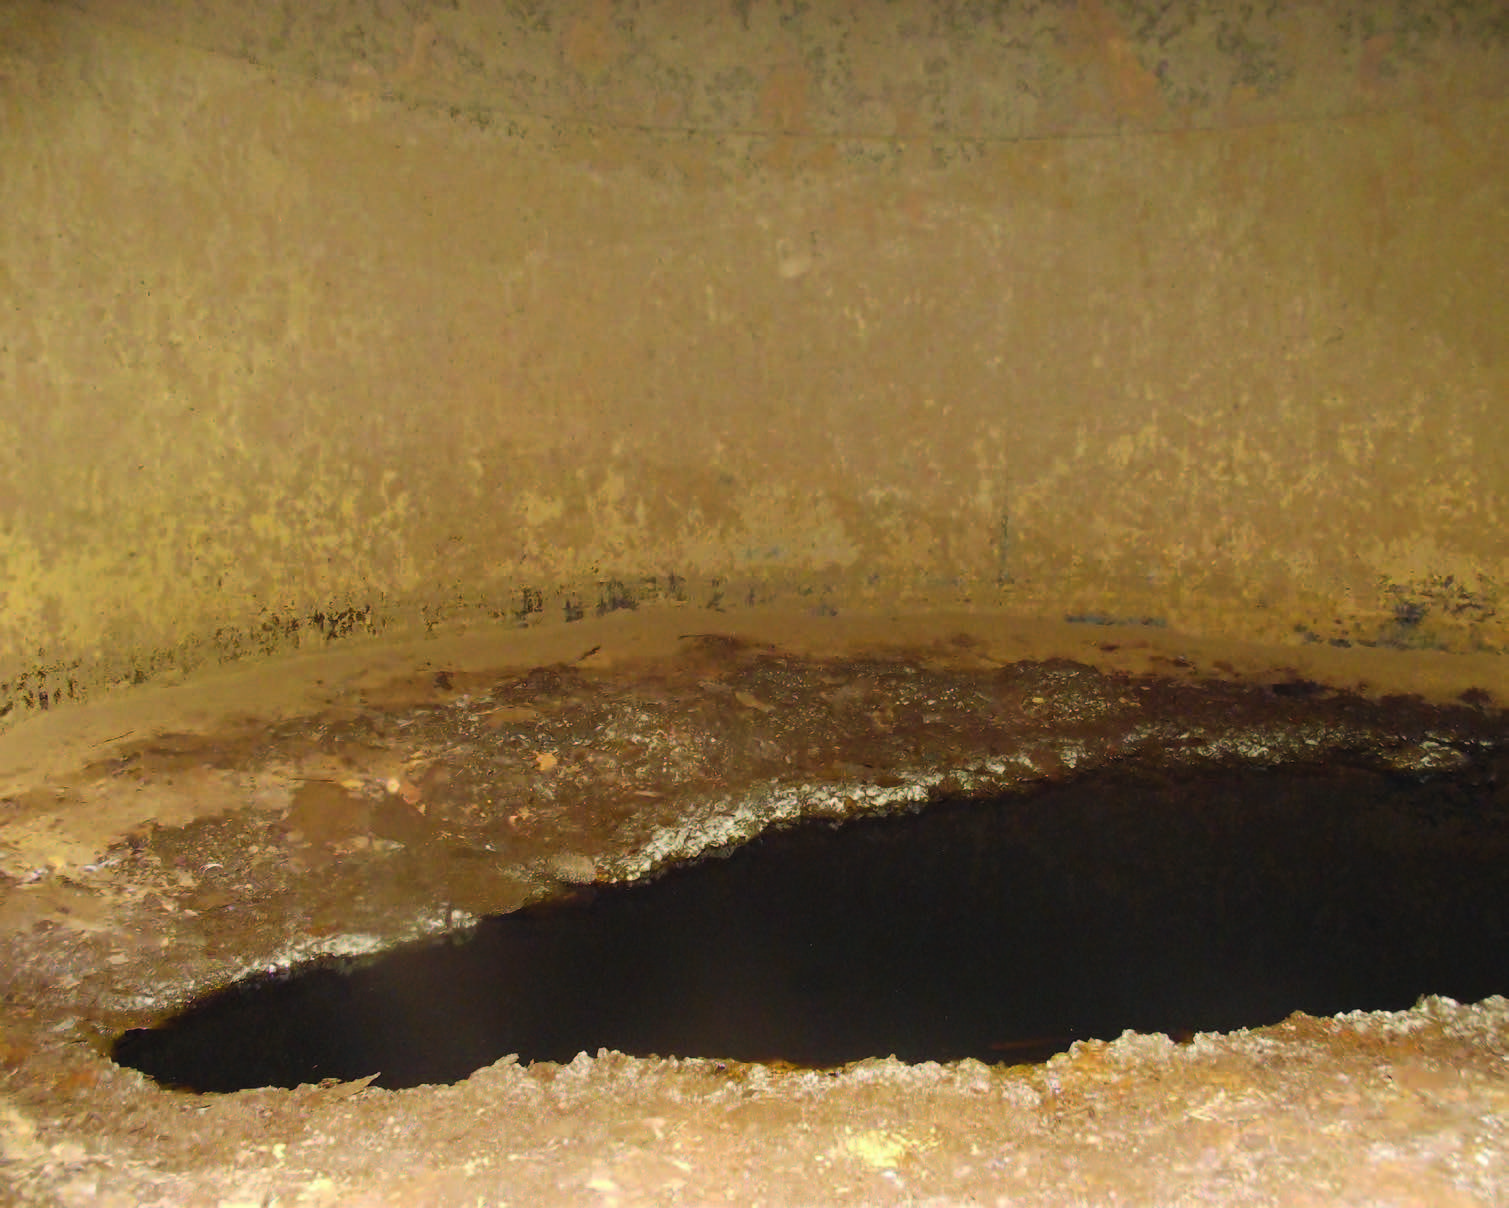
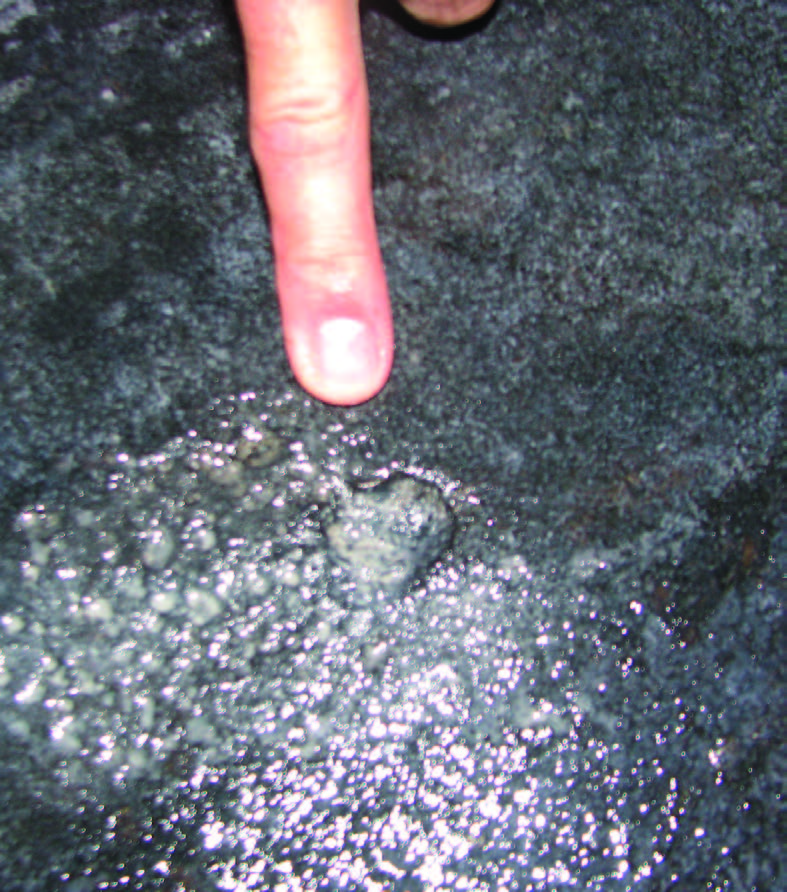
This tank was cleaned six years ago. Materials that are not agitated will salt out, and the residue tends to accumulate around the perimeter of the tank.


6. Should you paint the outside of the tank? It is a good idea to paint the tank even if it will be inside. Steel sweats during changing environmental conditions, so it will rust unless it is in a controlled environment.
At a minimum, you should apply a coat of primer to every mild steel tank you place indoors. You should apply a primer coat and an additional coat of paint to every tank that will be exposed to rain. These are important steps in preventing rust.
Don’t skimp: use a high-quality paint. Metal expands as temperatures rise in the summer and contracts as temperatures fall. Over time, an inflexible paint will crack and peel as the tank expands and contracts. The tank manufacturer will be able to recommend specific paints for their mild steel tanks.

Other questions that don’t deal with corrosion and rust are:
7. How much does the product weigh per gallon? When designing a tank, engineers calculate part of their requirements for wall and floor thicknesses on the weight of the product it will store or transport. A heavier liquid will apply more pressure on the lower sections of a tank, so those lower sections will require thicker walls.
Most pesticides weigh about the same as water, which weighs 8 .33 pounds per gallon. Liquid fertilizers can vary from 10 .67 pounds per gallon for 28-0-0, to 11 .65 pounds per gallon for 10-34-0. Phosphoric acid weighs approximately 14 pounds per gallon, is highly corrosive, and should not be stored in a mild steel tank.
Increasing the thickness of the sidewall or floor by a mere 1/8 inch can have other benefits. First, if you have a thicker tank you can store a heavier product in the future without having to order another tank. Second, a thicker walled tank is a heavier material that creates a built-in corrosion allowance. Check with the tank manufacturer to be sure the walls are thick enough for the materials you want to store.
8. Will a larger tank save you money? Having the storage capacity to be able to fully unload a tanker truck or railcar can save you money on your fertilizer and pesticide purchases. You can also take advantage of lower prices by buying in bulk during the off-season. If you buy in bulk, you may need to be able to store up to 3,200 gallons from a straight truck, 4,900 from a semi-tanker, or 18,000 from a rail car.


9. Will you place the new tank in an existing containment structure? If you are buying a tank to replace an old one, be certain the diameter of your new tank will fit in the existing containment structure. If the new tank is larger than your old one, make sure the new containment dike has enough capacity for the new tank.
Don’t forget to leave enough room around each storage tank to allow you to work around them to paint, inspect, and make any necessary repairs. Be sure that adding a larger tank will not make the dike out of compliance with the state’s containment regulations. Follow any applicable local and state fire codes.
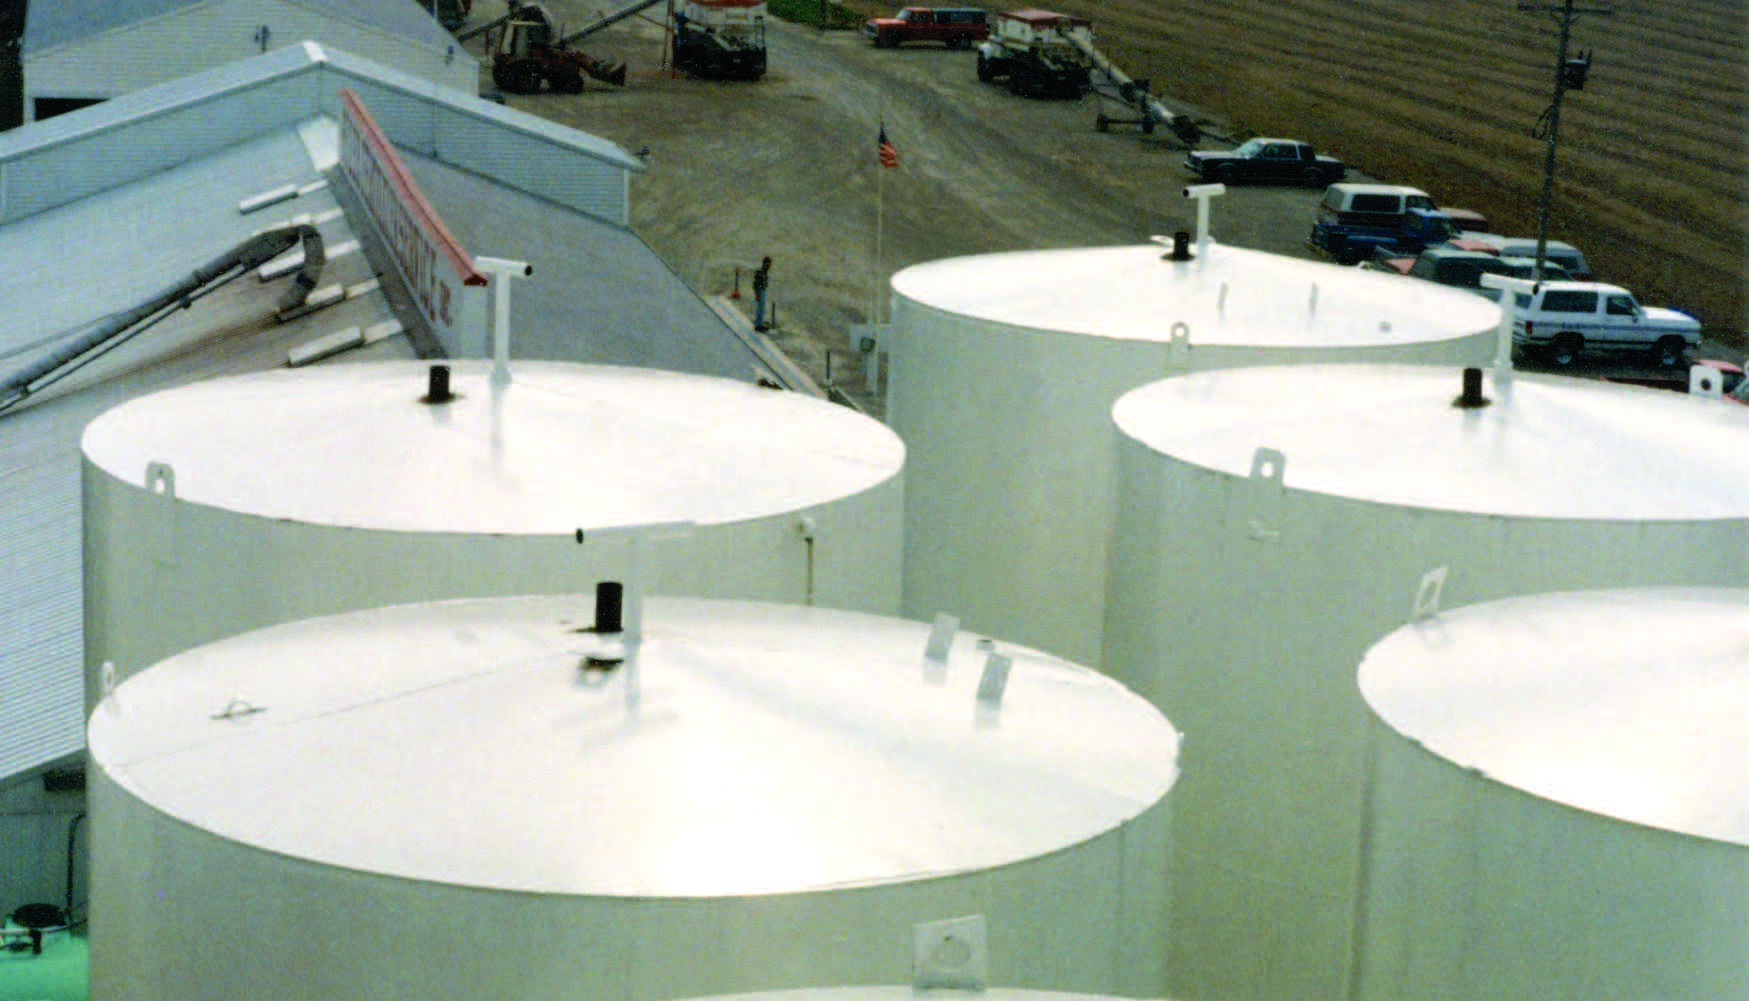
10. If you are placing a tank in a building, will it fit inside?
Dikes can pay for themselves, especially if environmental cleanup is involved. A 2-inch steel plug blew out the largest tank shown here. If the tank had been larger, the spilled liquid could have gone over the wall and into the surrounding area.


These poly tanks barely fit inside the building. A few inches taller, and they would not have fit.
11. What is the condition of the concrete you’ll place the tank on? Inspect the condition of the concrete pad where you will place the new tank. Look for signs of cracking and chipping. Replace any aging dike with one that has a thicker slab or reinforced concrete if you see signs of fatigue or excessive cracking.


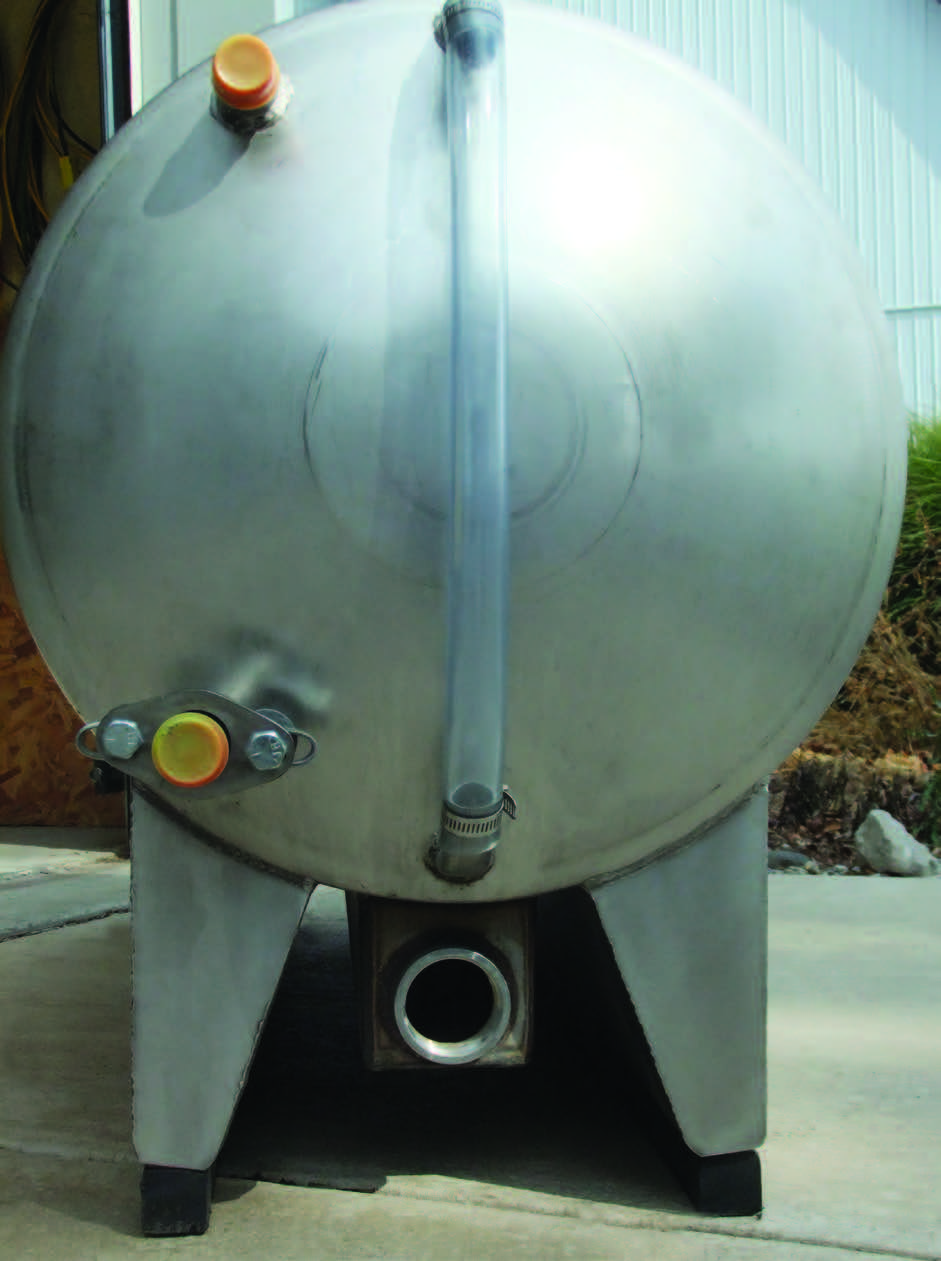
15. Do you want an internal or external sight gauge? A tank is usually fitted with a 1-inch external plastic sight gauge. Another type of gauge uses a float inside the tank and a flag on the outside to indicate the number of gallons of product in the tank.
If you use the second type, a stainless steel float or cable is best to prevent corrosion. Over time, external tubes may stain, making them difficult to read. Having a shut-off valve on the bottom of the tube allows you to easily replace a stained tube.

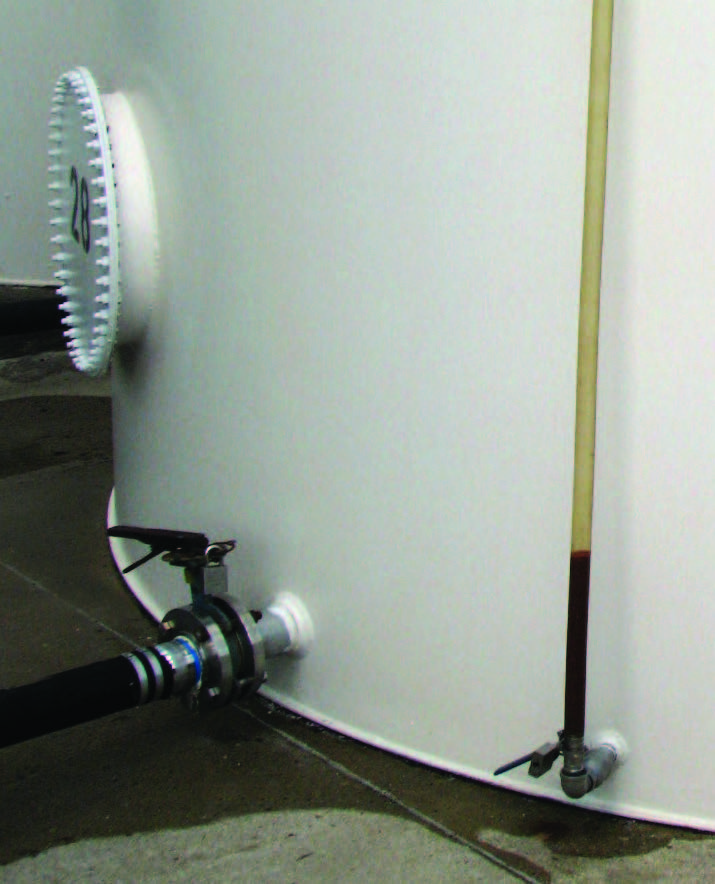
An external sight gauge is easier to read, but is more vulnerable to damage. Over time, tubing of the kind on the right of this tank can stretch, become opaque and brittle, and fail. Replace this type of bose annually.

An internal sight gauge (above) normally is less vulnerable, but requires more maintenance. It is a good idea to consult the manufacturer so the style of measuring device you choose accurately measures the tank’s contents.

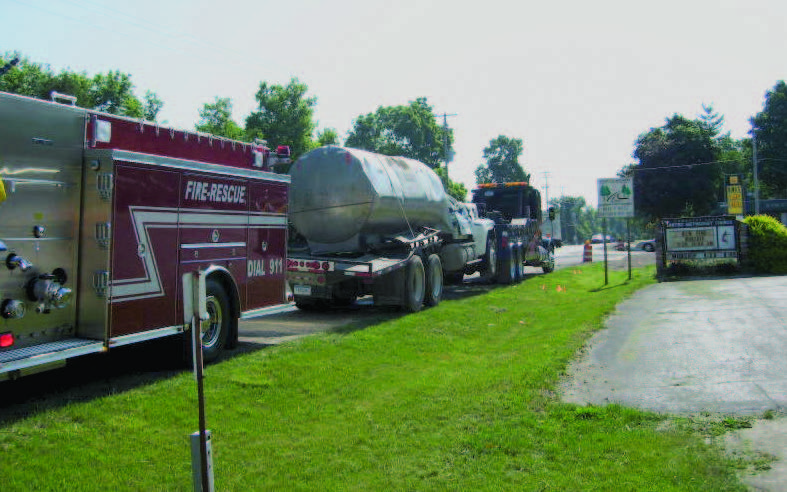
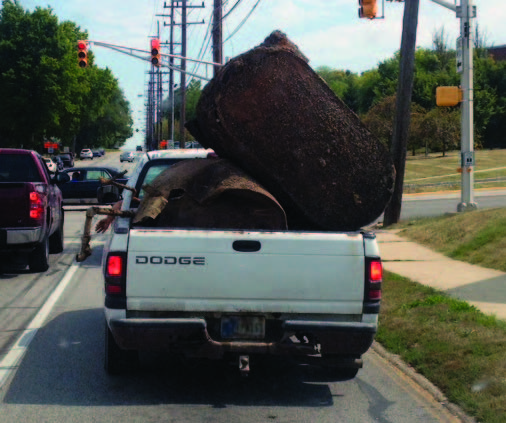
16. How much will it cost to deliver and install the tank? A tank with a diameter larger than 12 feet will require special transportation and permits. Some delivery trucks are equipped with knuckle booms to unload tanks, but the size of the tank and the location where you place it, may require a crane. When you move a tank, always use the fabricator-applied lift lugs.
Always consider delivery and setup costs when purchasing a tank. A wide-load permit and crane rental will add to your overall cost for the tank.


Installing

Before you have a tank delivered sketch out the area where it will be set. If the new tank will be placed next to other tanks, make sure to leave enough space to allow for inspections, repairs, and painting. Before placing the tank, mark the ground in the containment pad with spray paint to indicate where the tank should go. Cut and lay spacer boards to indicate the spaces you want to leave between tanks, walls, and other features.
Some states specify how far tanks must be from containment walls (a typical rule may call for a 4-foot setback from walls). These specifications can allow enough distance between the tank and wall so that any leak with head pressure cannot spurt over the dike wall.
Your sketch should also indicate where you want the manhole and fitting to be located. When you order a steel tank, provide this information to the manufacturer. Remember that you must place a tank on a smooth, level, well compacted surface. Placing a tank on soft or unlevel ground can create instability by placing more weight on one side of the tank, which may cause the tank to sink into the soil on the soft side When that happens, the tank can topple unless you straighten it. The best foundation for a steel tank is to put it on a pad designed to carry the tank’s weight when loaded.


An unstable base will shorten the life of any tank.

When your tank is delivered, inspect it before it’s unloaded. Look for buckles, flat spots, or distortions on the sides of the tank that may indicate more than cosmetic damage,
Place outdoor tanks on a 6- to 10-inch deep circular pad with a sand or pea gravel substrate. This will keep the bottom of the tank out of standing water. To give the tank more stability, make the pad’s diameter slightly larger than the diameter of the tank’s base.


The bottom of this tank is showing signs of corrosion.

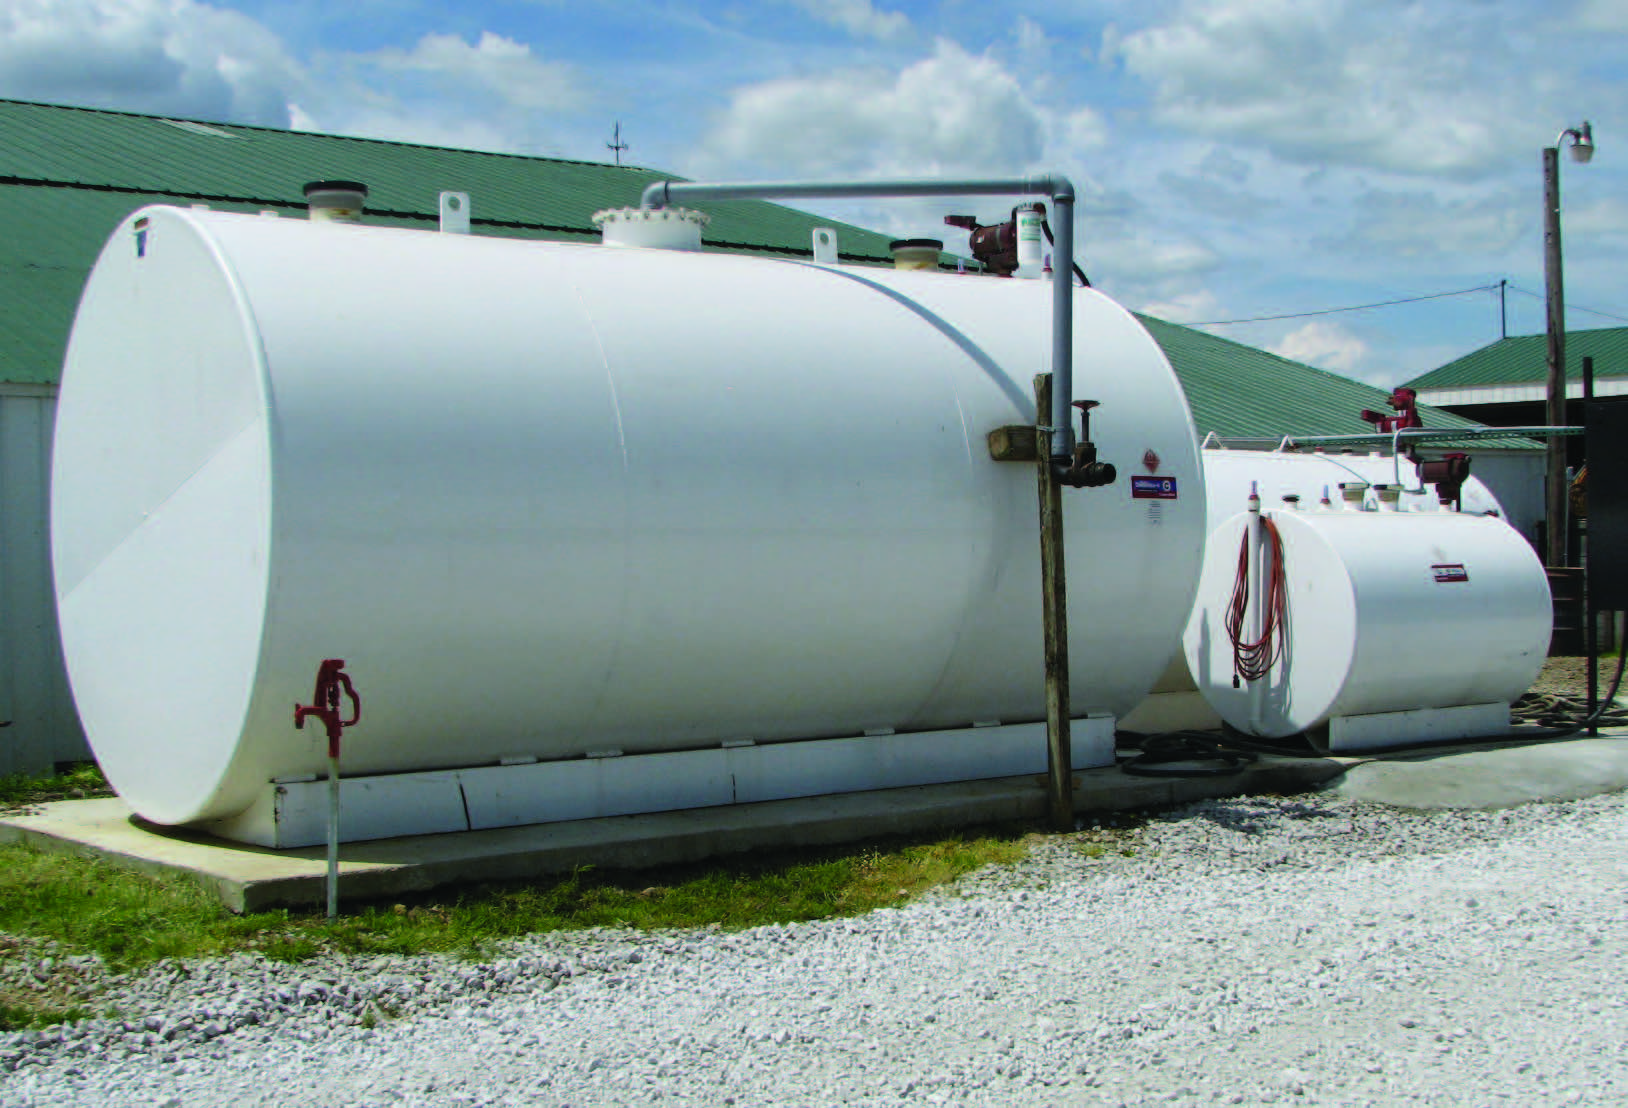
Many horizontal storage tanks are placed in concrete or in a supporting frame. In such a configuration, make sure to place a piece of rubber (or a similar product) between the tank and the saddle. The rubber will help reduce corrosion and abrasion to the tank. The padding is important because steel will shift as temperatures rise and fall.
Always secure outdoor tanks against flooding, wind, and excessive movement. Use the tank’s lift or tie-down lugs to attach anchor cables or anchor them to the concrete.
Securing a tank will prevent it from floating in high water situations or from moving in high winds. If the tank moves only a few inches, it can break valves, fittings, or pipes, which can cause leaks and environmental problems.


Inspecting and Maintaining
Mild steel tanks require periodic inspections and routine maintenance just like other tank materials. You need to paint steel tanks to minimize the effects of rust. While the first appearance of rust may only be cosmetic, it could indicate a hidden problem that needs further inspection. Bubbling or peeling paint may be the start of more serious problems underneath the paint.
The paint on the outside of a steel tank may look acceptable, but you may not be able to see the condition of the top surface, Adding a ladder to the tank will allow you to inspect and paint the top. Always wear fall protection equipment when you inspect or paint the top.

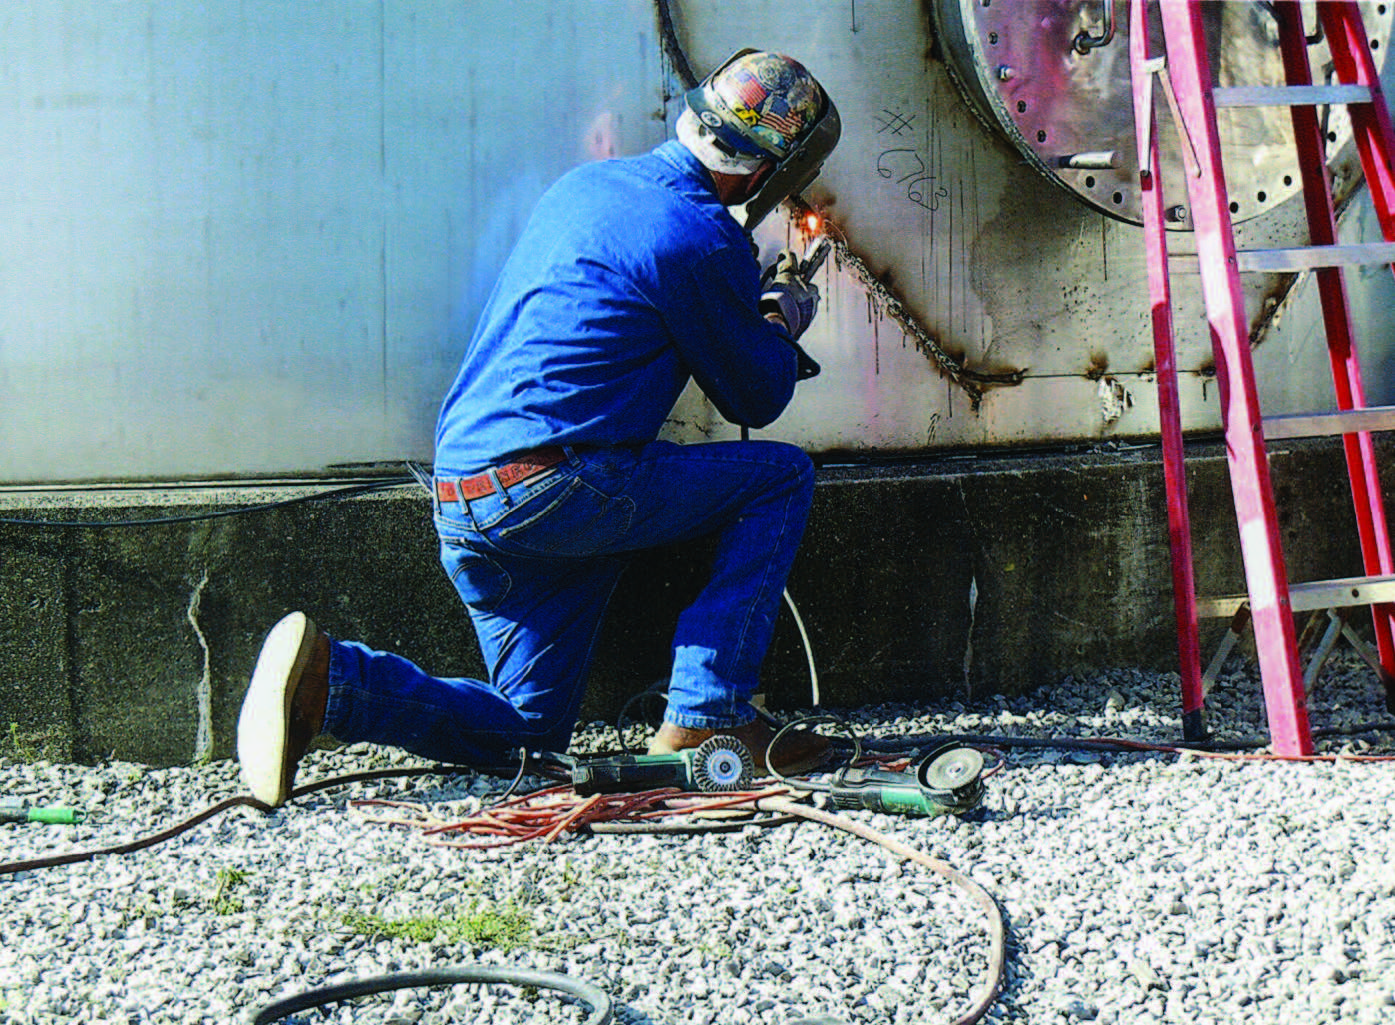
Removing rust is important. Not only can rust damage the structure of the tank, it can also affect the supports. At the first sign of rust, use a wire brush or wire wheel to remove the loose or flaking pain on the affected surface to better inspect the area. You will need to thoroughly clean the steel surface, remove all rust, and pain over the area. This will prevent small problems from becoming larger and more significant.
Riveted tanks are old and hard to repair. Welding along the seams on such tanks usually creates more problems than it fixes.

When you use a power or manual wire brush, make sure to wear goggles, clear face shield, long sleeves, gloves, and hearing protection.


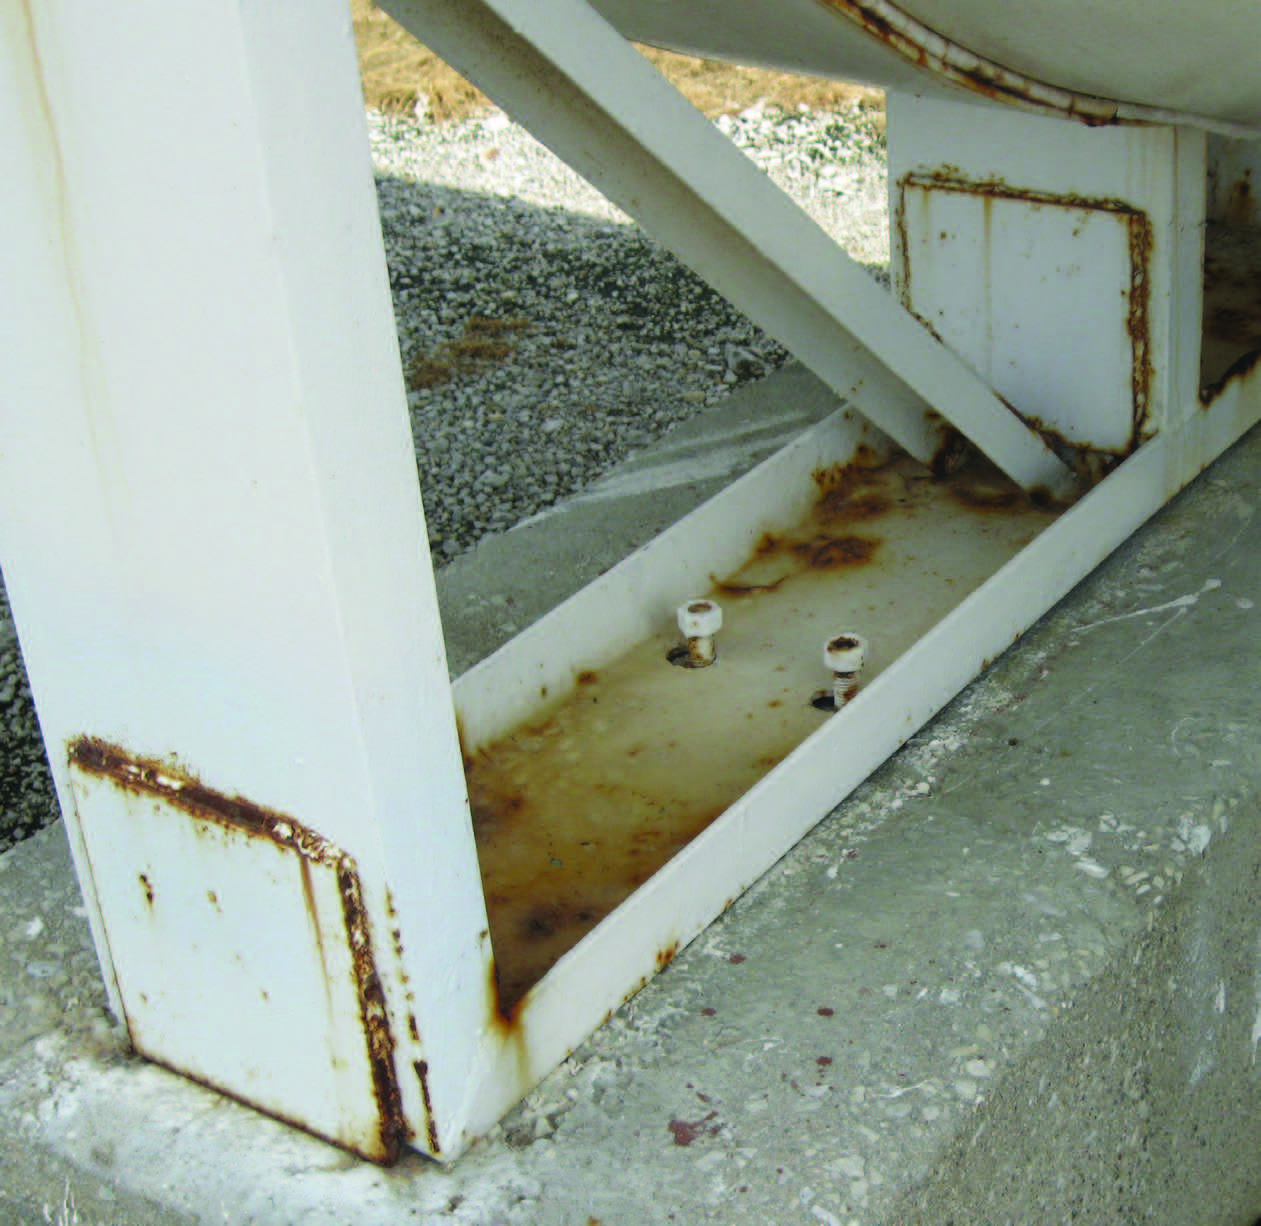
This mild steel frame shows signs of serious rust corrosion. The owner made repairs by placing larger square pieces of steel over the rusted portion of the tank frame. If you make such a repair, be sure to seal the welded plates to avoid future problems with rust between the plate and saddle structure.
1. Apply a coat of primer before applying the top coat of paint. A primer allows the top coat of paint to properly adhere to the tank and last longer.
2. Maintain proper drainage around tanks. Keep water pumped out of dikes to allow drainage through the sand or pea gravel. Standing water promotes rust.
3. Replace sight tubes regularly. Replace external sight tubes yearly because sunlight and chemicals will weaken the plastic used in these tubes.


4. Regularly inspect tanks. Inspect the interior of each steel tank for pitting every one to three years.
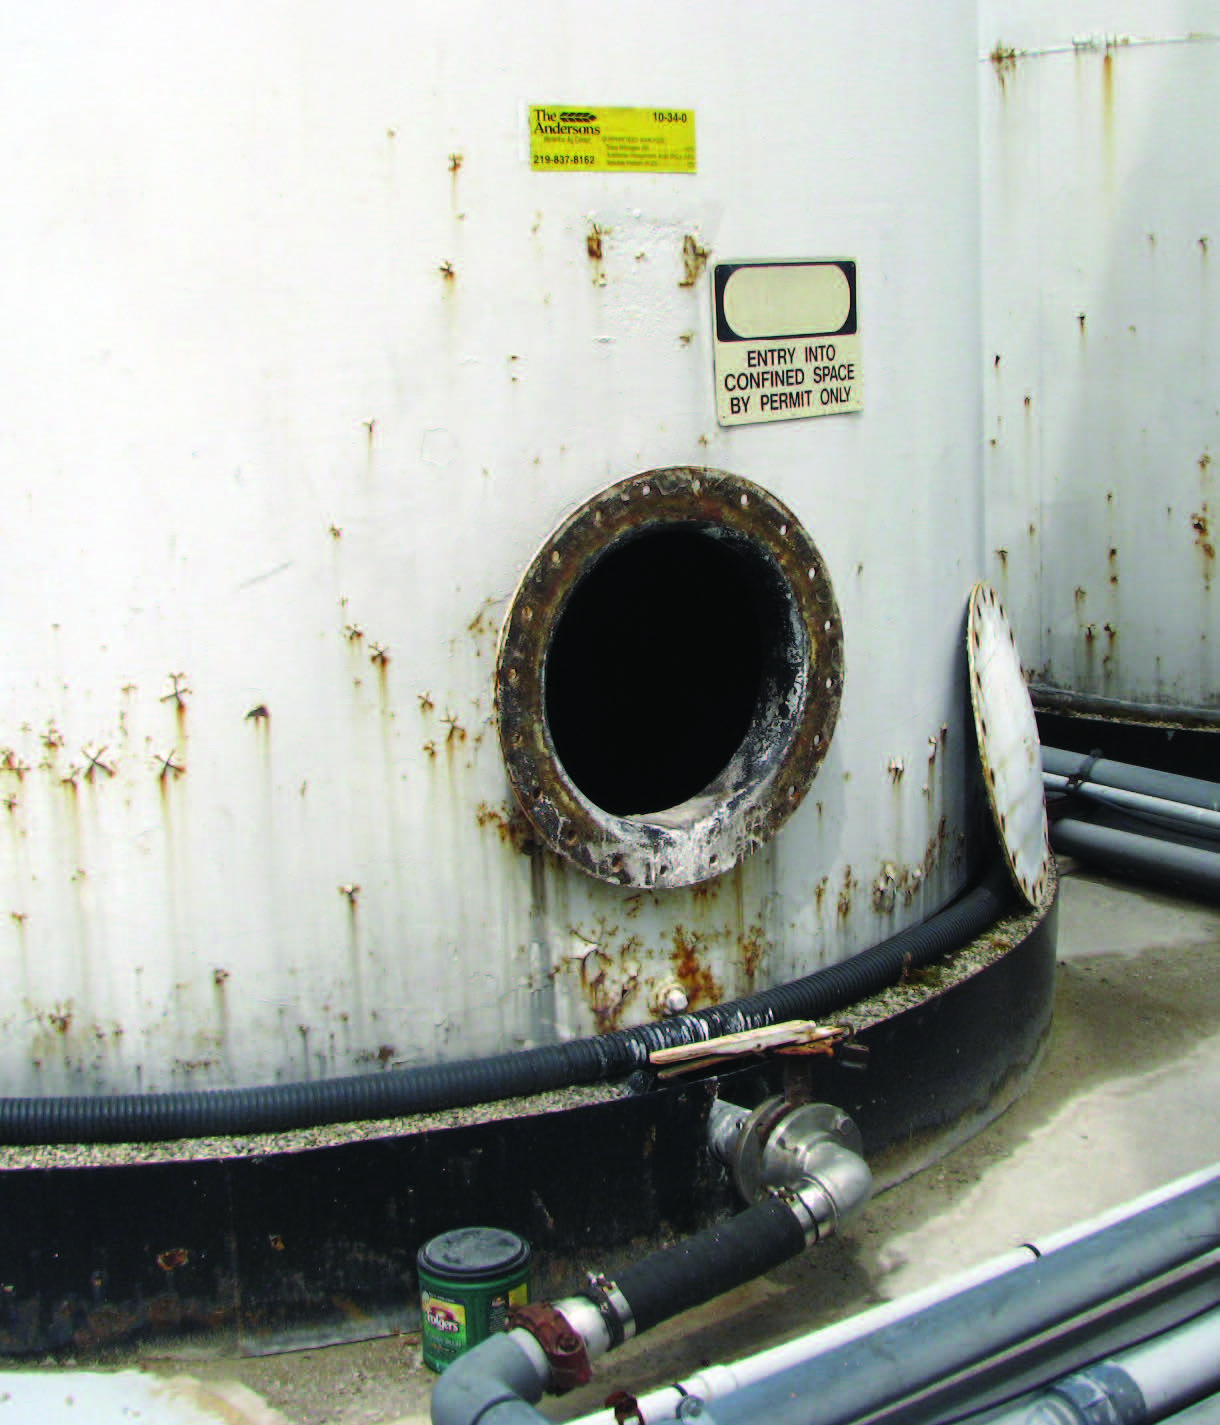
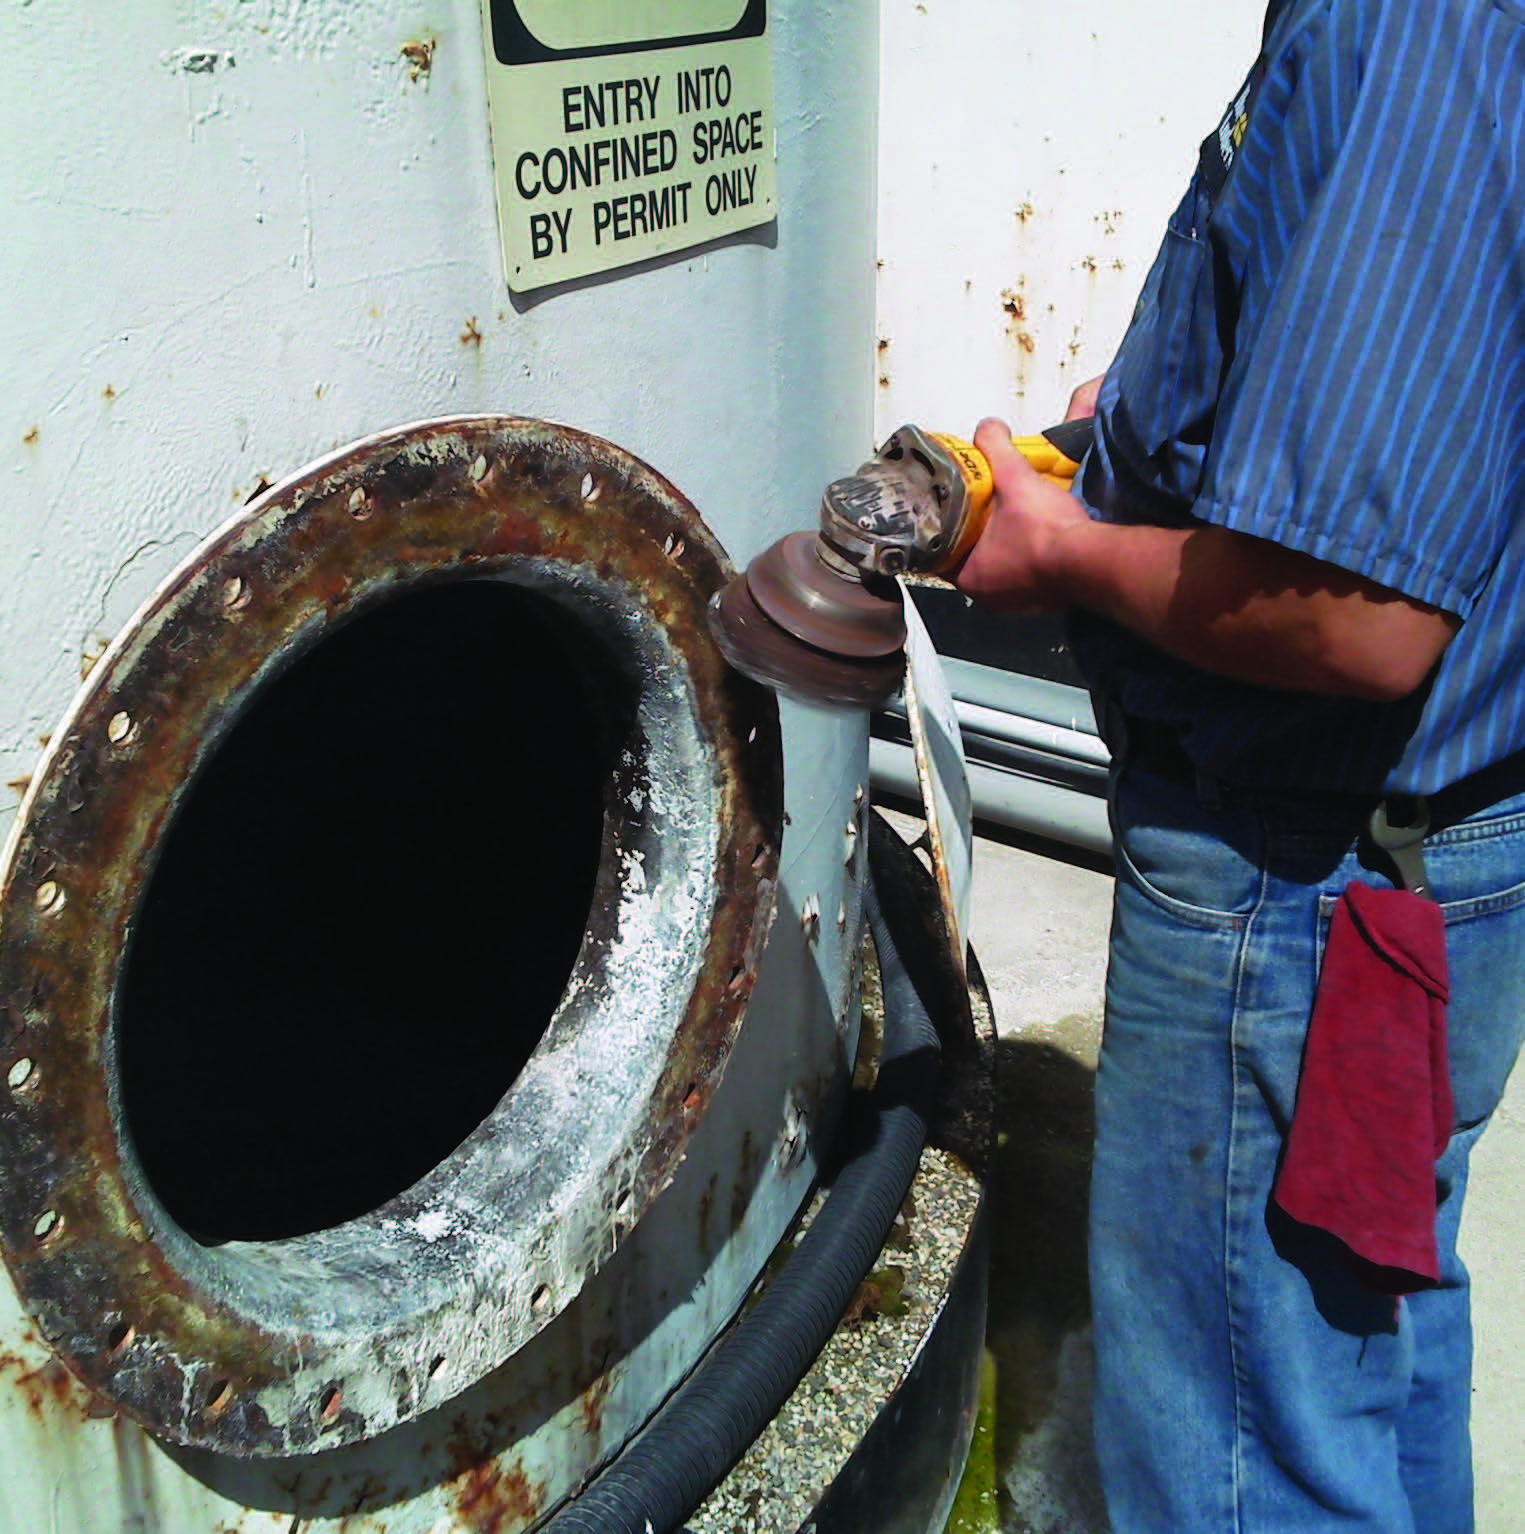
Before any inspection, remember that the confined space of a tank’s interior can have dangerous fumes, making the air within the tank unfit for breathing. Before anyone enters any tank, make sure it is empty, and then remove the manhole cover and leave it open for at least a week to allow noxious vapors to escape.
If there are any openings or covers on top of the tank, remove them, too. A fan will help clear vapors from the tank. If you need to make repairs or welds, the tank has an opening on top. Place an exhaust fan over this top opening to draw air out. This allows fresh air to come in the bottom opening and draws the welding smoke out the top.
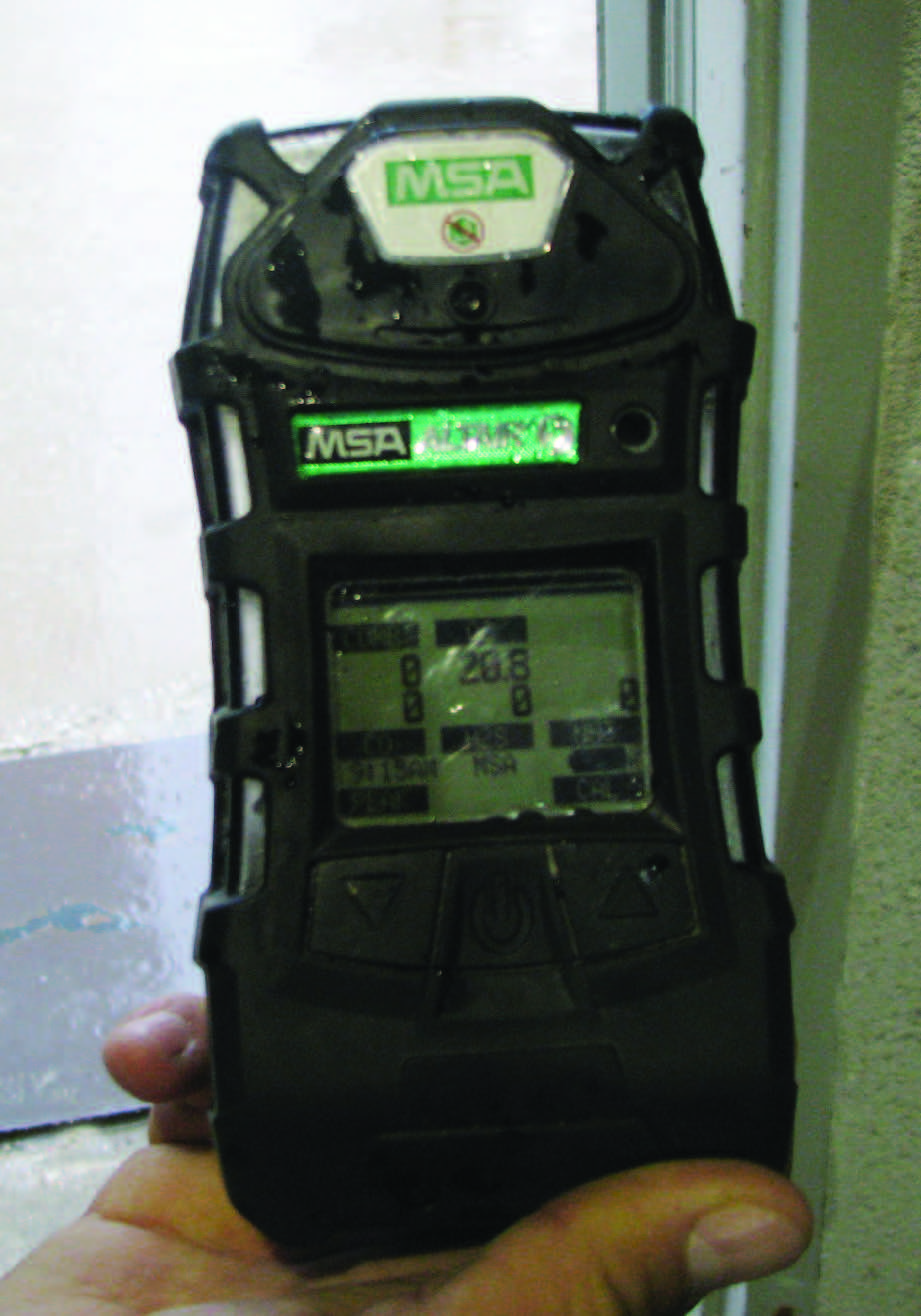
For safety, ask your local agricultural retailer if you can use their atmospheric monitoring device to check the toxicity levels of a tank before you enter it.
A Tragic Story!
The nephew of a farmer entered a stainless steel tank on a sprayer to clean it out and was overcome by fumes. A farm employee went in to rescue him and also was overcome. The nephew dies and the employee had to be rushed to the hospital.
This tragedy is a serious reminder to make sure you monitor the air quality in any tank or confined space before entering it and to use supplemental breathing equipment as required.
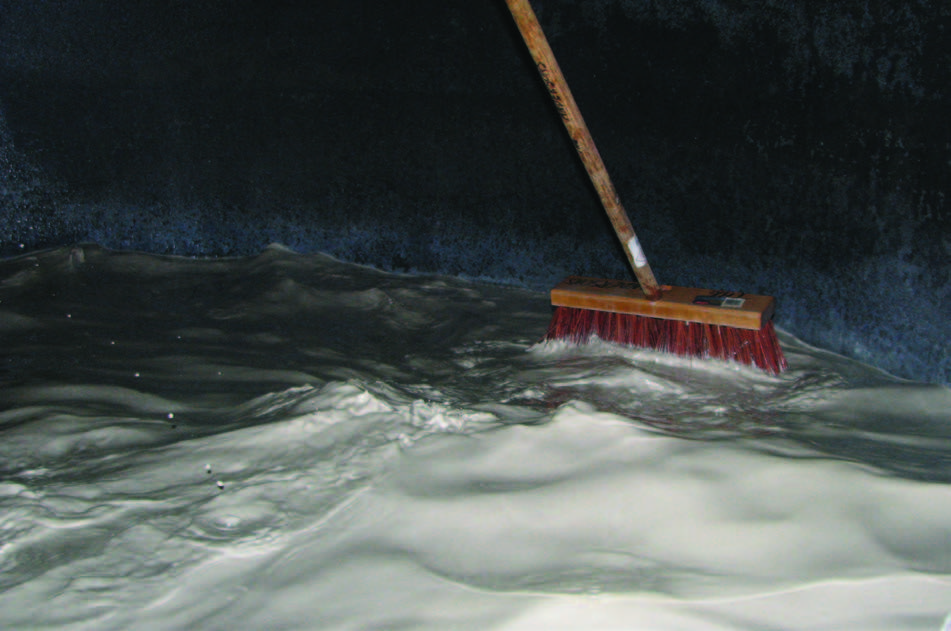
After the tank has been cleared to enter, you first want to remove any residues from the floor. Use a stiff broom to loosen any solids stuck to the bottom of the tank, and then get them into a solution by adding water. Then, completely drain the tank, moving the product into a holding tank or sprayer.
Next, rinse the lower rings and floor with water to remove excess fertilizer. Empty the water remaining on the floor using the drain outlet.
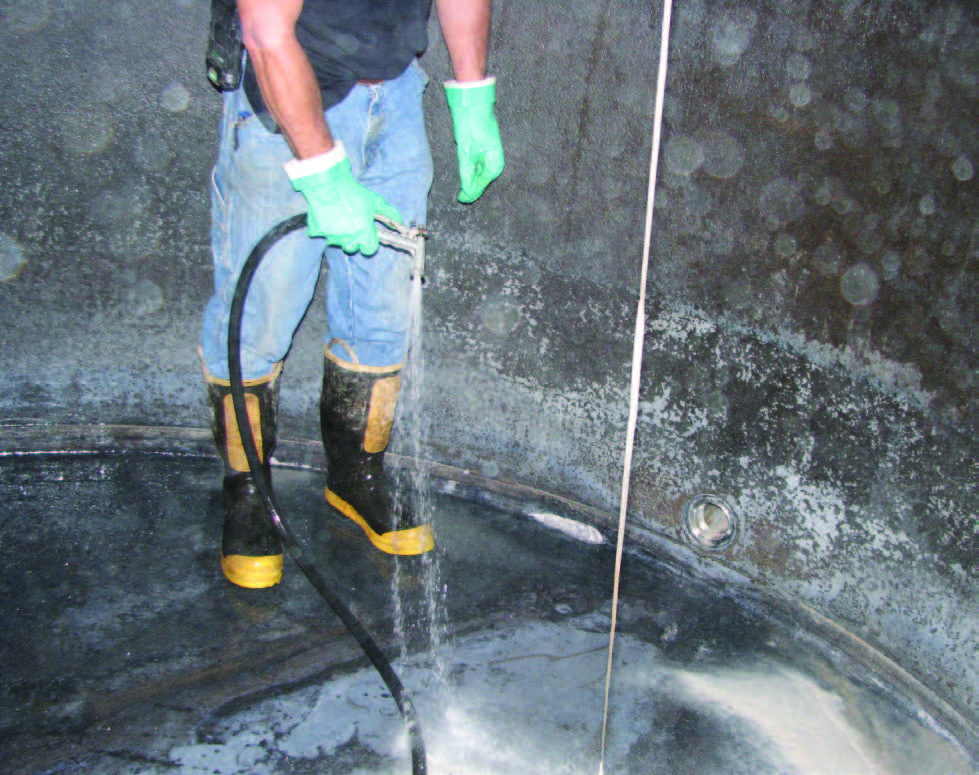
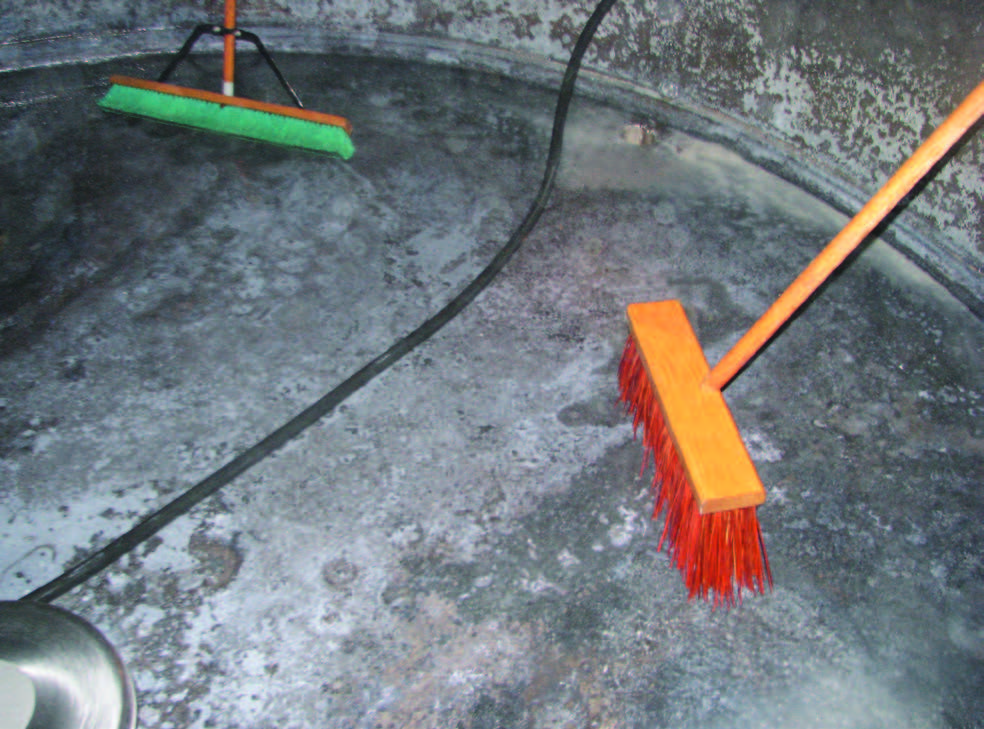
Never enter a tank unless you are a trained professional with proper safety equipment, environmental monitoring equipment, and confined space training and equipment.
Closely examine the tank’s floor and sides for the presence of rust, pits, cracks, and compromised welds. Make repairs as required.
(Above) The lower sides of this tank have rust. (Below) There is a little rust on the walls of this tank.
The painted portion of this tank looks good. The unpainted portion shows signs of corrosion.
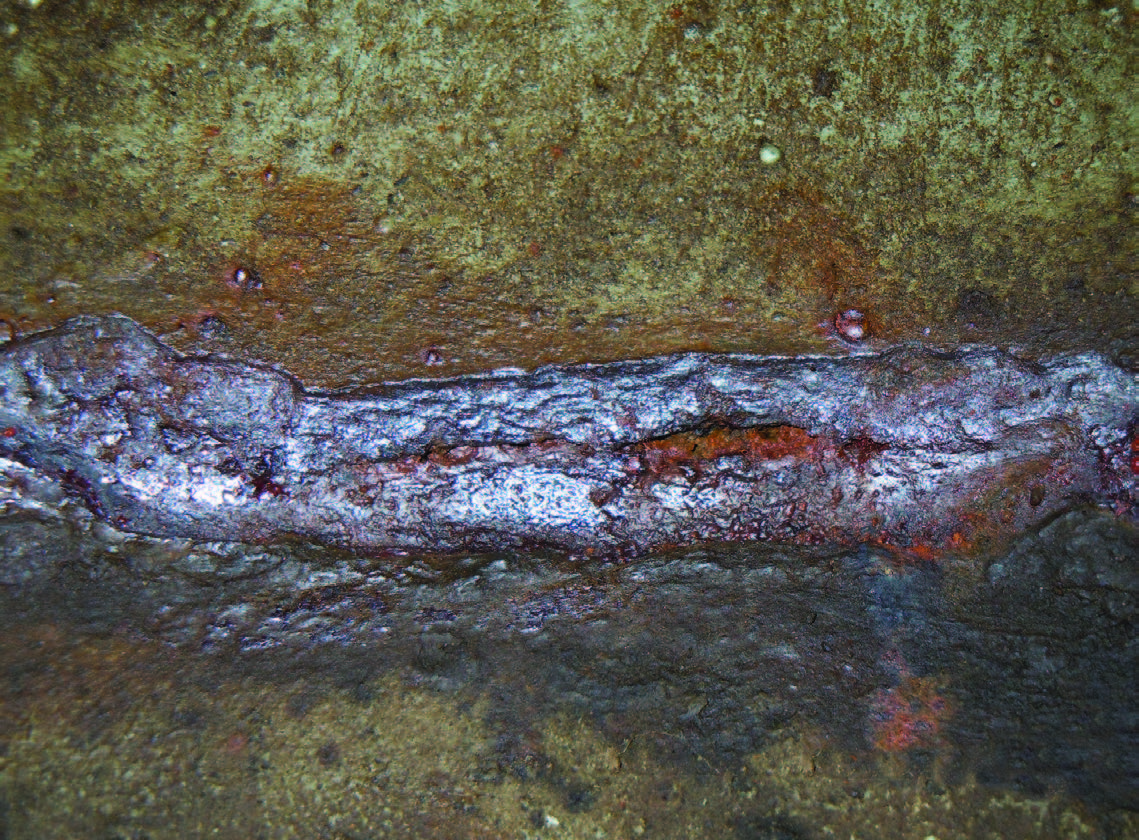
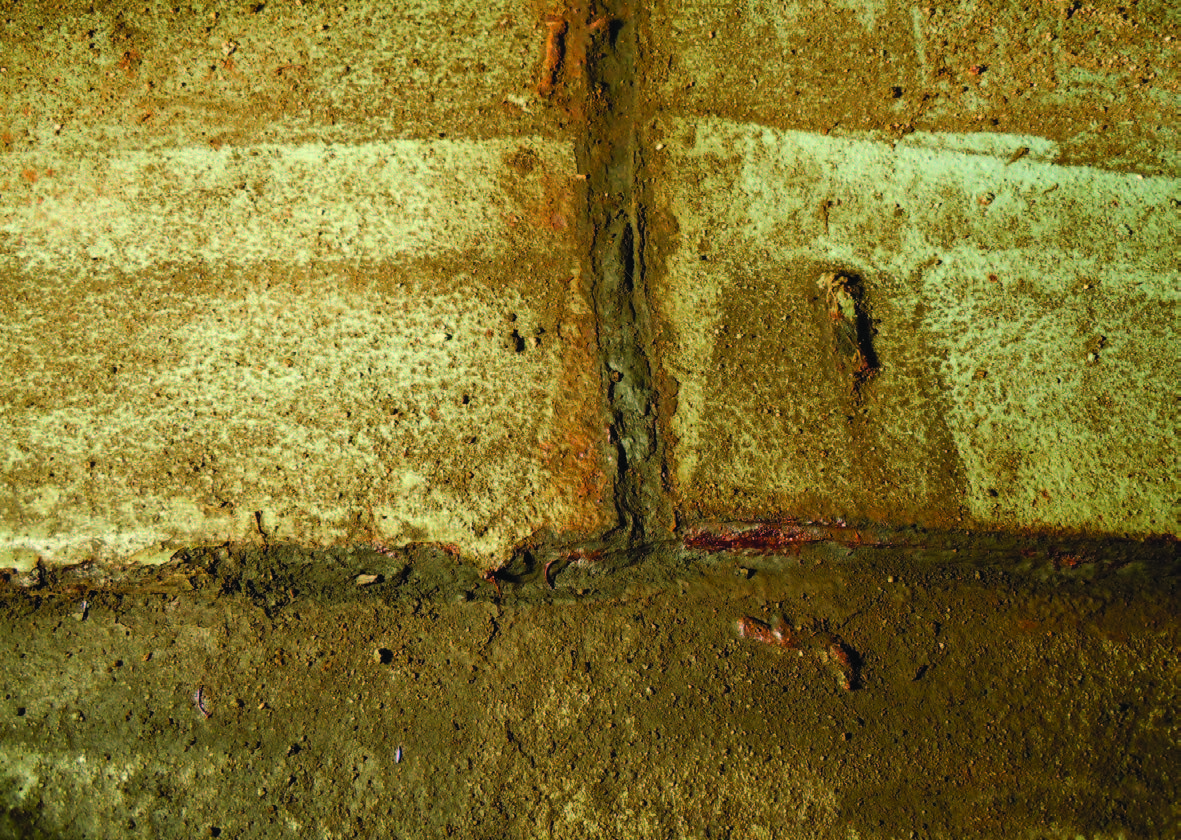
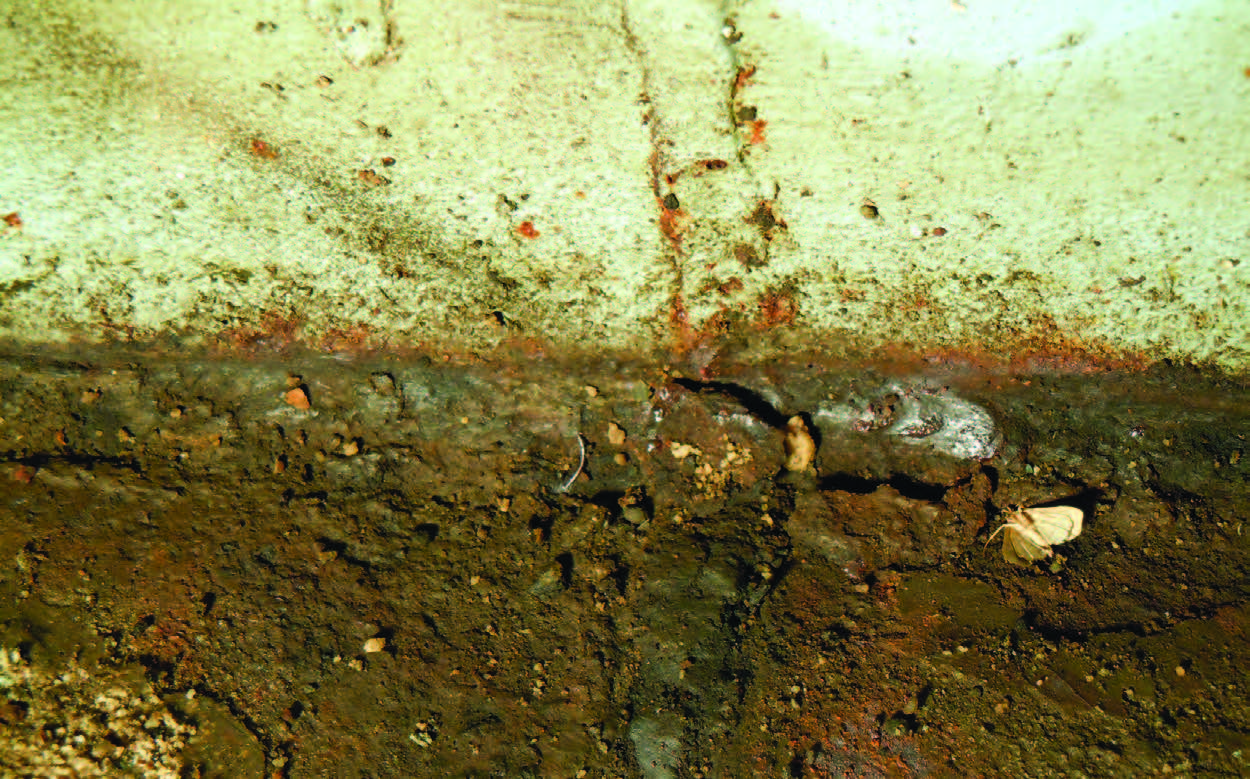
These welds show signs of corrosion damage. The most vulnerable part of a mild steel tank is where the quality of the welds is insufficient, and the steel closest to those welds is exposed to pockets of stagnant water. Always use qualified or certified welders when repairing a tank.
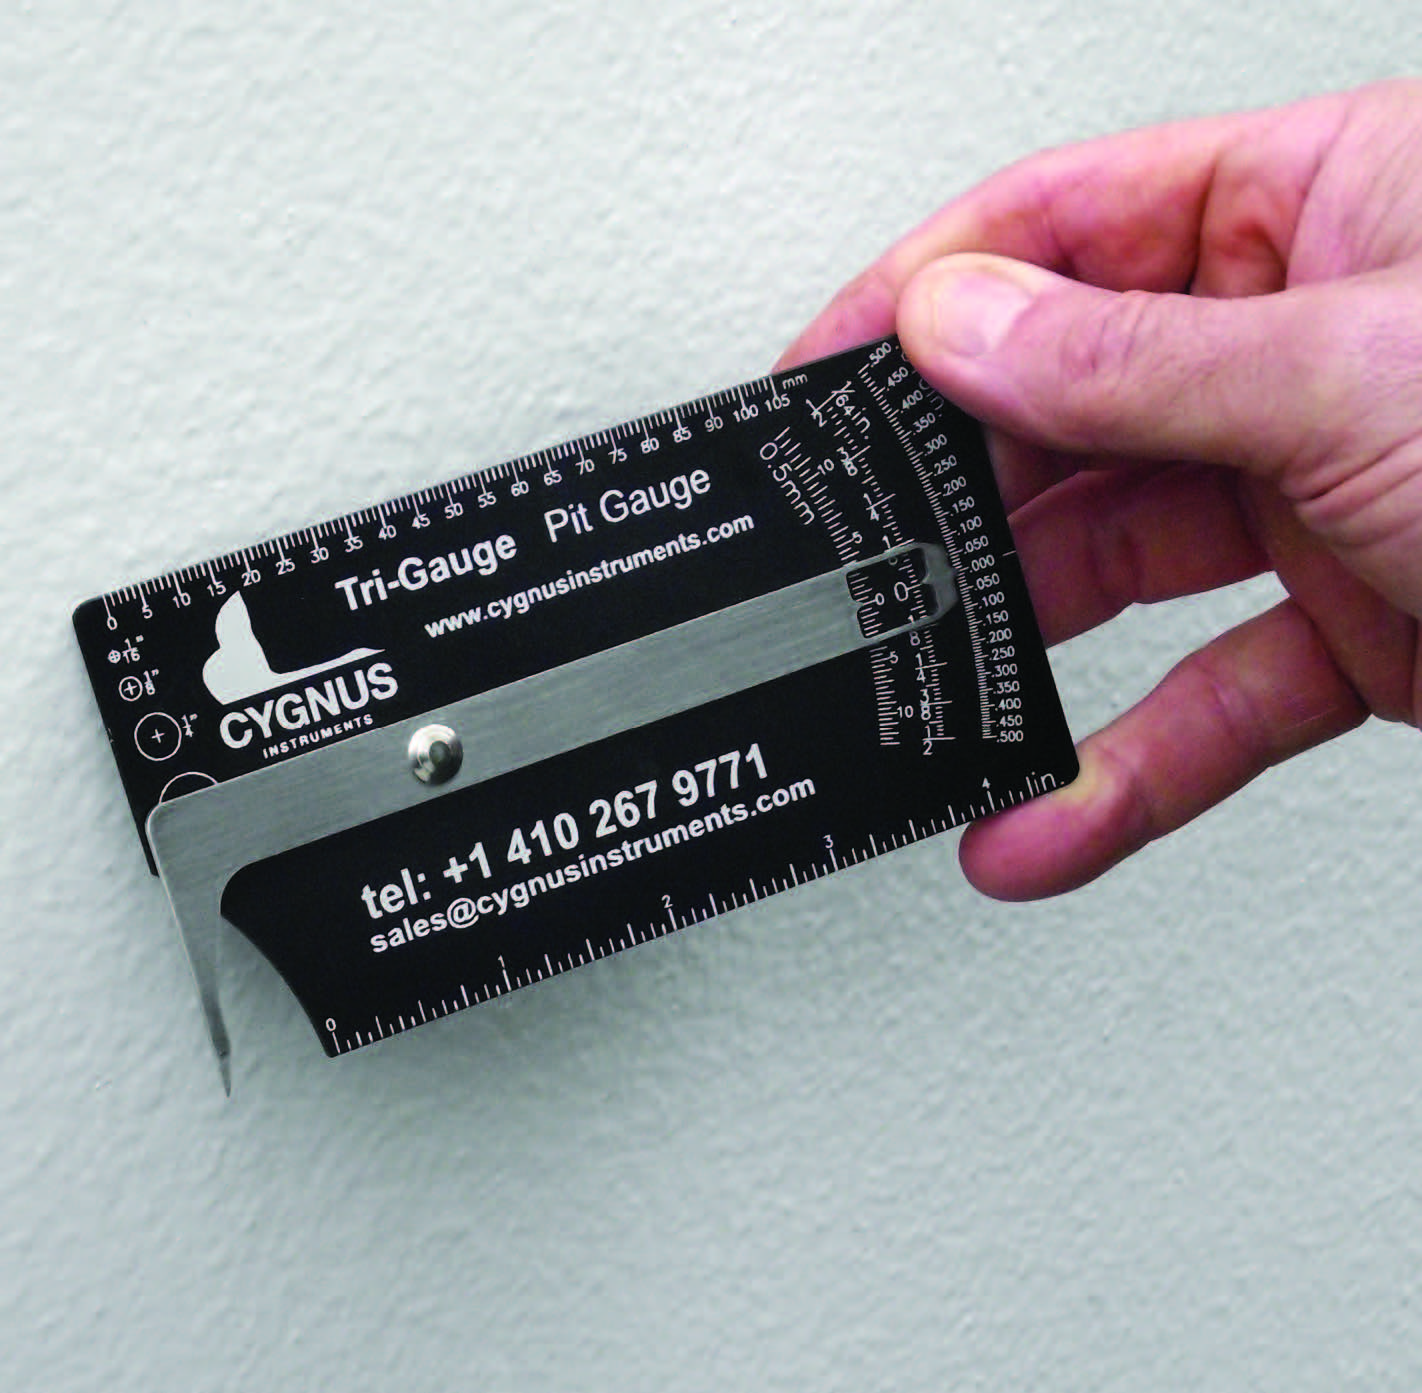
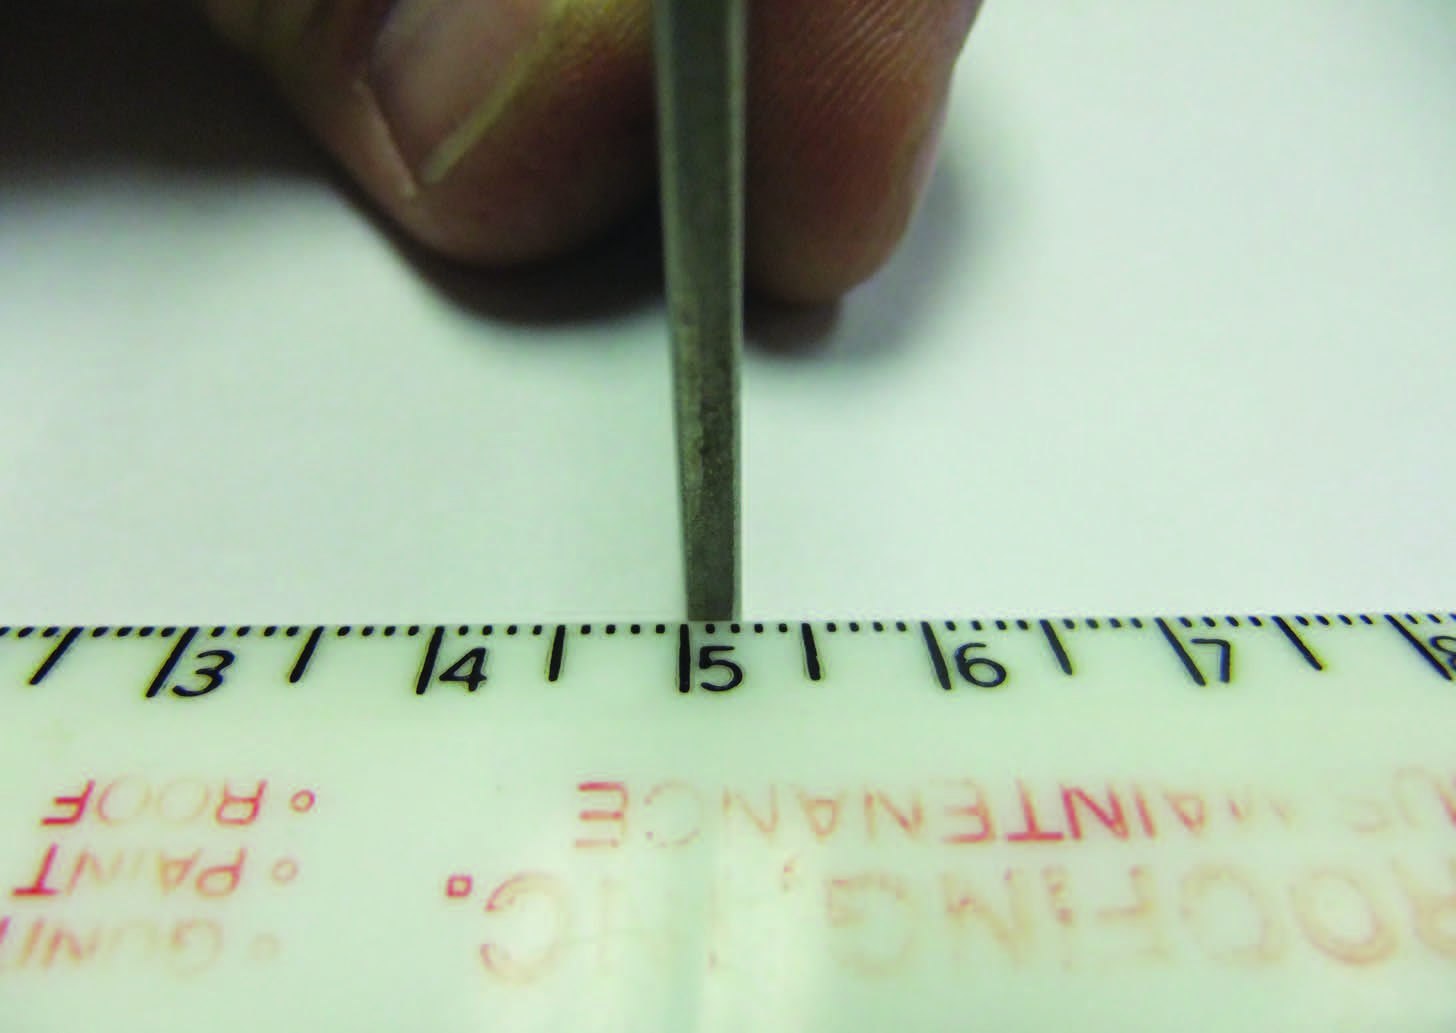
If you find a pit, use a pit gauge to measure how much steel has corroded. A rule of thumb says that the tank is still acceptable if the pit is no deeper than 50 to 60 percent of its original thickness. For example, if your tank has a wall that is 1/4 inch thick, it is still usable if the pit is less than 1/8 inch deep. Deep pits require metal plates to be welded over the damaged sections. If the sides and bottom are extremely pitted, you should replace the tank.
If you need to repair a large area on the floor of a tank, it can be difficult because welding in new plates can weaken the floor. There can also be problems if the metal piece you need for the repair is larger than the manhole opening — how will you get it inside the tank?
5. Replace gaskets. Pay close attention to gaskets on any frequently used manhole cover. Be sure to use the right size gasket that also is compatible with the product that will be stored in that tank. Wait 24 hours before refilling the tank to let the silicone cure.
A light film of grease on both sides of a gasket may help prevent it from being torn when you take off the lid, Using anti-seize on the bolts will help the next time you need to remove the manhole lid.


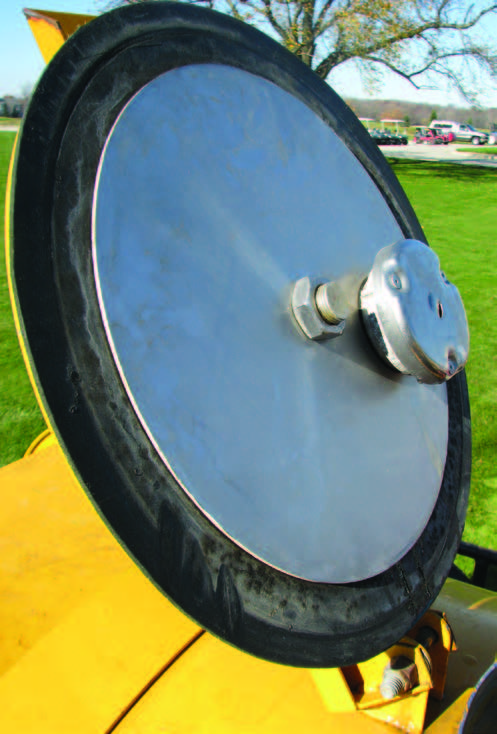
6. Inspect tank lids. Be extra careful to inspect the lids on transport tanks to ensure they have a tight seal.
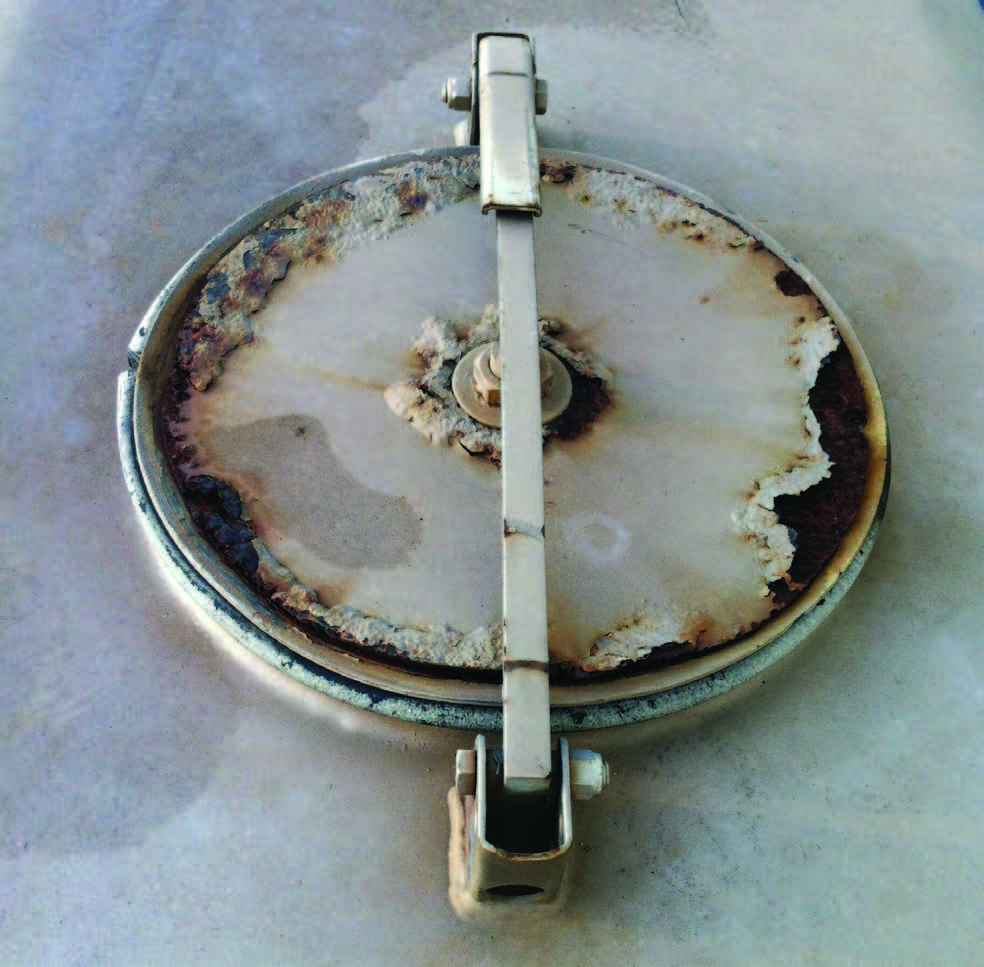
(Above) Tank lids and gaskets can also corrode.
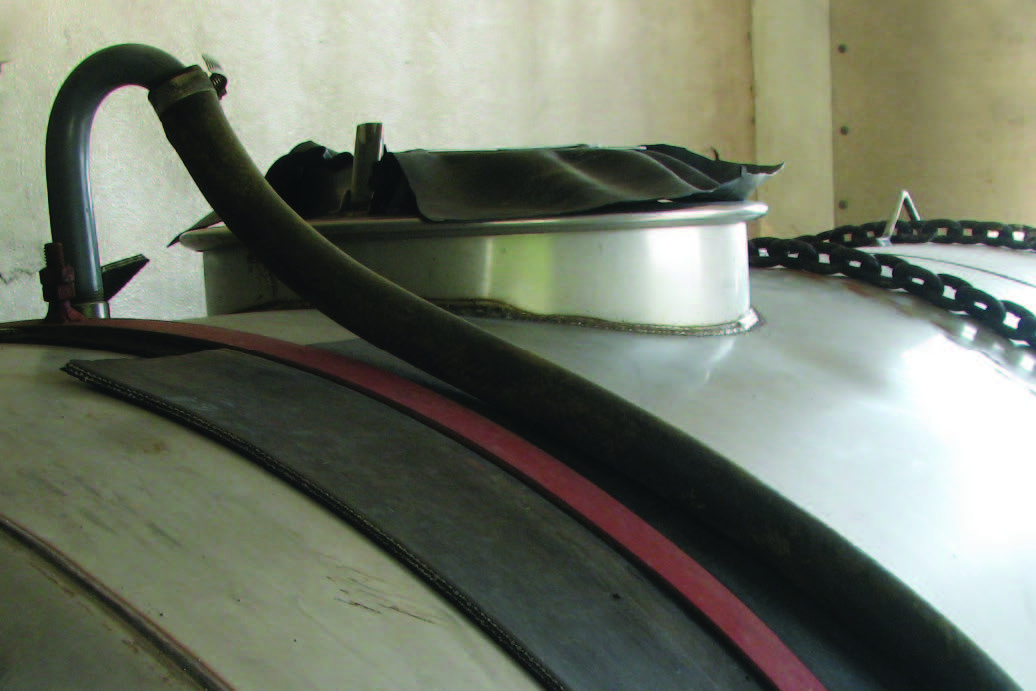
The owner placed a piece of rubber on this tank lid to help seal the liquid inside the tank. Rubber gaskets on transport tanks are a lot better than the old cork style, which tend to deteriorate over time.
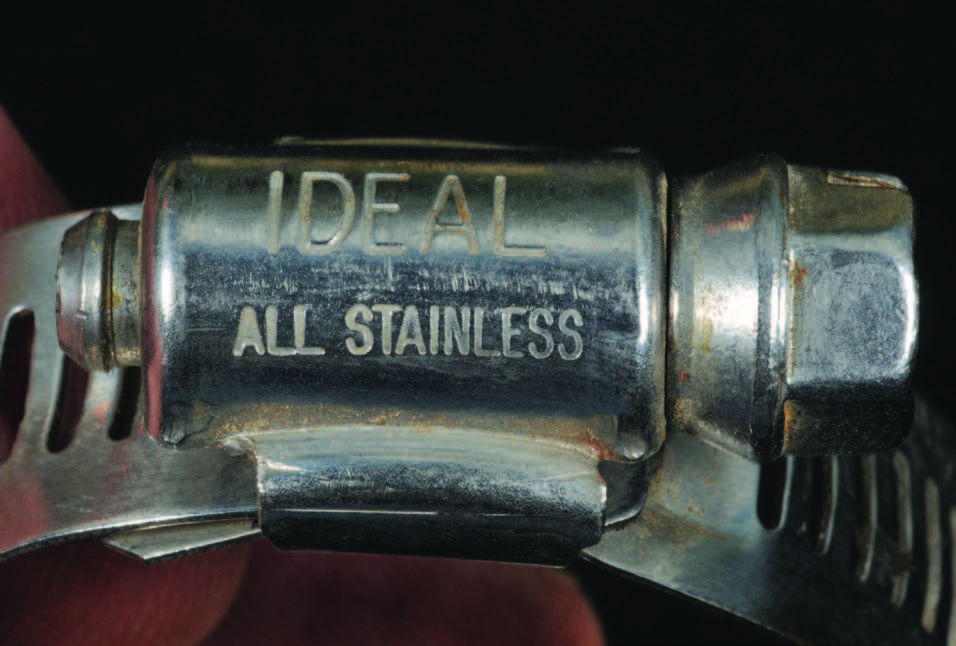
7. Inspect all attachments and clamps for corrosion. Use stainless steel clamps and attachments when possible.

8. Consider investing in detection tools. There are a number of electronic tools that use ultrasound to measure the thickness of the tank wall by standing on the outside. You can compare a reading from such a device to the original wall thickness. IF you use a device and detect that the wall’s thickness has been compromised by corrosion, examine that area inside the tank.
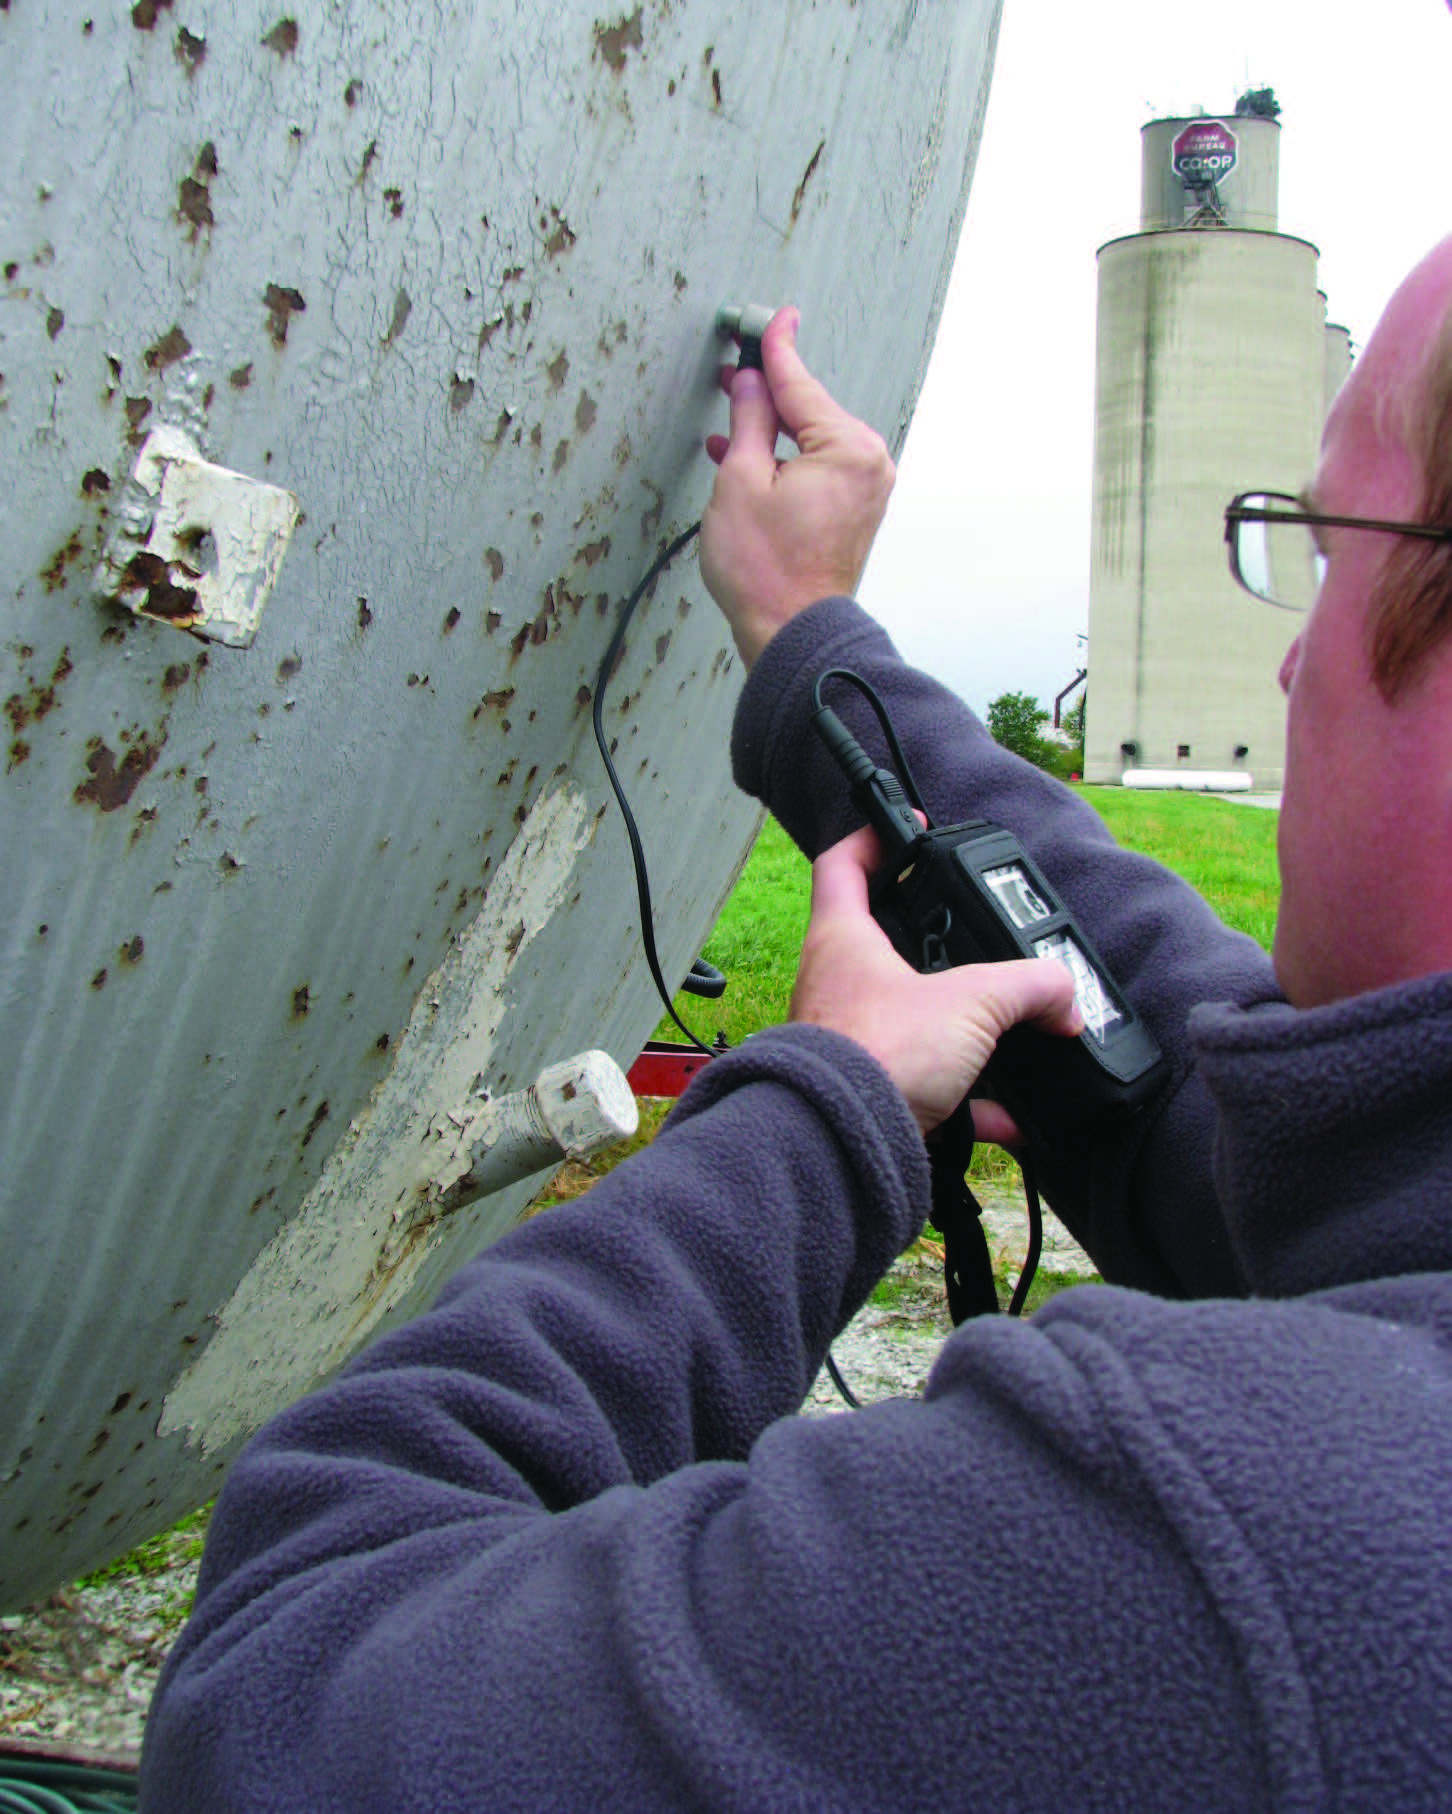

There are good instruments that measure the thickness of tank walls, but the devices should complement a careful visual inspection of the area. Instruments can give you a good reading in one spot, but just 1 inch away there could be a hole nearly all the way through the wall.


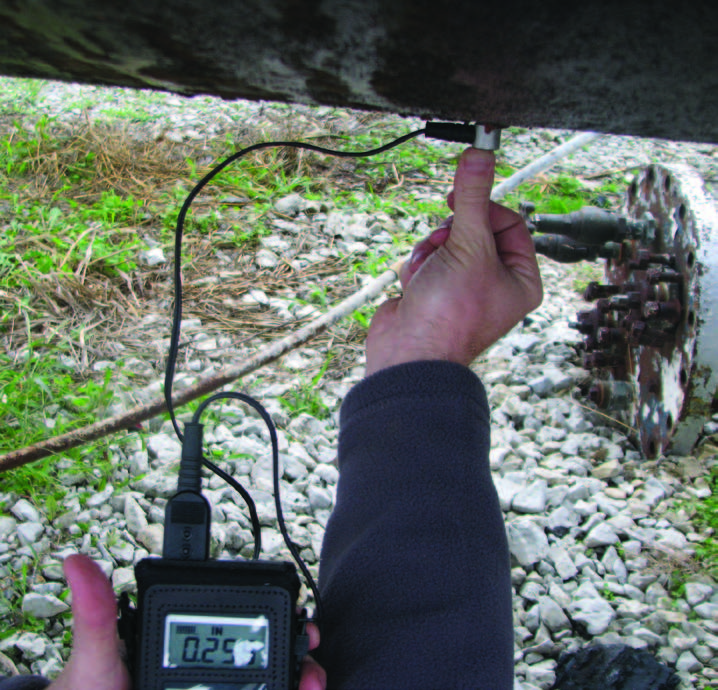
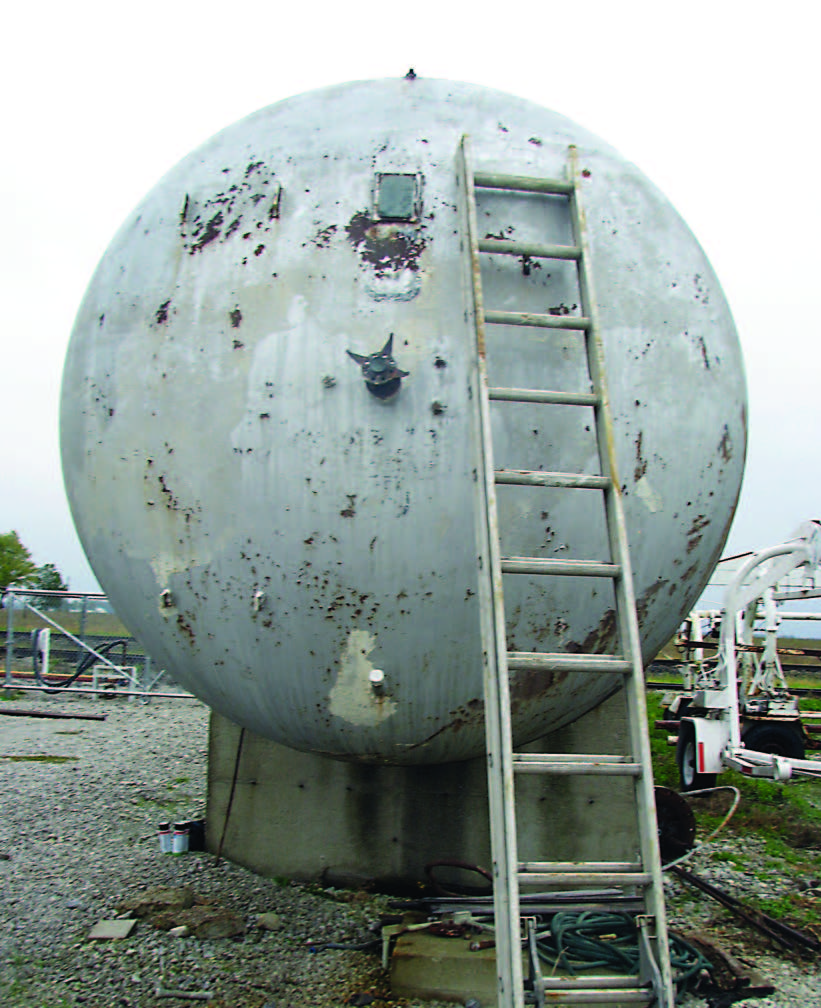
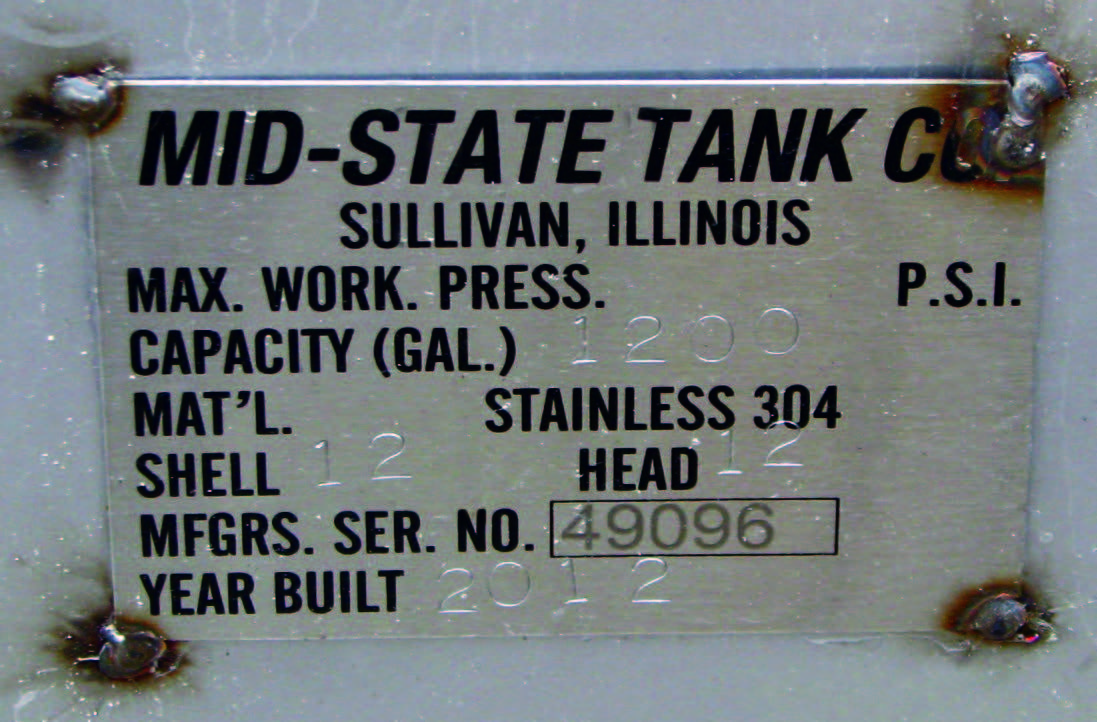
Most repairs on a fertilizer tank are on the bottom. This is why many tanks are painted on the bottom and a few feet up the shell. The tag on this tank (manufactured in 1947) indicates the ends and sides were 1 inch thick. A visual inspection indicates little corrosion there, but the device indicates only a quarter of the tank’s thickness remains.
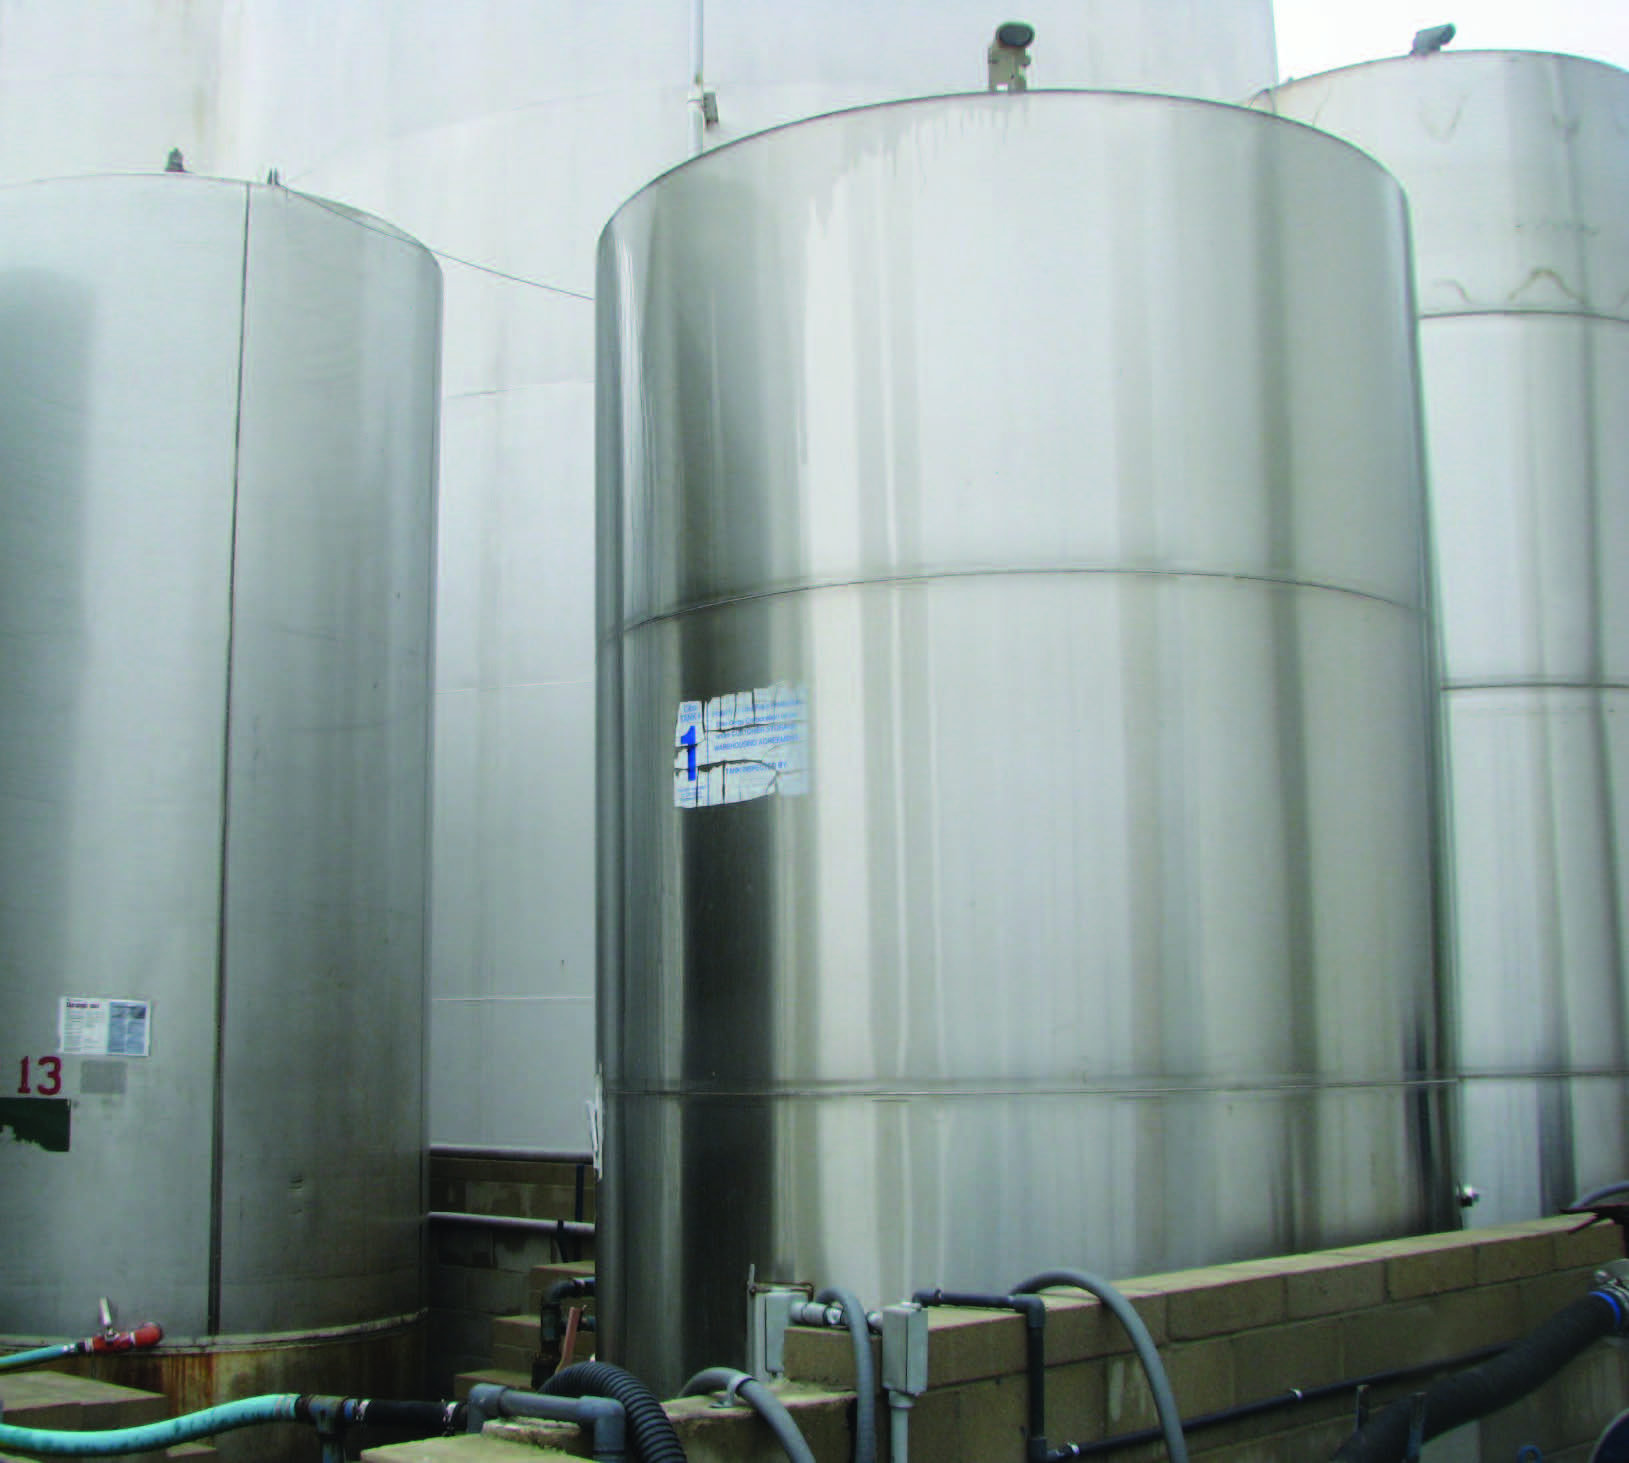
STAINLESS STEEL TANKS
Basic stainless steel begins with iron and carbon just like mild steel, but then manufacturers add chromium and nickel to improve corrosion resistance. Like mild steel, there are various grades of stainless steel. The grades of stainless steel used most in the pesticide and fertilizer industry are 300-series (or 18-8) stainless.
The 300-series stainless steel contains 18 percent chromium and 8 percent nickel. Tanks made with 300-series stainless steel offer excellent corrosion resistance, so they can store a very diverse range of products: from fuels, to pesticides, to fertilizers.
The two most common 300-series grades are 304 and 316 stainless. Of the two, 304 stainless is used the most. It has excellent corrosion protection and costs less than 316 stainless (which is superior in quality). Steel manufacturers further designate a 304L stainless, which indicates the carbon content is no more than 0 .02 percent, further enhancing its corrosion resistance.
However, even 304 stainless can still be degraded by extremely acidic liquids or when product remains in the tank for extended periods. Calcium chloride is one product that will corrode 304 stainless.
Grade 316 stainless steel is used in tanks that store very acidic liquids such as calcium chloride. Grd 316 stainless may also have the L designation.
The major advantage of using stainless steel for storage or transport tanks is that liquids seldom interact with, adhere to, or penetrate the inside walls of the tank, Stainless steel also allows you to completely rinse the tank with little chance of cross-contamination or leaving chemical residue, These attributes make stainless steel the more desirable metal tank material for transporting fertilizers and pesticides to and from businesses and farms.


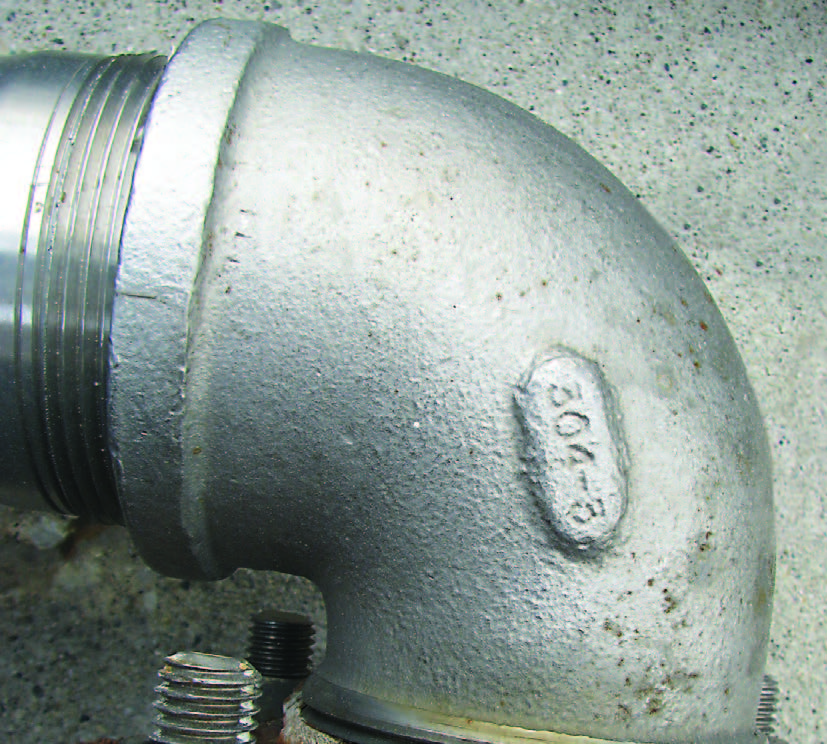
Nipples, elbows, and pipe fittings made from stainless steel have information about their grade stamped on them.
There are other advantages to using stainless steel. It:
- Is not affected by sunlight
- Is not subject to rust
- Can be painted
- Can have decals attached
- Can remain in service linger
- Will hold its value longer
Of course, the major drawback for stainless steel tanks is its initial cost compared to poly, fiberglass, or mild steel models. This high initial cost is the major reason why large fertilizer storage tanks are built of mild steel or fiberglass.
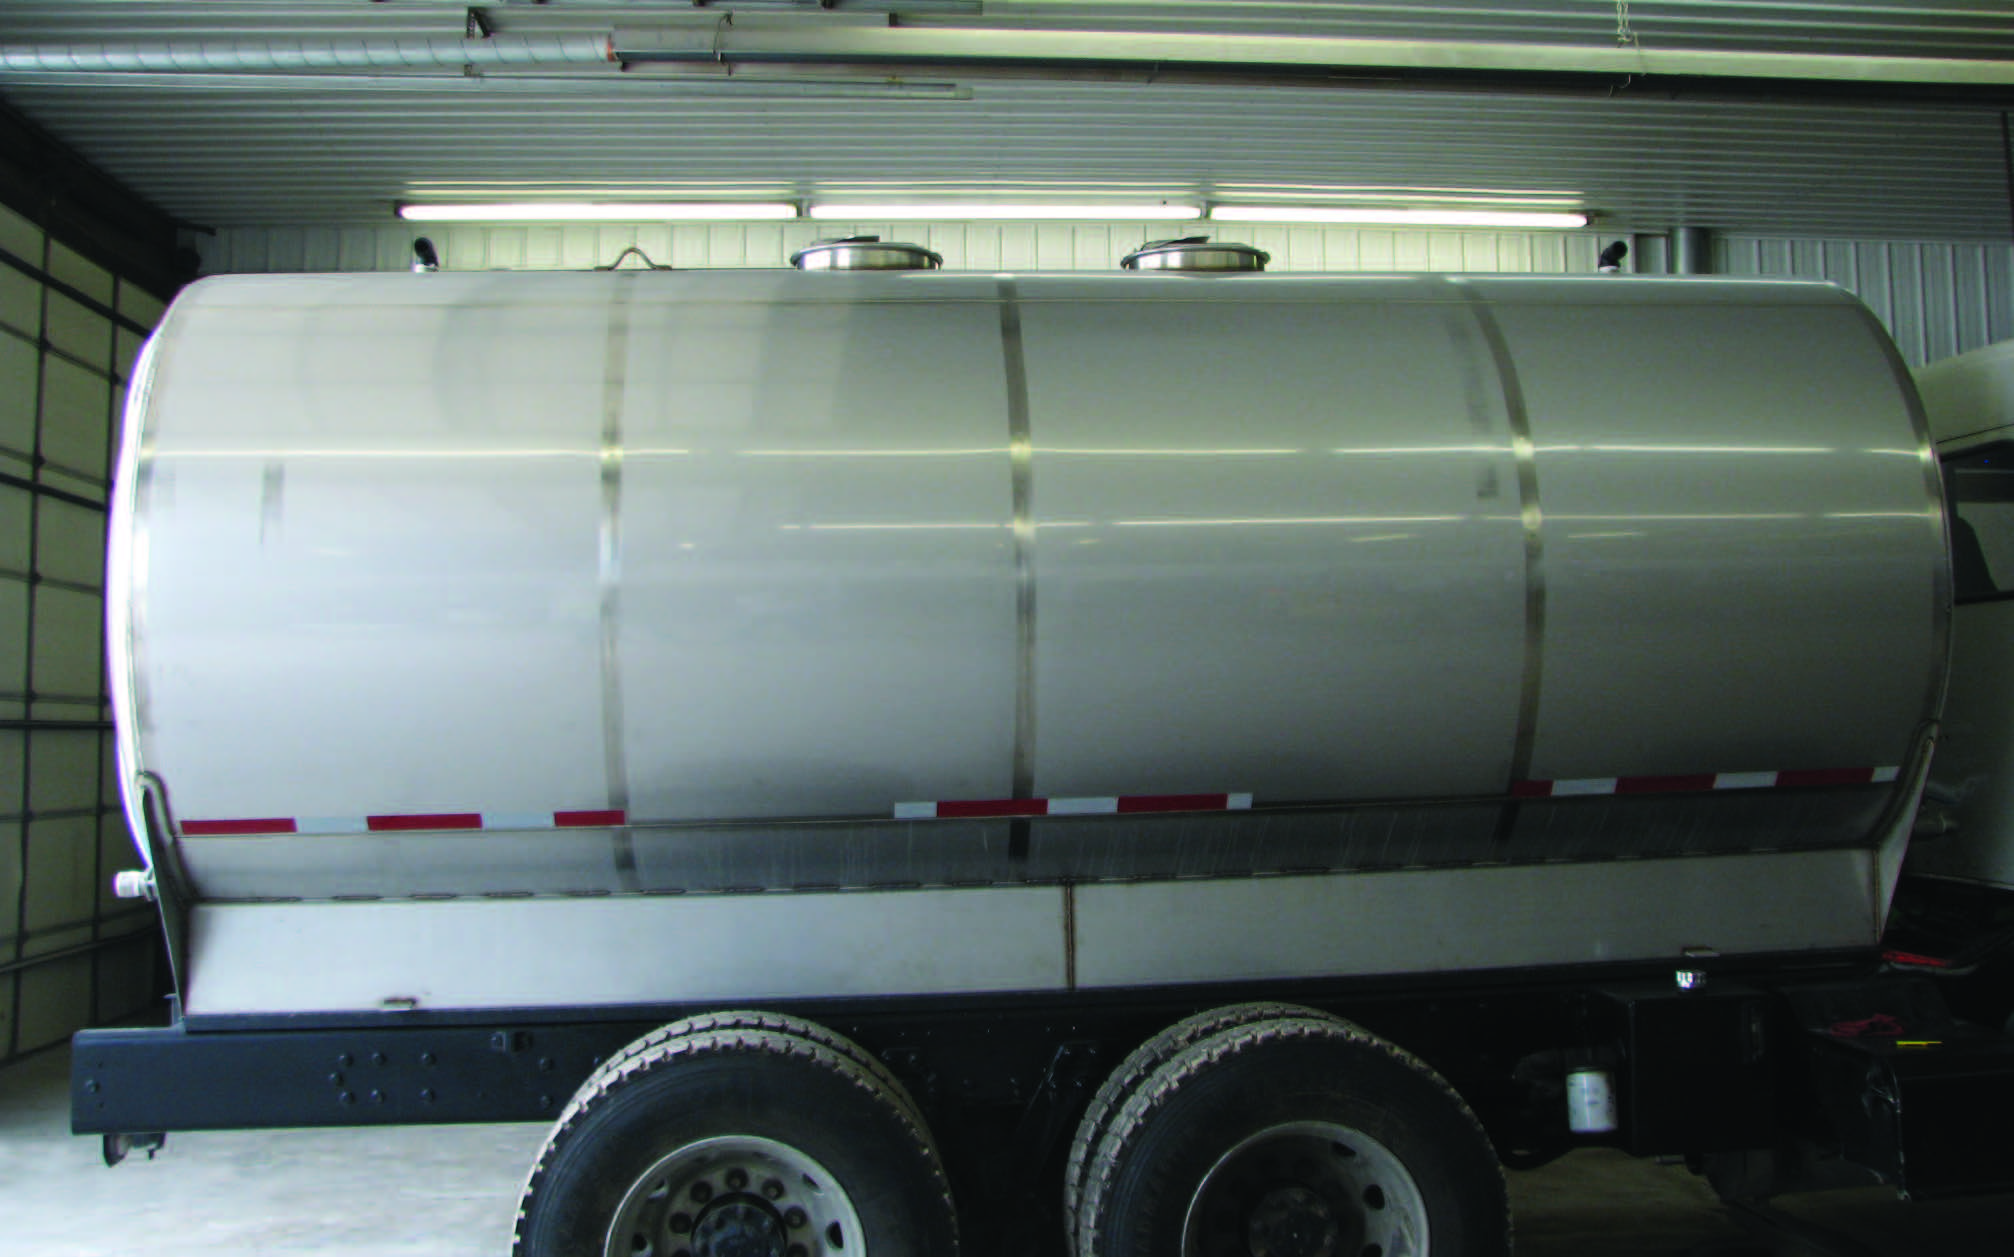
Although stainless steel resists corrosion better than mild steel, you still need to regularly inspect and maintain them as you would with mild steel tanks.
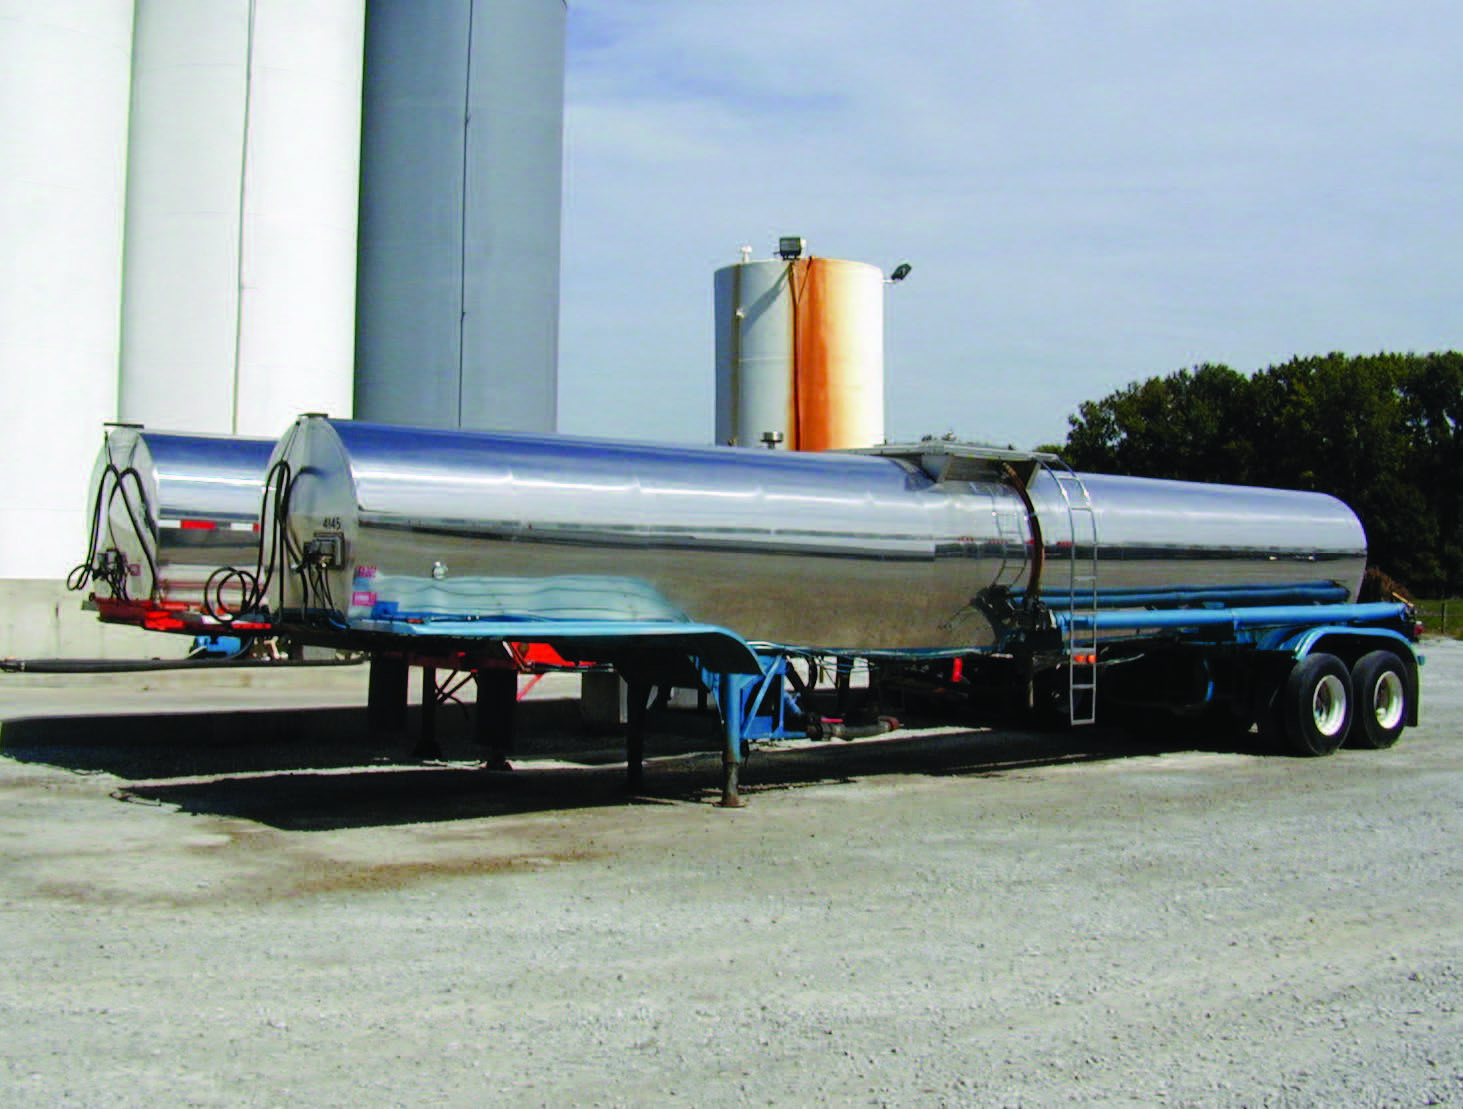
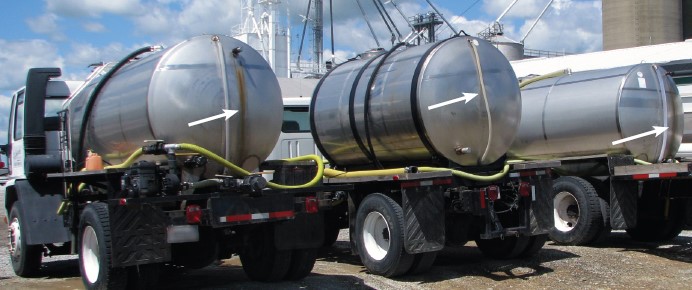
These photos show how stainless steel does not rust like mild steel.
Questions for Stainless Transport Tanks
There are several options to consider when you choose a stainless steel tank. Here are 17 questions that will guide you in customizing a stainless tank to meet the needs of your operation.
1. What grade of stainless is best for the products you will store? Contact the manufacturer of the product you plan to store to determine which stainless grade (304 or 316) is most beneficial.
2. Will the tank be full most of the time? The less time a product stays in the tank, the easier it is to justify 304 stainless. If the product remains in the tank for an extended period, then 316 stainless will offer better resistance against corrosion.
3. How thick do the walls need to be? The wall thickness of a truck-mounted tank is measured by its gauge. The table below shows the relationship between gauge and inches. Note that the same gauge designation has a different wall thickness depending on whether the tank is made of mild or stainless steel.
Table 1. Wall gauges and thickness for mild and stainless steel
The relationship between gauge and wall thickness is inversely related. The lower the gauge value, the thicker the wall. For example, 12-gauge stainless is 0.1094 (a little less than 1/8) inch thick, 16-gauge stainless is 0.0625 (roughly 1/16) inch thick. For each gauge number there is about a 10 percent difference in thickness than the number directly above or below it.
A piece of steel that is 2 millimeters thick is equivalent to 0.0787402 inch.
A tank made of 10-gauge stainless instead of a higher gauge may be important if the tank will carry heavy liquids, be used primarily for delivery, or if the tank will carry a large volume (such as 3,500 gallons). Heavier gauge steel is recommended when purchasing a transport tank because the liquid inside it constantly moves back and forth during travel. A heavier gauge may reduce the likelihood of a serious environmental mishap, hefty environmental fine, or serious long-term legal issues.
4. How are the internal seams welded? The entire seam should be welded on transport tanks. This will protect the seams weakening or leaking from the liquid shifting back and forth.
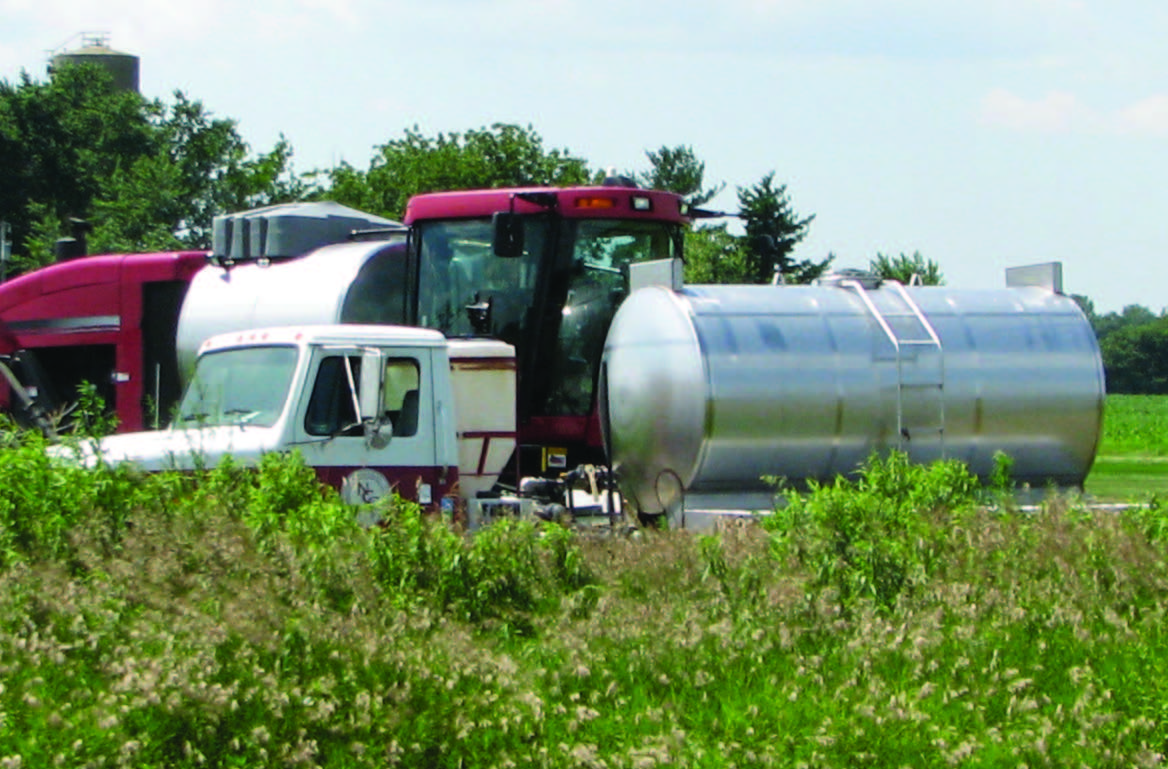
5. How many gallons will the tank store? How you use the tank could determine its size. For example, if you will use the tank to transport product to an applicator, then try to match the transport tank size to what the receiving tank will use. So, if the pesticide sprayer has a 1,200-gallon tank, a 1,000-gallon stainless nurse tank will never quite fill the sprayer, while a 1,500-gallon nurse tank will always have some product left over. Try to match supply and use tanks as closely as possible.
6. Will the tank be mounted on a truck or trailer frame? The height of truck-mounted tanks tends to be limited so the driver can see through the back window. However, you have more choices for trailer-mounted tanks.
7. How much weight is the truck or trailer rated to carry? How much weight a truck or trailer can transport depends on how much weight the truck, axles, and tires are rated to carry. If you want to mount the tank on a truck frame, check the distance from the truck’s cab to the back axles, and check the wheel base length to make sure the weight over the axles does not exceed its ratings.
8. Does the size of the vent opening match the pump? As with standing tanks, the vent’s diameter needs to be large enough to prevent the tank from collapsing when you remove fluids. Know how many gallons per minute (gpm) the pump is rated.

Standard vent openings will easily handle a 2-inch pump pulling 150 to 180 gallons a minute. For example, a 3-inch pump can withdraw more than 325 gallons per minute, which can quickly create a vacuum strong enough to collapse the tank if the vent is undersized. Consider adding a larger vent opening or multiple openings, to allow you to use a larger pump in the future.
Keeping the fill port open while you fill the tank allows enough air to escape and prevent a seam or weld failure.
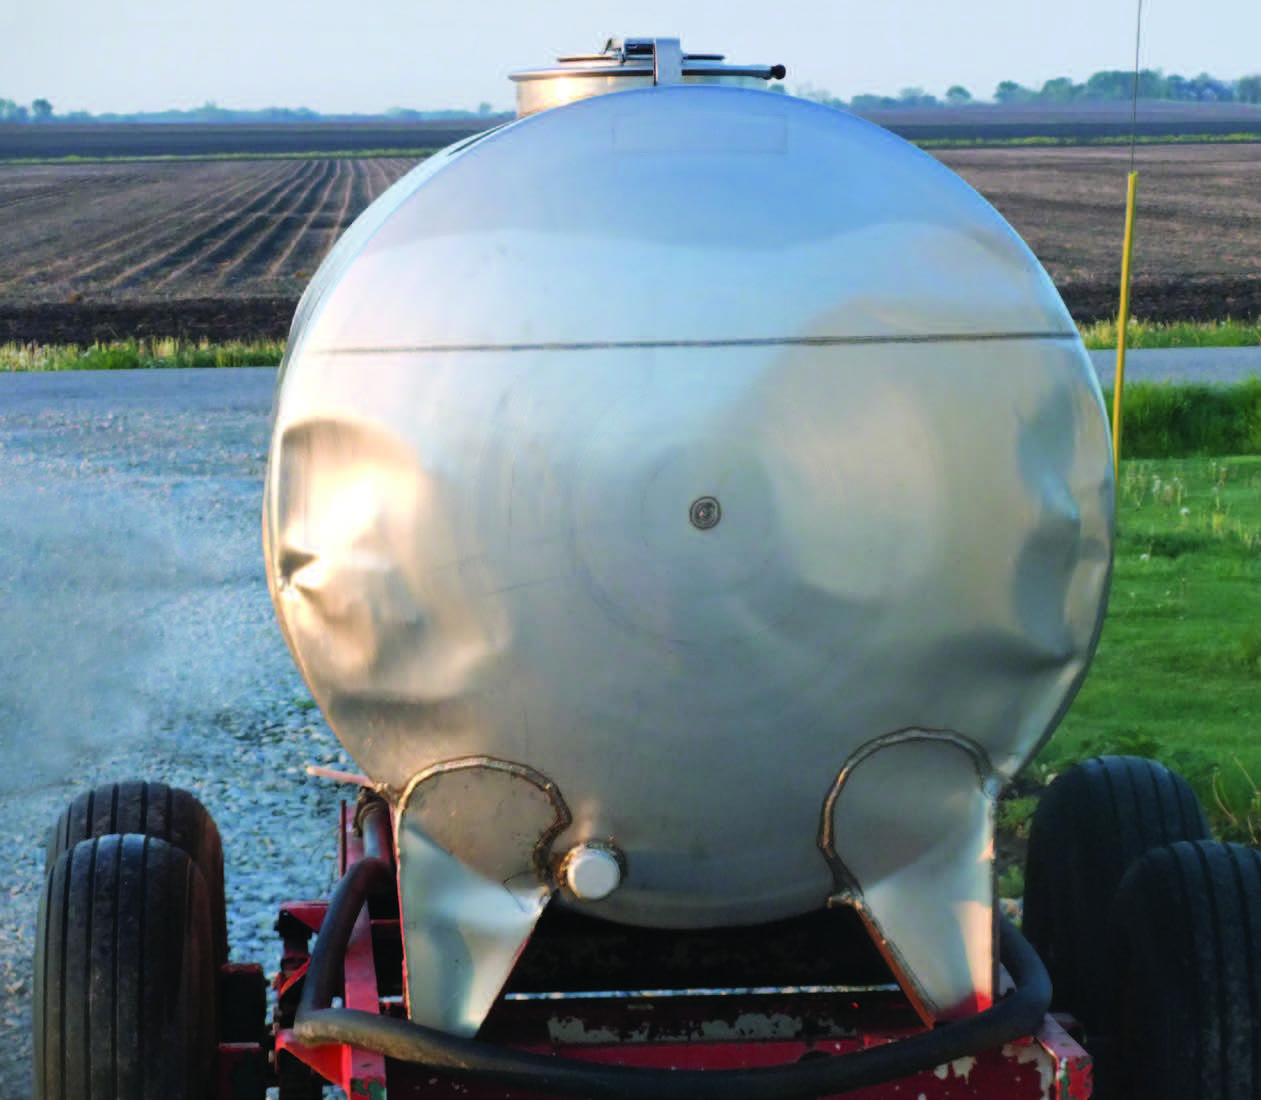
These tanks imploded because of inadequate venting. Tanks implode when you pull liquid out of the tank faster than air can enter the tank. Under the right conditions, even storage tanks can implode.
9. Does the tank come with baffles? All larger transport tanks should have baffles. Permanent baffles are important, because they help reduce the forward and backward movement of the fluid during transit.
10. Does the tank come with an attached frame? Stainless steel tanks usually come separate from the supporting frame. Adding a frame will increase your cost.
11. Does the tank need single or multiple compartments? You can order tanks with multiple compartments. For example, you can divide a 3,200-gallon tank into two separate compartments— each holding 1,600 gallons.
12. Does the tank need a collection sump? You can fit stainless tanks with sumps and troughs to collect and remove liquids. You can position an 8 x 8-inch box sump to help drain the entire tank. A trough sump runs the entire length of the truck or compartment and slopes to a collection point where the material can be pumped out of the tank and cleaned easier.
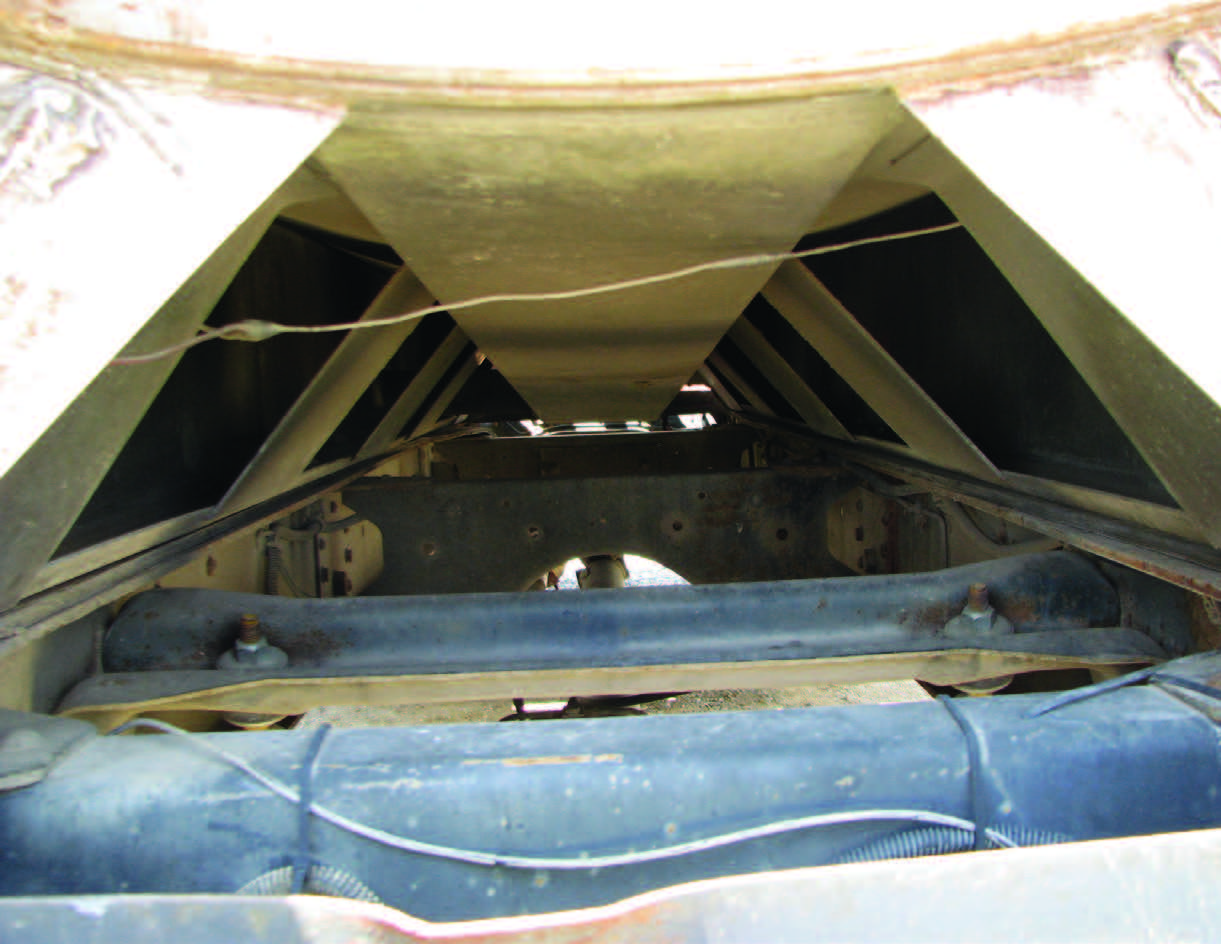
This view from the rear of the tank shows the gradual slope of the trough toward the front.
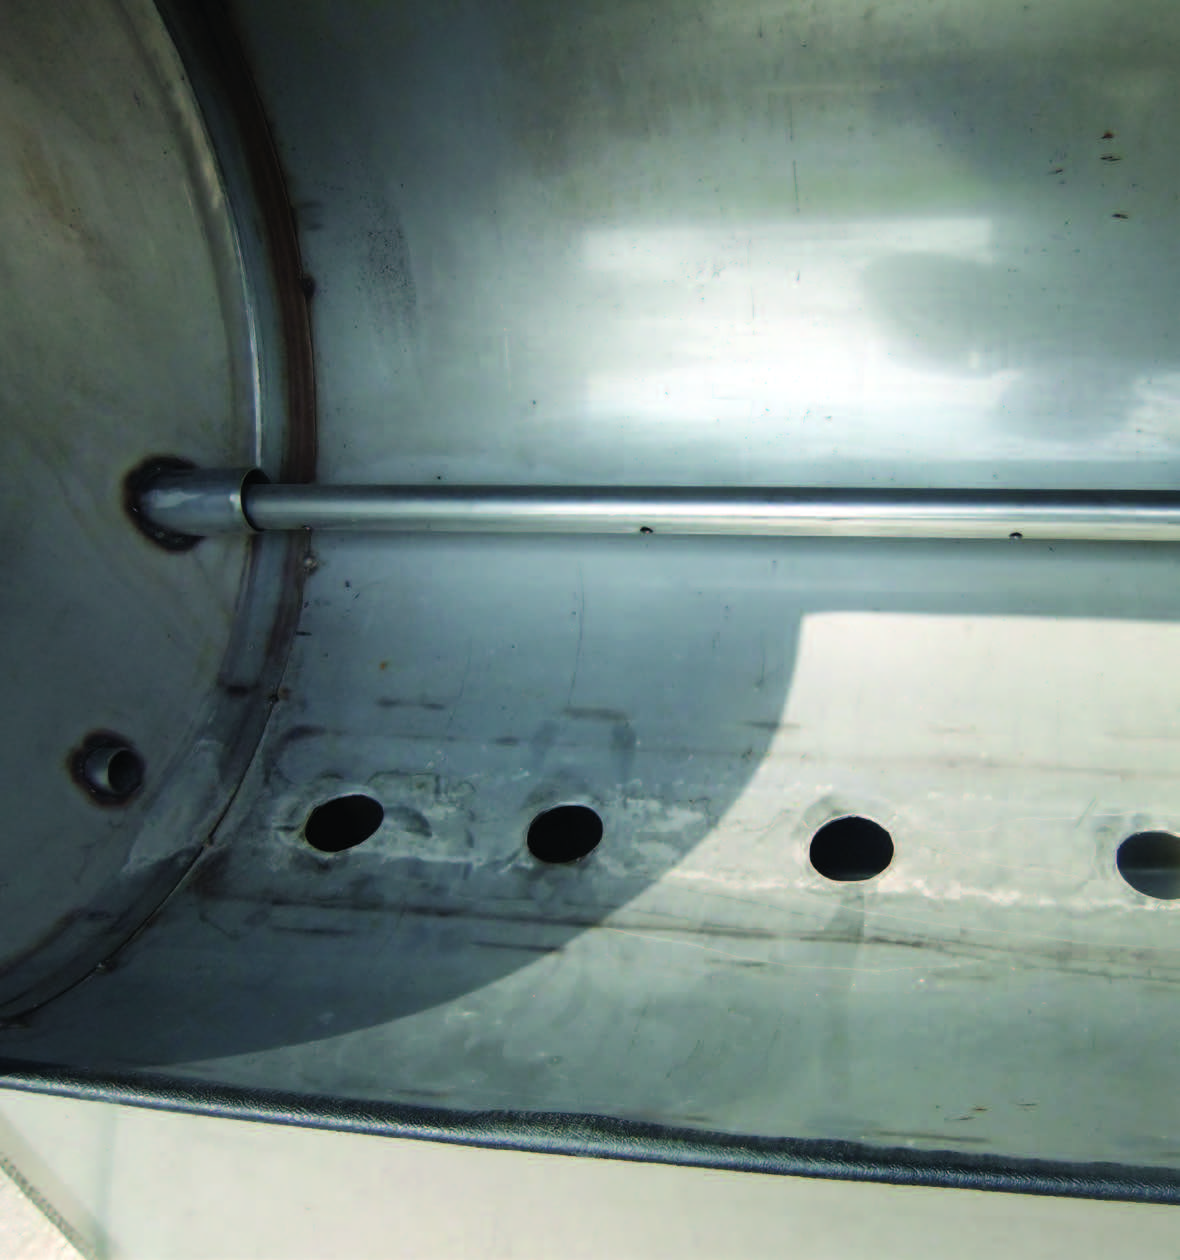
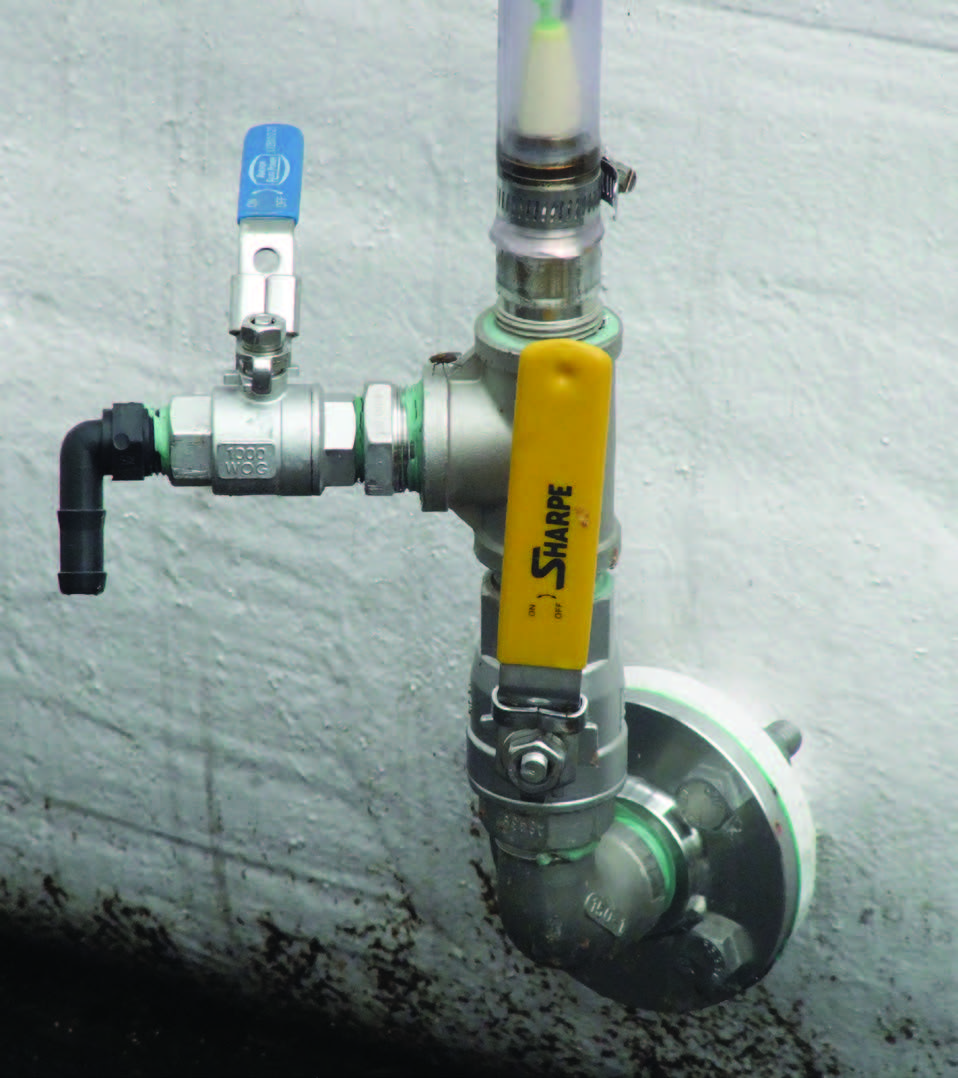
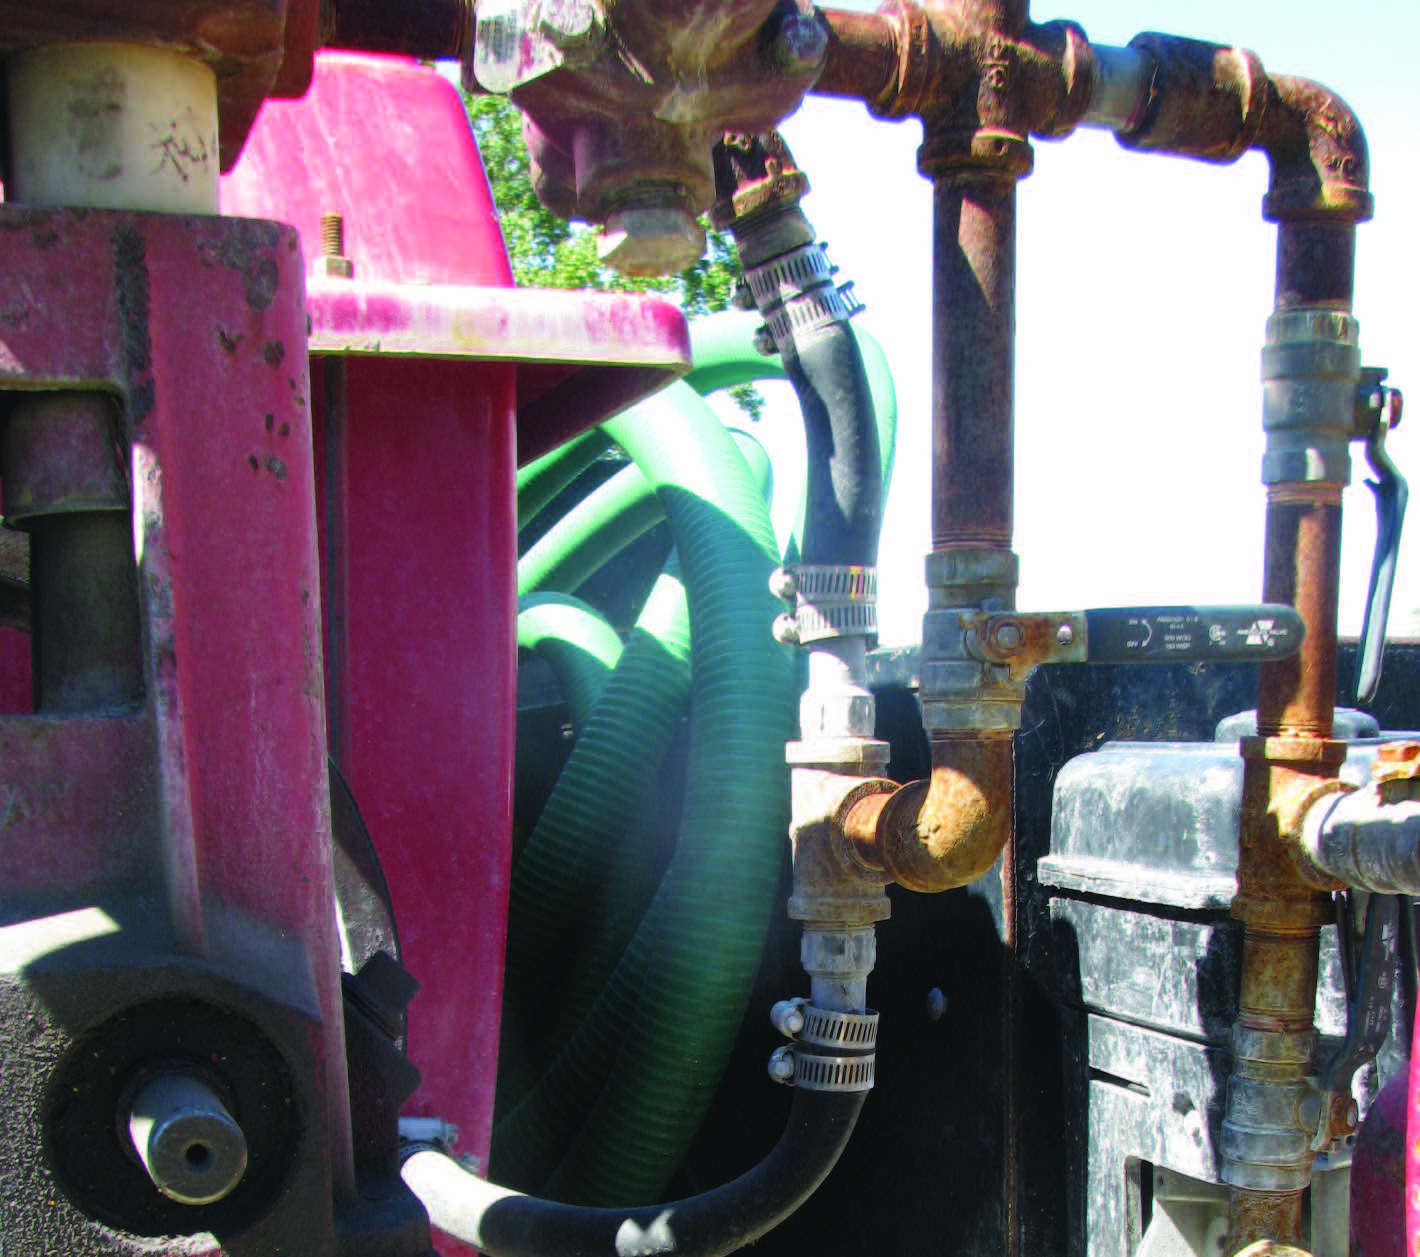
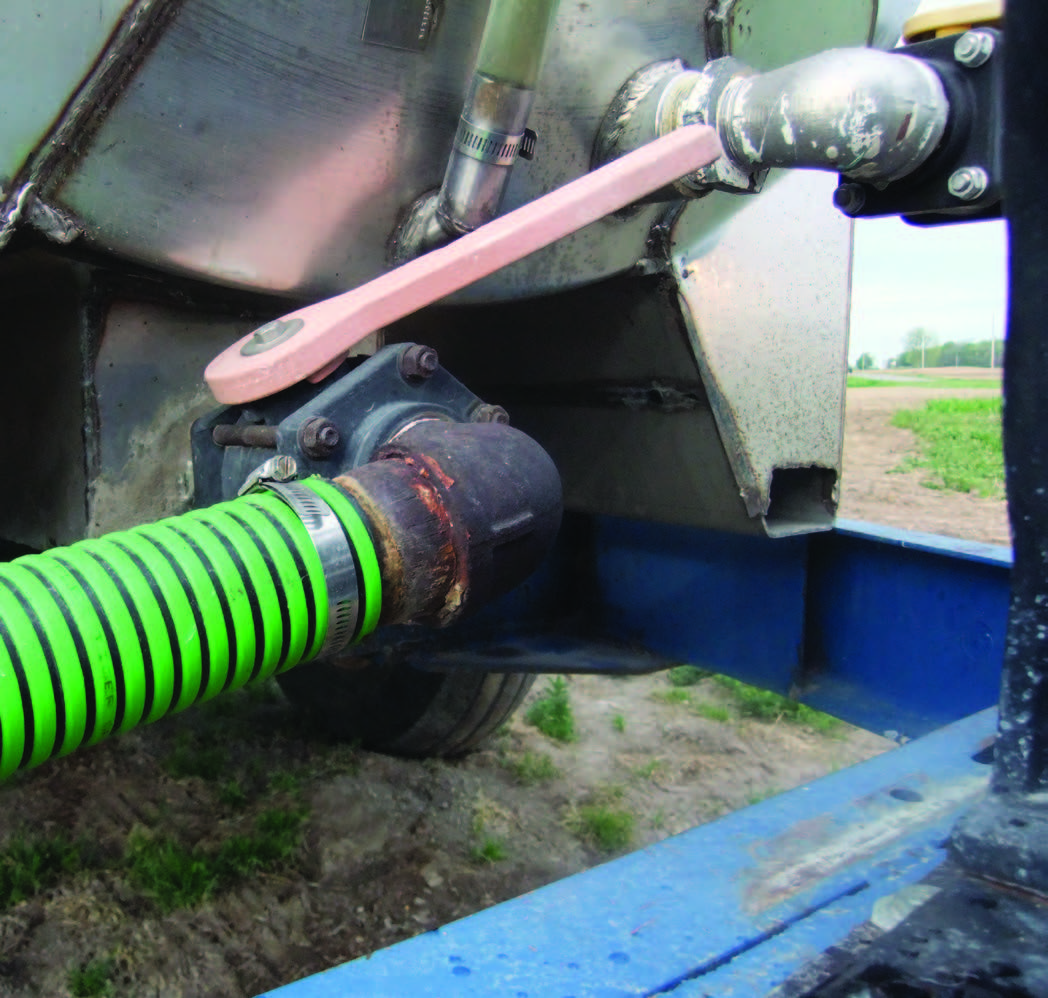
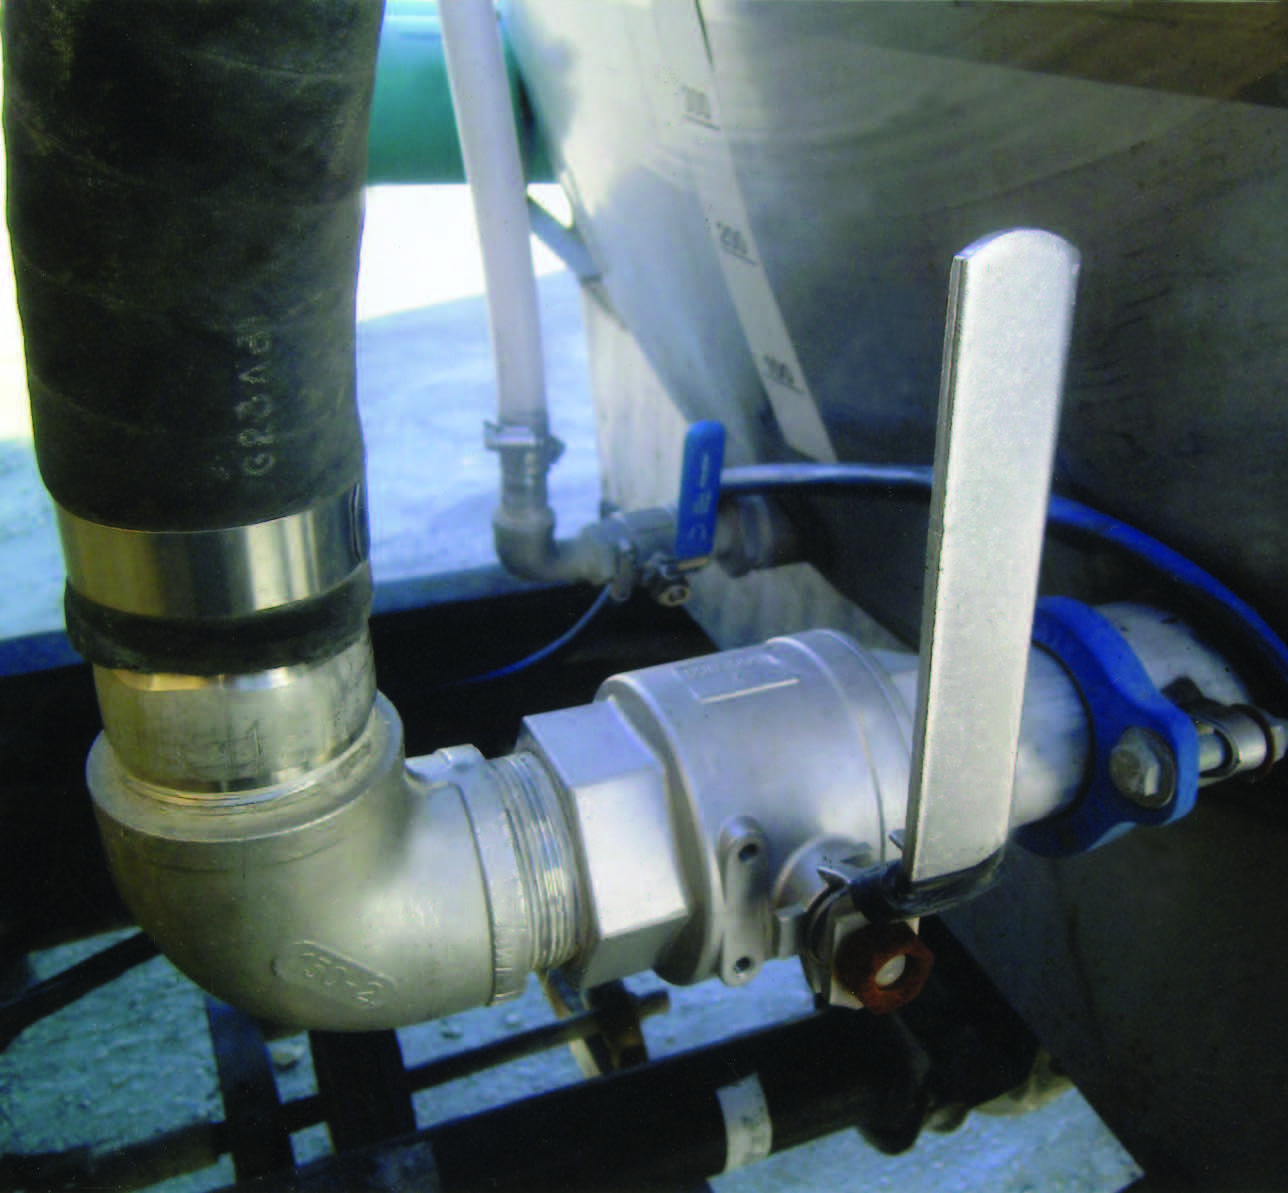
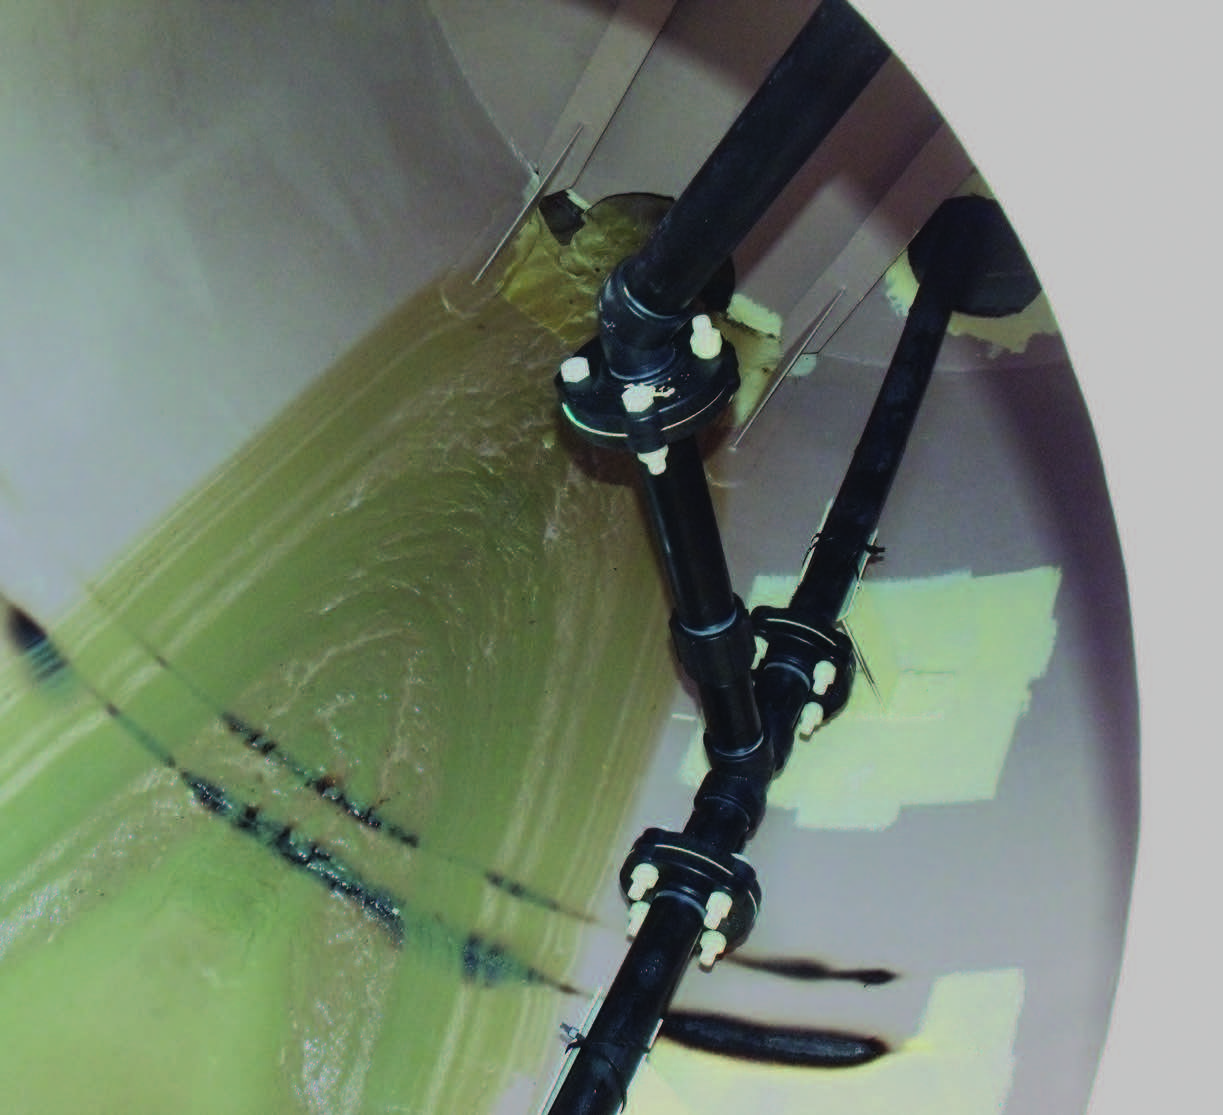
A stainless tank showing the trough from the front view (top left) and the holes in the tank that allow the liquid to drop into the trough (top right). Products that require suspension or constant agitation may settle in the sump area, and cause a blockage if the tank is not emptied or the agitation is shit off. A box sump allows you to completely remove all of the product (bottom left). A stainless steel valve on the tank followed by poly valves is generally a better choice than poly attached directly to the tank.
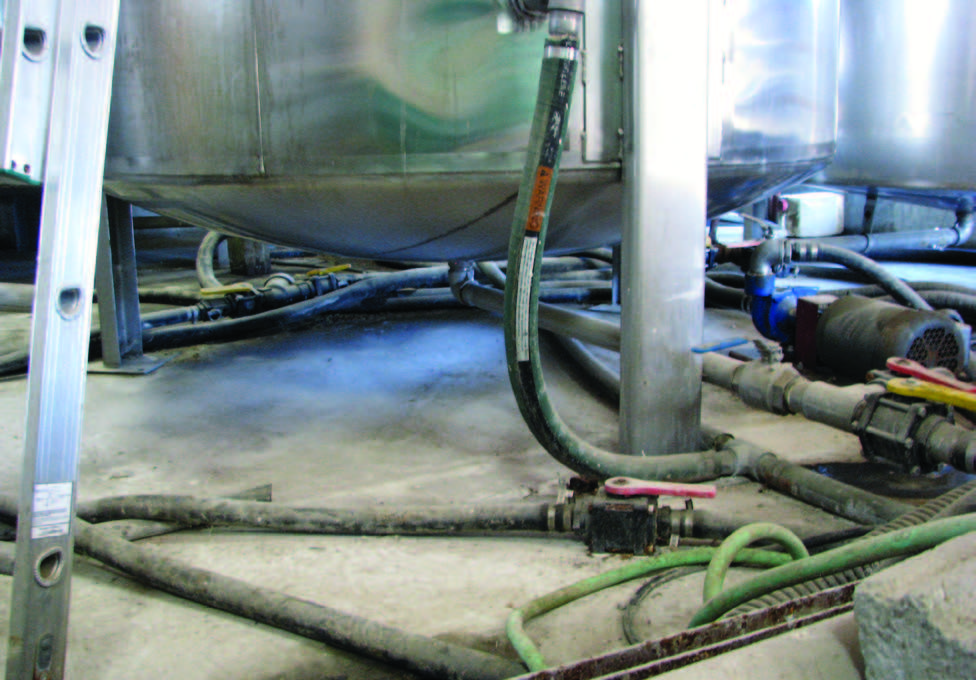
A fitting on the bottom of a stainless tank allows you to empty it completely.

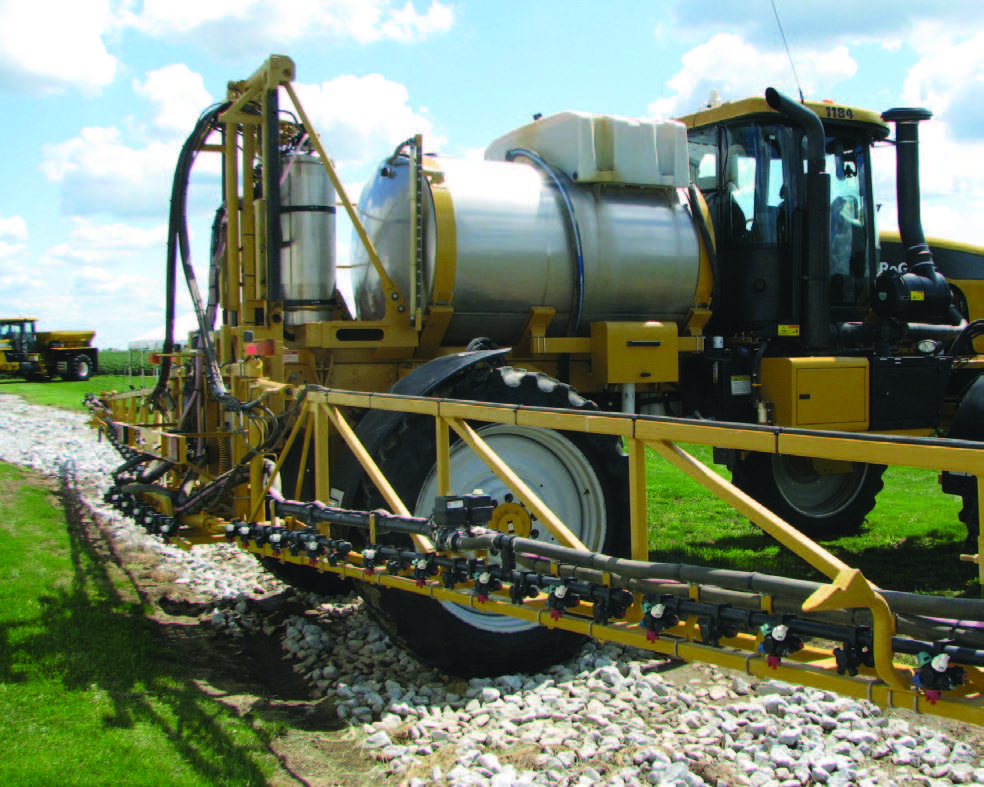
13. Does the tank need a sparger tube for agitation? Many liquid products require agitation to keep them suspended within the tank. Most applicators agree that a tank used for spraying should have a sparger tube.
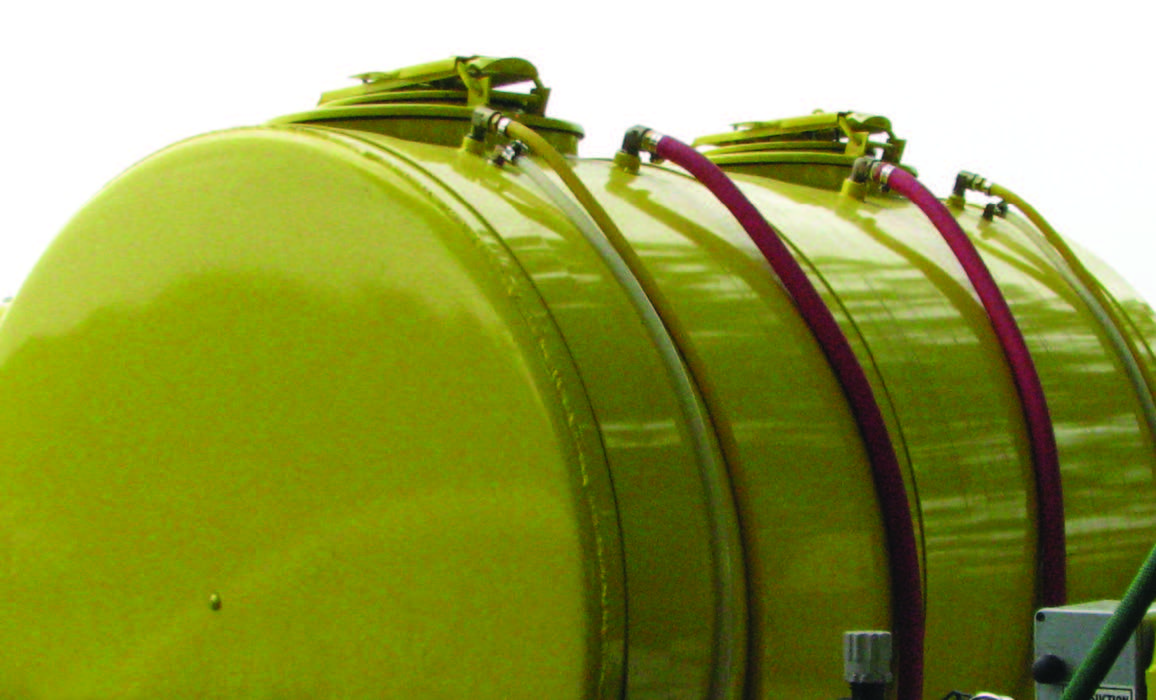
14. Does the tank need a rinse line? Rinse lines installed at the top of tanks vary from 1 to 1.5 inches in diameter. The lines make it easier to rinse the tank by applying clean water from an external water tank.
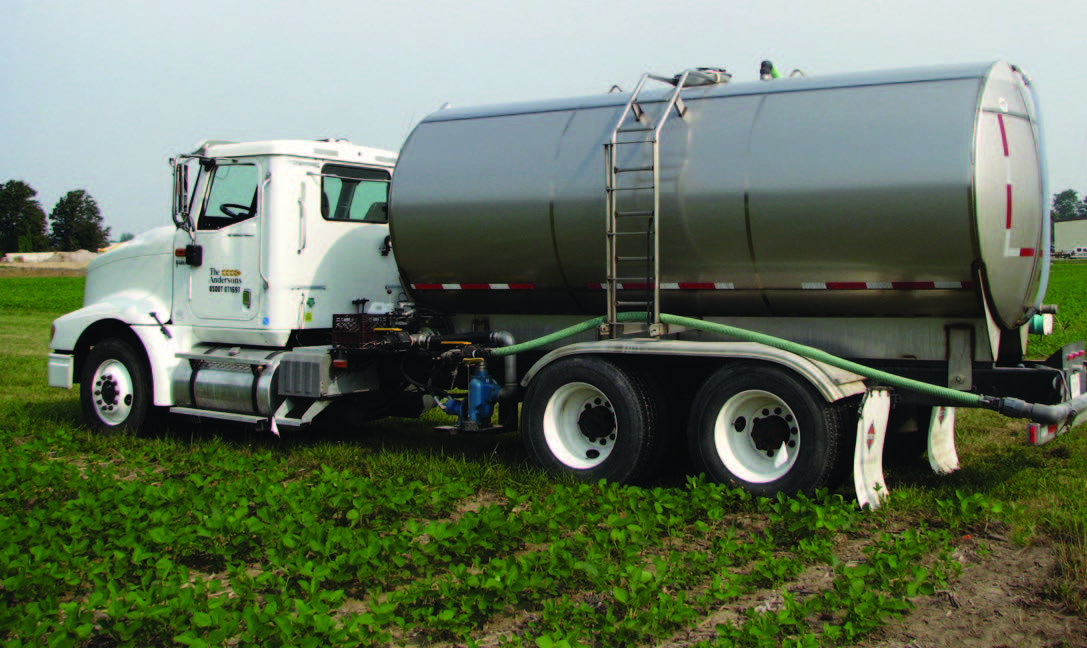
15. Does the tank need a ladder, platform, or railing? A ladder or platform provides easy access to the top of the tank, and a railing may be required for a work platform. Make sure that the ladder, platform, pump, valves, and hoses are on the driver’s side of the vehicle. This should help the driver react quickly to an emergency.
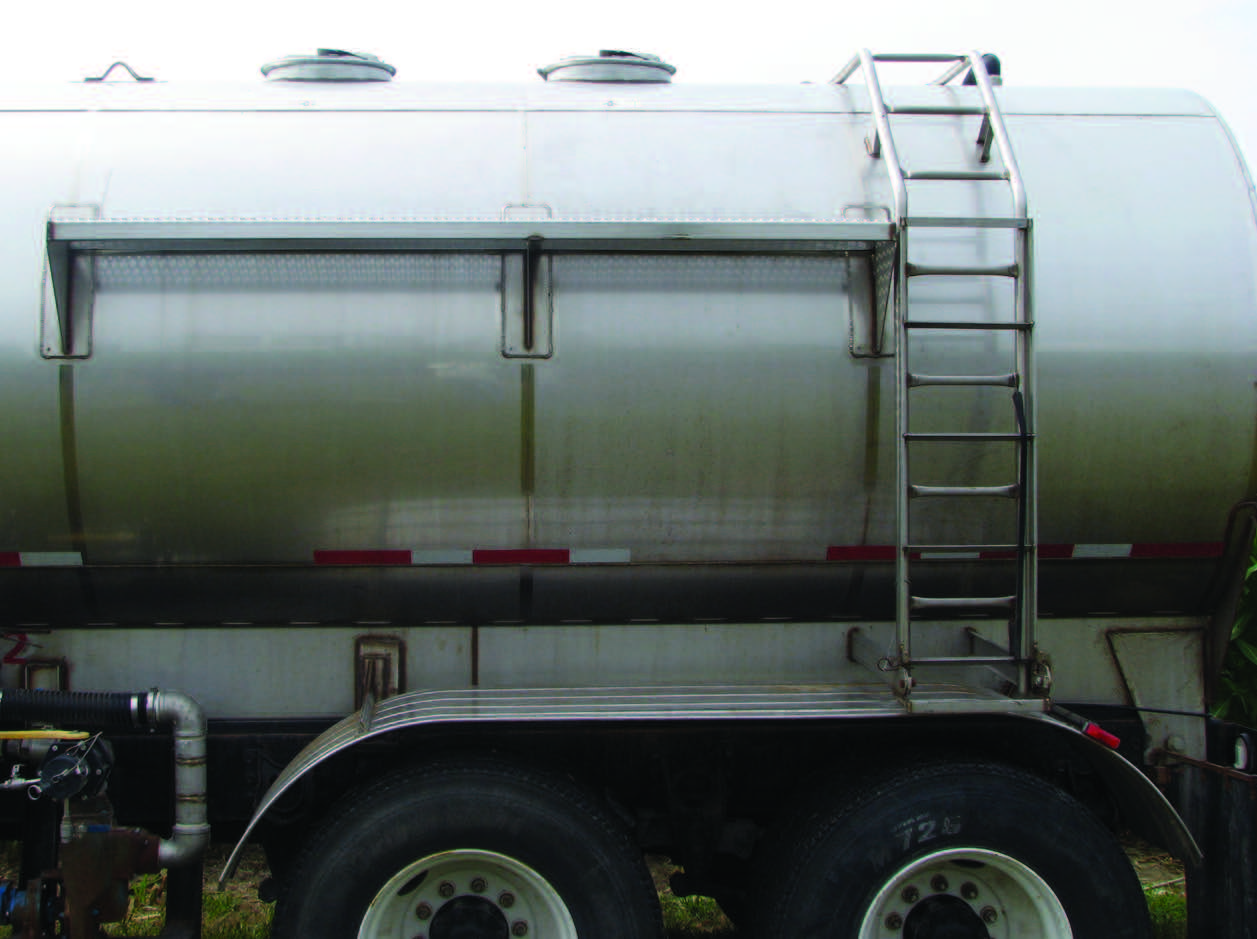
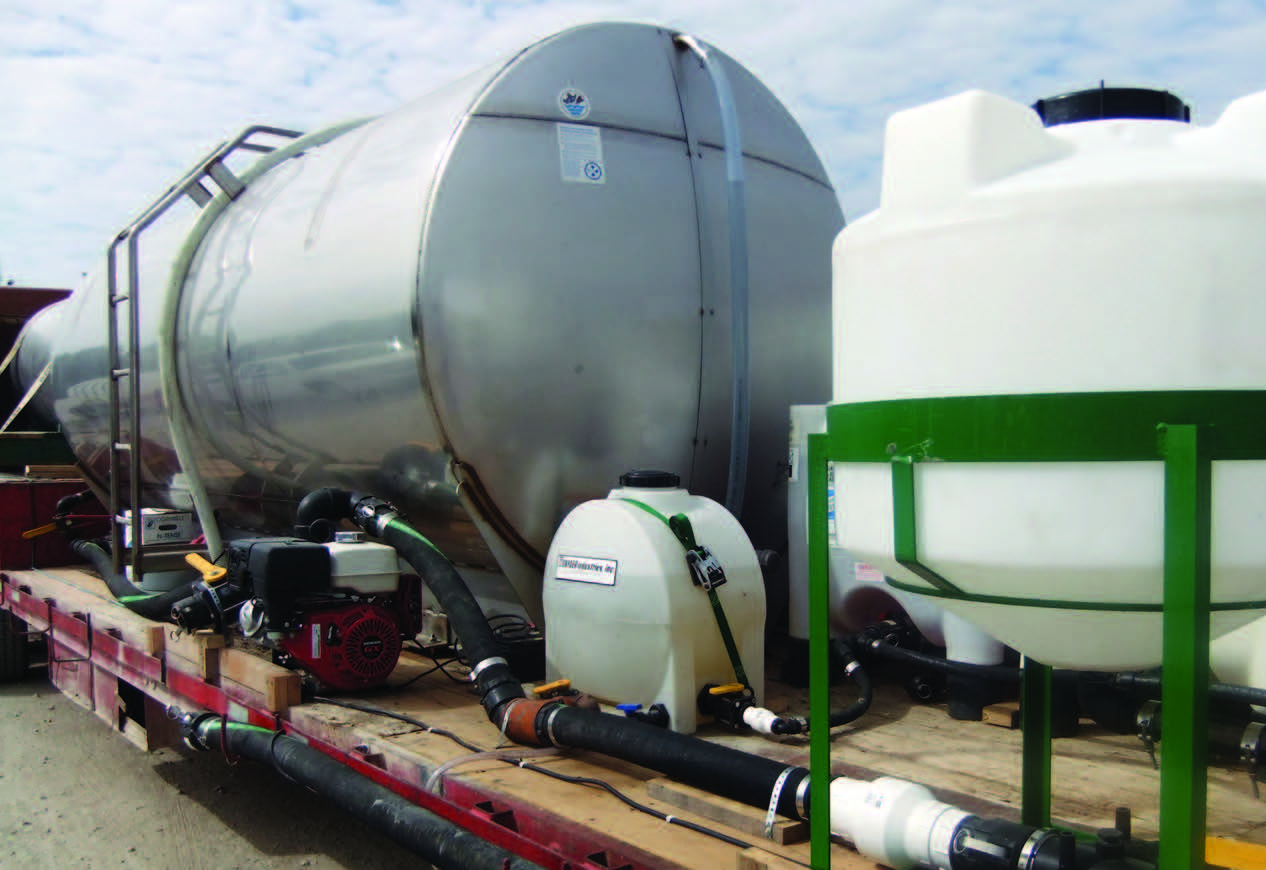
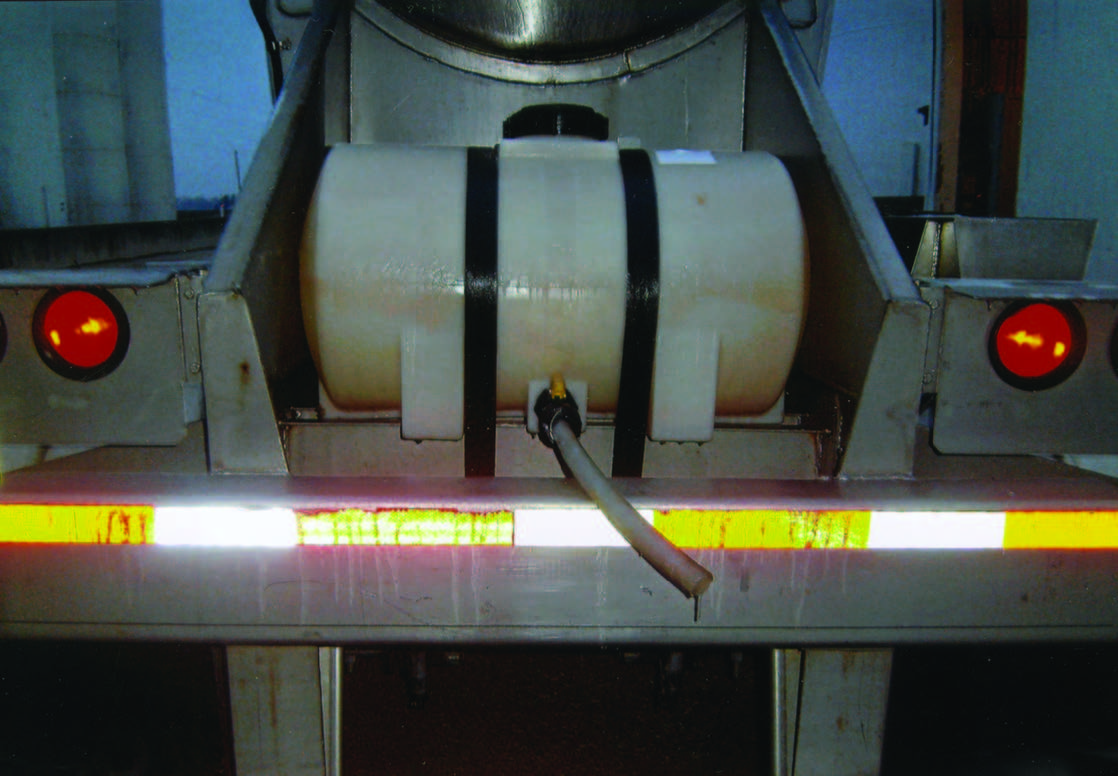
16. Does the tank have an area for a fresh water auxiliary tank? While you can purchase on separately, the manufacturer also can add a tank to hold clean water.
17. Is the final finish of the tank important? Most stainless steel tanks have a standard flat finish. While the finish is mostly a cosmetic consideration, some companies prefer a brighter finish to help advertise their operations.

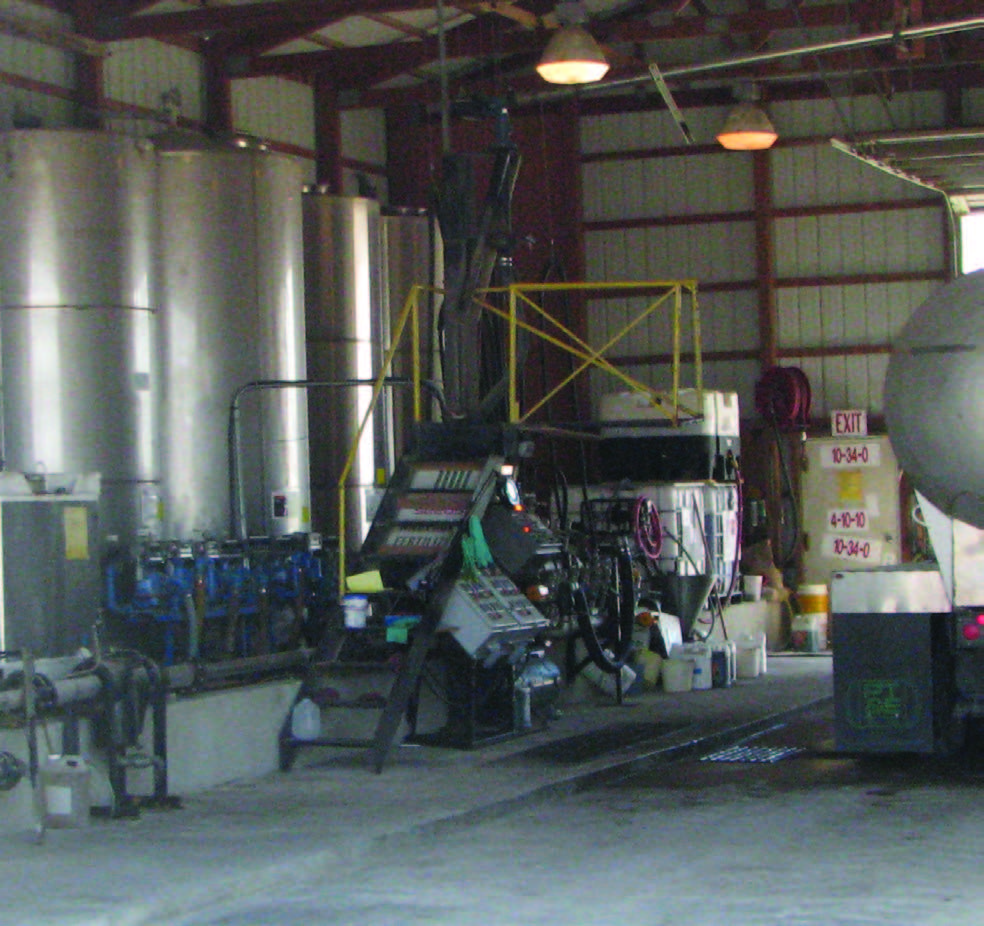
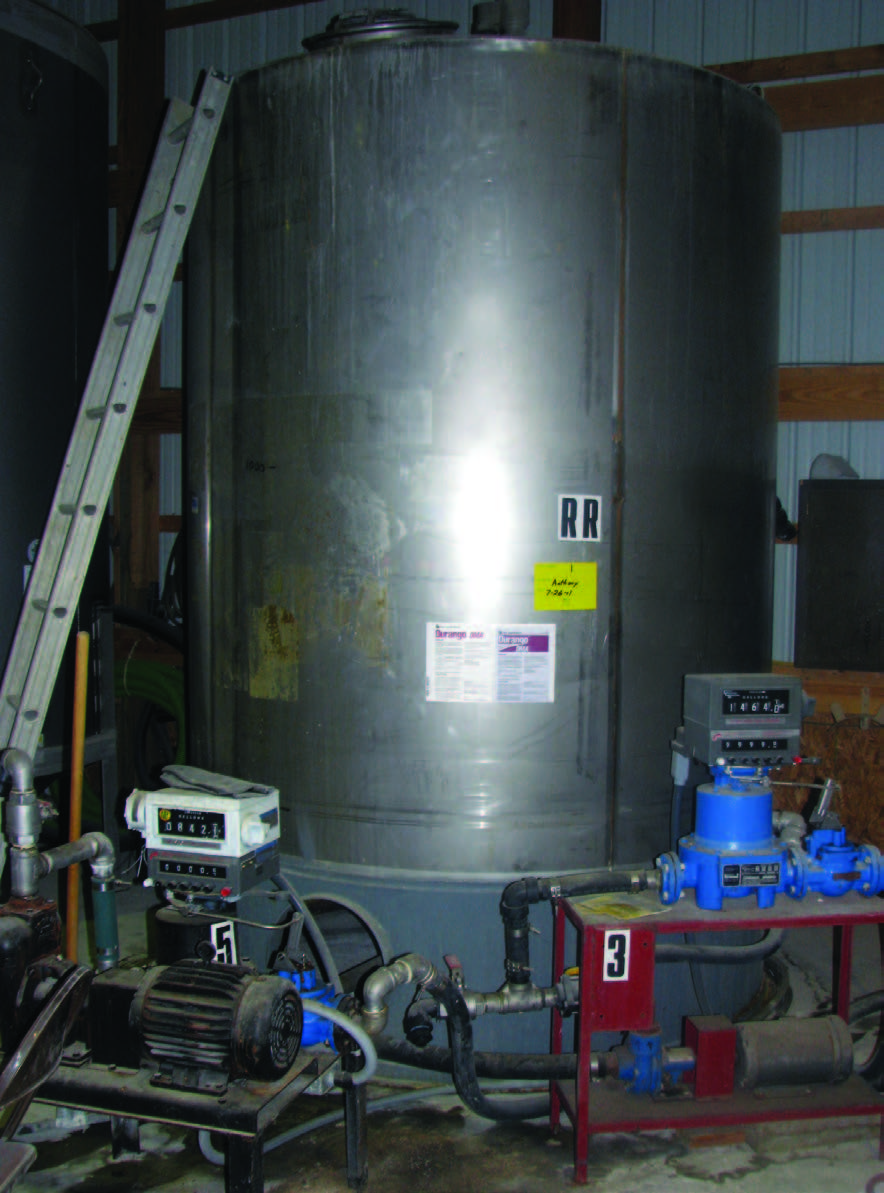
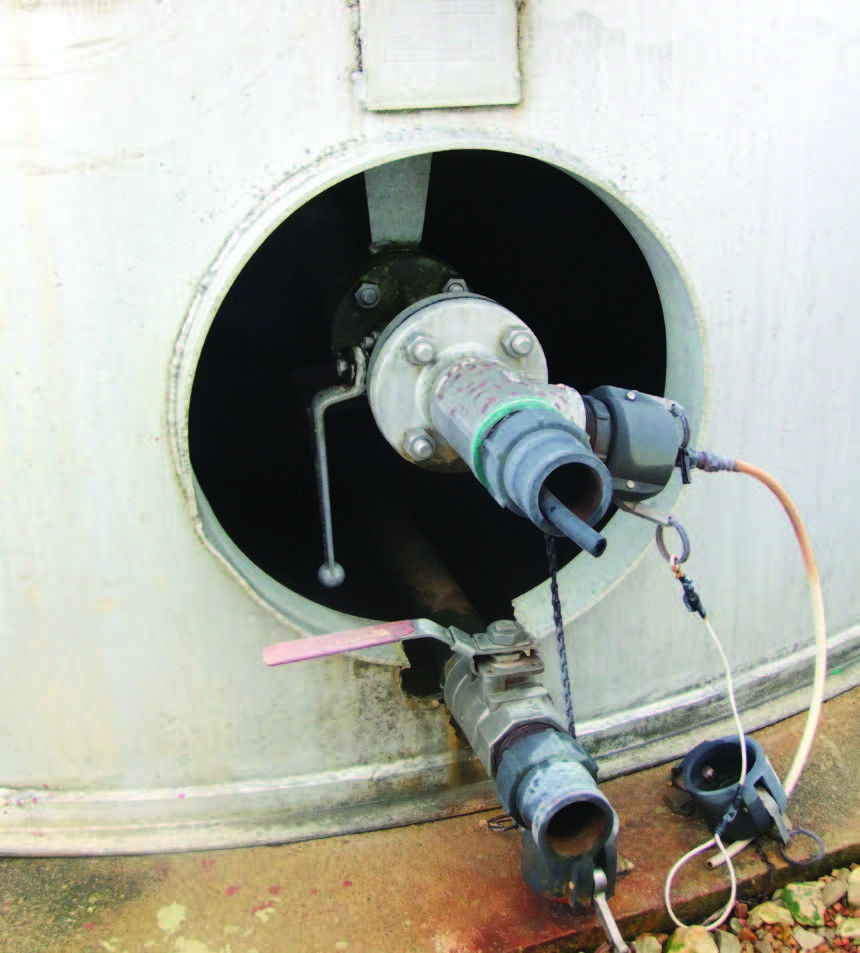
Stainless steel tanks that store agricultural chemicals should have product labels firmly attached. Close and lock the valves when not in use.
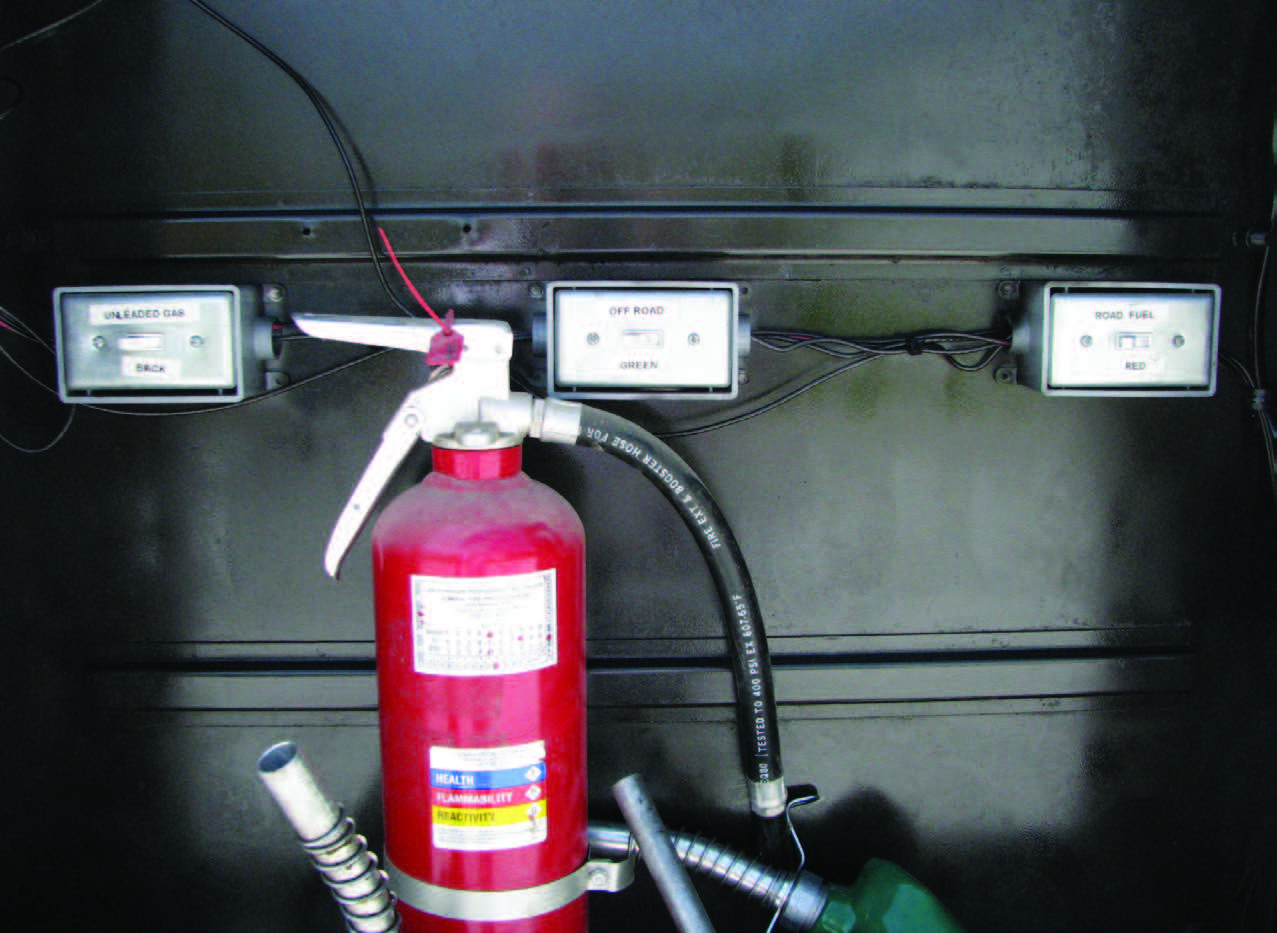
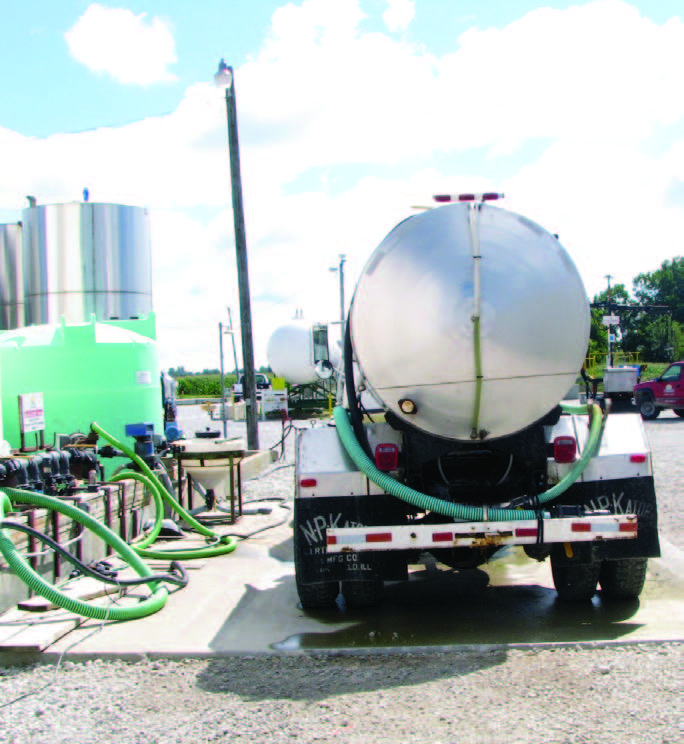
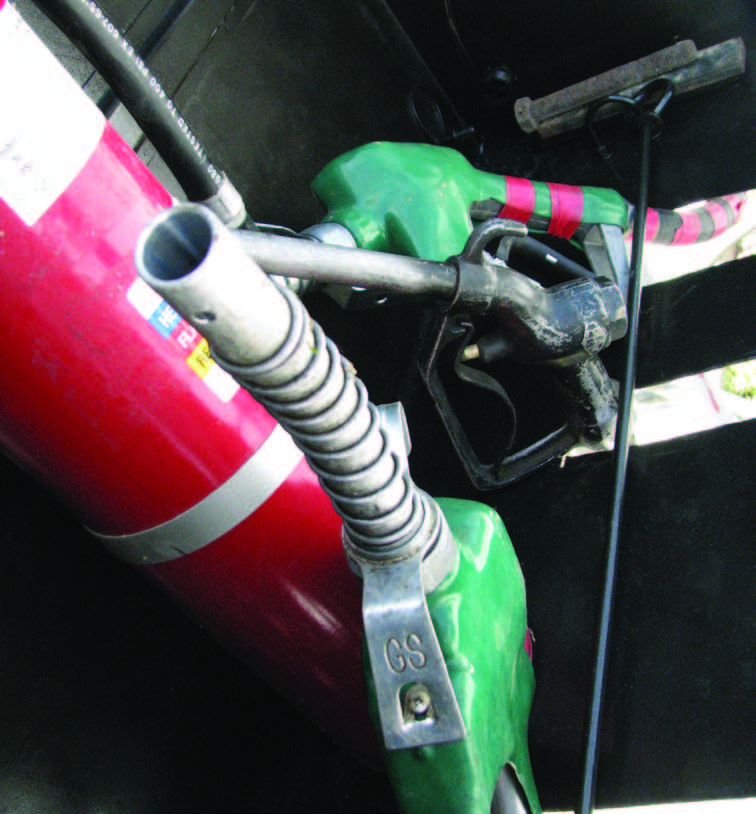
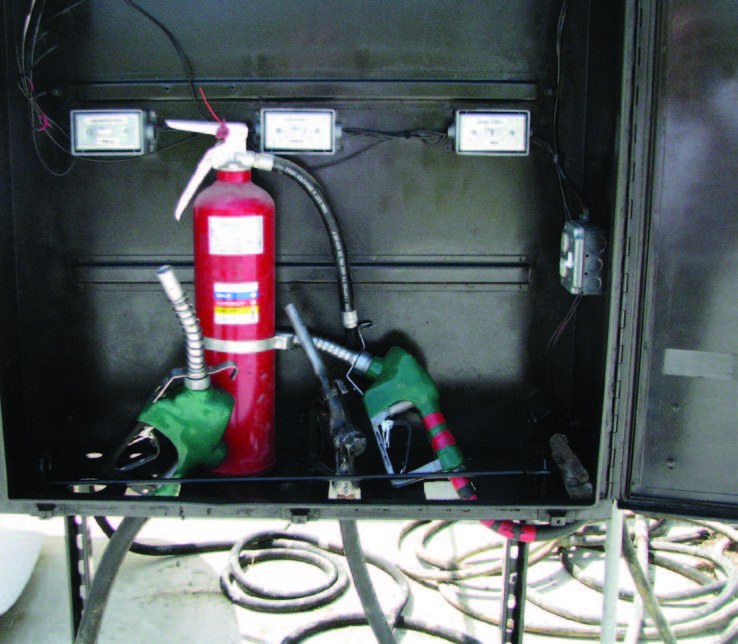
Always protect against theft and vandalism. The owner of these pumps locked the nozzles inside a storage box. The owner also turns off the power to the pump inside a locked box and inside the building.
Installing Tanks on Trucks and Trailers
Manufacturers should provide the installation procedures their tanks require. Follow these procedures closely. If you do not mount it properly, a stainless steel tank will likely develop stress cracks from the twisting and turning of the truck frame or trailer.
Have you ever held both ends of an aluminum pop can and twisted each end in opposite directions? You can feel the can weaken as you continue to twist until the surface of the aluminum creases. Without the ability to flex, a stainless tank will develop stress cracks just like the pop can, and it will lose its strength and integrity.
There are many methods used to reduce the stress on tanks. Some companies place a 1-inch composite board or piece of wood between the tank and the frame of the truck or trailer.
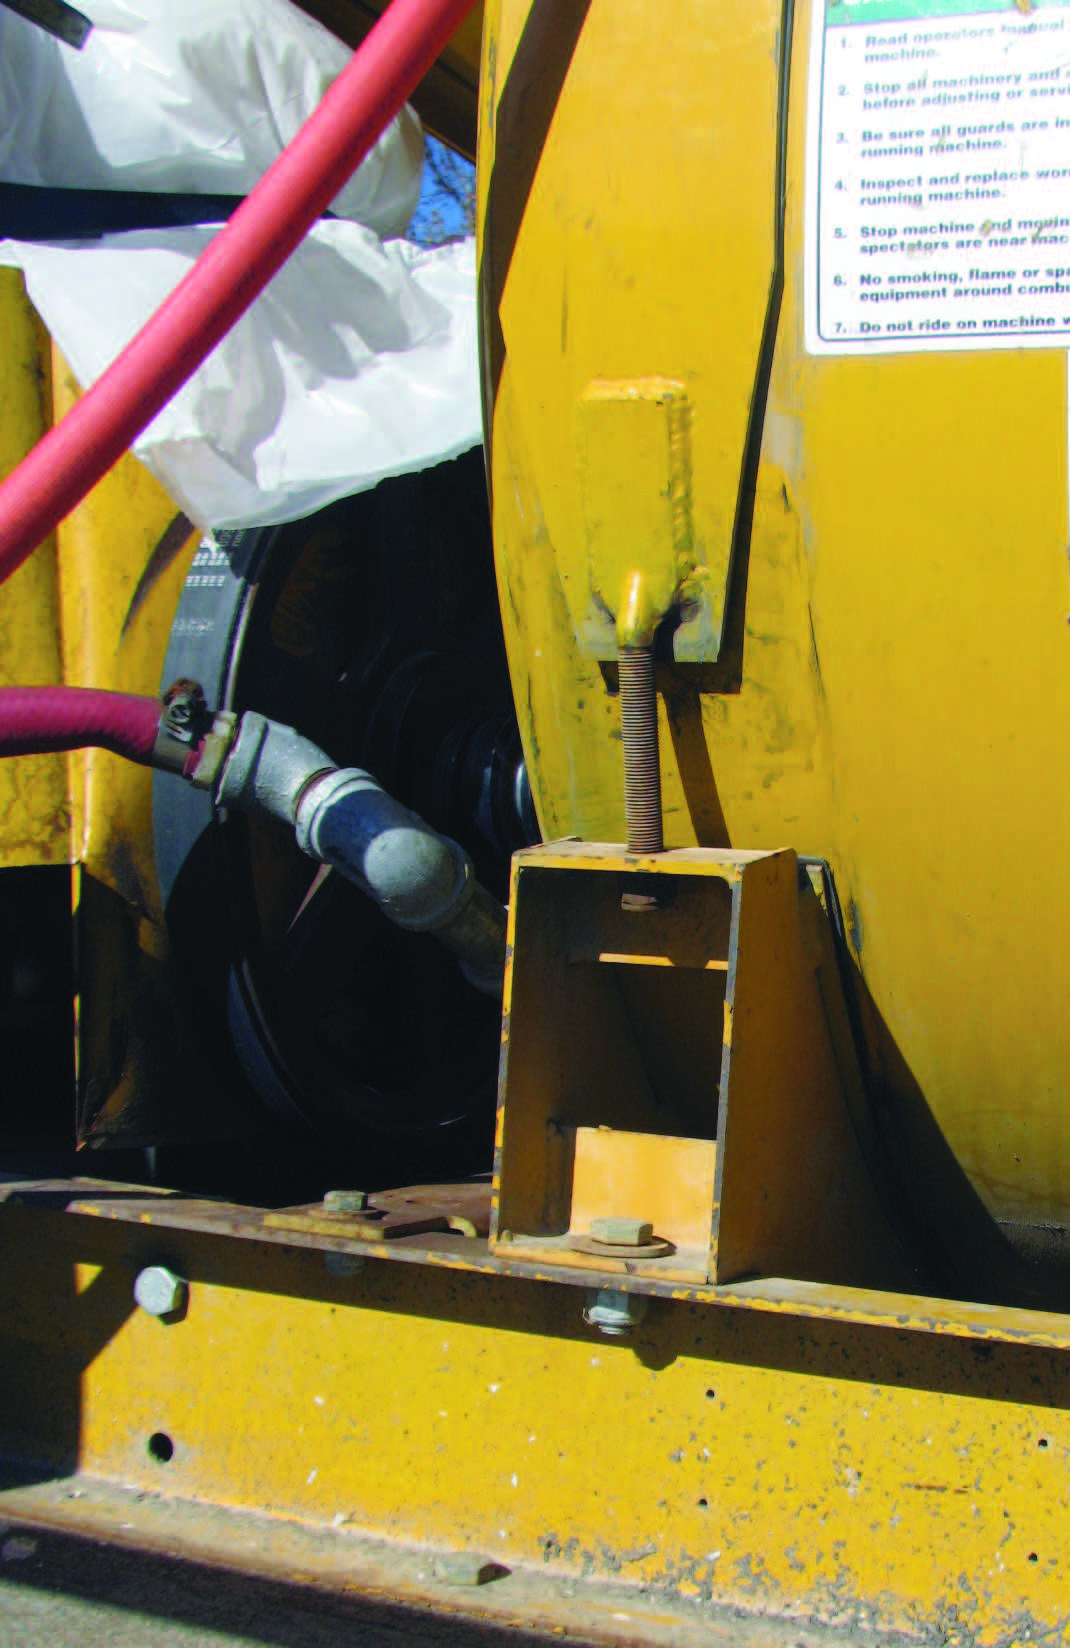
Another method is to mount the tank frame to the trailer or truck with springs, which act much like shock absorbers. The springs will absorb the shock instead of the tank.
You can add stop blocks to either end of the trailer or truck bed to keep the tank from sliding back and forth when the tank is not bolted to the frame. In some cases, the blocks can even be welded to the sill but avoid welding anything on the truck frame.
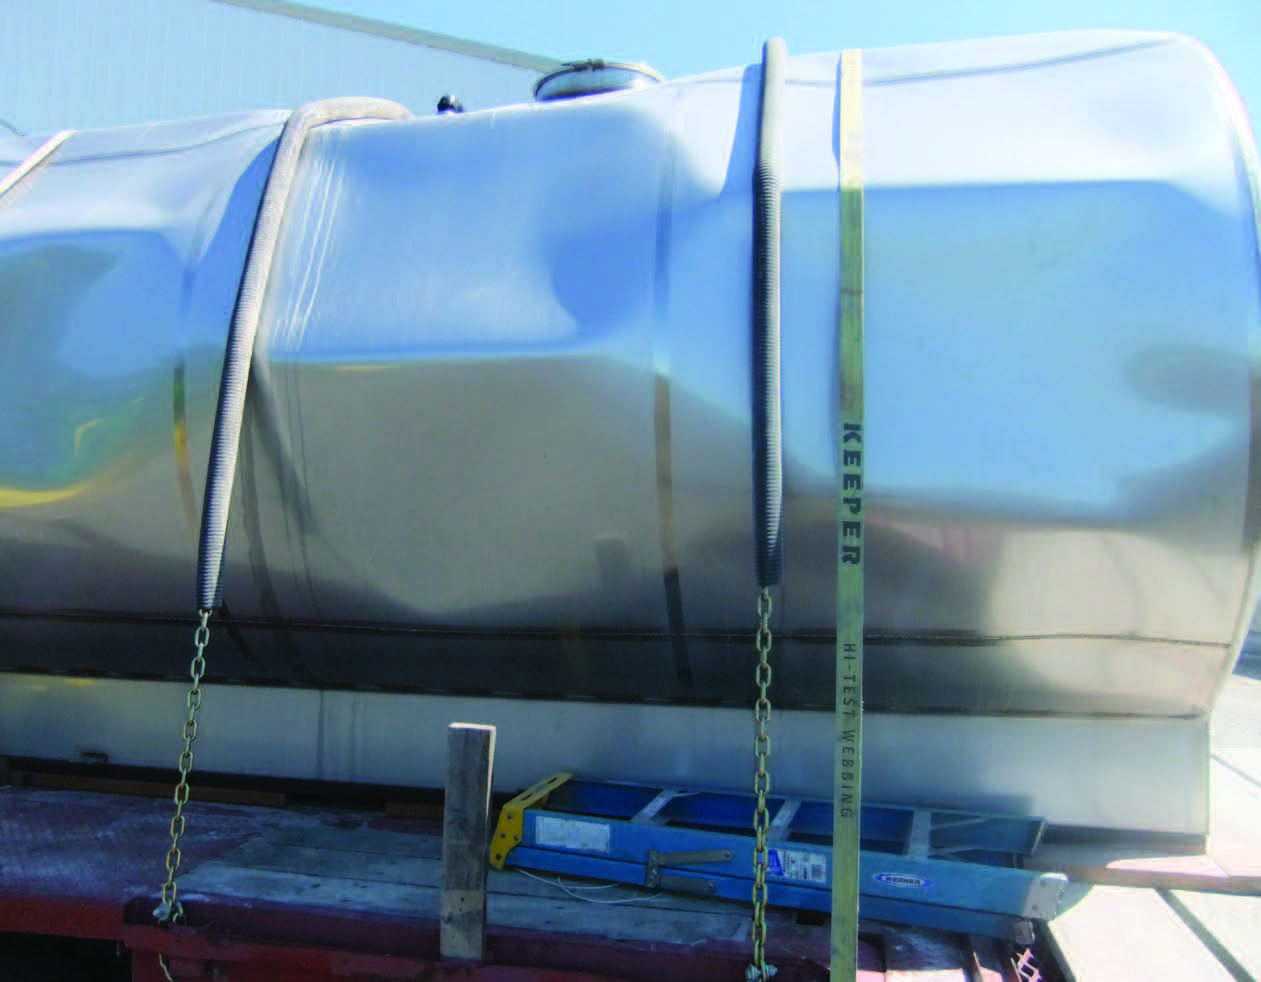
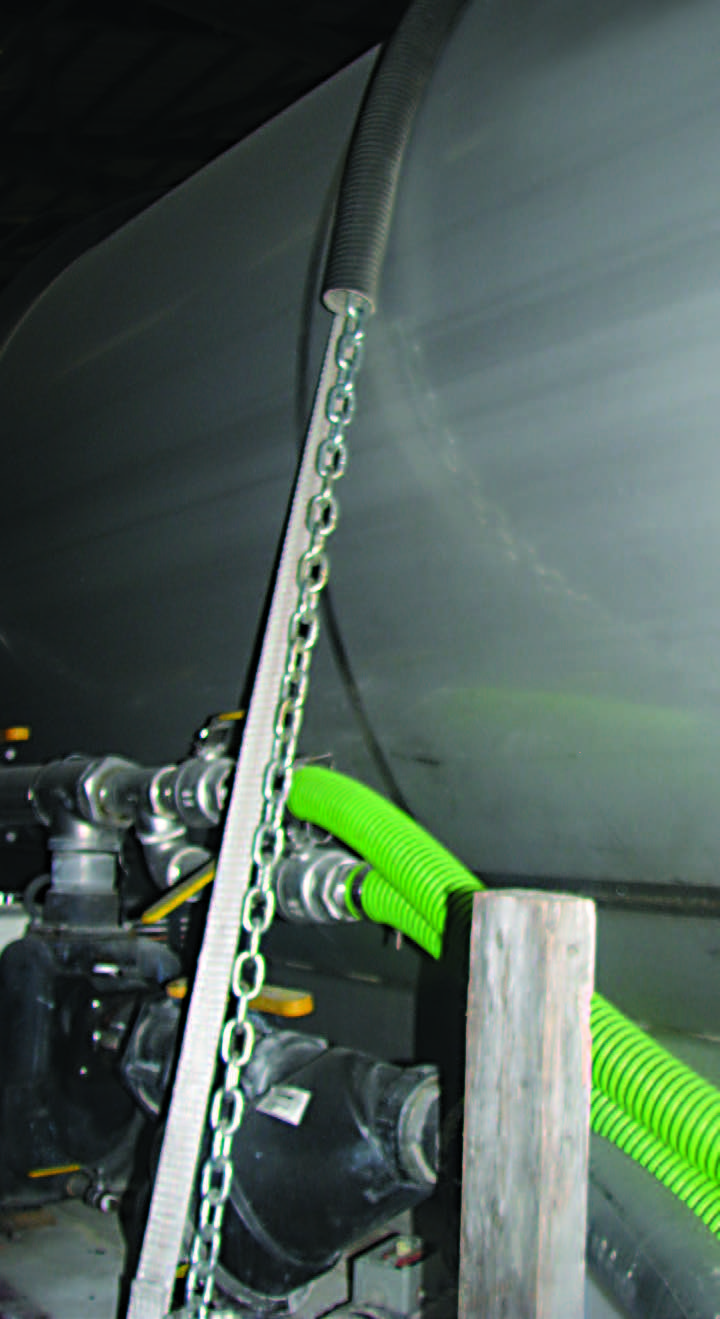
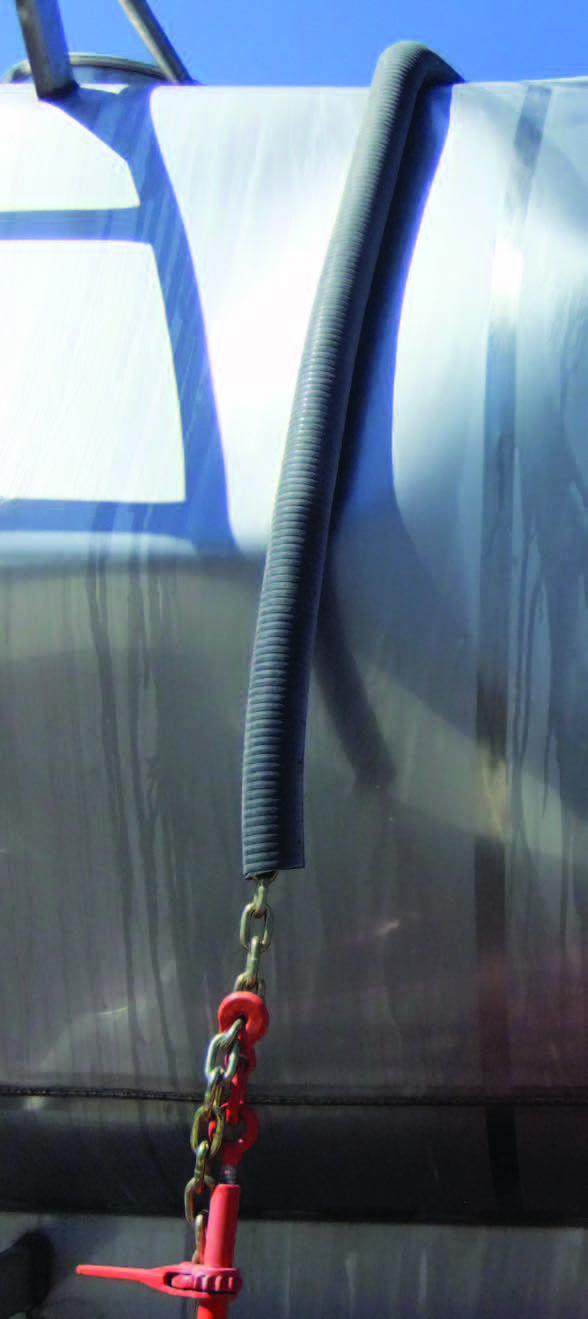
You may also use straps, bands, and chains to hold the tank to the trailer or truck. Make sure that rubber pads or similar materials are placed between the frame and chains to prevent metal-to-metal contact. For more information, see Securing the Load: A Guide to Safe and Legal Transportation of Cargo and Equipment (Purdue Extension publication PPP-75), available from the Education Store.
A rubber strip between the tank and bracket or hold down strap will reduce the stresses that can come from twisting and bending.
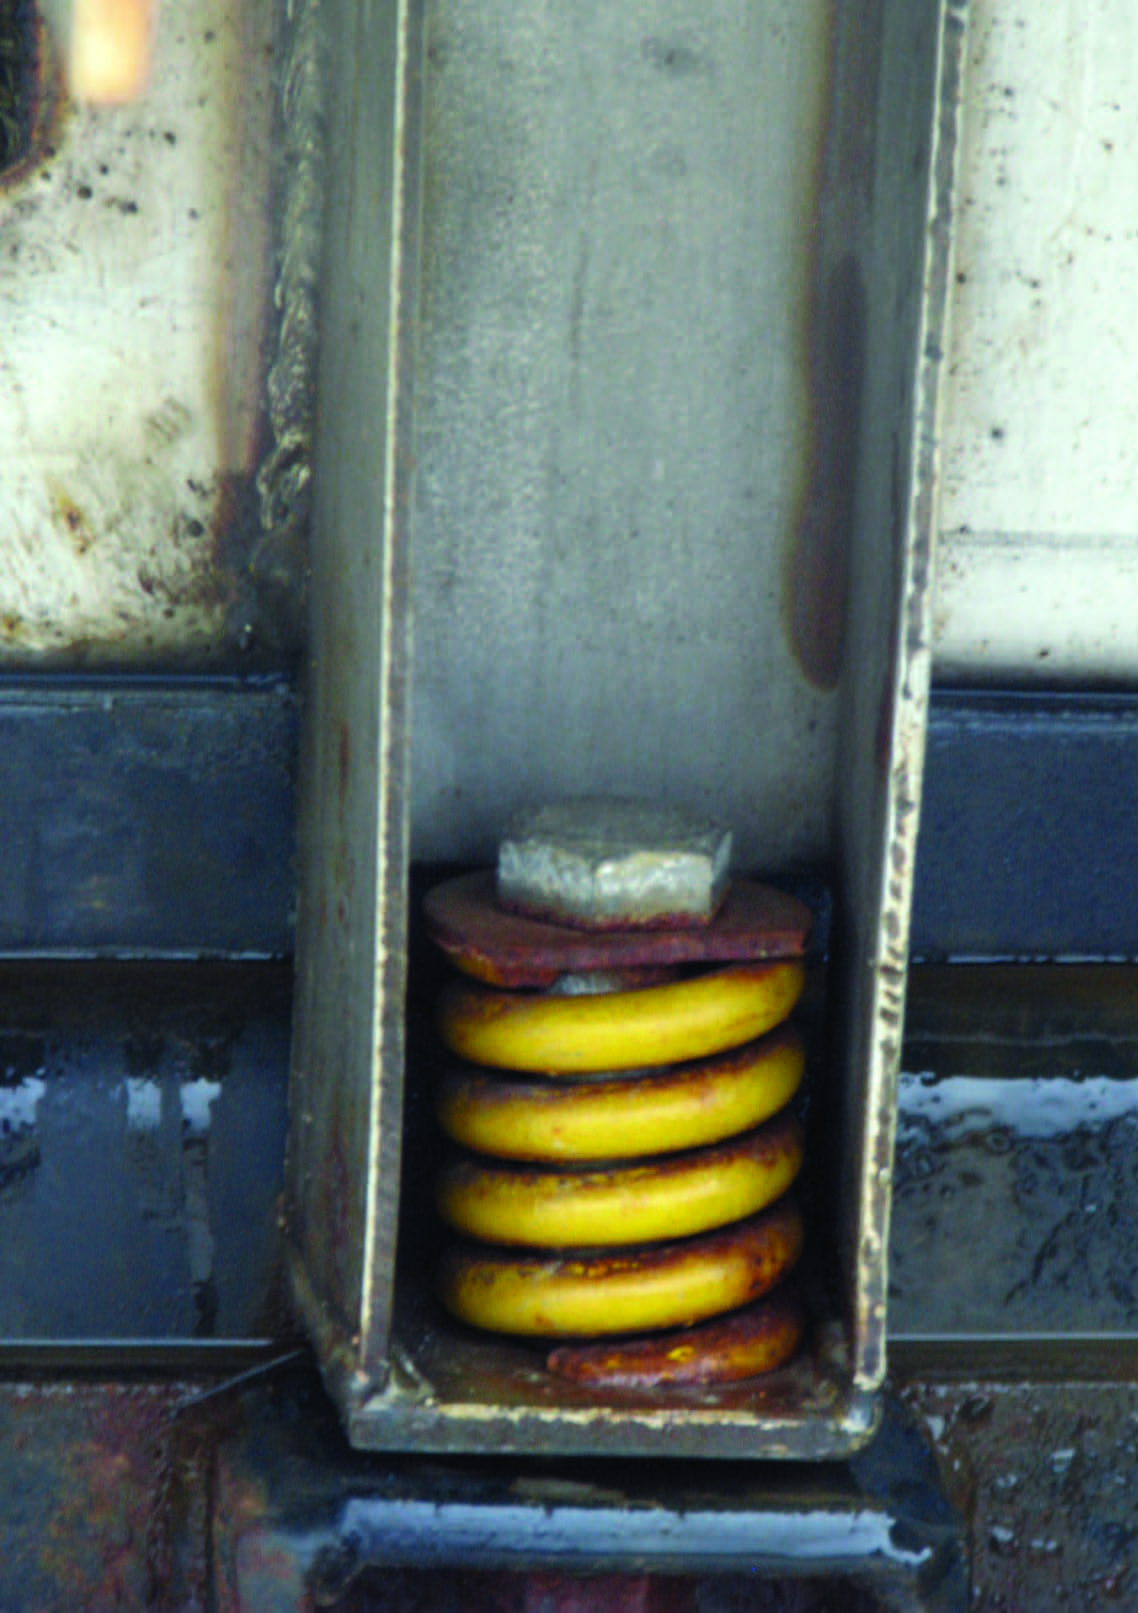
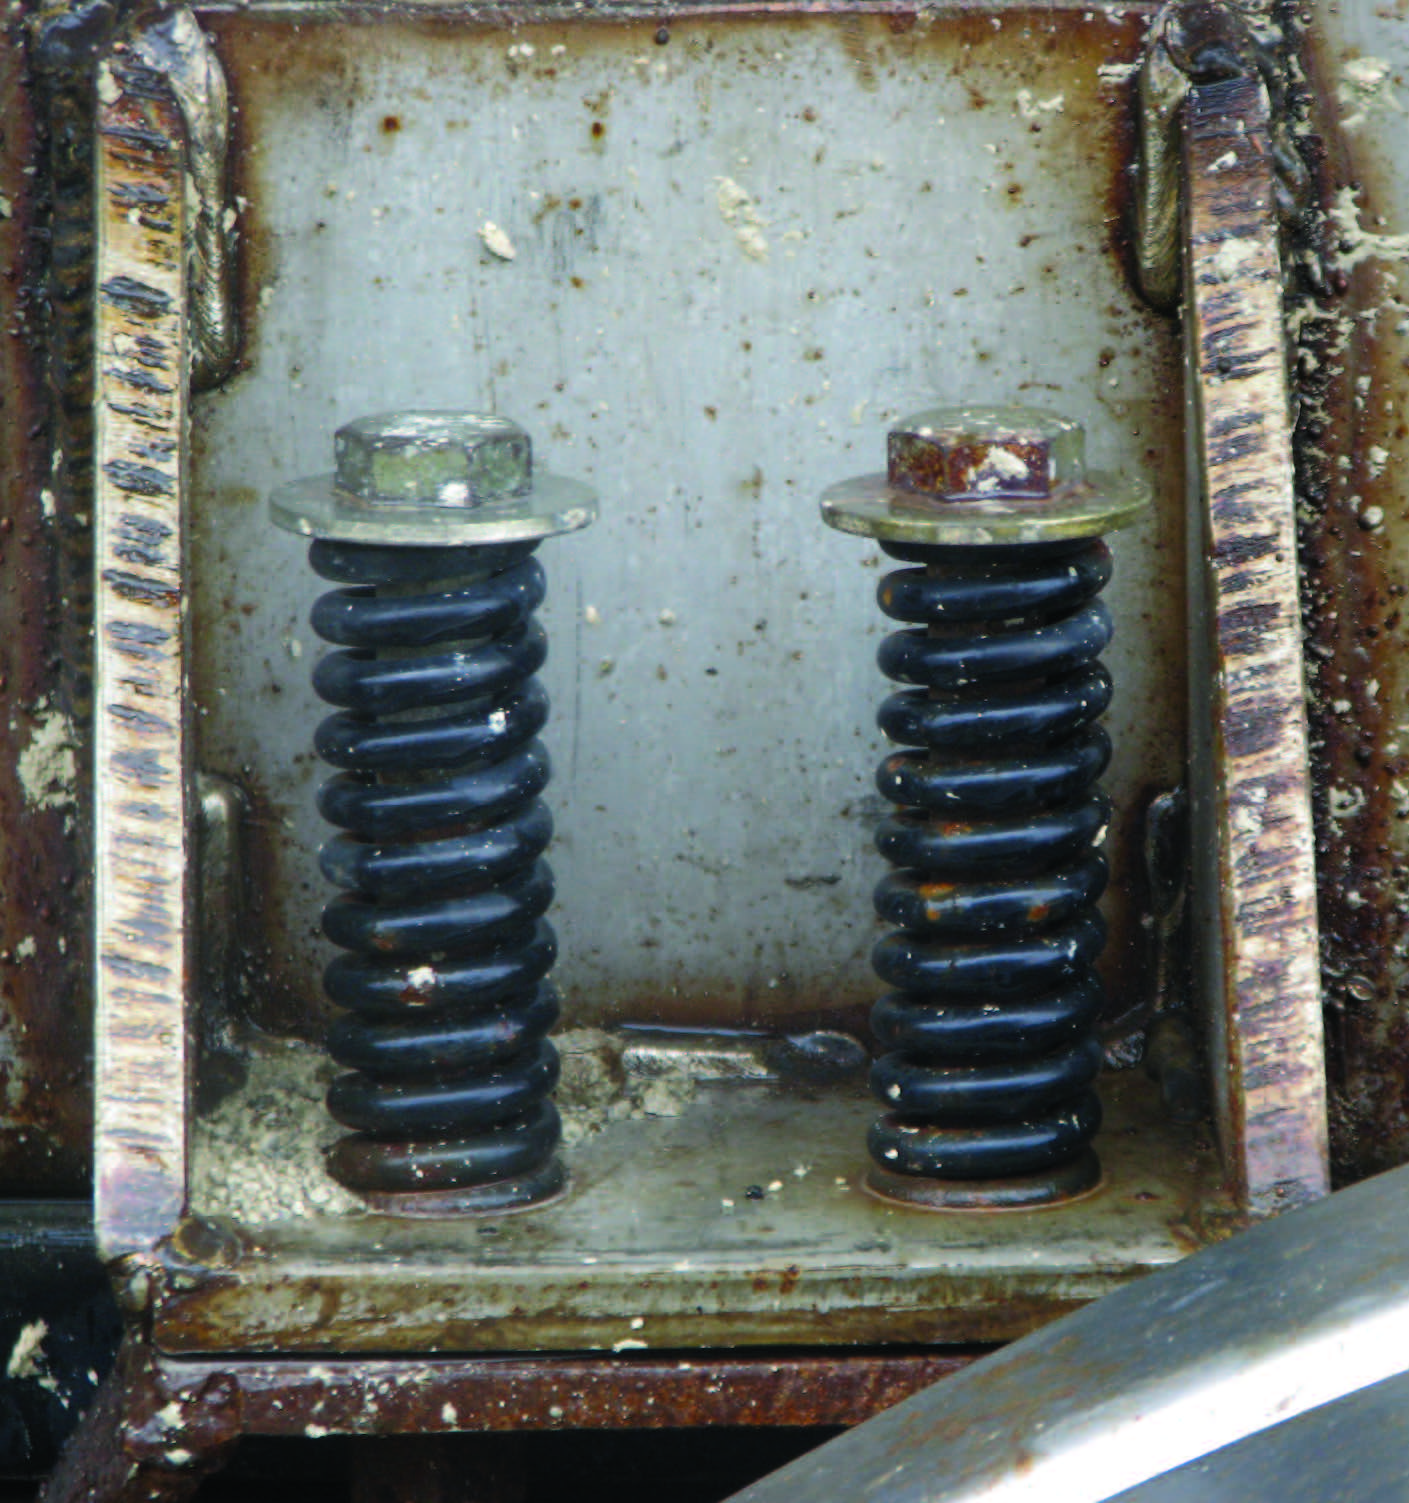
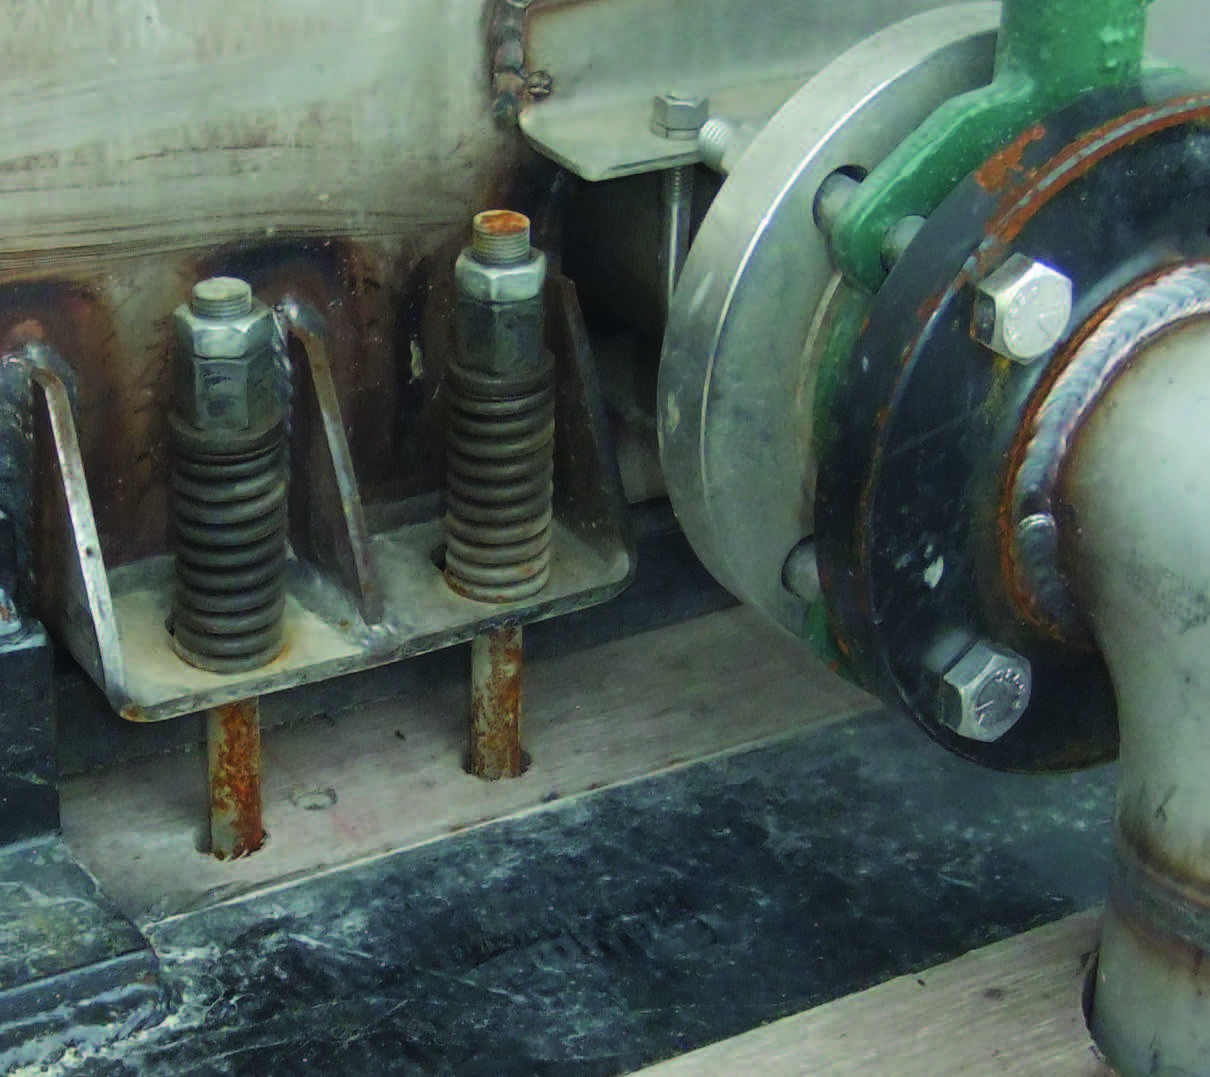
The cumulative distance between each coil provides the cushion. The yellow spring (left) has little flexibility because the spaces are very tight between each coil. The two black springs can accept more stress.
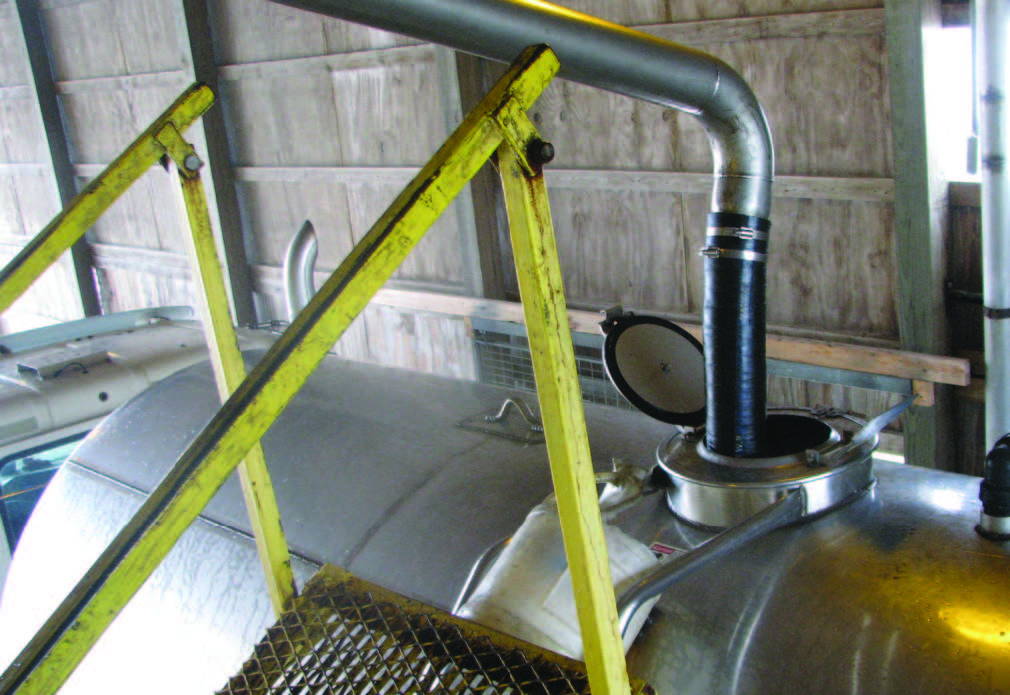
When placing a pesticide tank indoors, consider venting the fumes that come from the product to the outside of the building.

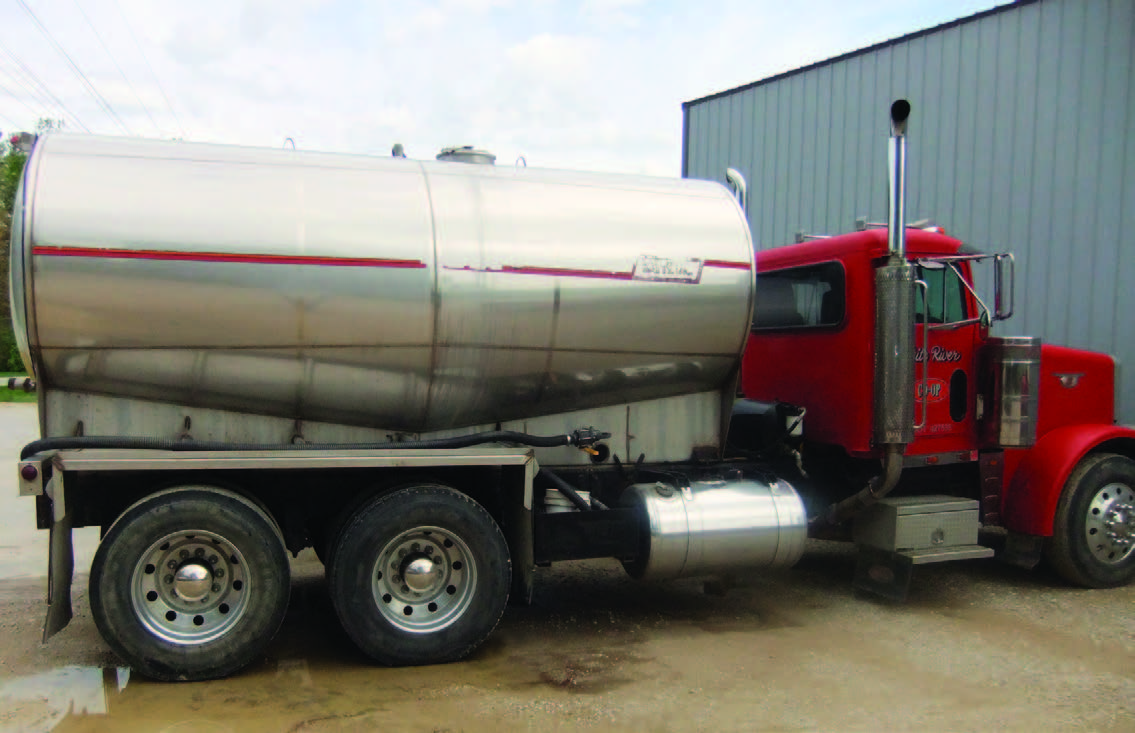
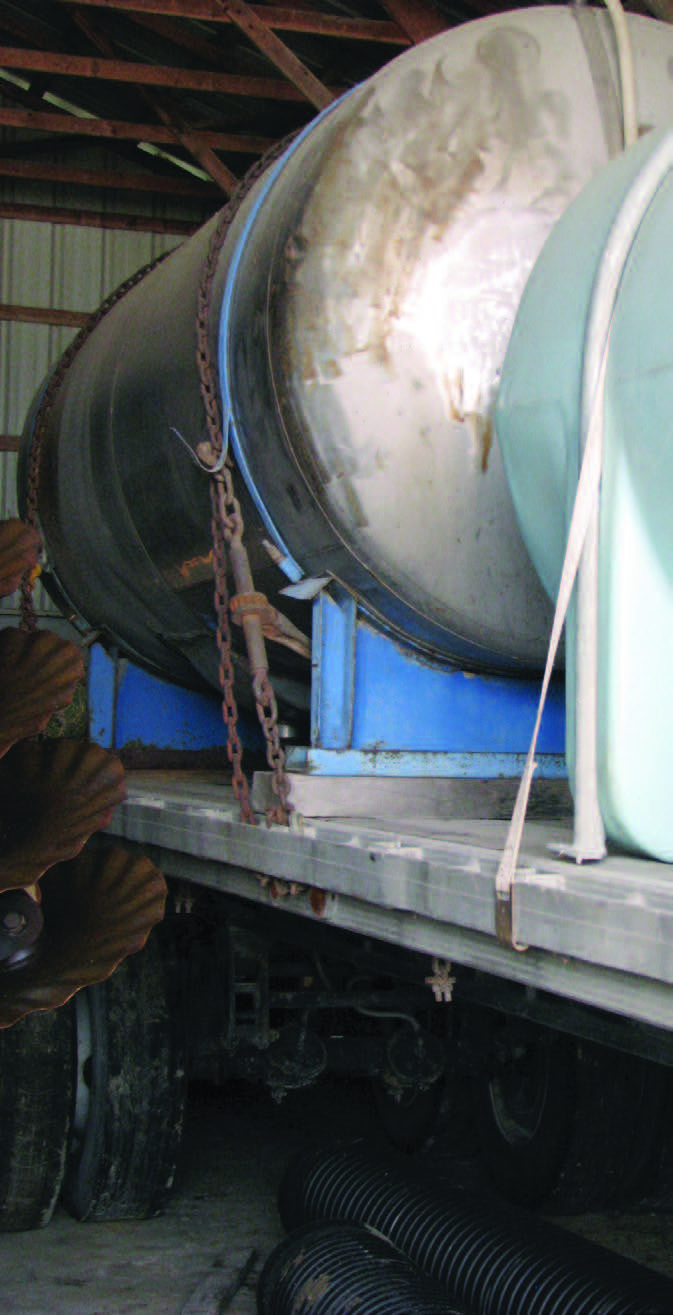
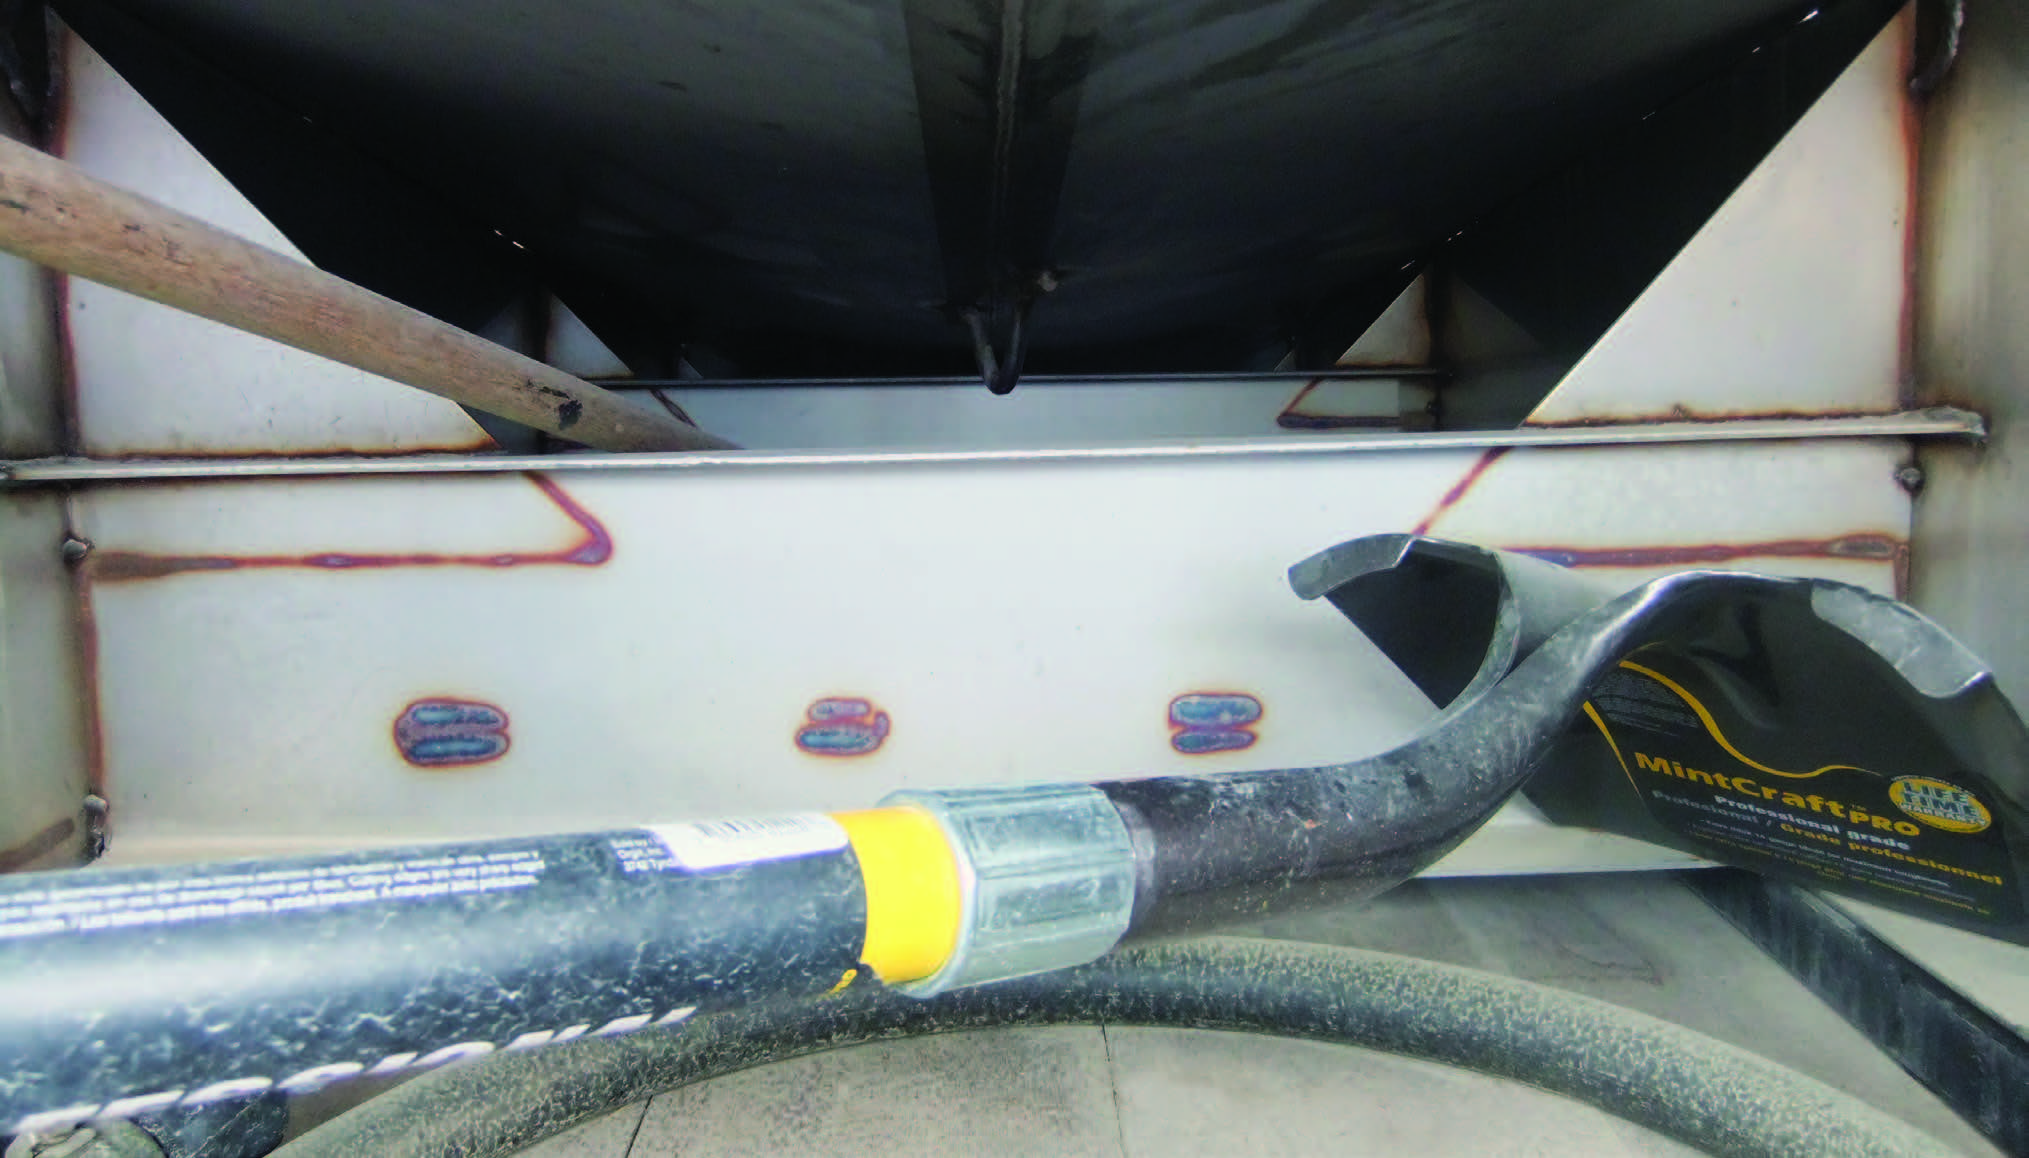
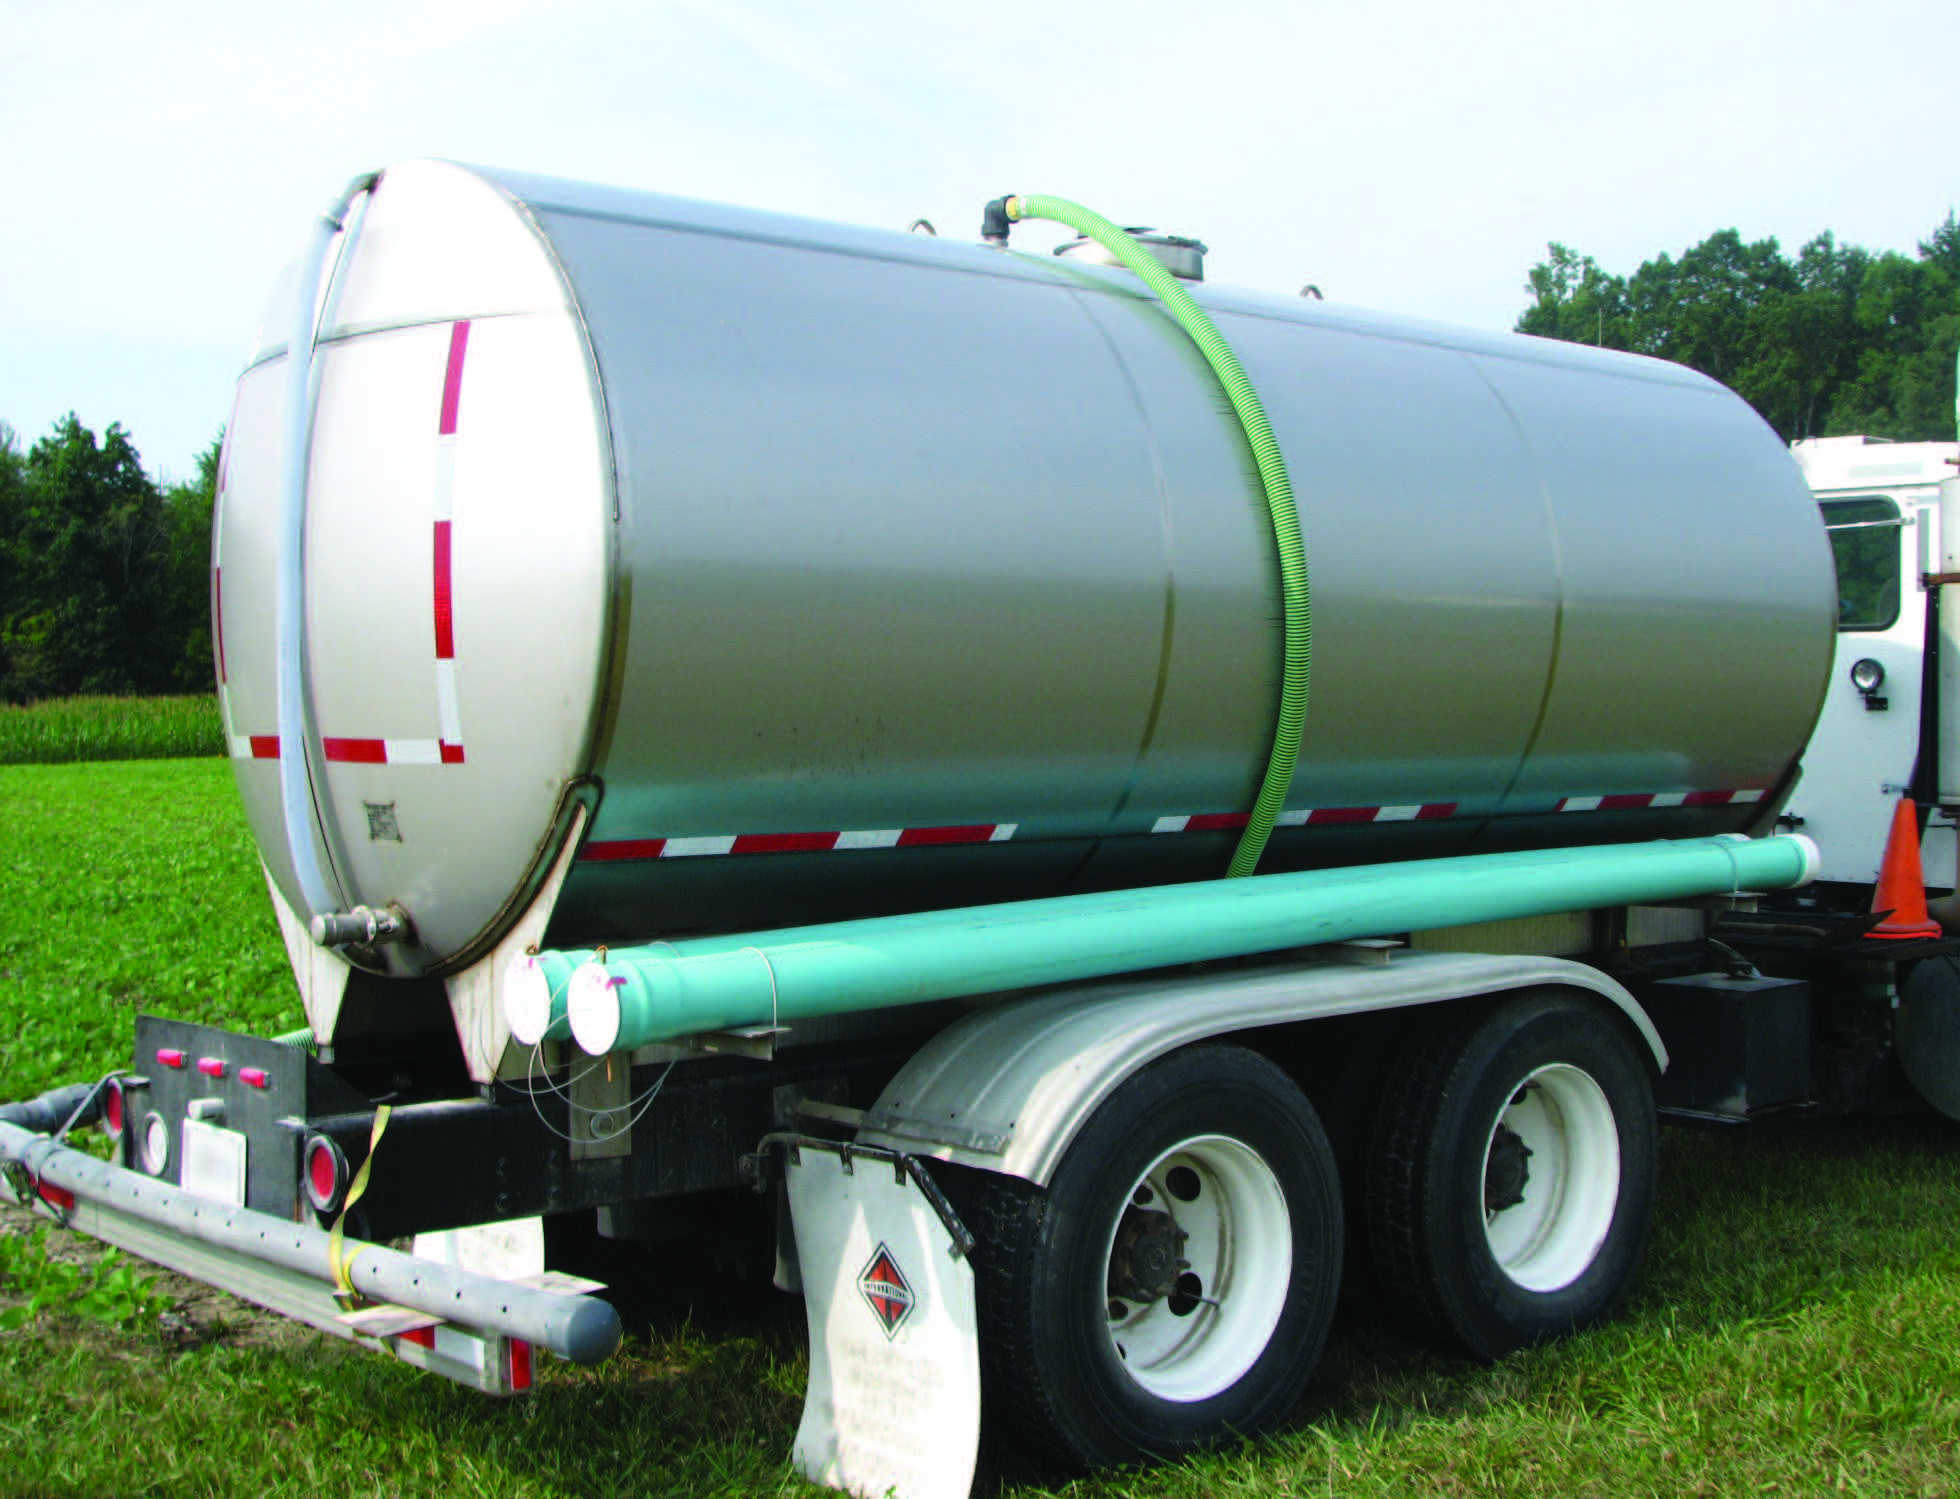
This is a good installation of a stainless tank on a trailer. Notice that the tank slopes down, which allows the operator to completely empty its contents and clean it easily. It is also mounted securely to the trailer with steel and wood bracing.
This picture shows the inside of the railing (sills). Notice the stainless steel cross members.
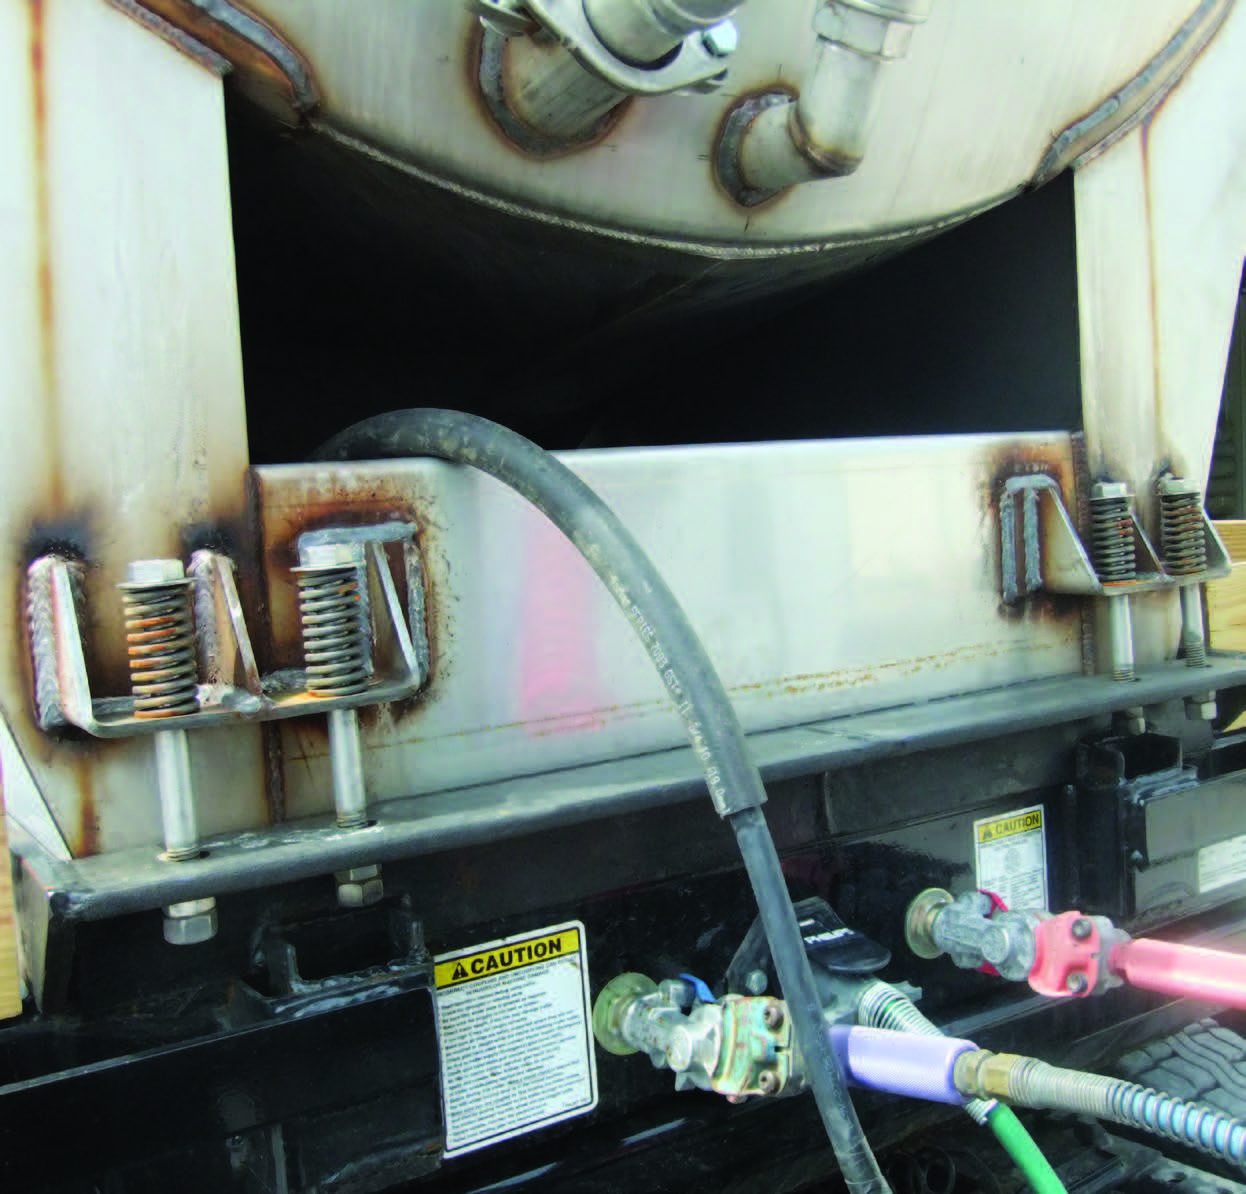
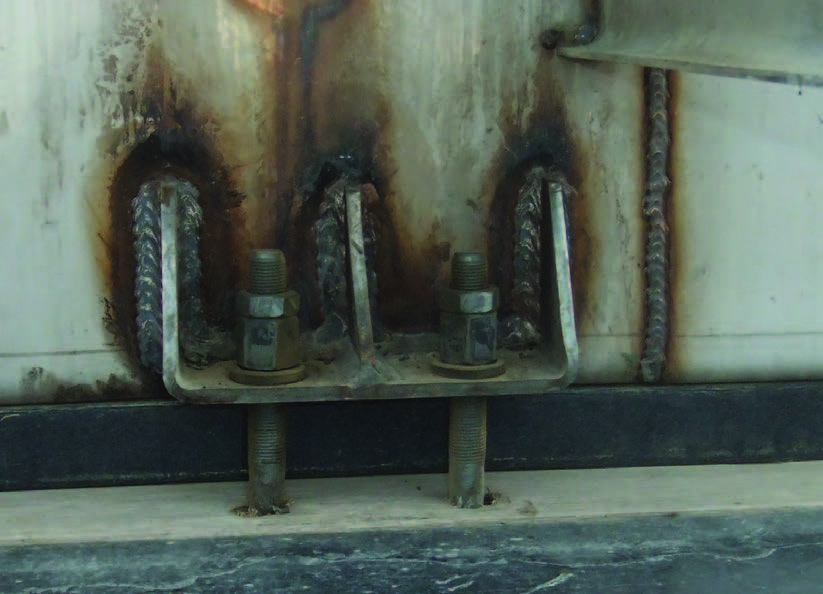
These pictures show the springs and welded metal stops on the outside of a tank.
This truck rolled over, but the stainless tank remained attached to the bed.
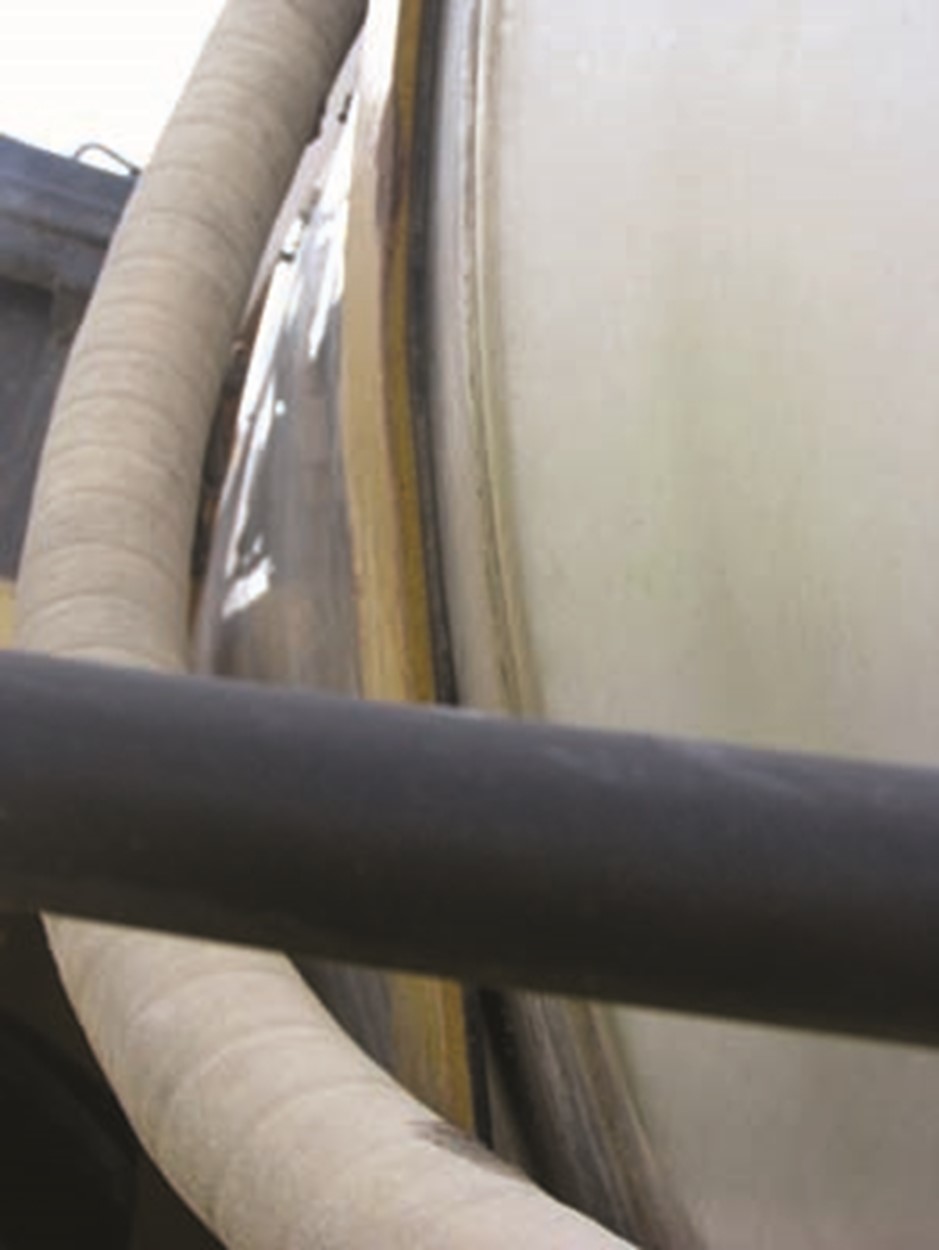
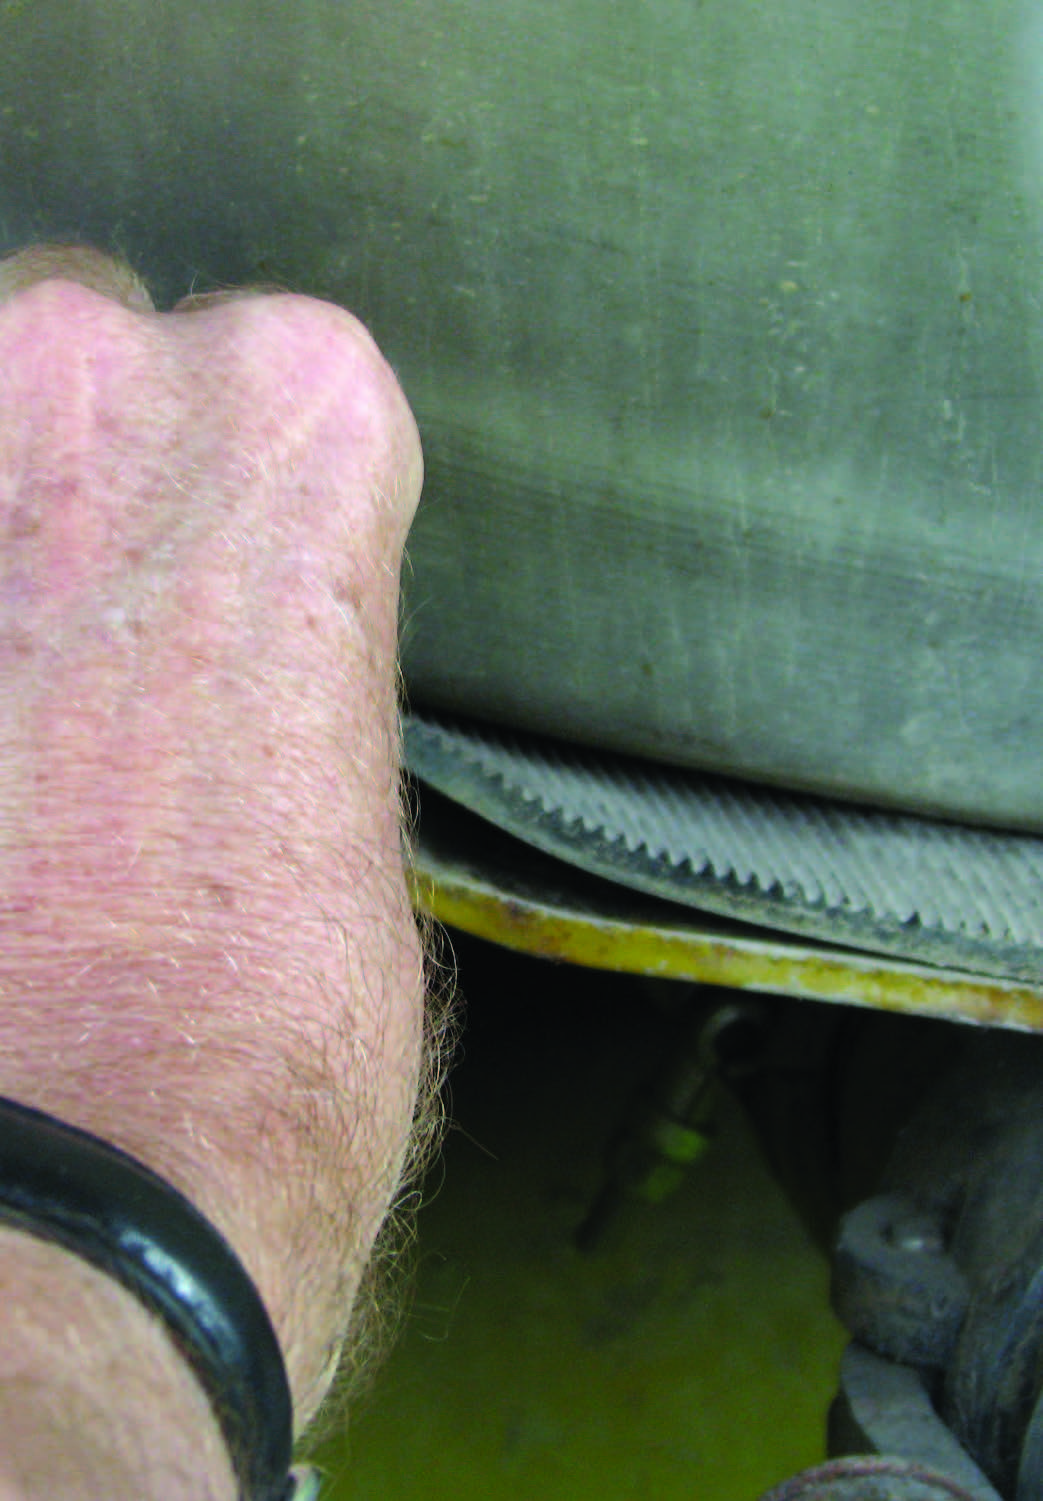
Properly storing hoses helps maintain their integrity during transit.
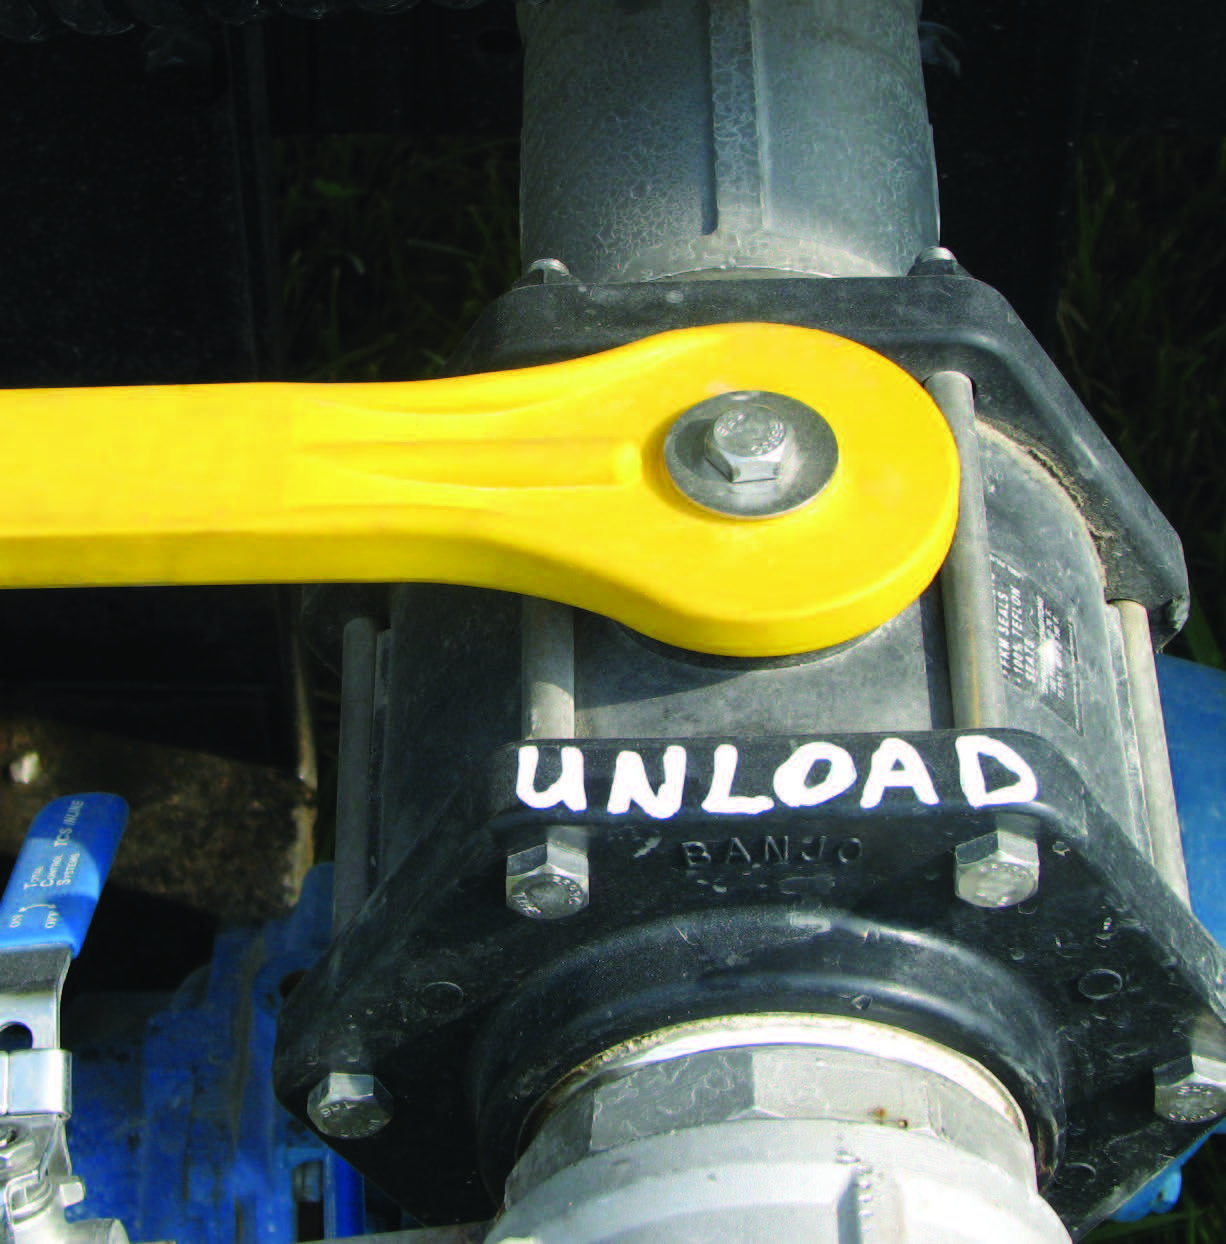
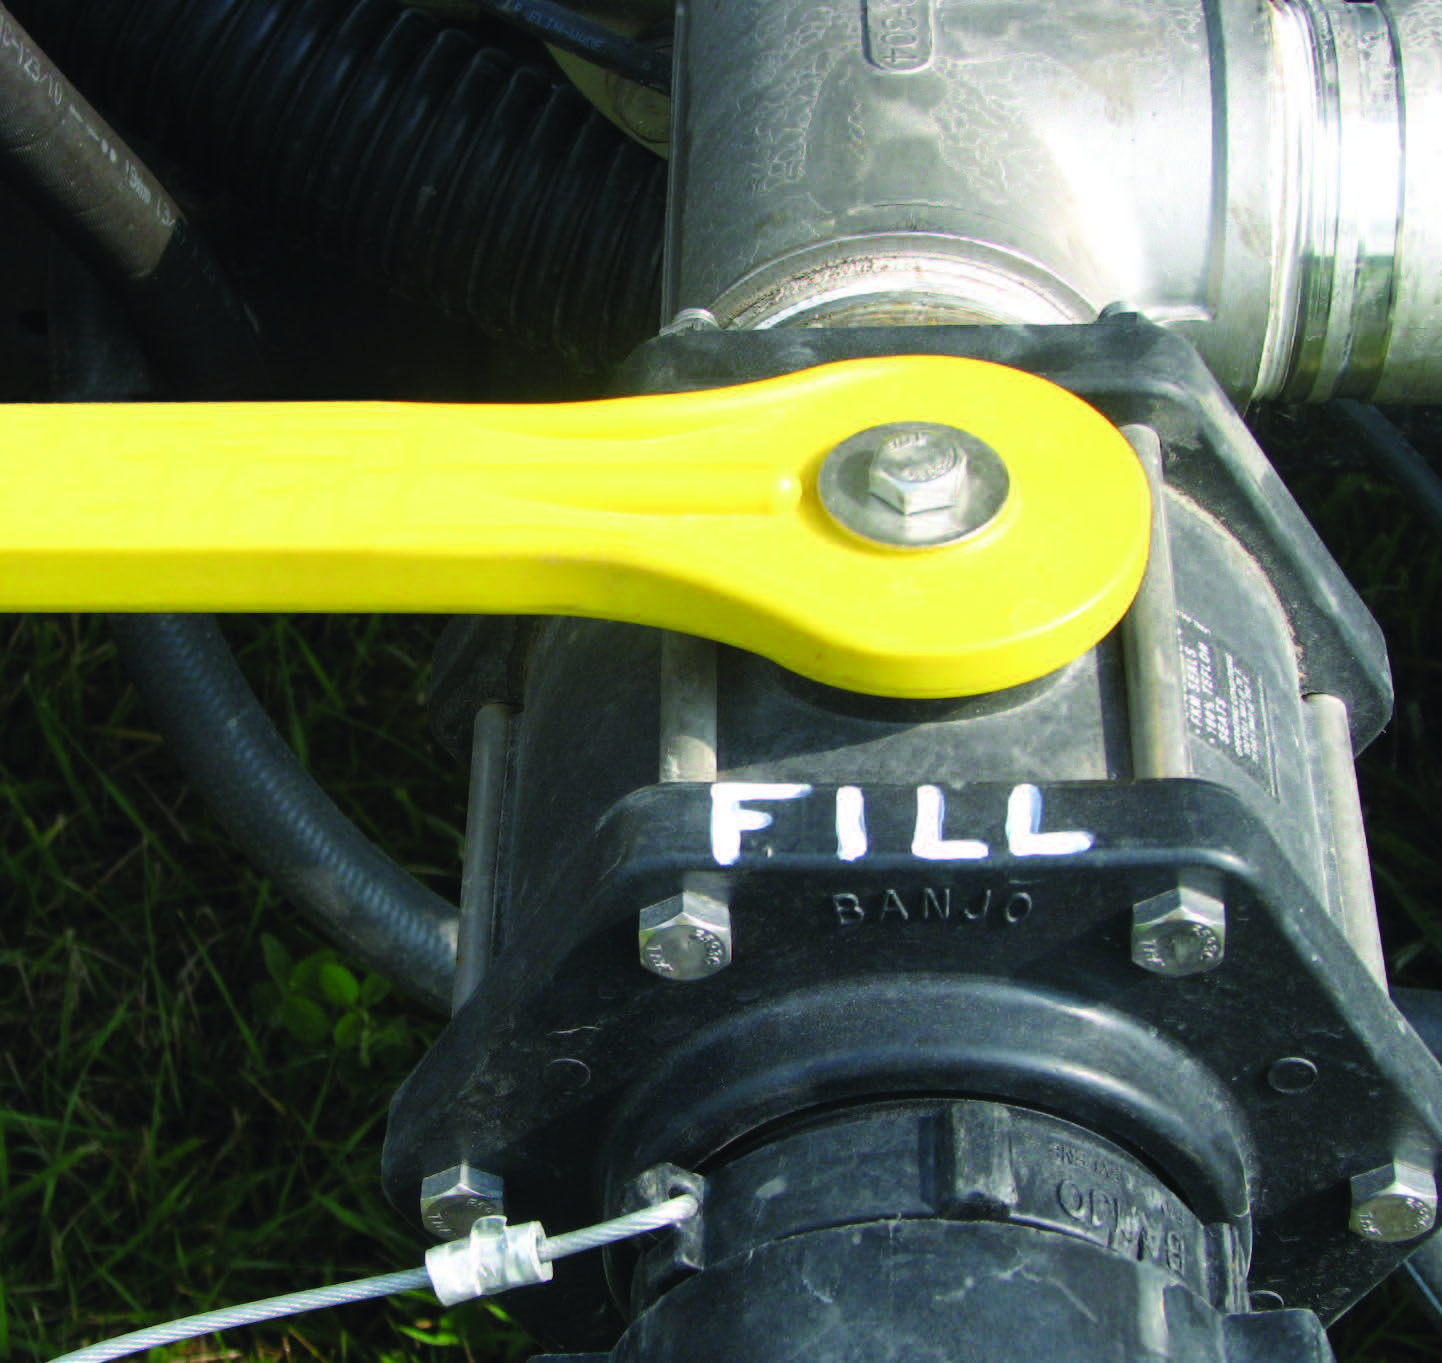
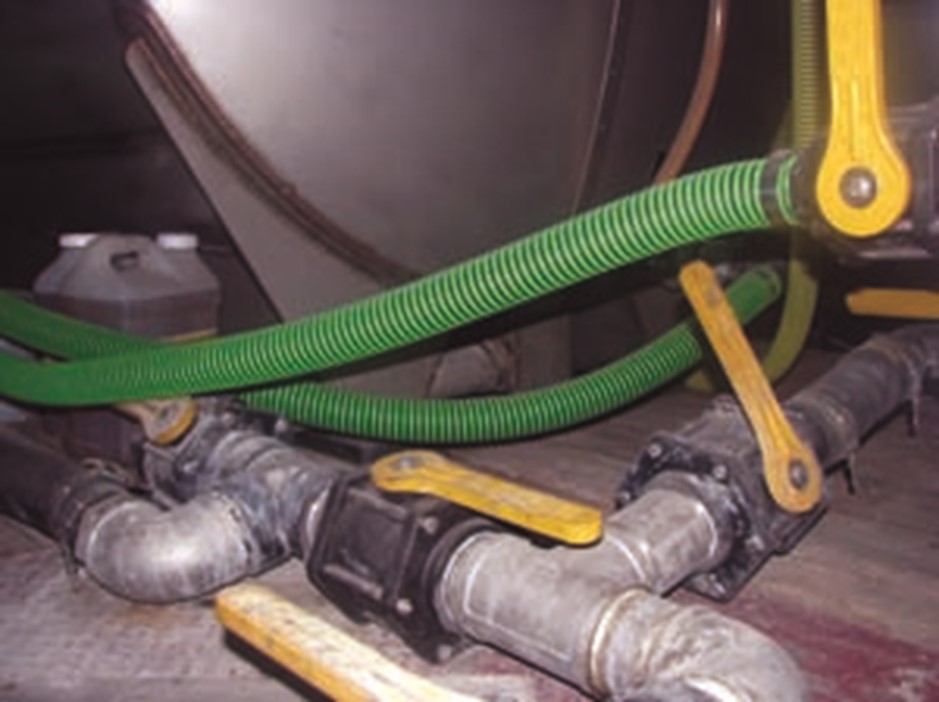
Clearly mark valves help to prevent mistakes.
Inspecting and Maintaining
A common misconception is that stainless steel is impervious to corrosion While it’s true that stainless resists corrosion better than mild steel, chemicals left in any tank for an extended period can damage the metal — even stainless steel Empty and thoroughly clean the inside surface of a stainless steel tank occasionally to help protect against corrosion.
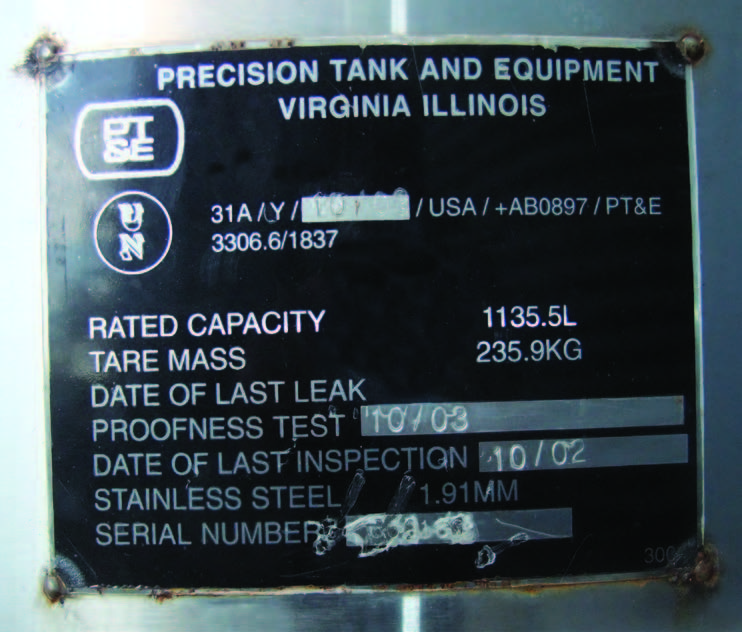
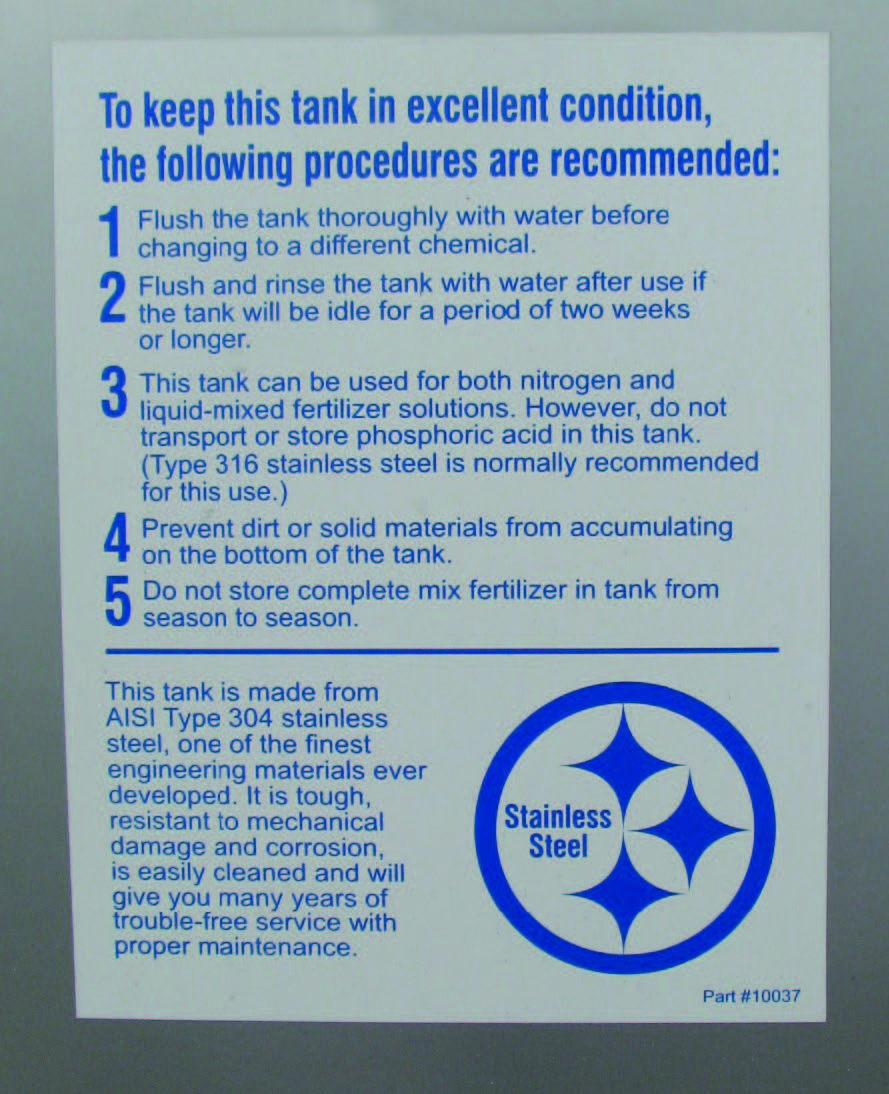
Important information on a tank decal.
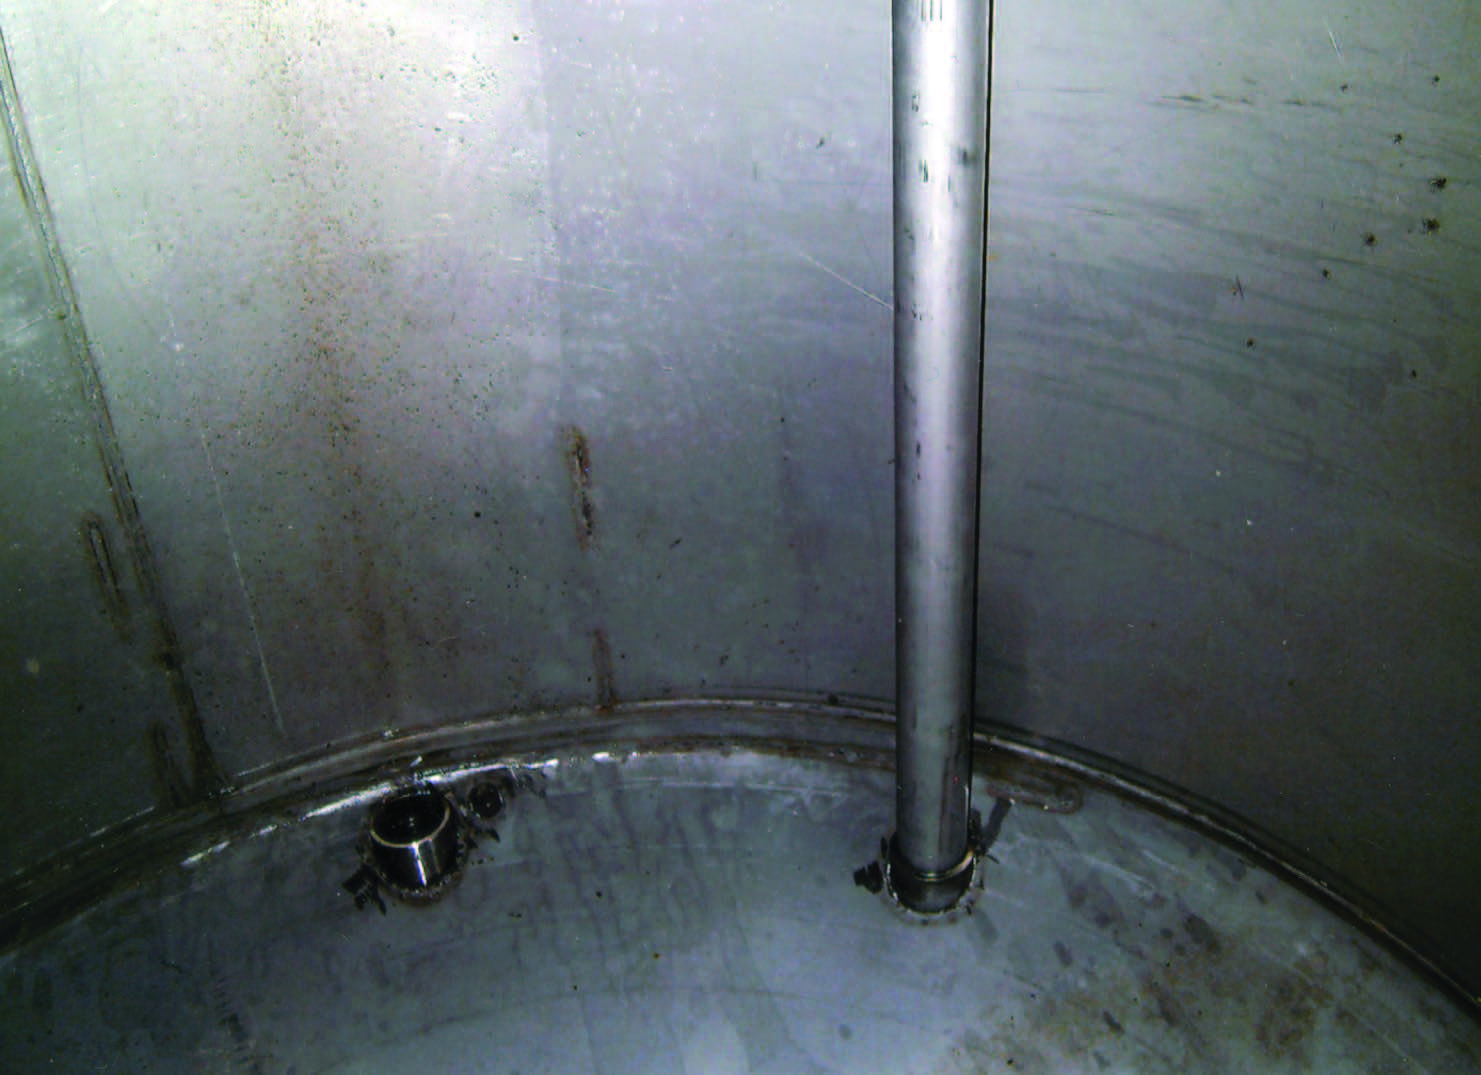
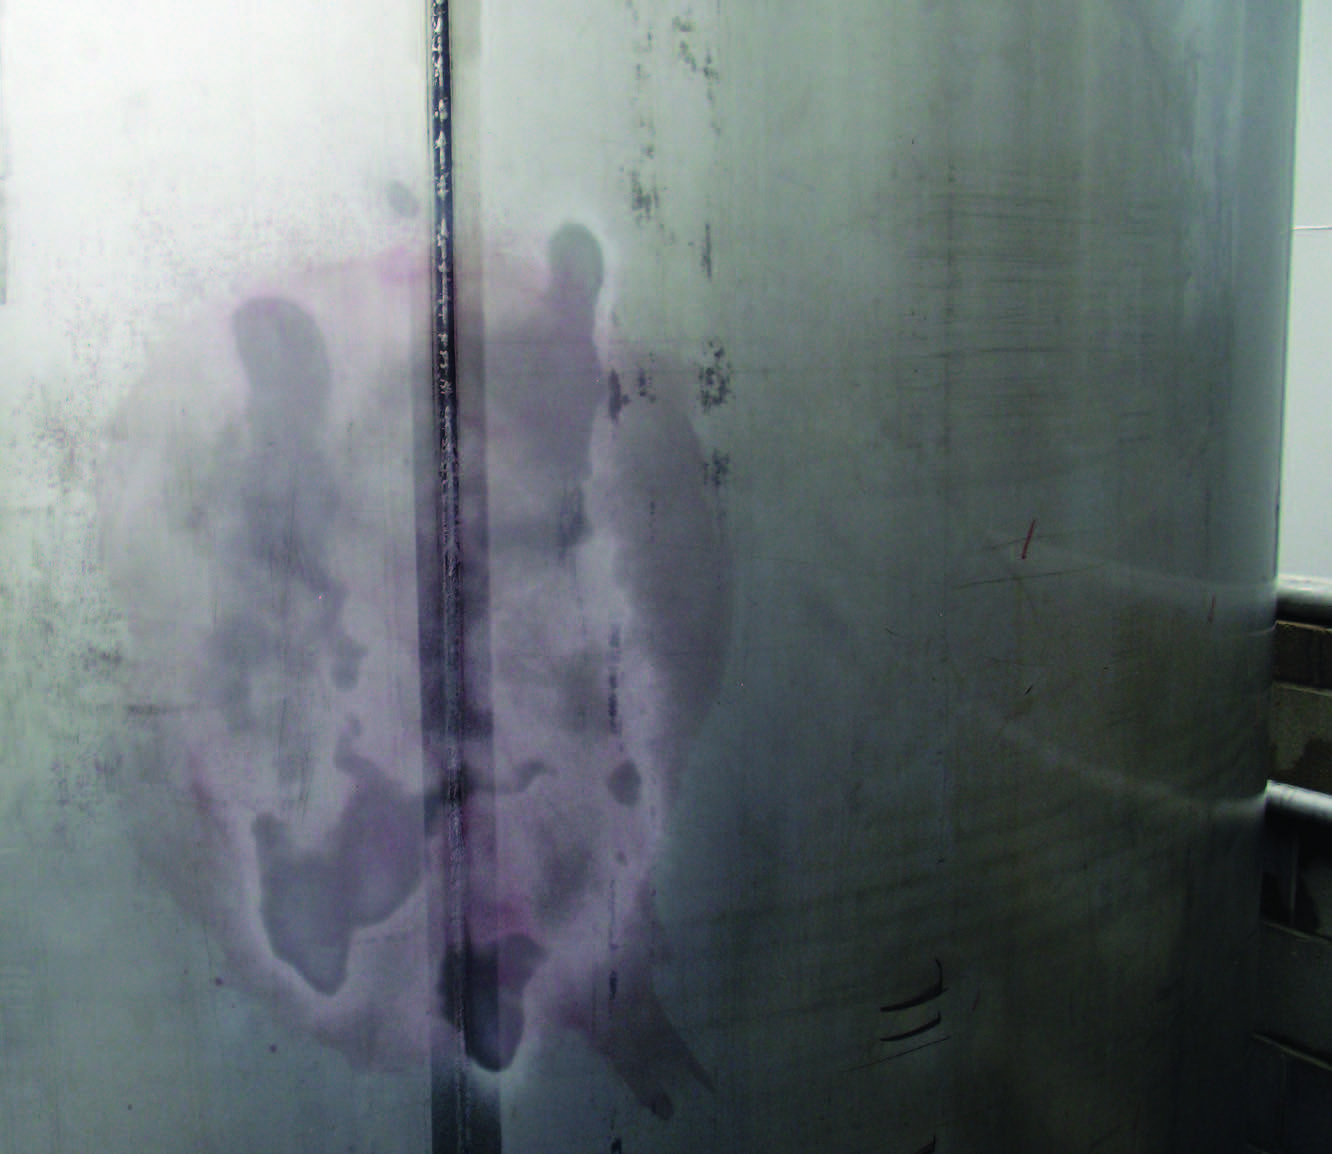
Periodically washing out a stainless steel tank can increase its lifespan. This tank is still in service even though it was manufactured in the 1970s. Notice how little pitting there is on the inside of the tank.
Chemicals spilled on the exterior of a stainless tank can cause reactions with unsightly effects. The backs of these stainless tanks are beginning to show signs of corrosion.
You should inspect tanks as part of any maintenance schedule During inspections look for:
• Areas that contain a manufacturing flaw.
• Tanks that may be incompatible with the products they store.
• Points of contact between the tank and other metal.
• The condition of exterior sight gauges.
• Worn and corroded valves, hoses, and fittings.
• Stress cracks from improper mounting.
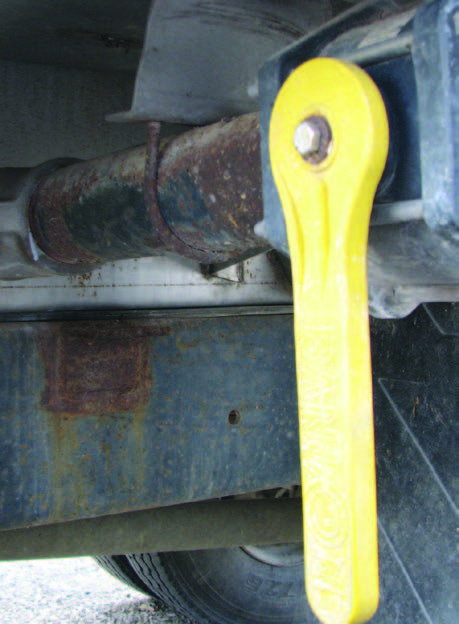

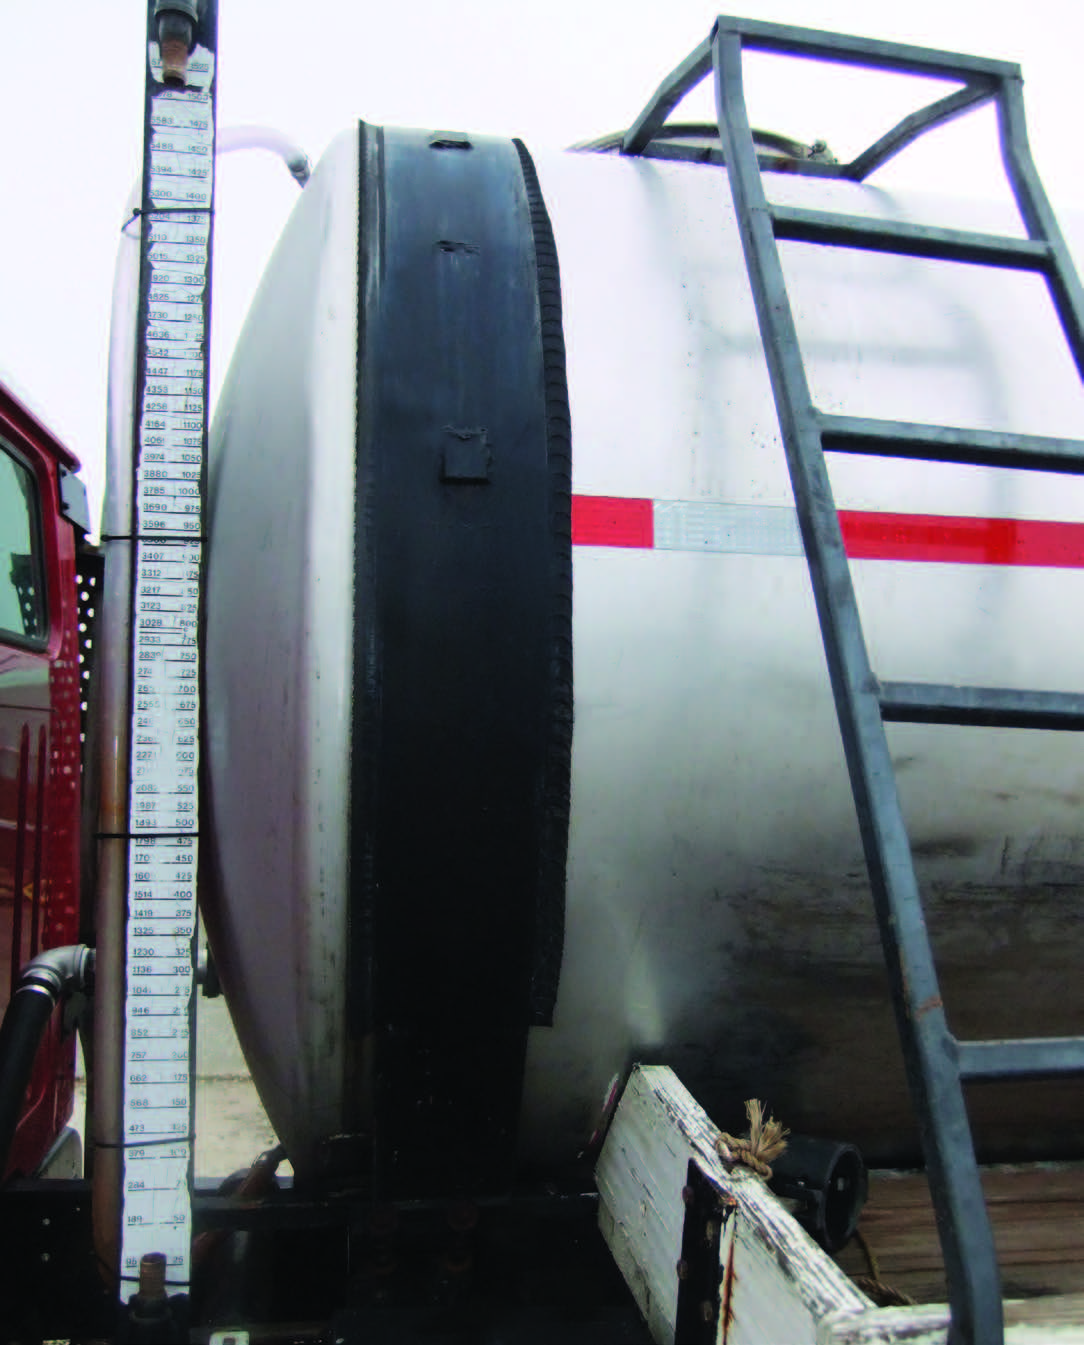
A sight gauge should always have a shut-off valve. This will allow you to open the valve when loading or unloading and to close it to prevent spills while in transit.

A dye penetrant test makes the metal failure in this tank obvious.

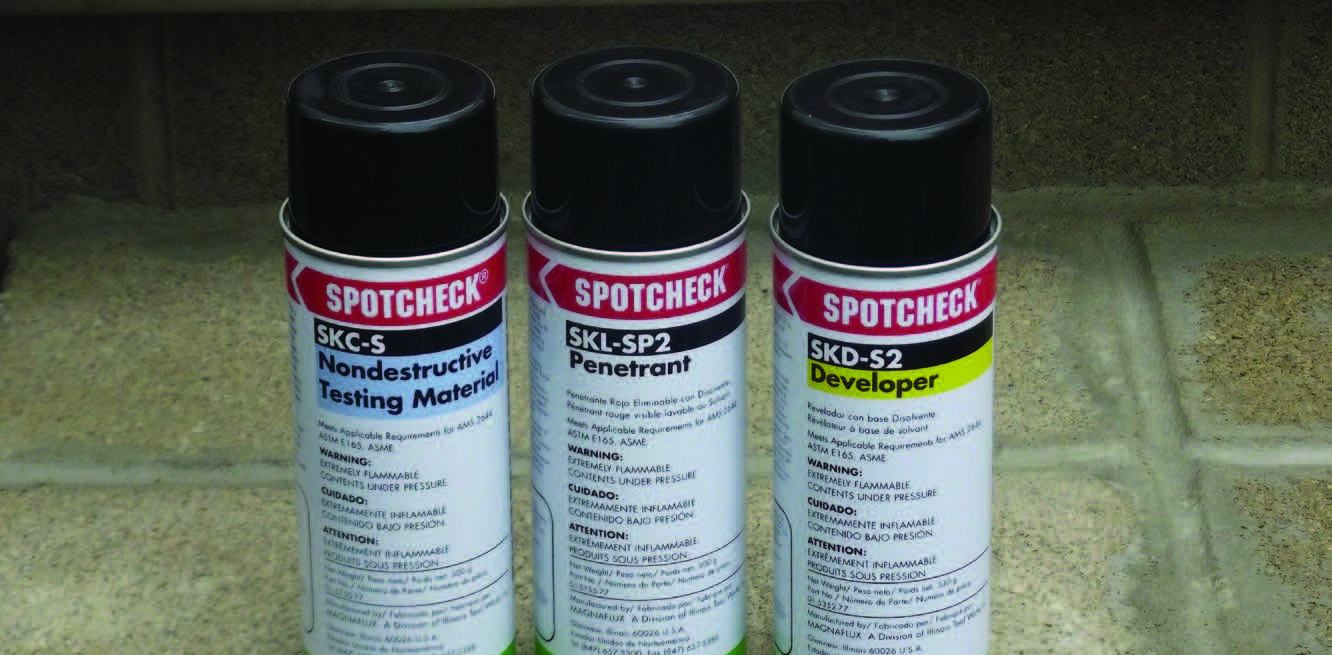
Apply dye penetrant before applying developer. Check for defects in the weld and base metal zone. Another way to check for stress cracks is to use diesel fuel. This only is effective if you can see both sides of the questionable area. Start by applying a light coat of diesel to one side of the crack. Then allow enough time for the fuel to penetrate. If the crack is all the way through, the fuel will seep through to the other side.

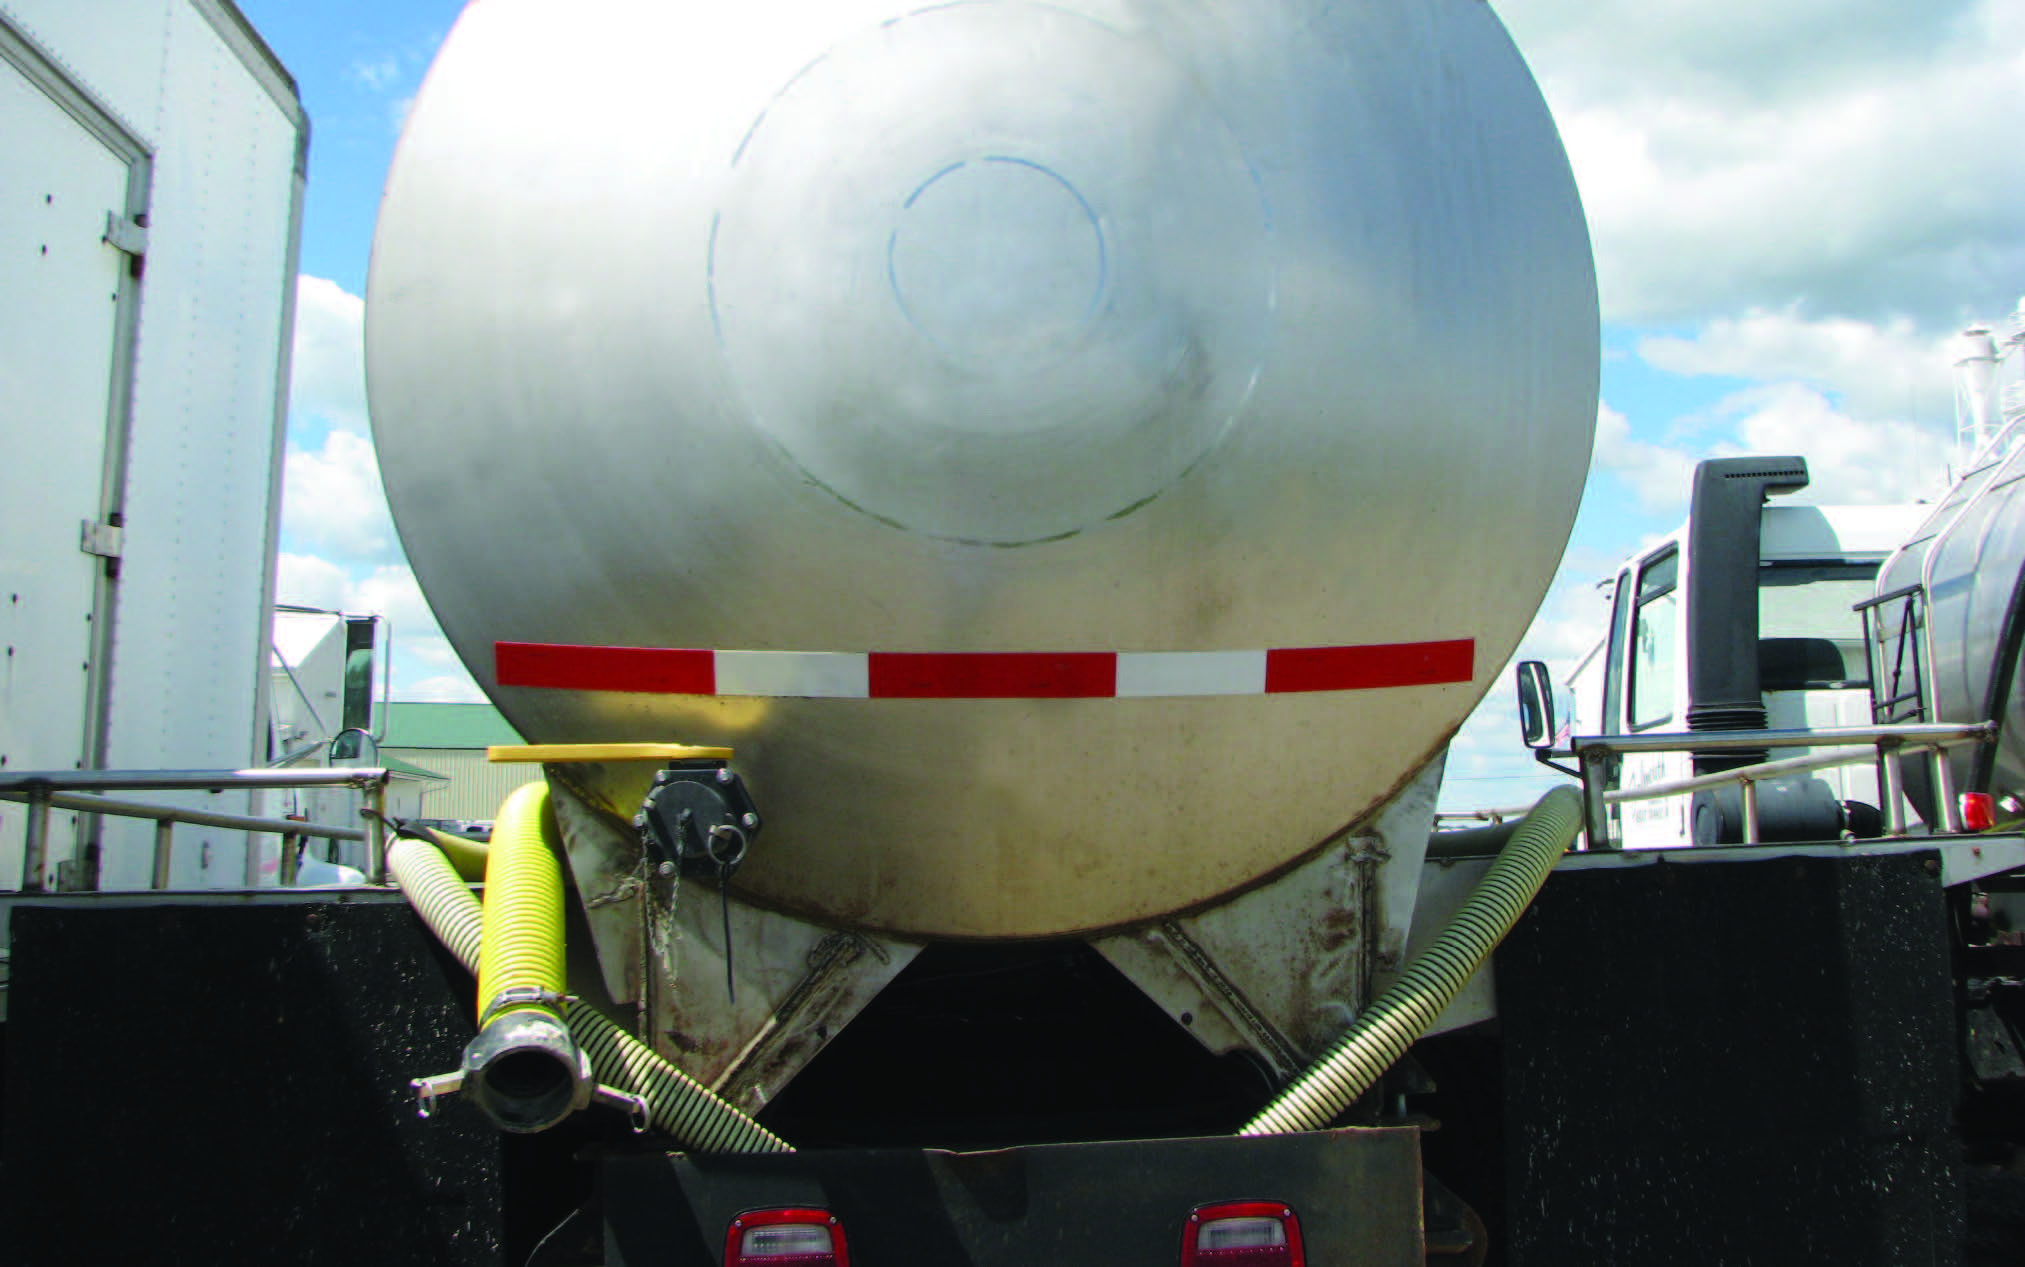
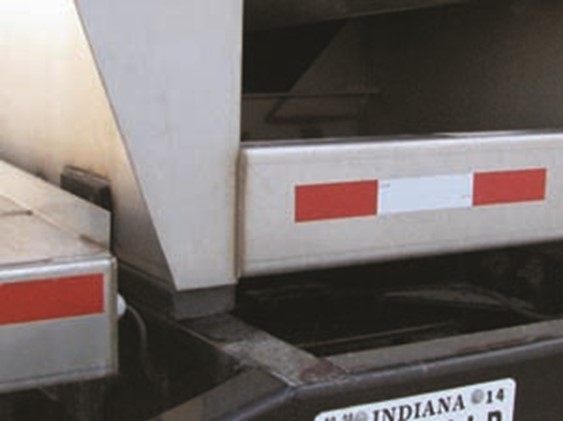
Mark the back of each tank with reflective tape and any required DOT markings because drivers approaching from the rear of the truck may not see the vehicle itself. Consider using a ball valve or center line valve made of stainless steel instead of poly for all tank outlets. Poly valves damage easier than stainless ones, especially in cold weather.
RepairingTanks
The tanks described in this publication are atmospheric tanks (unpressurized tanks) and store commonly used products such as liquid fertilizers, diesel, gasoline, and pesticides Another group of tanks, known as code tanks (pressure vessels), hold products such as anhydrous ammonia, propane, and fumigants While code tanks and atmospheric tanks are both designed to hold products, their similarities end there.
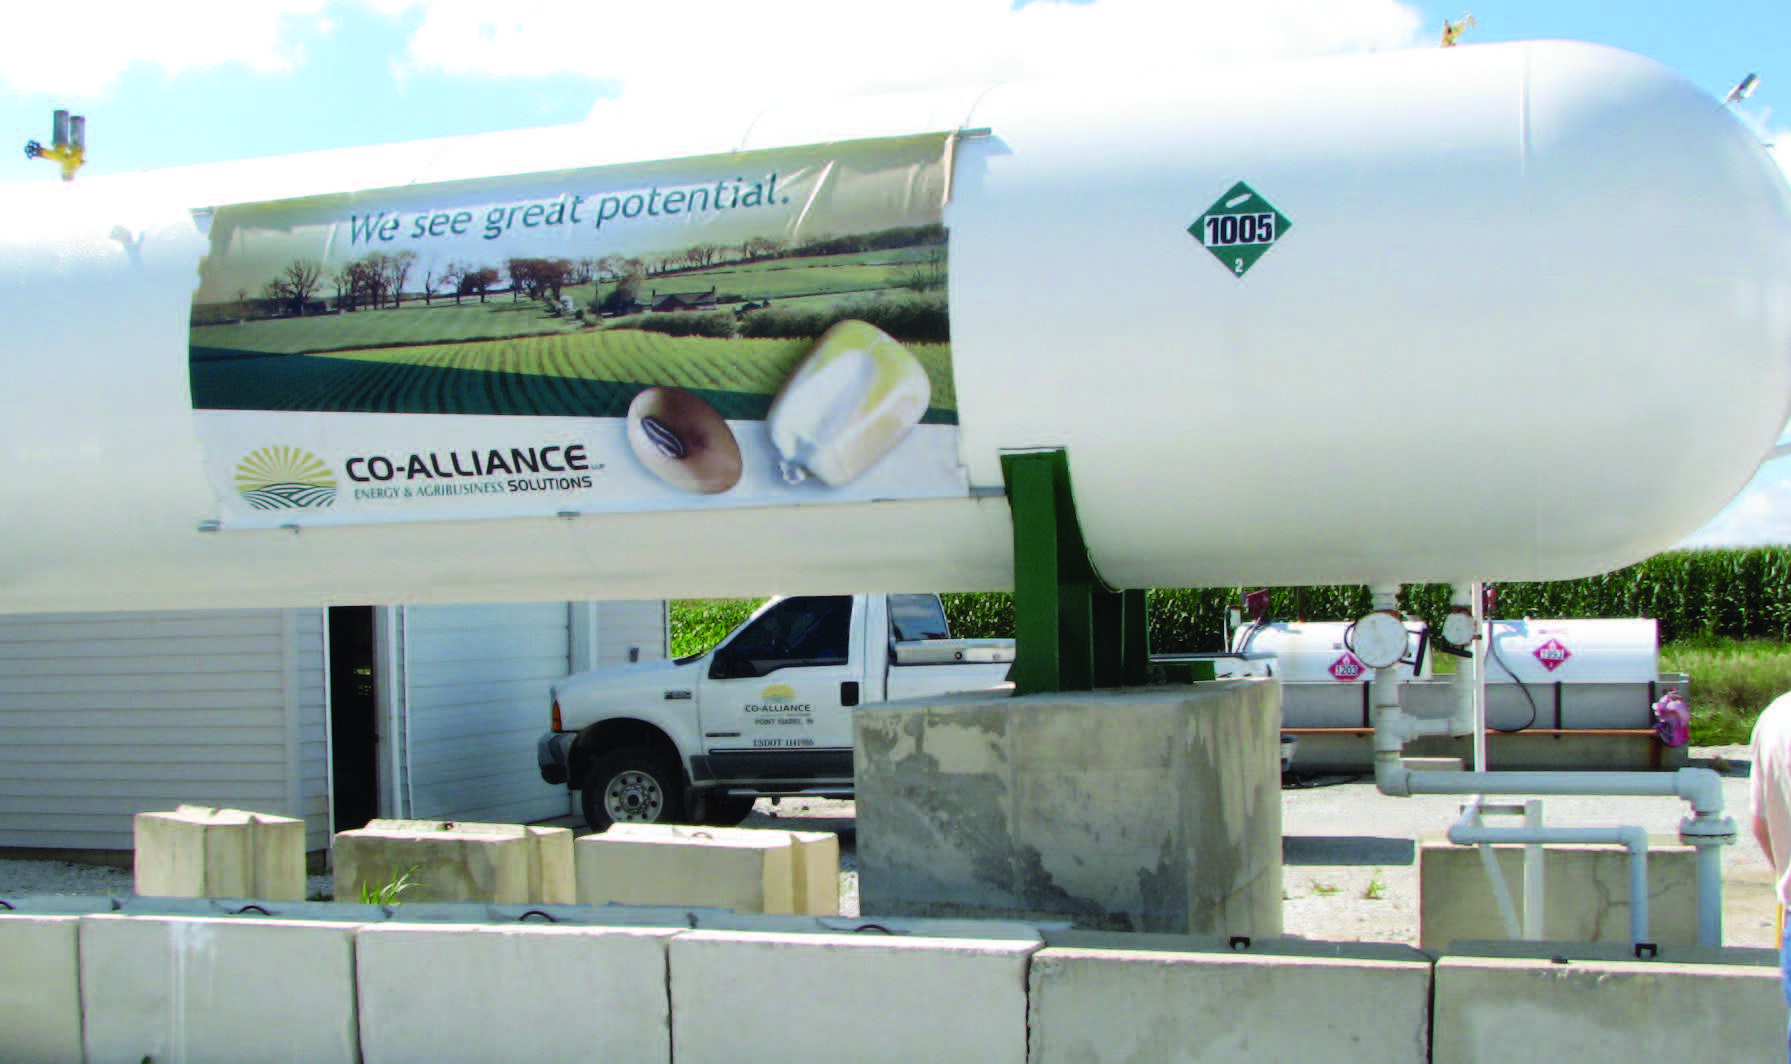
Do not weld on this type of tank unless you are certified.
Pressurized Tank Repairs Require Certification
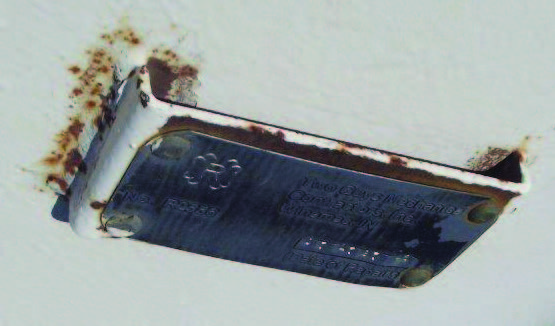
Code tanks are designed and manufactured according to federal guidelines and standard setting organizations For instance, every anhydrous tank made in the United States is registered with the National Board of Boiler and Pressure Vessel Inspectors (National Board) and given a unique serial number that links it to the manufacturer.
Because code tanks are built to withstand higher pressures, federal regulations define how often they must be inspected, who is qualified to perform inspections, and who is qualified to make repairs Inspectors are certified to inspect code tanks, measure the thickness of the walls, observe the status of the welds, and test the pressure holding capabilities of tanks.

Pressurized tanks are designed to hold specific pressures. No matter the tank — pressurized or atmospheric — call the manufacturer to honor warranties, work quality, and other factors before working on them yourself.
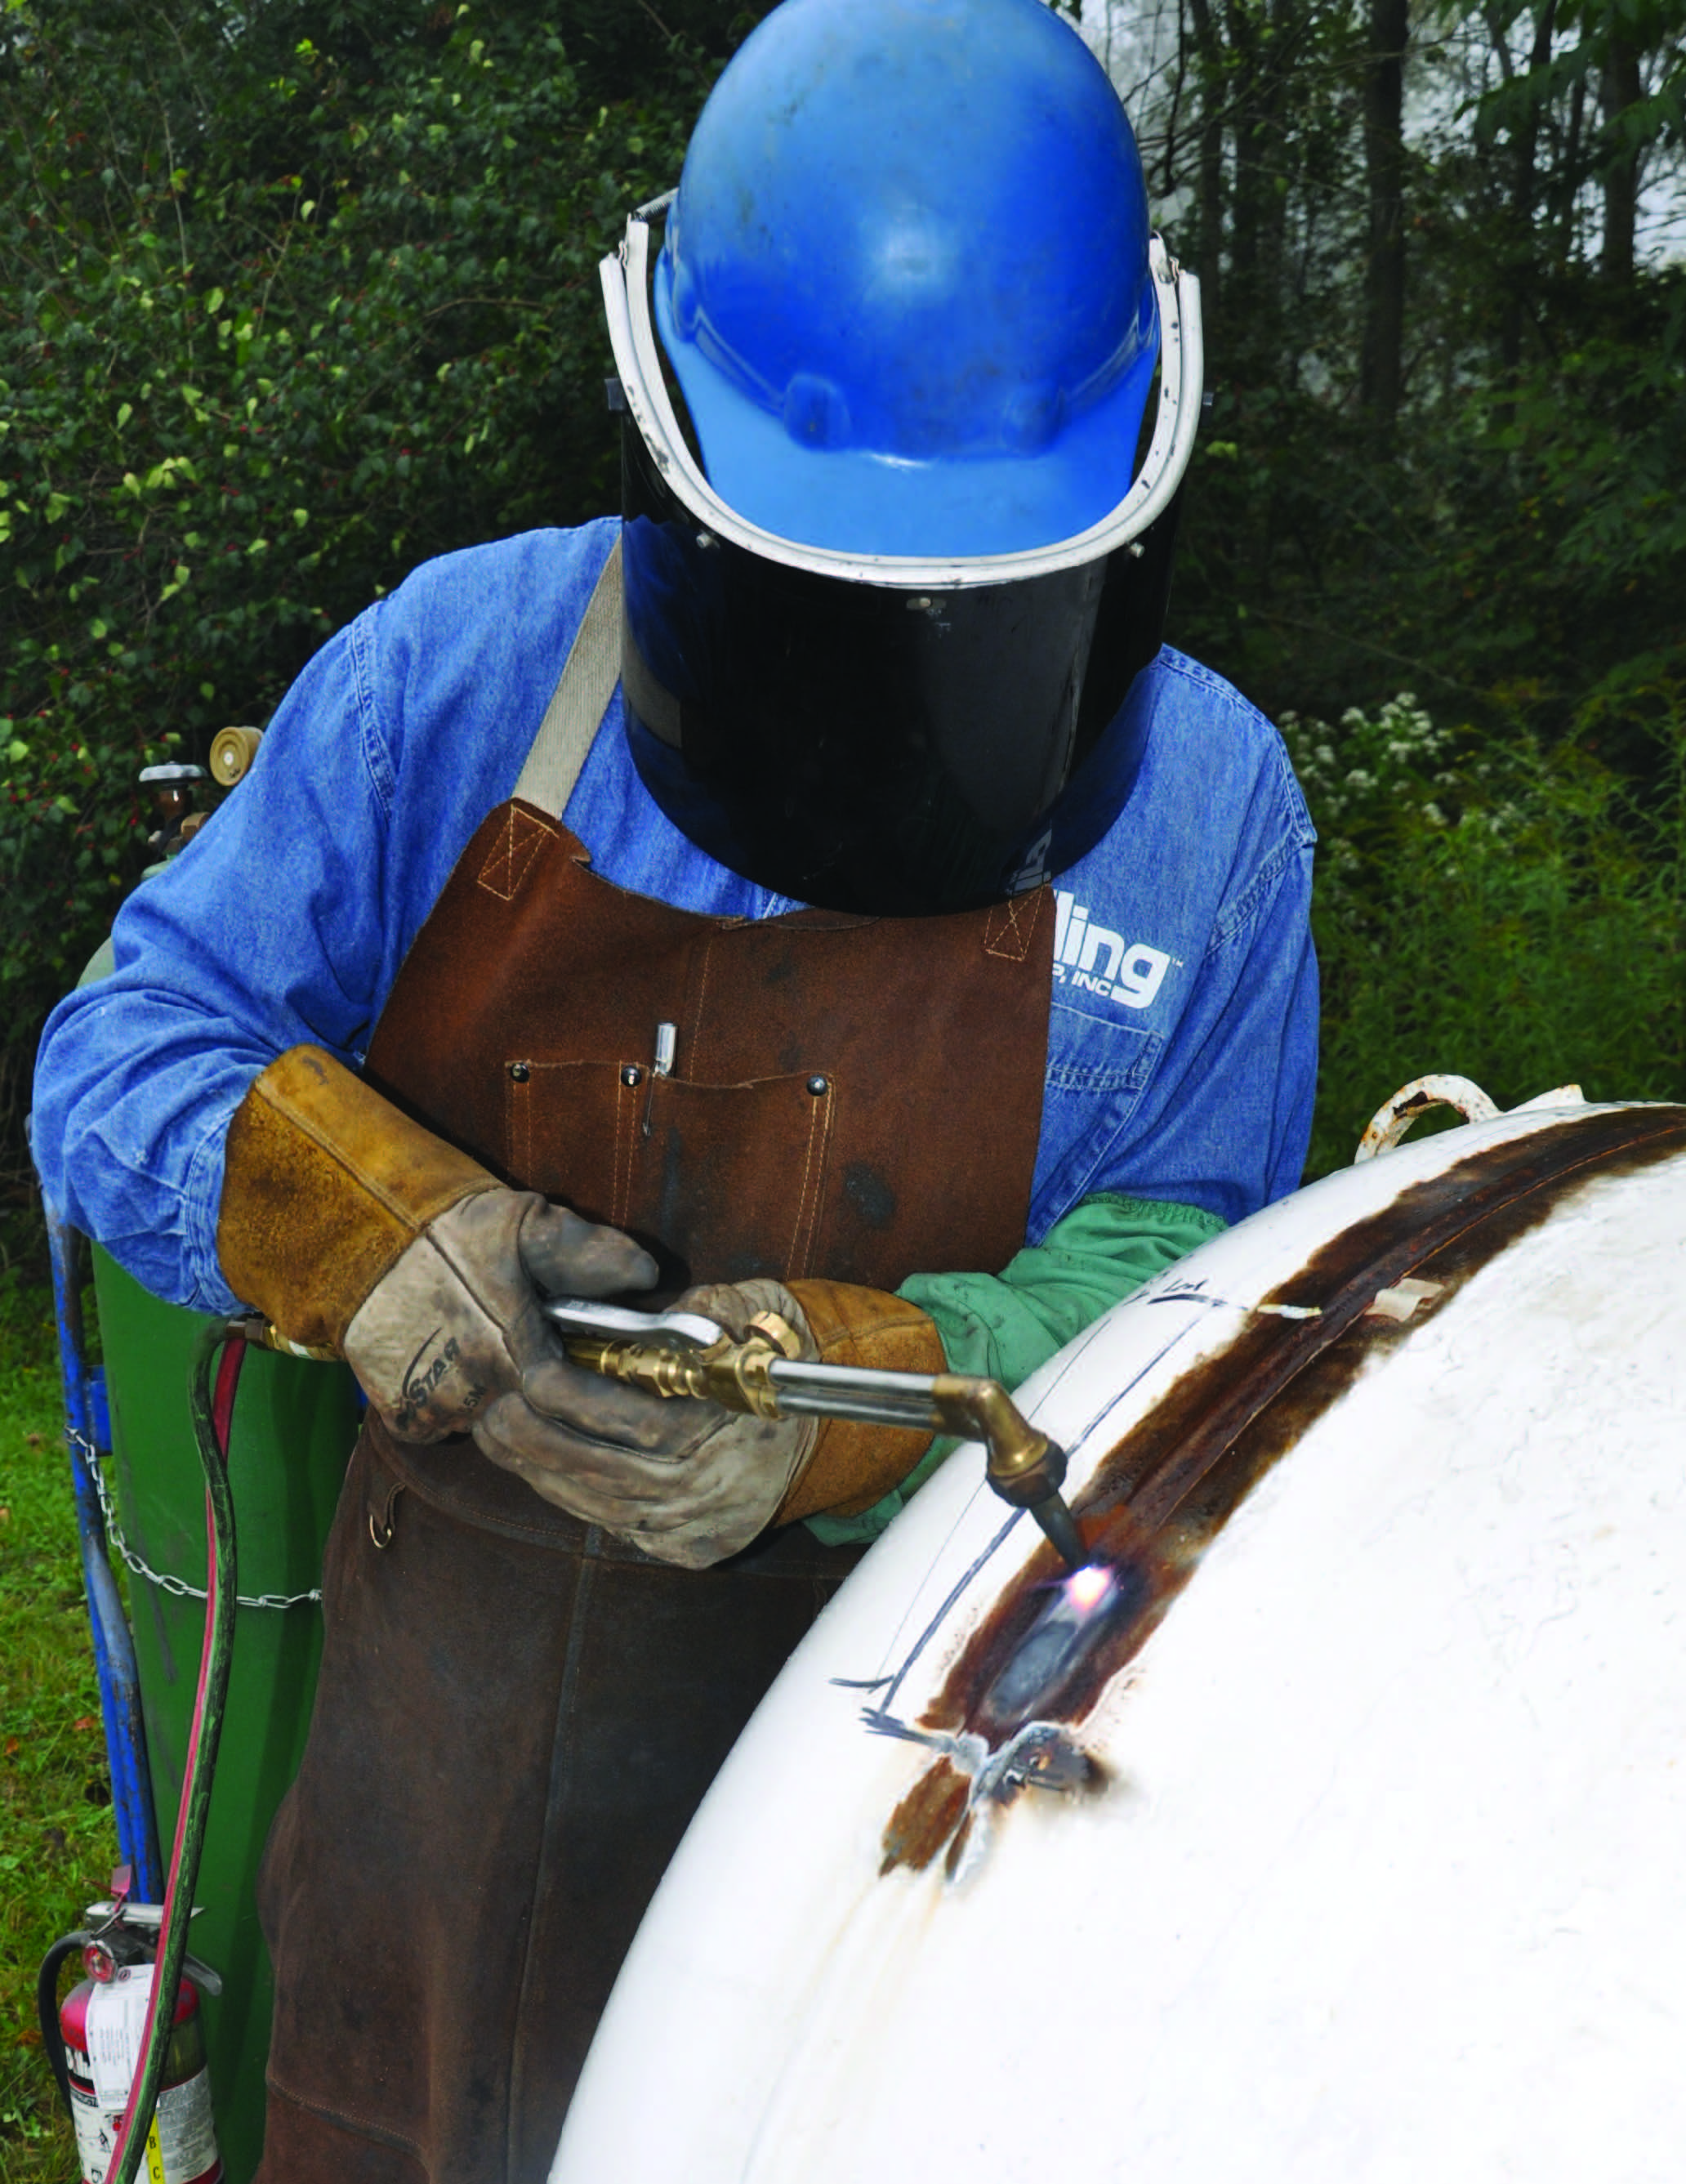
If you have a problem or issue with one of these tanks, you will need to contact a welder who is certified to make repairs on code tanks Certified welders are the only ones qualified to legally make the repairs These welders are not only certified, they also have experience and knowledge of working on pressurized vessels.
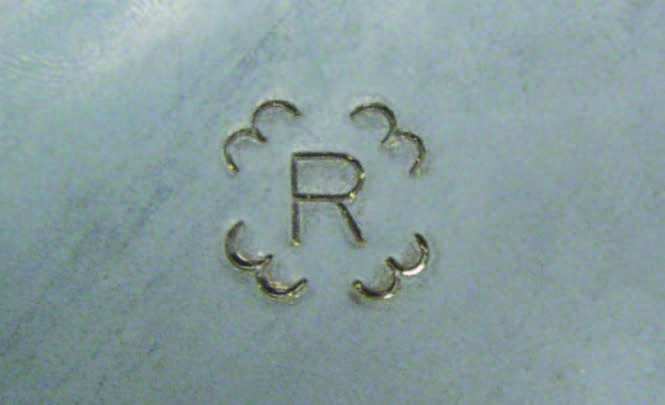
Code tank welders identify their work by placing their name and stamp on a plate next to the area they repair An R stamp on an anhydrous ammonia tank signifies that the tank was repaired according to the National Board’s inspection code Ensure the R stamp has the National Board symbols and keep the welder’s R stamp certificate number on file.
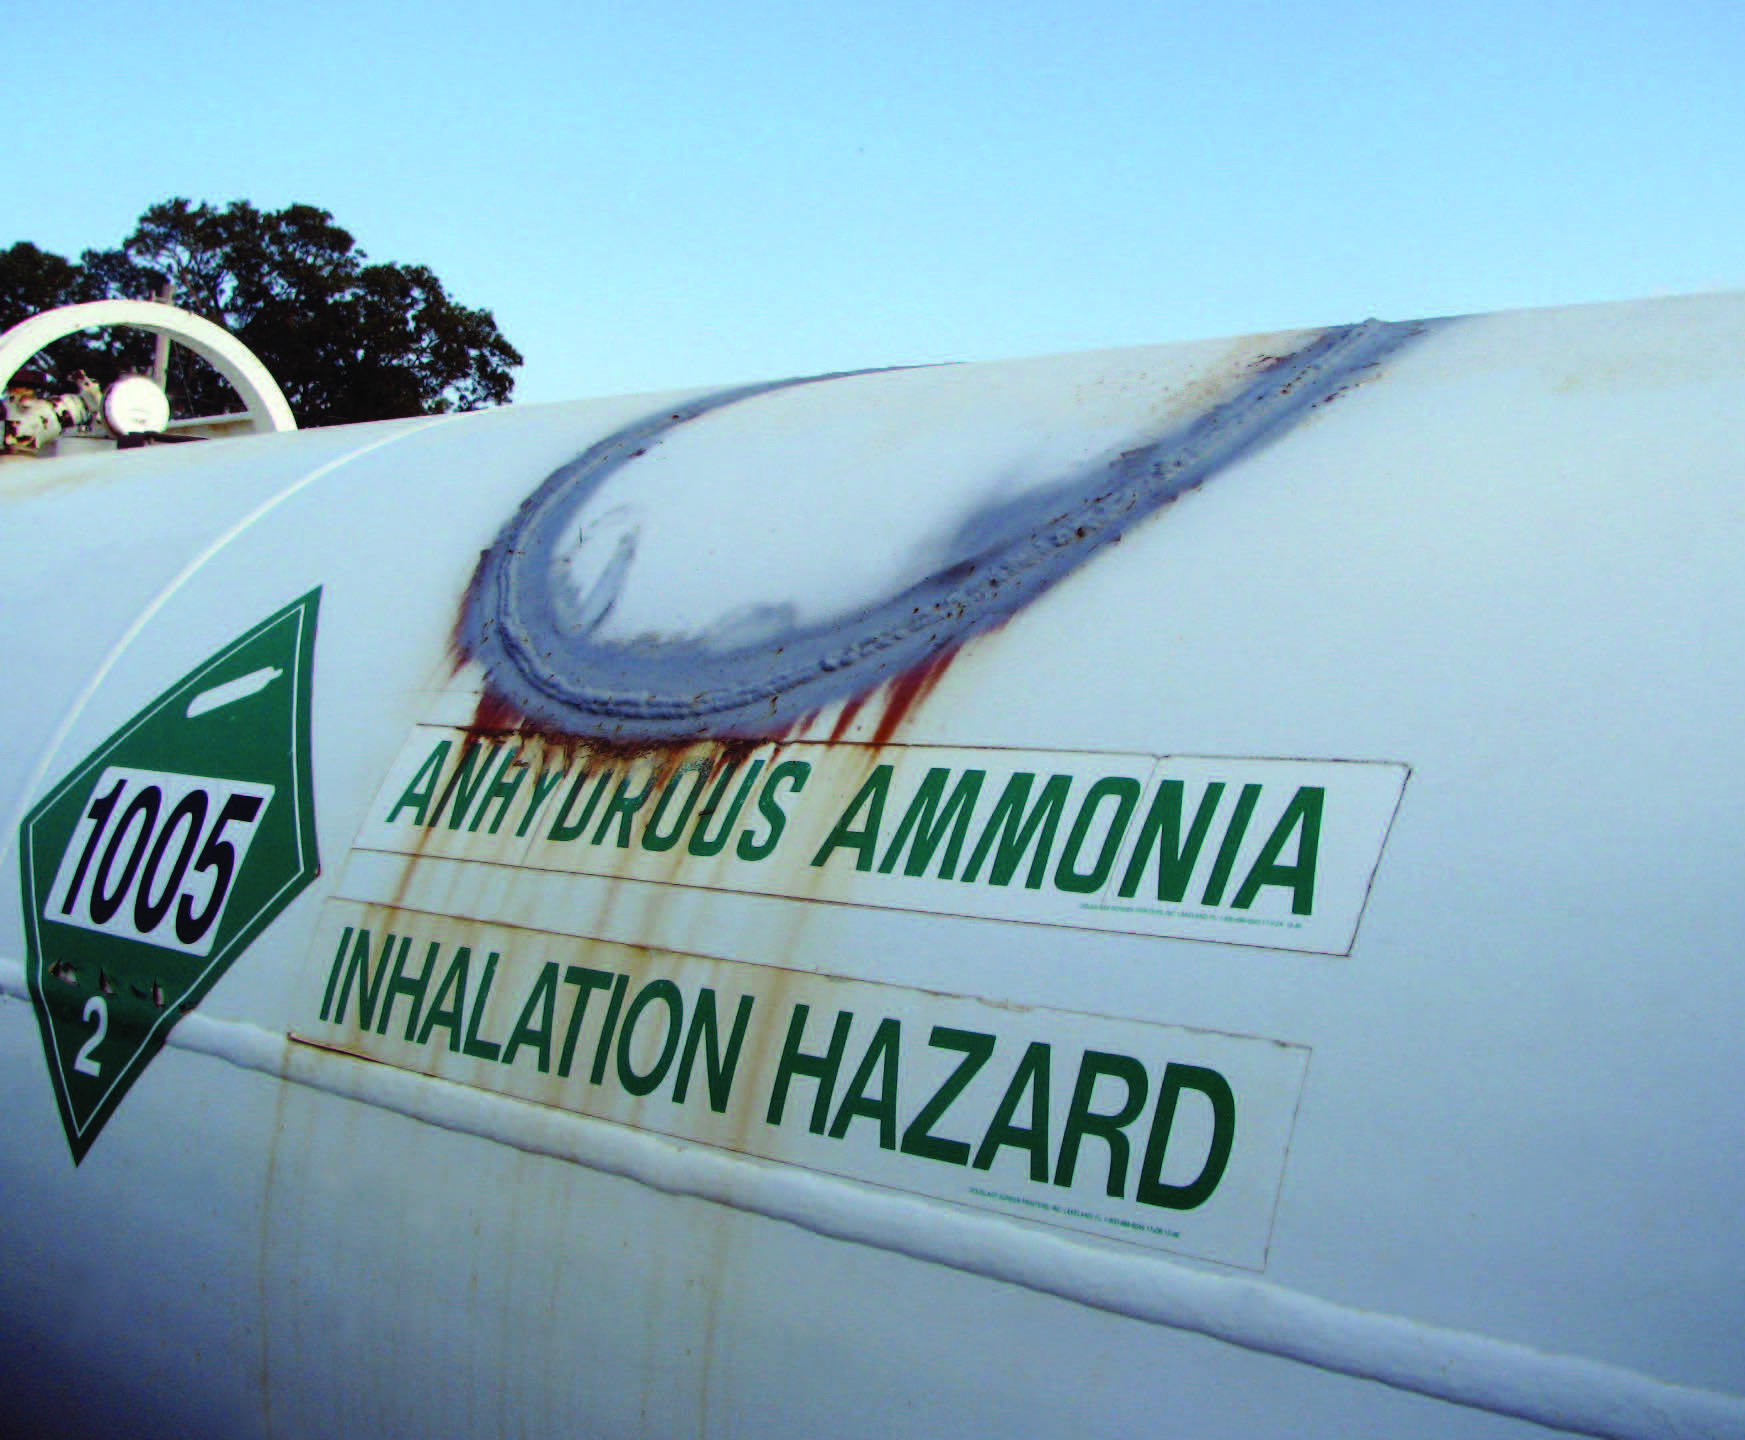
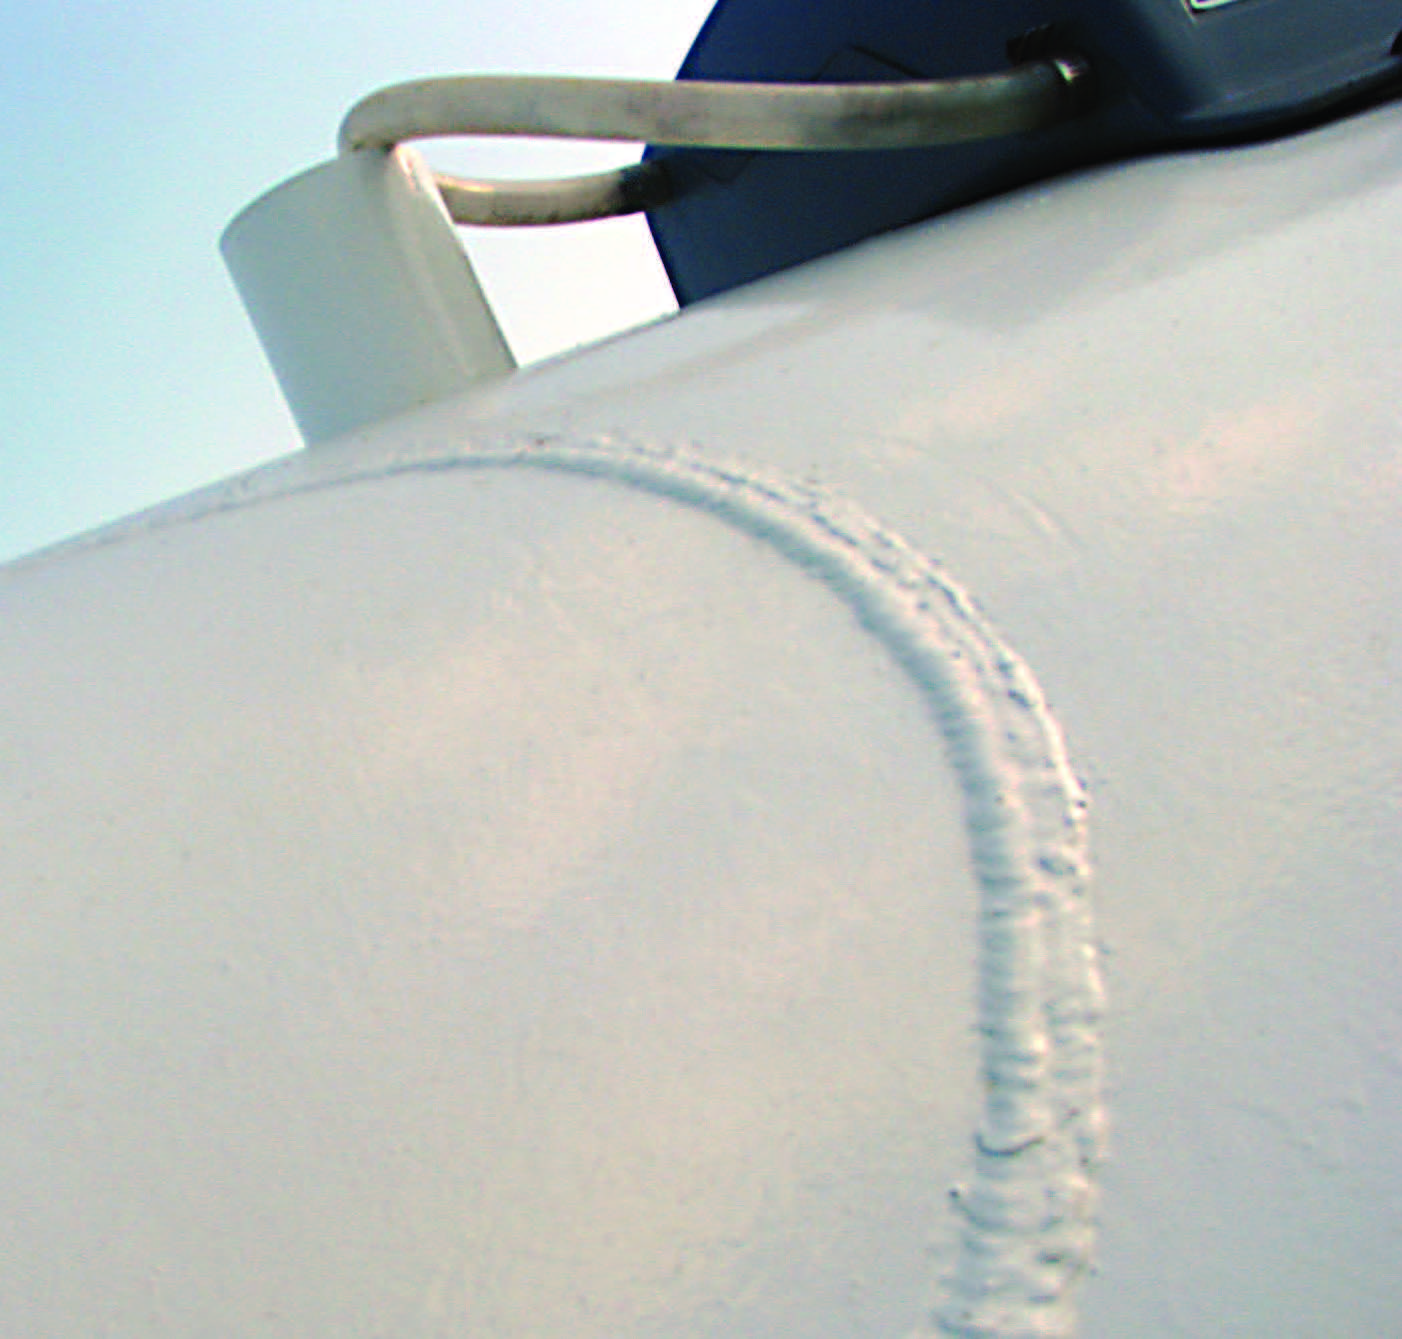
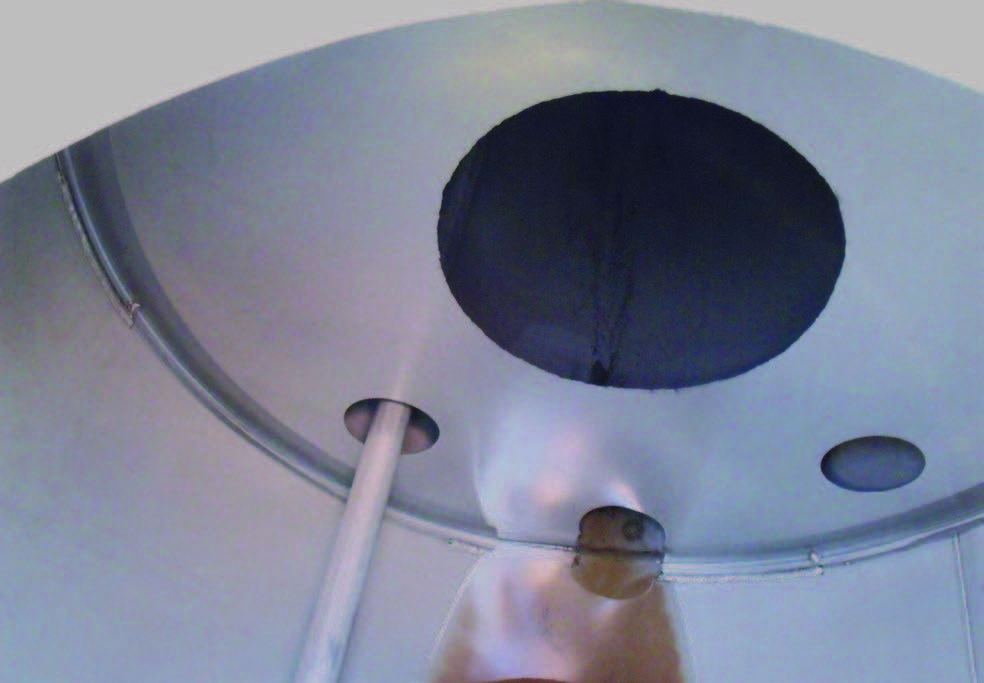
An access hole was cut into this tank to repair the internal baffles. This process is acceptable as long as the repair shop has the proper credentials and follows the correct procedures.
Repairing Unpressurized Mild Steel Tanks
Most leaks in unpressurized mild steel tanks occur through a corroded weld rather than through the side or floor Any product escaping through a hole or weld will eventually get worse and must be repaired
Repair the damage as soon as possible after you discover a leak While you can make some repairs while the tank is full by welding a steel plate over the outside, it is best to repair it when the tank is empty
When making a repair, put a 3- or 4-inch plate over the area that’s been breached Try to cover the leak area with as large a patch as possible, since you don’t initially know the extent of the damage.
However, be careful that the flat plate is not so large that it sticks out over the curvature of the tank If you weld a patch that is too small, you could create more leaks if the area being repaired is weak and thin.
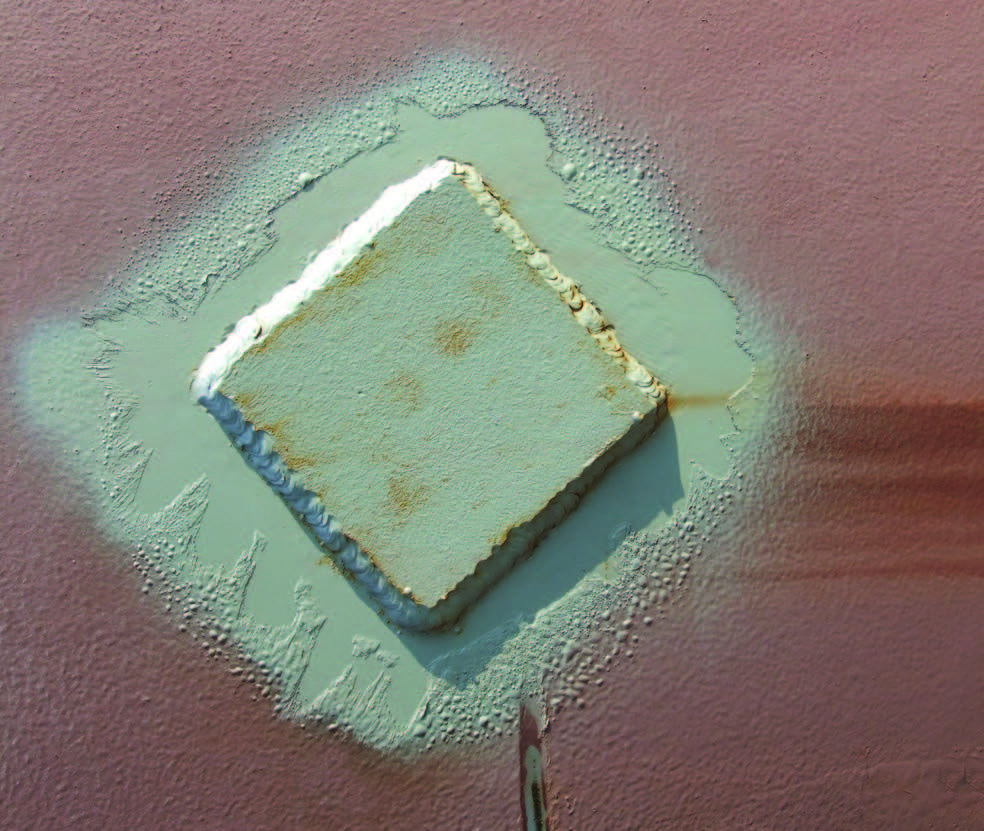

A permanent repair to this tank would involve removing the damaged area by grinding and replacing the weld with a full penetration weld.
Empty the Tank First Remember: patching a tank that is full of product could lead to more problems because you won’t know the extent of the weakened areas without inspecting the inside. When possible, pump the tank out at least below the leak. If the area around a hole is weak, you may end up making the leak larger.
Sometimes, the liquid in the tank can keep the metal too cool to get a good weld in the repair area.
Be sure to paint all repaired areas to prevent the metal from rusting.
While you can make repairs to stop the leak, it’s important to consider these repairs as only temporary Depending on the damage, you may also need to inspect and repair the inside of the tank When you do, make sure to check the air quality and properly vent the tank prior to entering (see Pages 25-26) Carefully inspect the area on the inside that was repaired on the outside.
Welding rods known as 6013, 7018, or 6010 are often used to repair mild steel tanks A 6013 welding rod is easy to work with, versatile, and readily available in most shops.
Repairing Unpressurized Stainless Steel Tanks
It’s been said that welding stainless steel is as much art as science You must weld stainless steel in a manner that repairs the problem without altering the physical and chemical composition of the steel The best approach is to hire a welder who is experienced on stainless tanks and knows which technique, rod, speed, and heat is most effective.
Rounded corners on the patch plate allow you to place a better quality weld on the tank. Welds that meet at a square corner are often the source of cracks. These welds were made because the patch wasn’t big enough.
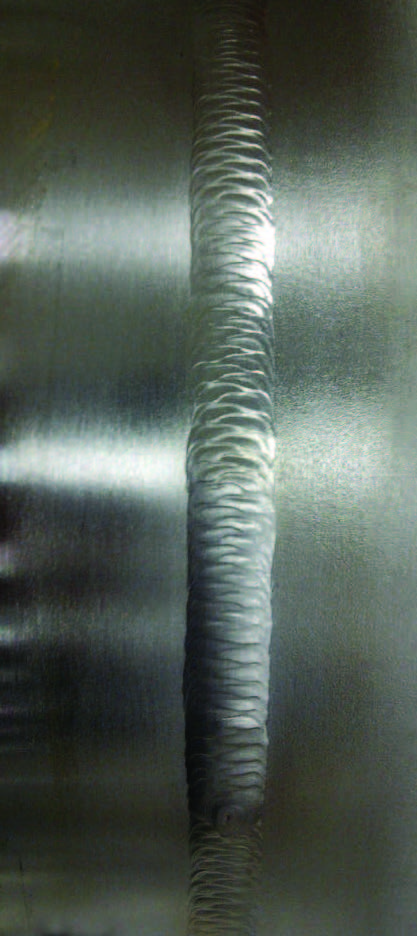
(Left) Notice the even bead and good tie in to the parent material on this good weld. Even the cap finish indicates a knowledgeable welder. (Right) Now observe the extremely irregular bead and poor tie in to parent metal on this poor weld.
Be Considerate of Commercial Welders
Many times, you don’t discover a leak until the tank is full and in use, and must be fixed quickly In some rare instances, you can repair leaks with product still in the tank, but you’ll have to drain the tank in most cases Very few welding shops will have a way of properly disposing any chemical you leave in the tank or of working on a loaded tank In other words, you must remove all pesticides and fertilizers from the tank before it can be repaired.
Have the welding shop test for vapors in the tank to ensure it is safe to weld To expedite repairs, consider preparing the tank before bringing the welder onsite or bringing the tank to a shopHere are some things you can do to prepare your tank for repairs:
- Completely empty the tank and hoses of any liquids.
- Pressure wash or steam clean the inside of the tank.
- Force air through the system to flush out any remaining liquids.
Purchasing Used Tanks
You can often find used steel tanks at acceptable to ensure you don’t end up buying one that should prices But just like buying a used car, tractor, have been sold for scrap It is often a good idea to or wagon, it’s buyer-beware when you purchase pay a professional inspection agency to inspect the a used tank Thoroughly inspect any used tank tank for you.
It is good advice not to buy a used tank without knowing its history. You can’t look at a newspaper or online ad and determine if the tank still has a number of useful years. You will have to visually inspect the tank. Never buy a used tank sight unseen.
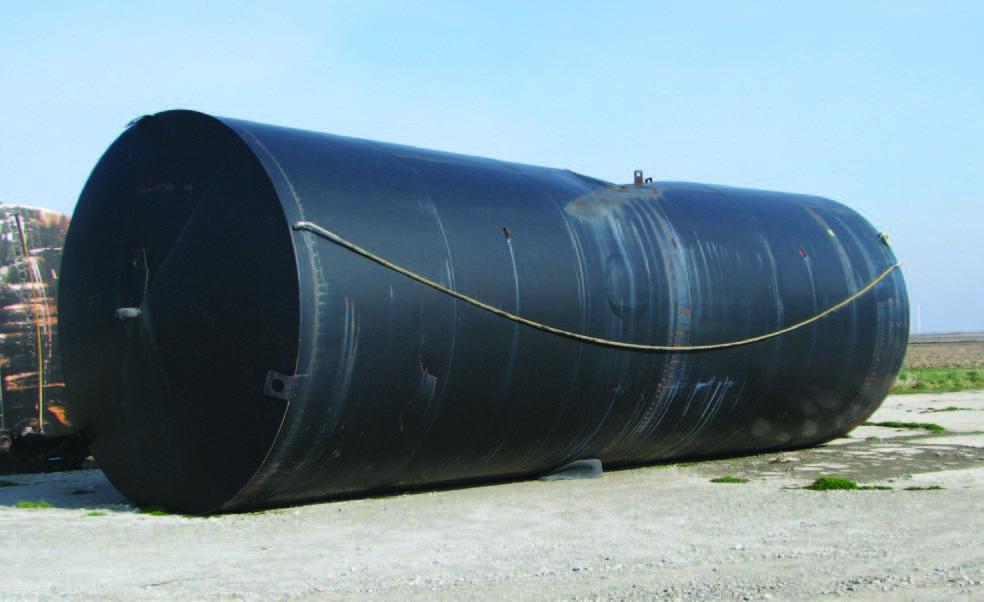
This tank looks worn out, but a closer look may reveal that it’s a solid tank that needs nothing more than a good paint job. In other cases a tank may look good when you inspect it and it held product for years only to leak after you move it. Before buying any used tank, inspect the inside for pitting if possible.
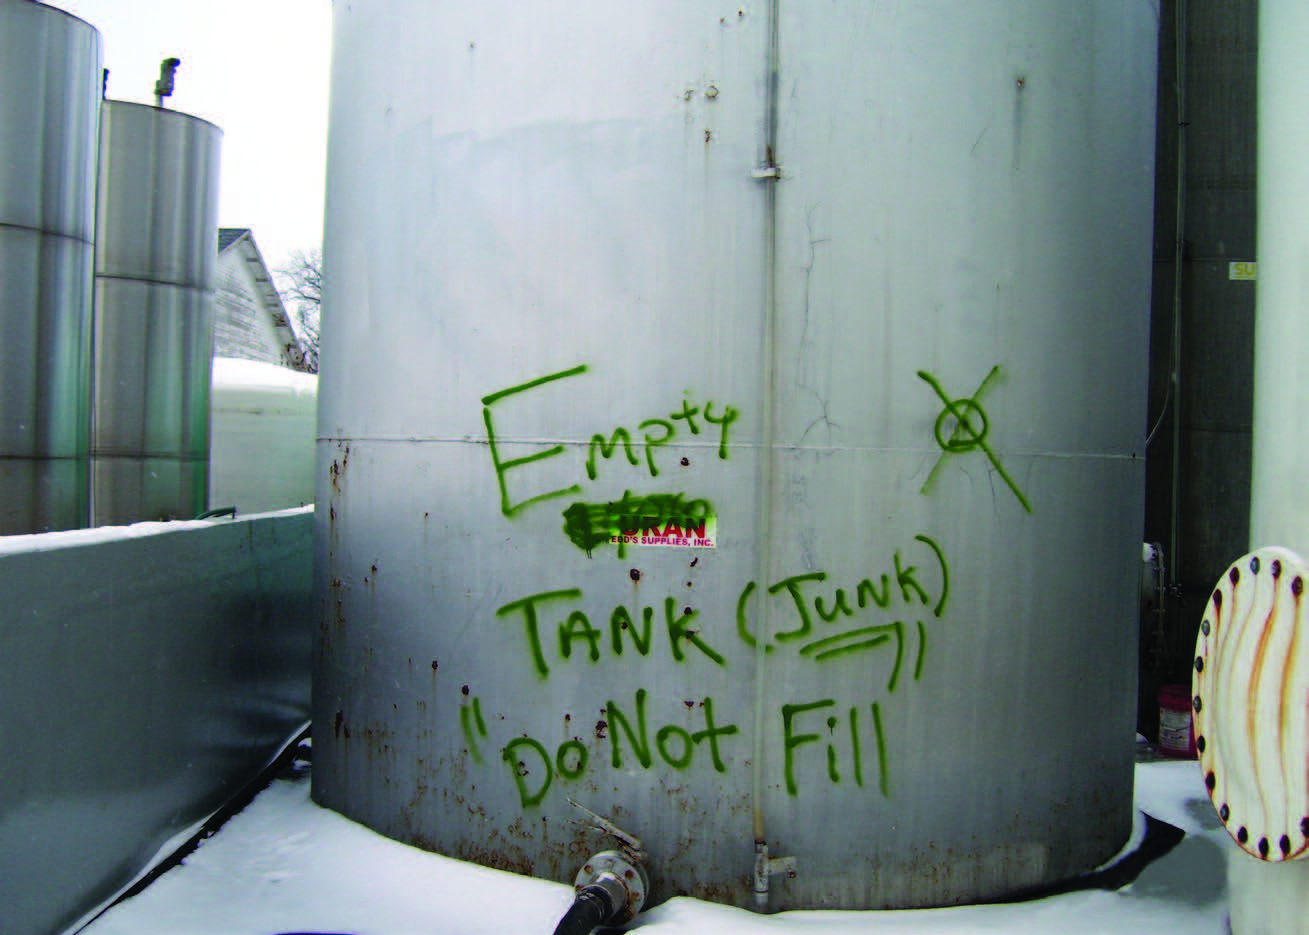
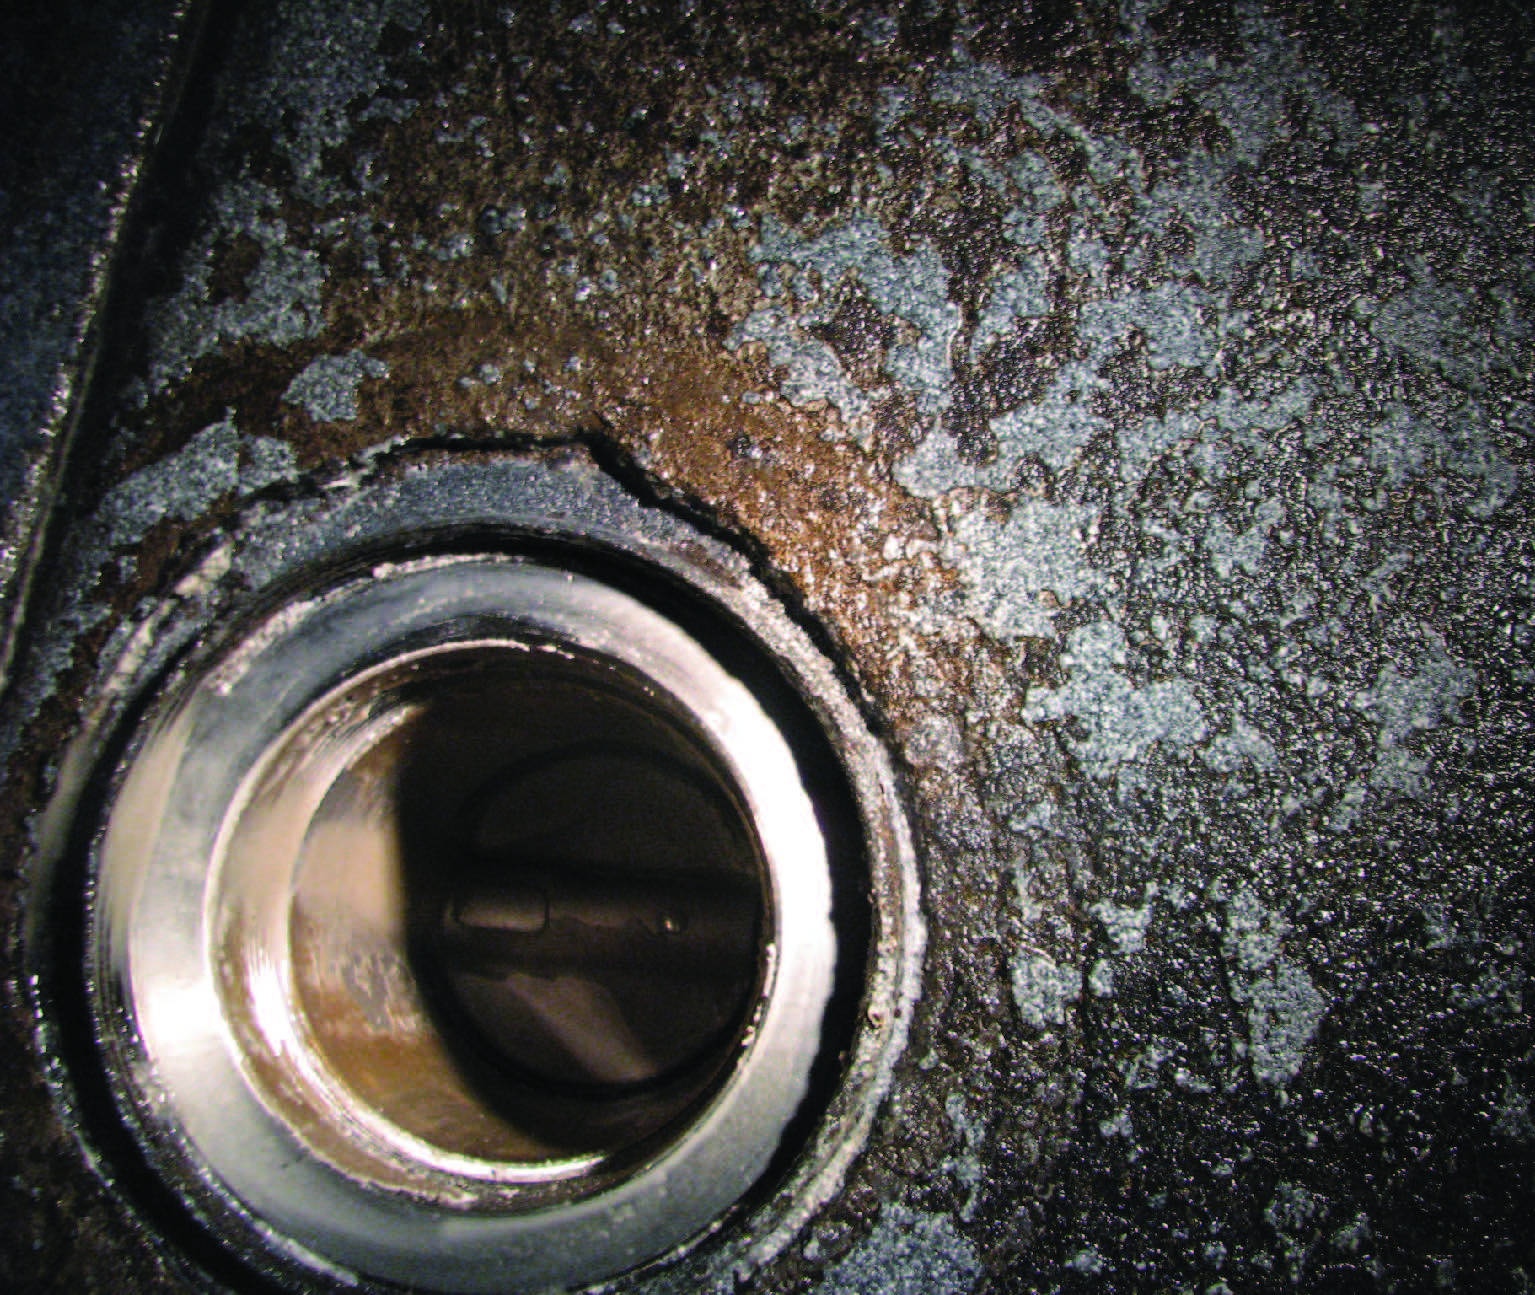
Here’s what the owner of this tank had to say: “This 25,000 gallon tank was set in a dike in either ‘97 or ‘98. It was a used tank when we put it there. The circle and X is where there was a small bird’s eye. It was not a hole. The real problem was on the throat of the manhole. After putting two loads of 28 0 0 in the tank, a small drip developed. The tank was emptied right away (there was no loss except for the tank). After scratching at the paint we found it was punctured on the throat. I was glad we caught it when we did.”
Check the condition of the top. The tank might look ideal at ground level, but looks can be deceiving. Make sure the tank is as good as it looks by inspecting the top. When you do, use fall protection in case the top cannot support your weight.
- The manufacturer’s name
- The grade of steel
- The thickness of the steel
- Its unique serial number
- The date it was built
What to look For When Buying a Used Mild Steel Tank
Thoroughly inspect a used mild steel (or any) tank before buying it Walk around the tank and look for any signs of repairs, rusting, or weak spots Don’t buy a tank that’s been repaired without looking at the state of the repair from inside the tank.
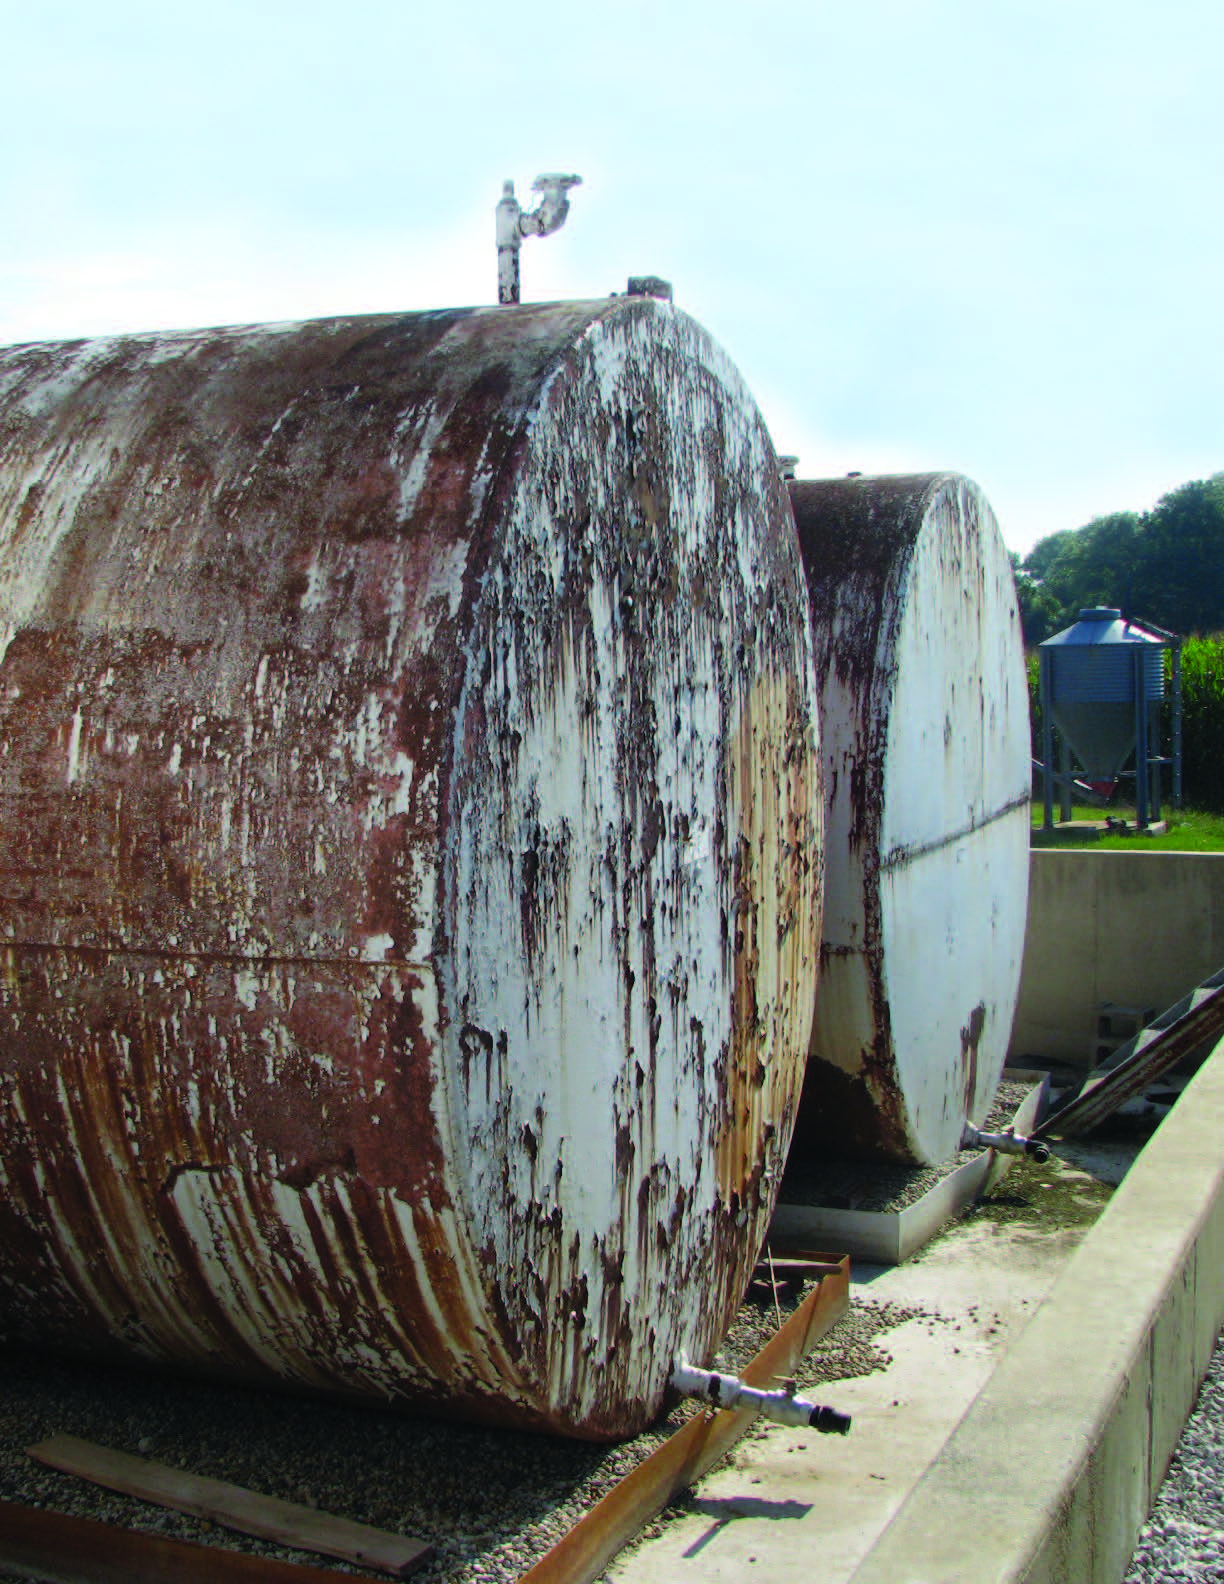
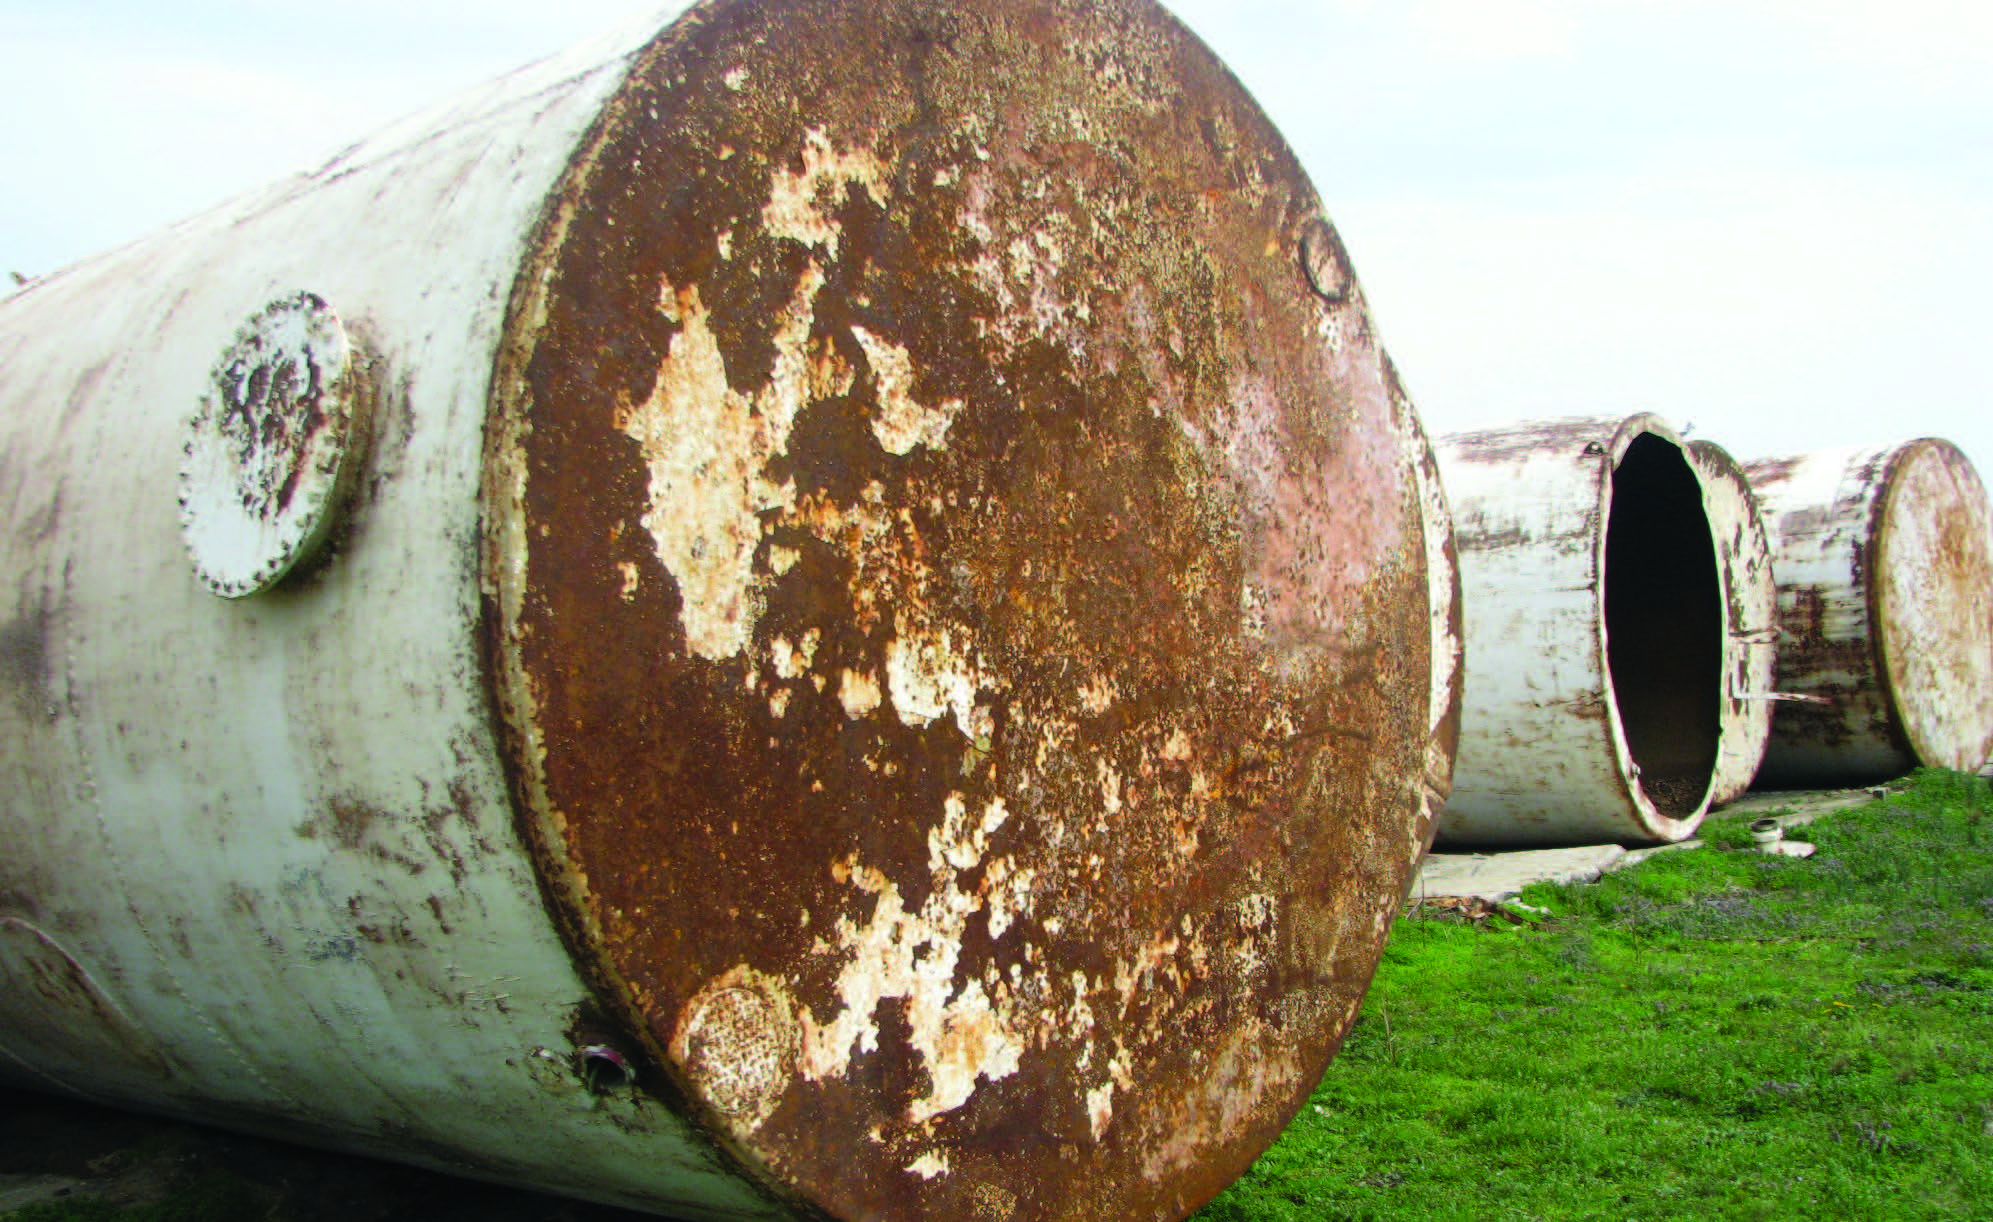
Be extremely careful when a used tank has a fresh coat of paint You should not purchase a tank that has been sitting on the ground unless you can inspect the bottom, because it may have a serious rust problem.
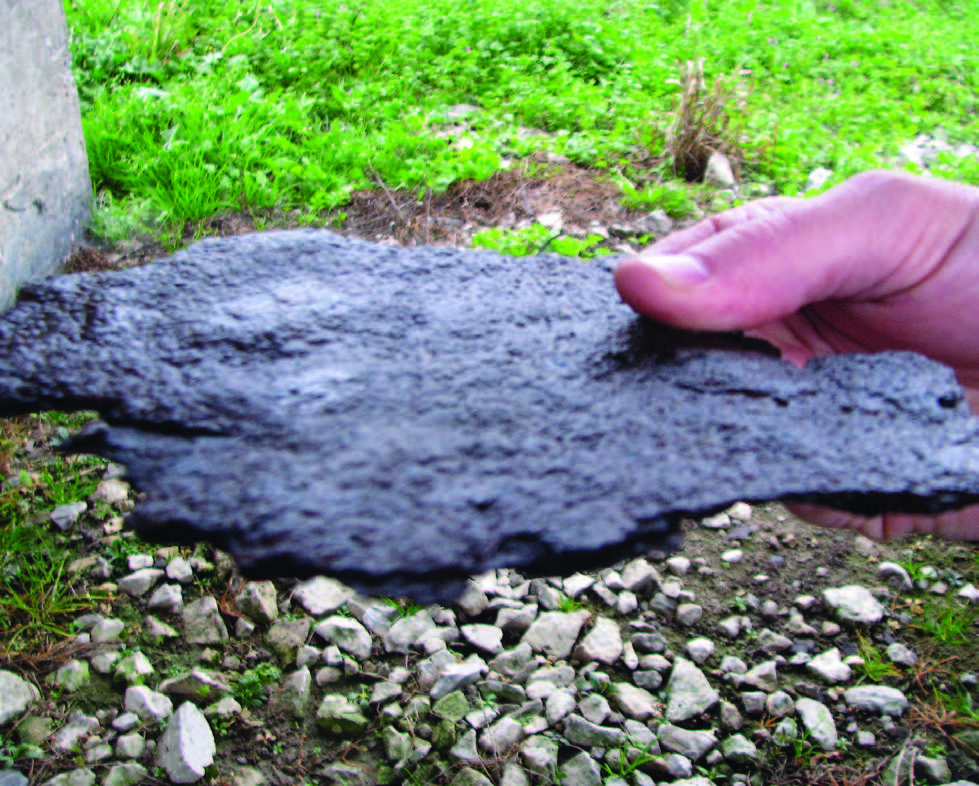
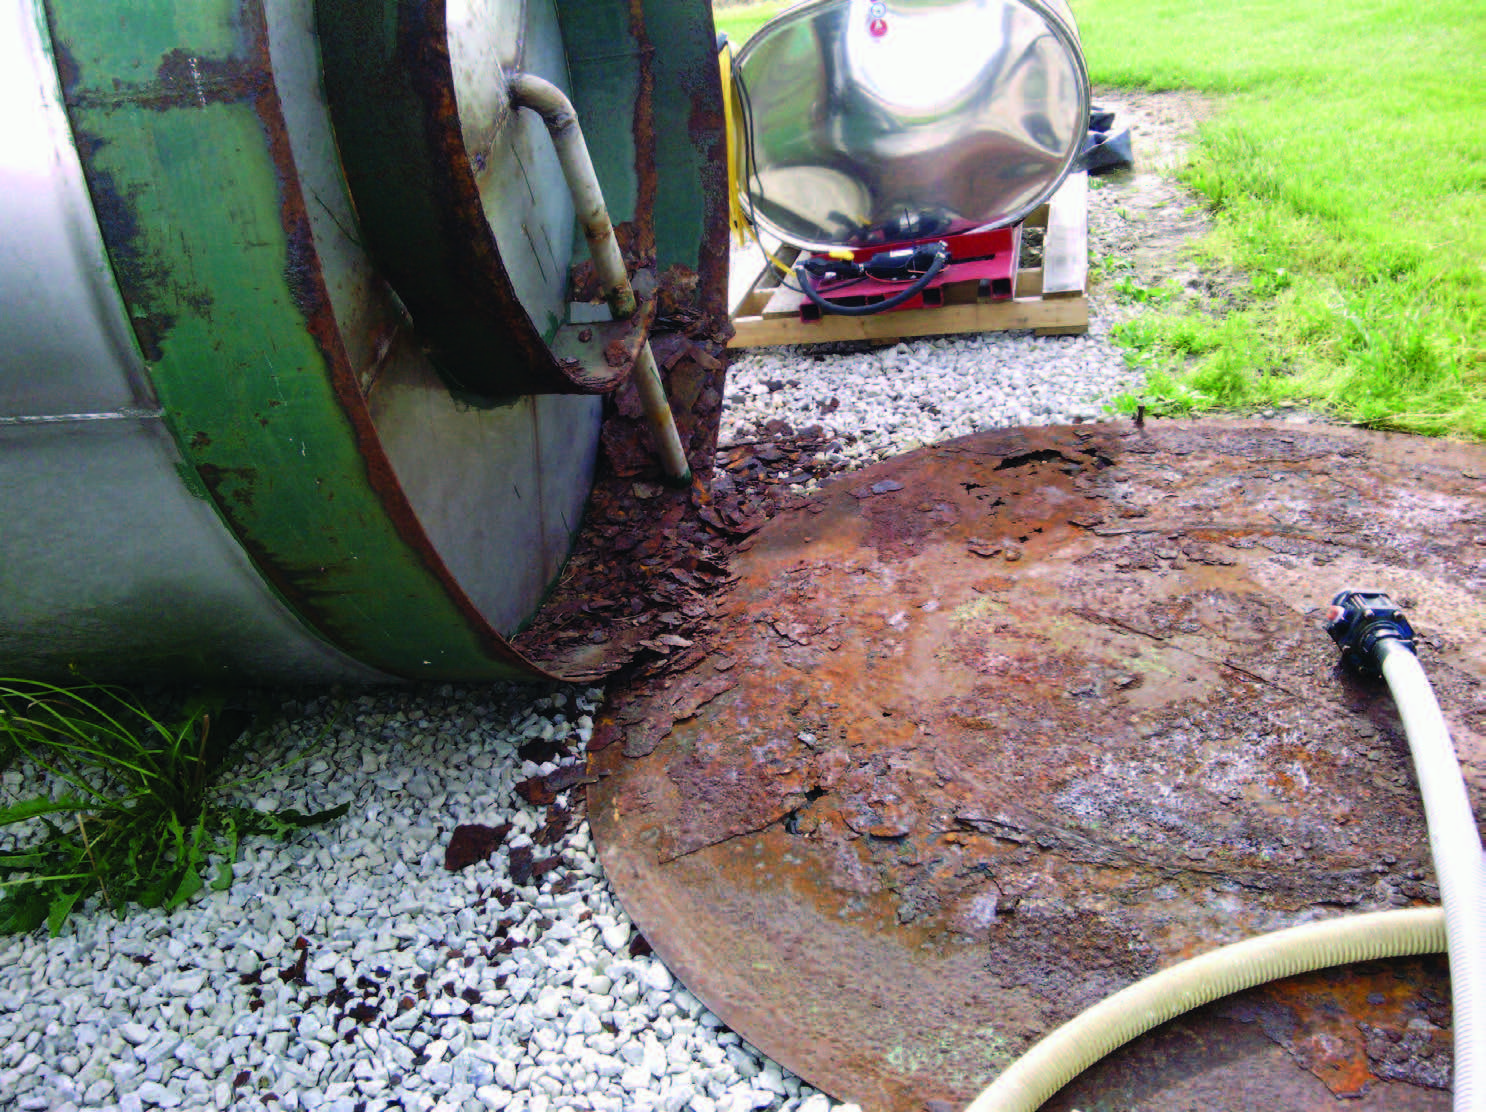
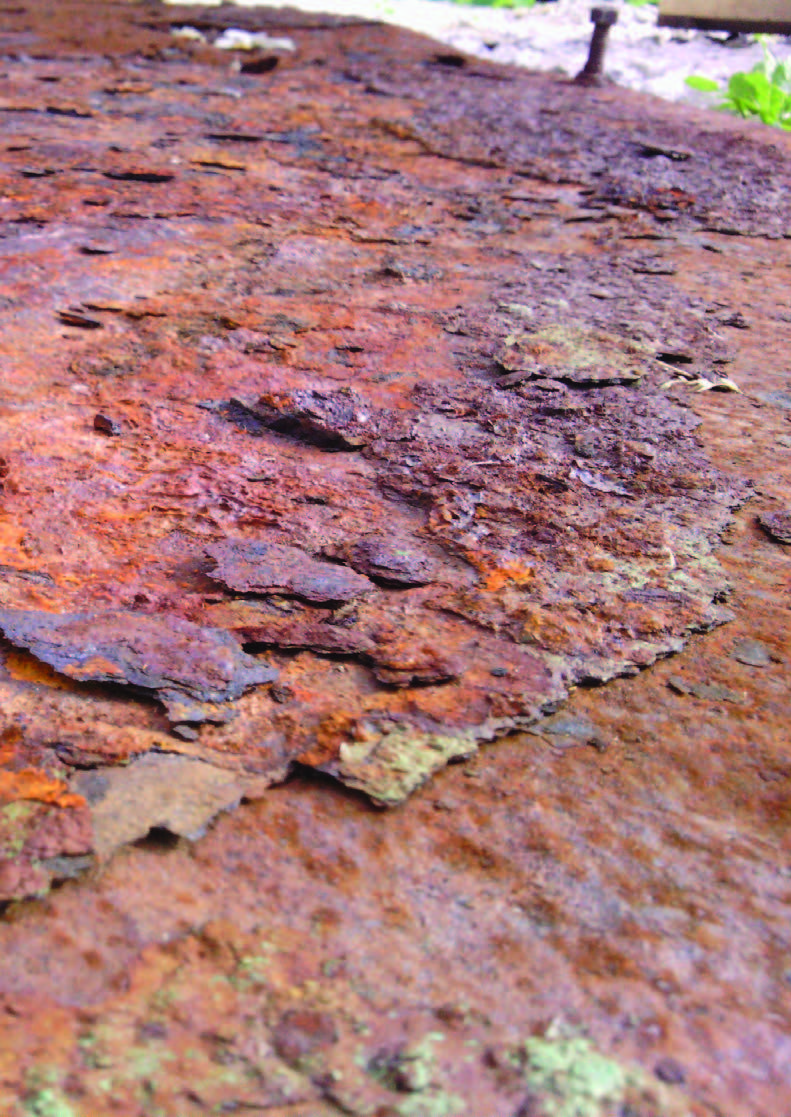
This 15,000 gallon used tank was thought to be in good condition. However, it had been sitting on the ground and the steel on the floor deteriorated. You can peel layers of rusted steel from the tank. The tank is worthless for anything but scrap.
Tanks that have stored liquid potash see more corrosion than some other liquids. Liquid potash is like storing liquid salts. It is very hard on mild steel tanks.

The sidewall of this tank shows significant corrosion. The outside might look clean, but it would not be a good idea to purchase this used tank. Be wary — a fresh coat of paint can be hiding a rusted or unclean steel surface that will not function long.
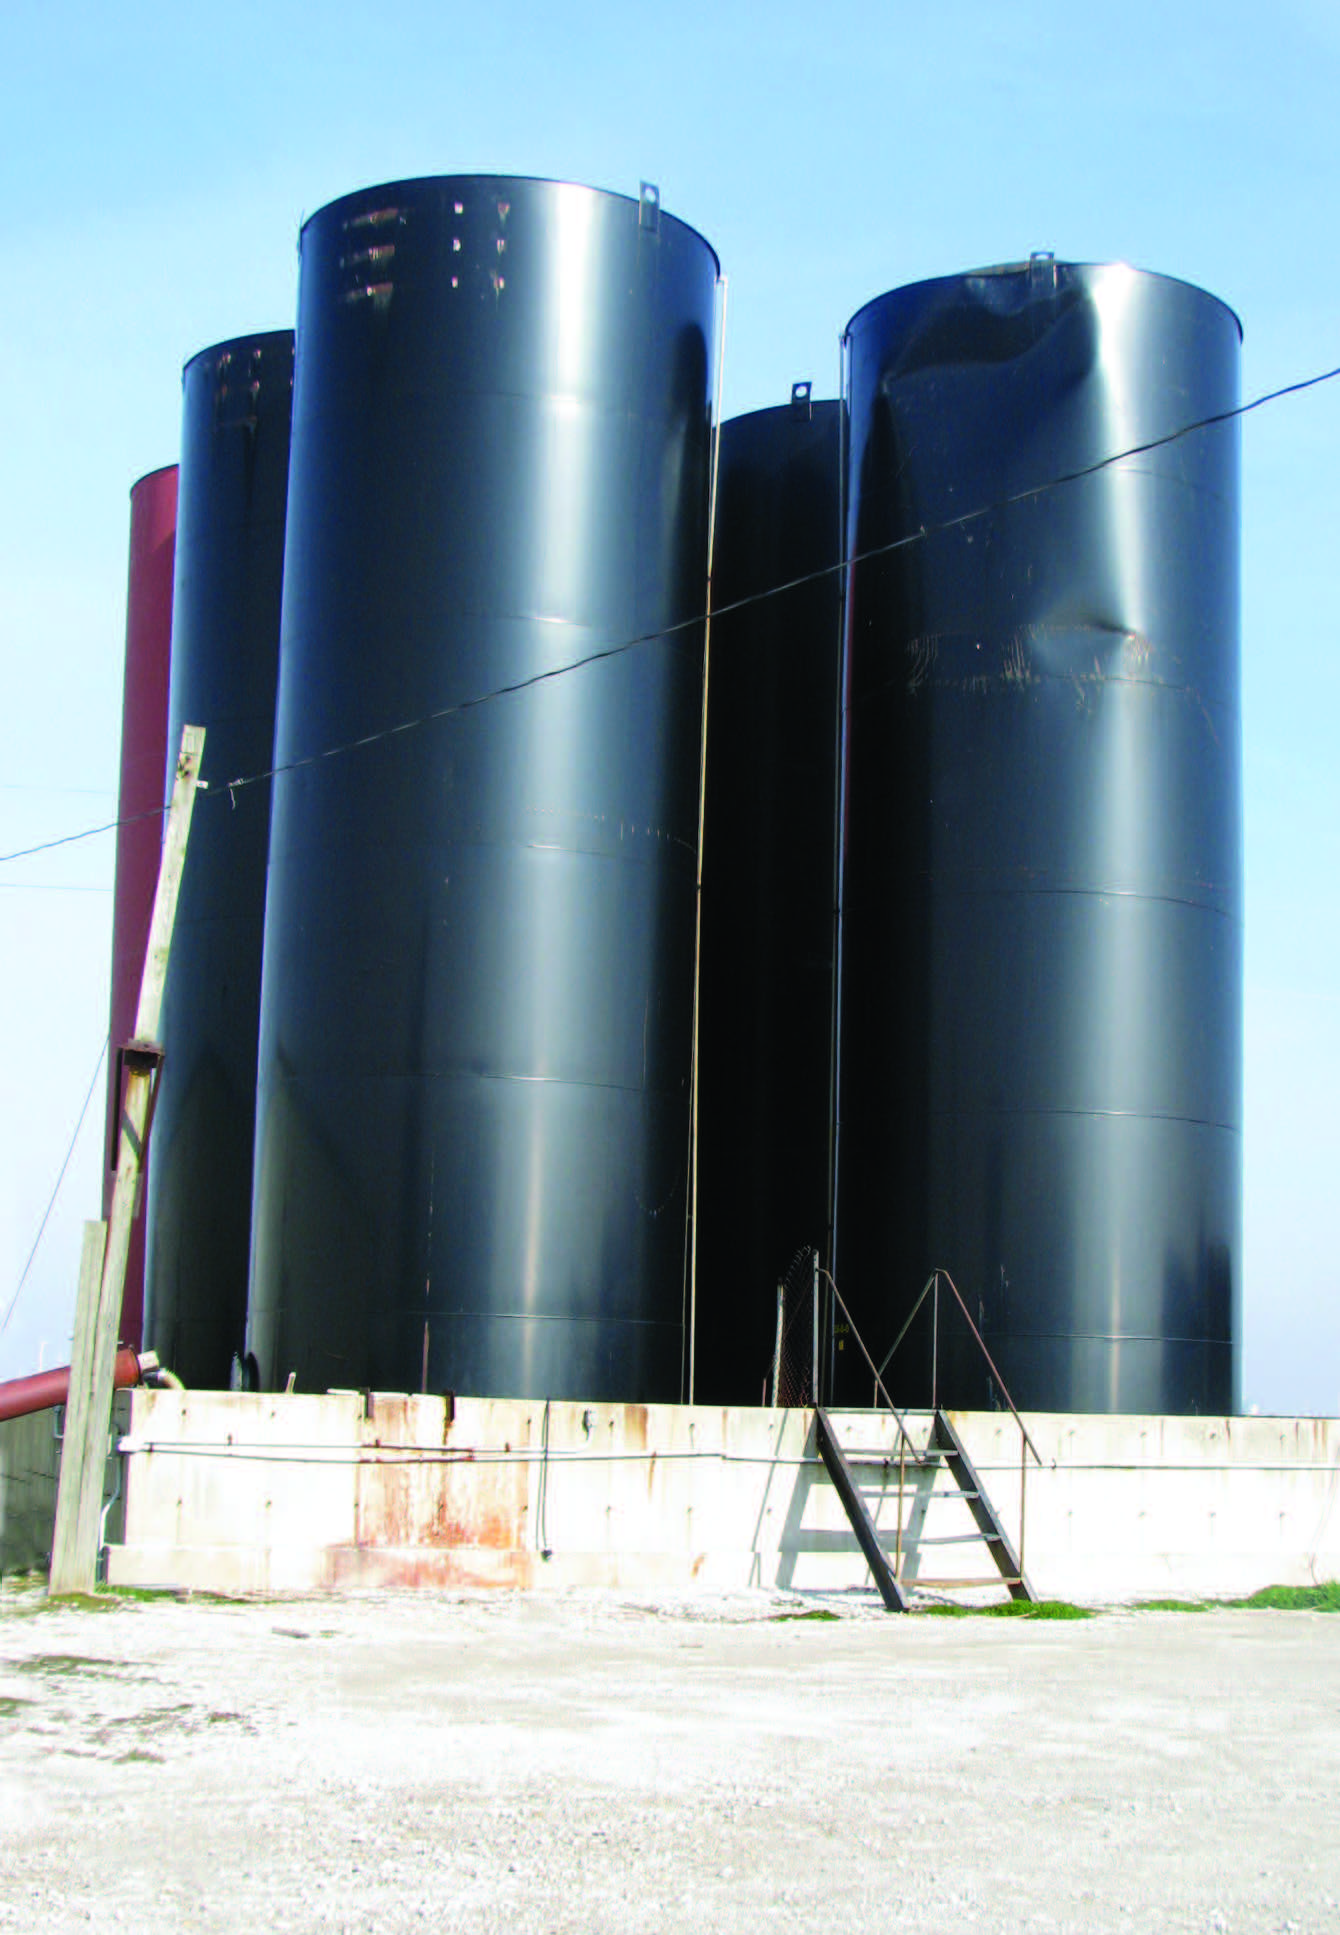
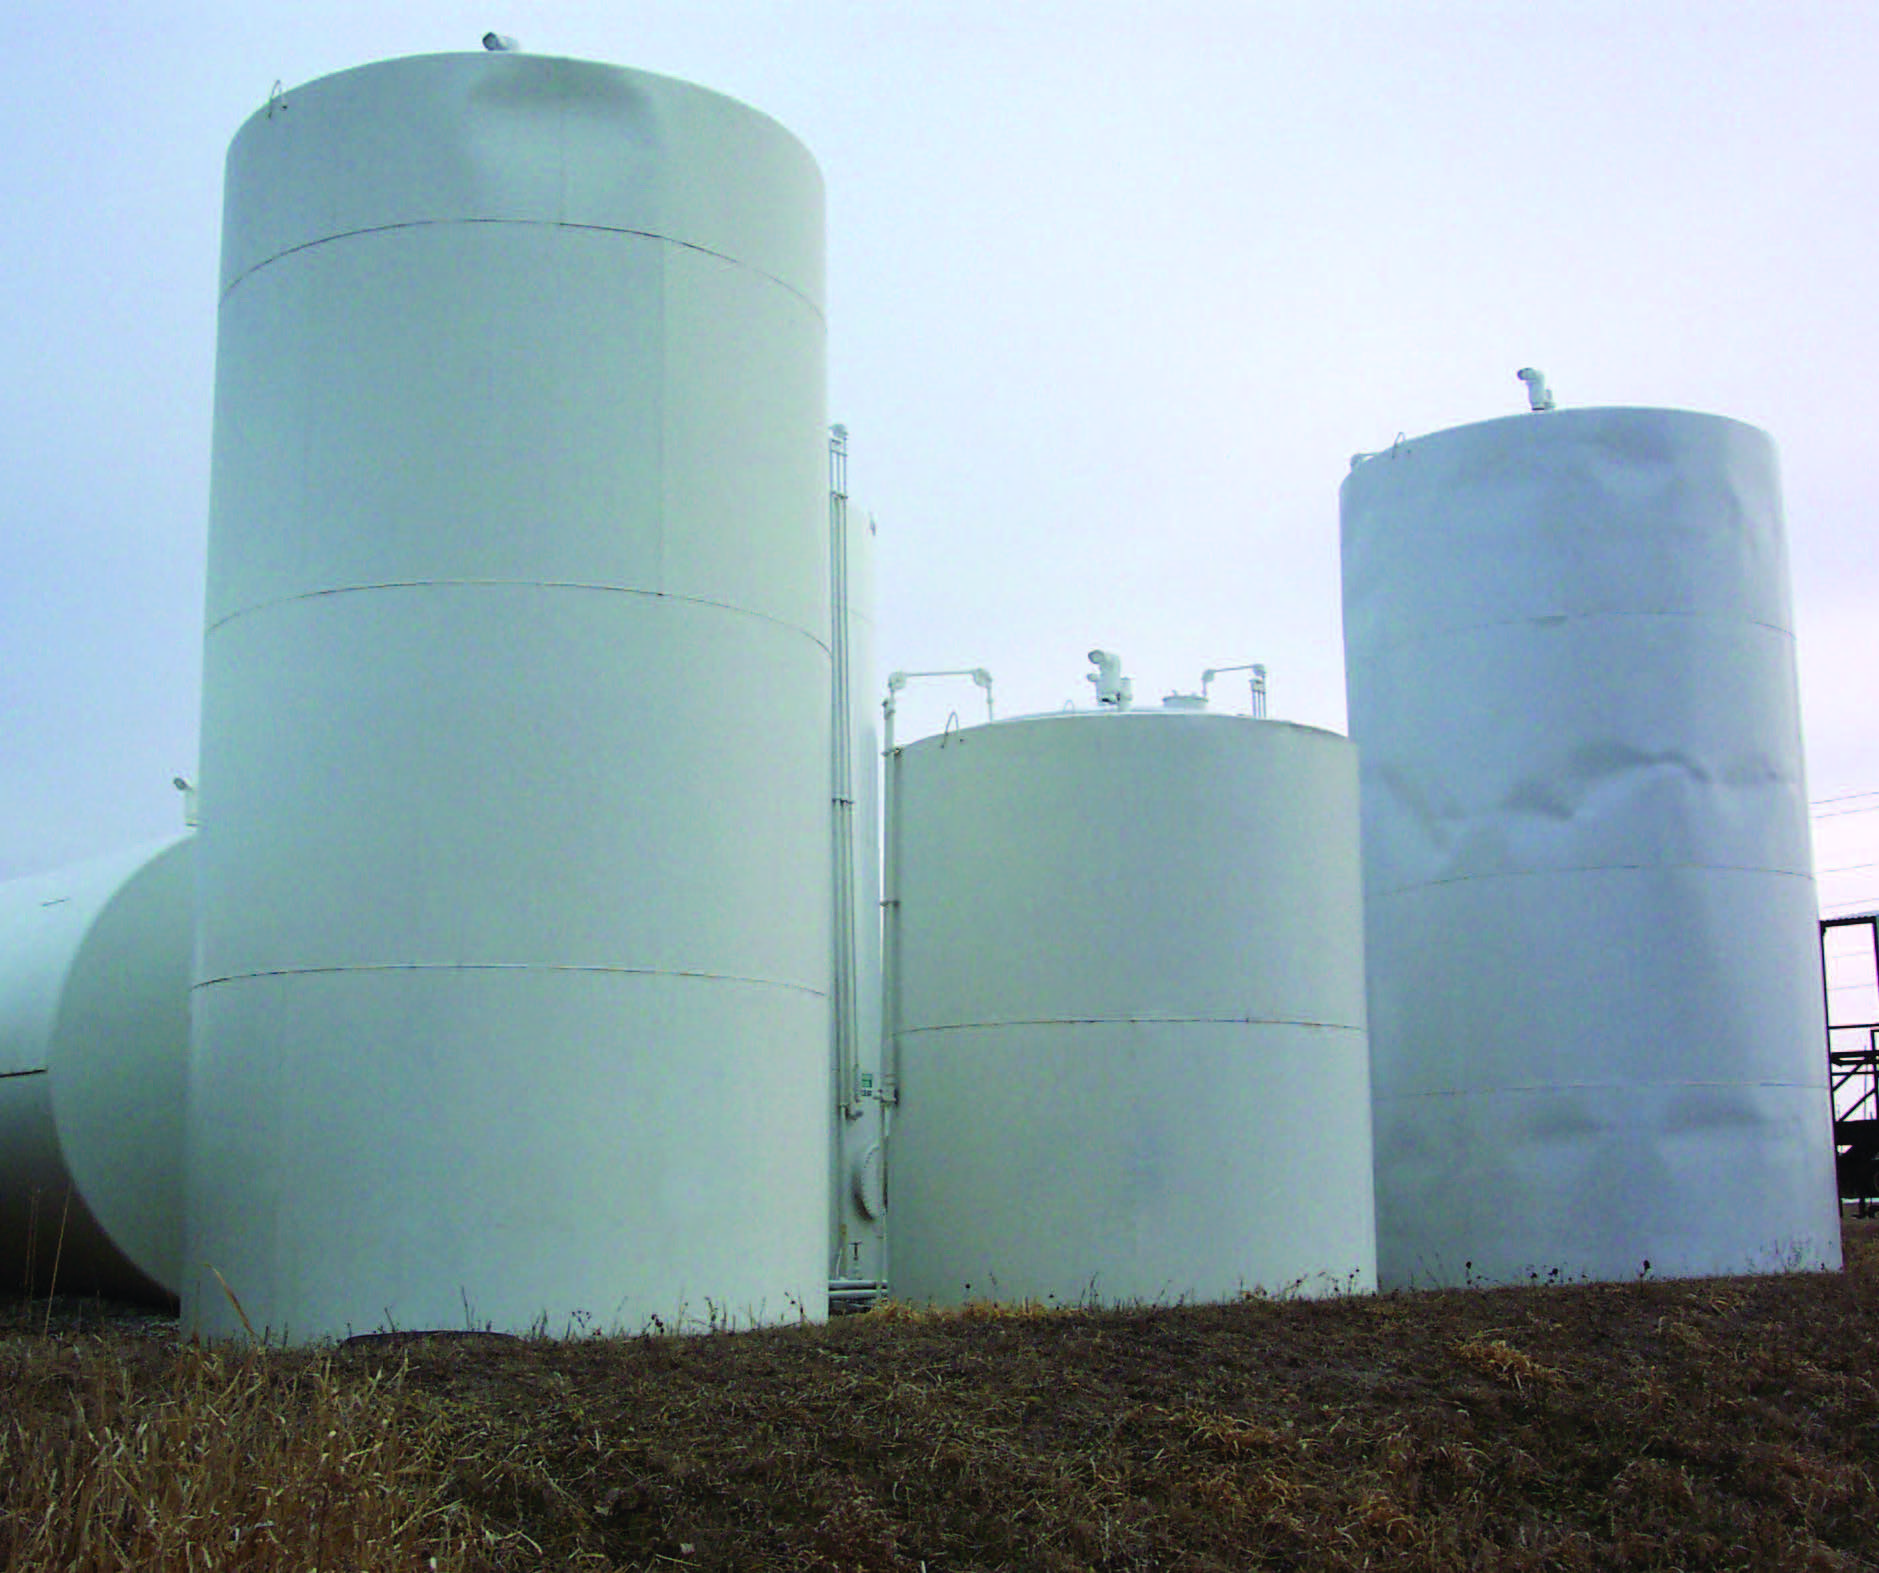
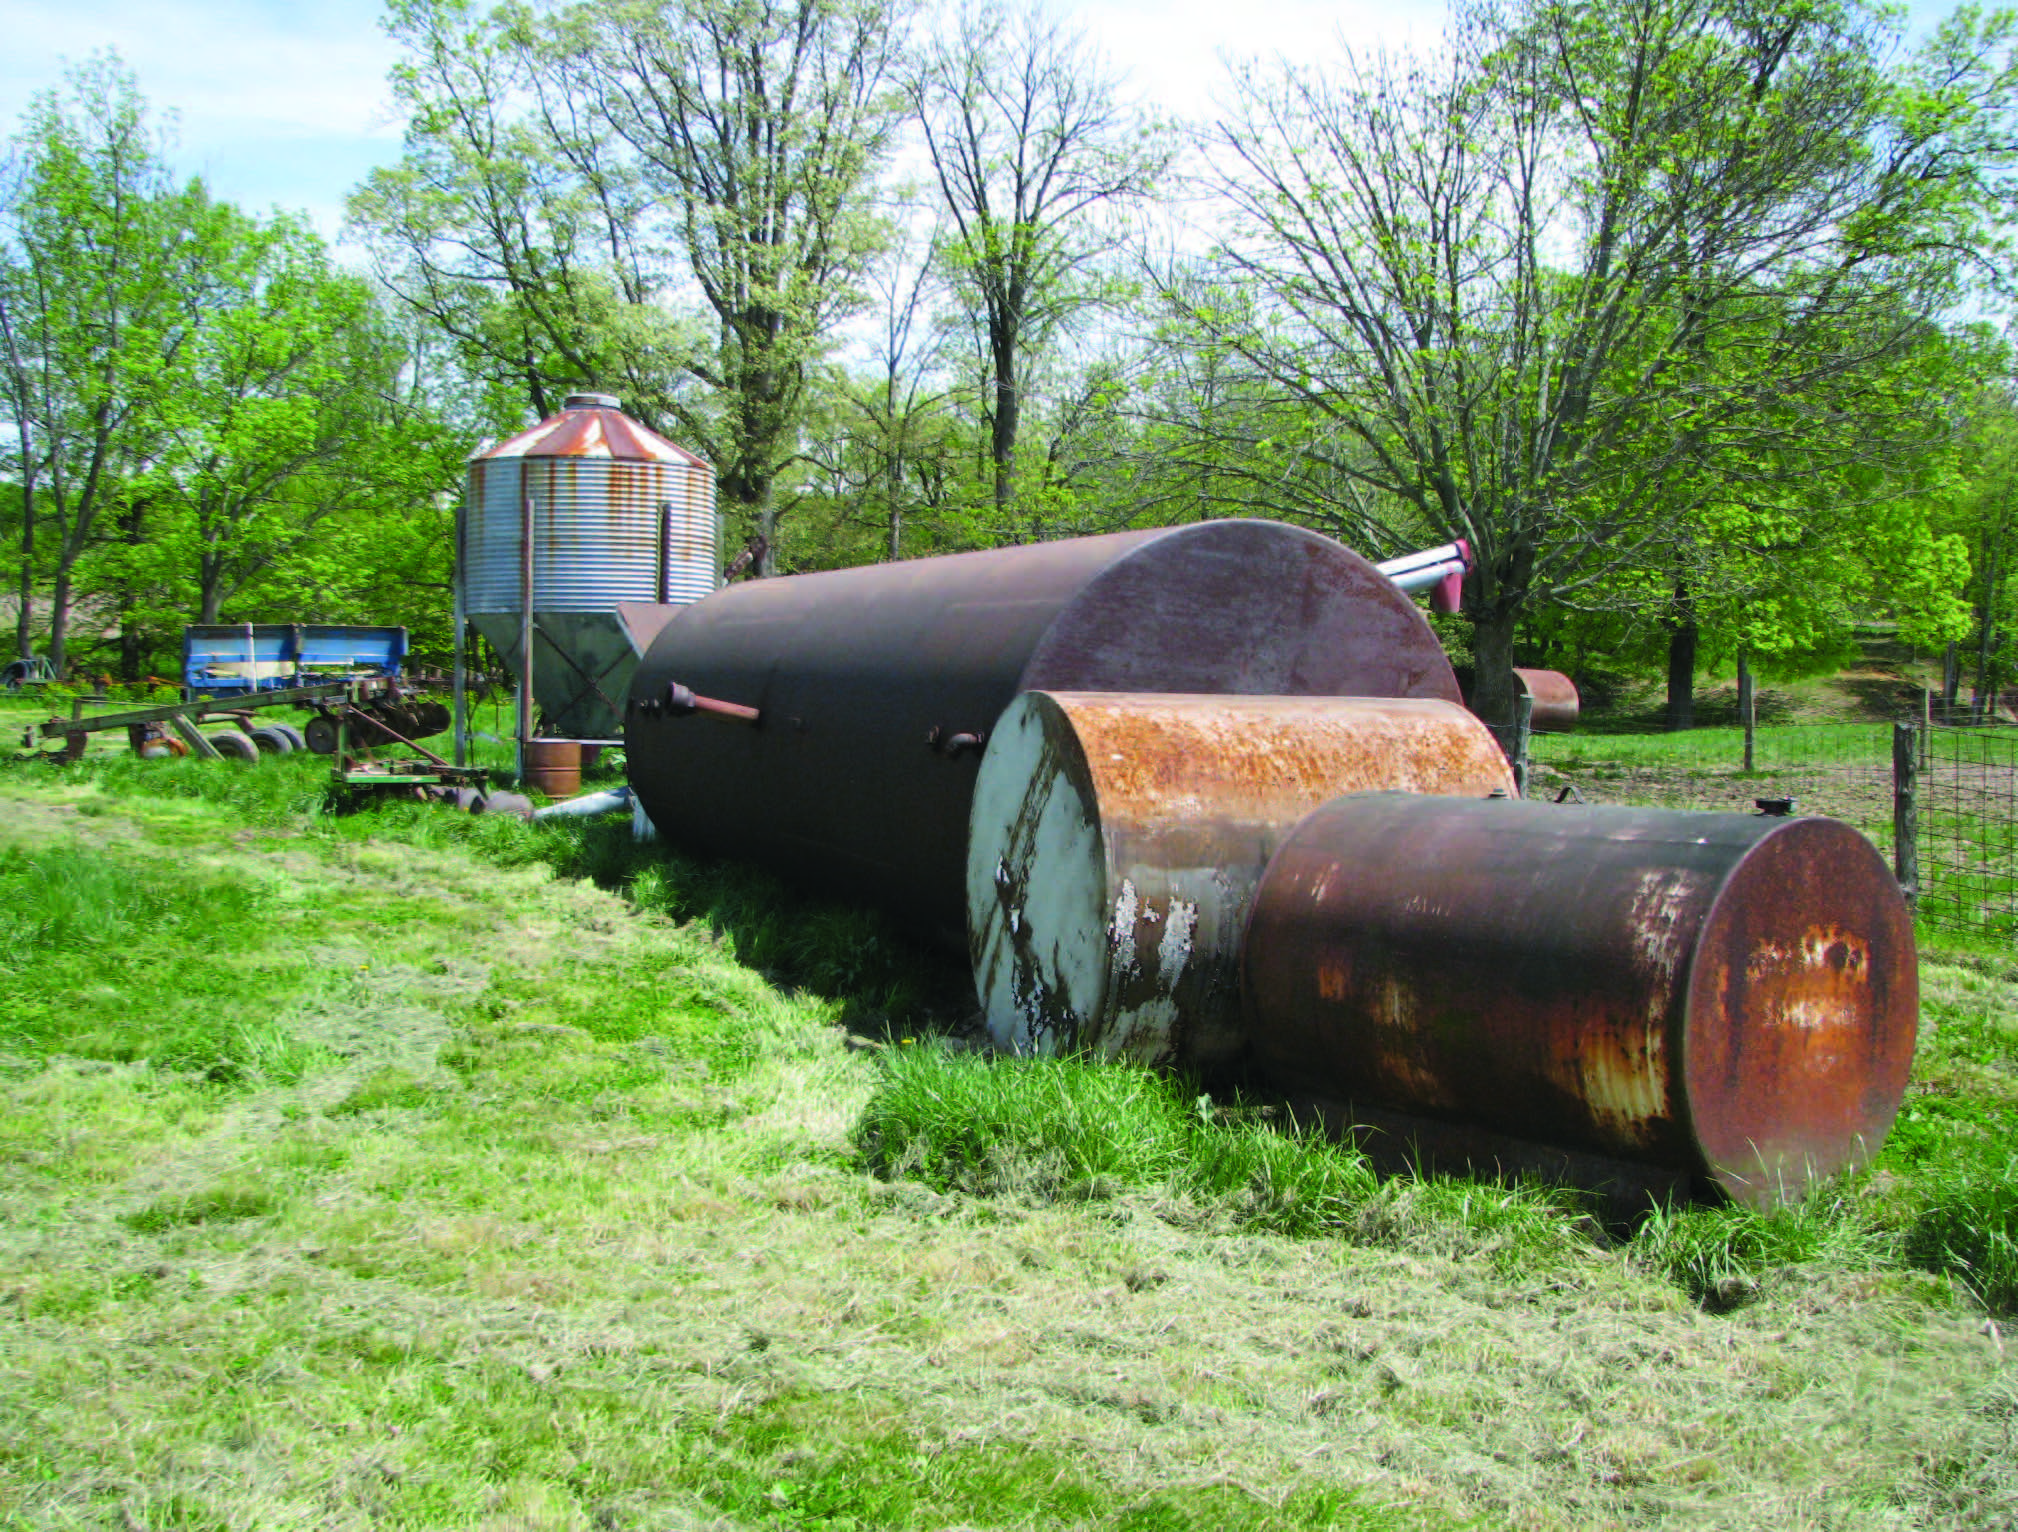
Used tanks waiting to be put in service.

Used tanks can be a good investment as long as you know the condition of the tanks inside and out.
A fresh coat of paint will make a tank look good from the outside, but it’s the inside that really counts When you inspect a mild steel tank, use a strong flashlight inside the tank and scan the floor and walls for pitting The severity of the pitting will be a key to knowing whether you should buy the tank.
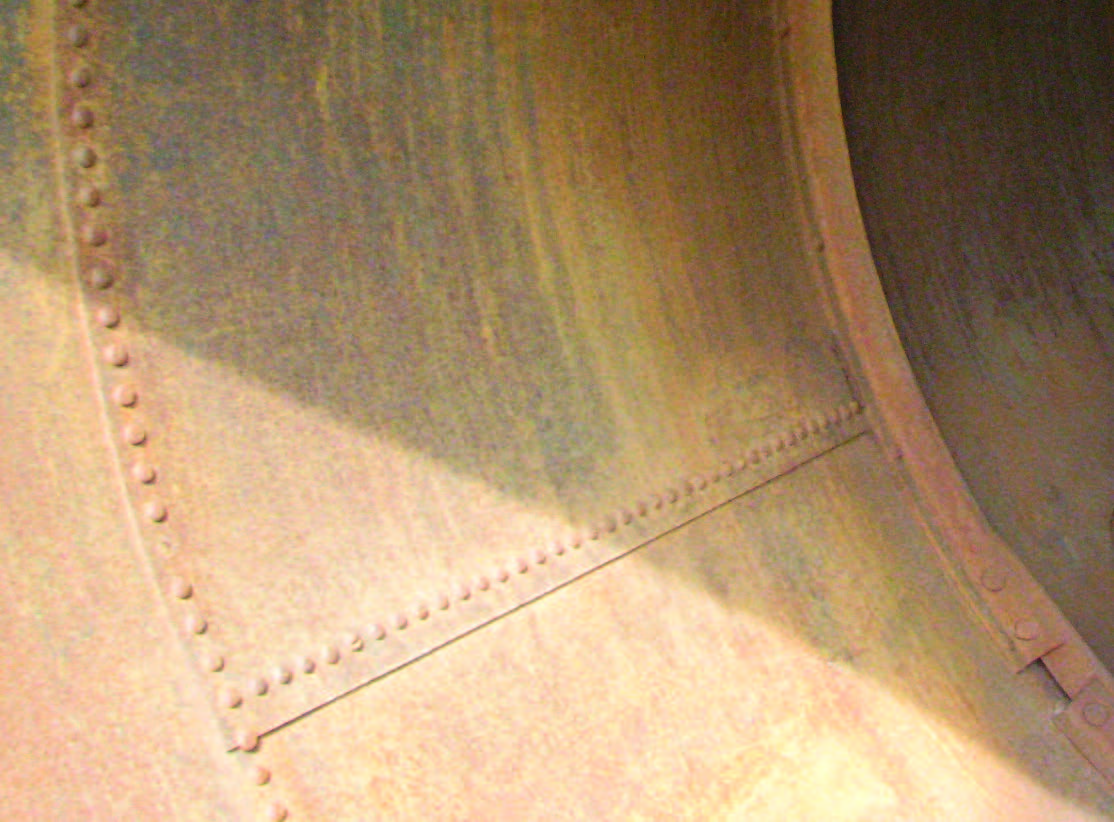
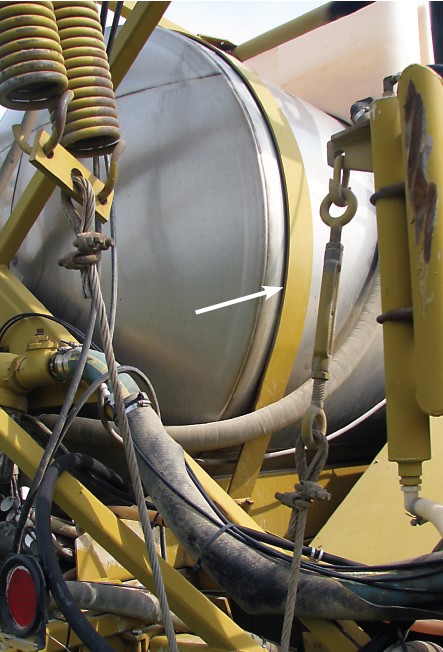
A tank with rivets was probably made before or during World War II. The arrow points to a missing rivet. It is important to thoroughly inspect an old tank like this before you buy it.
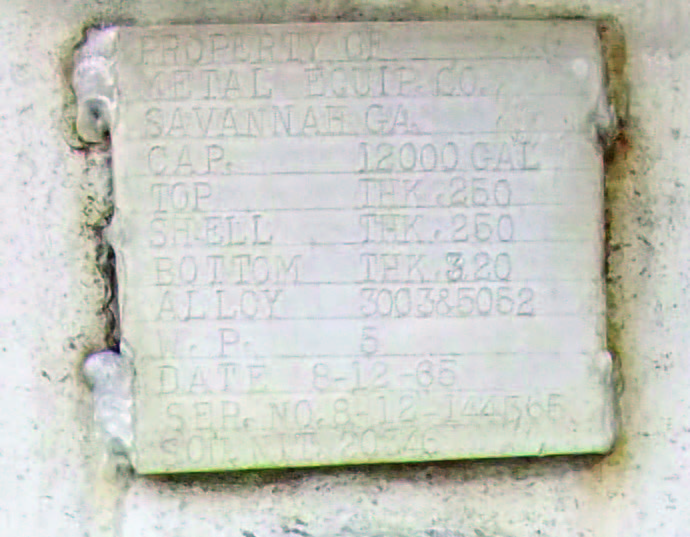
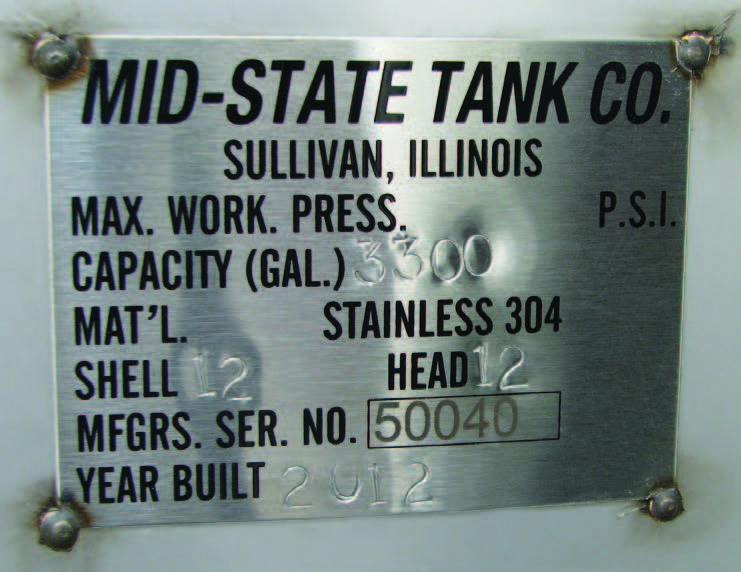
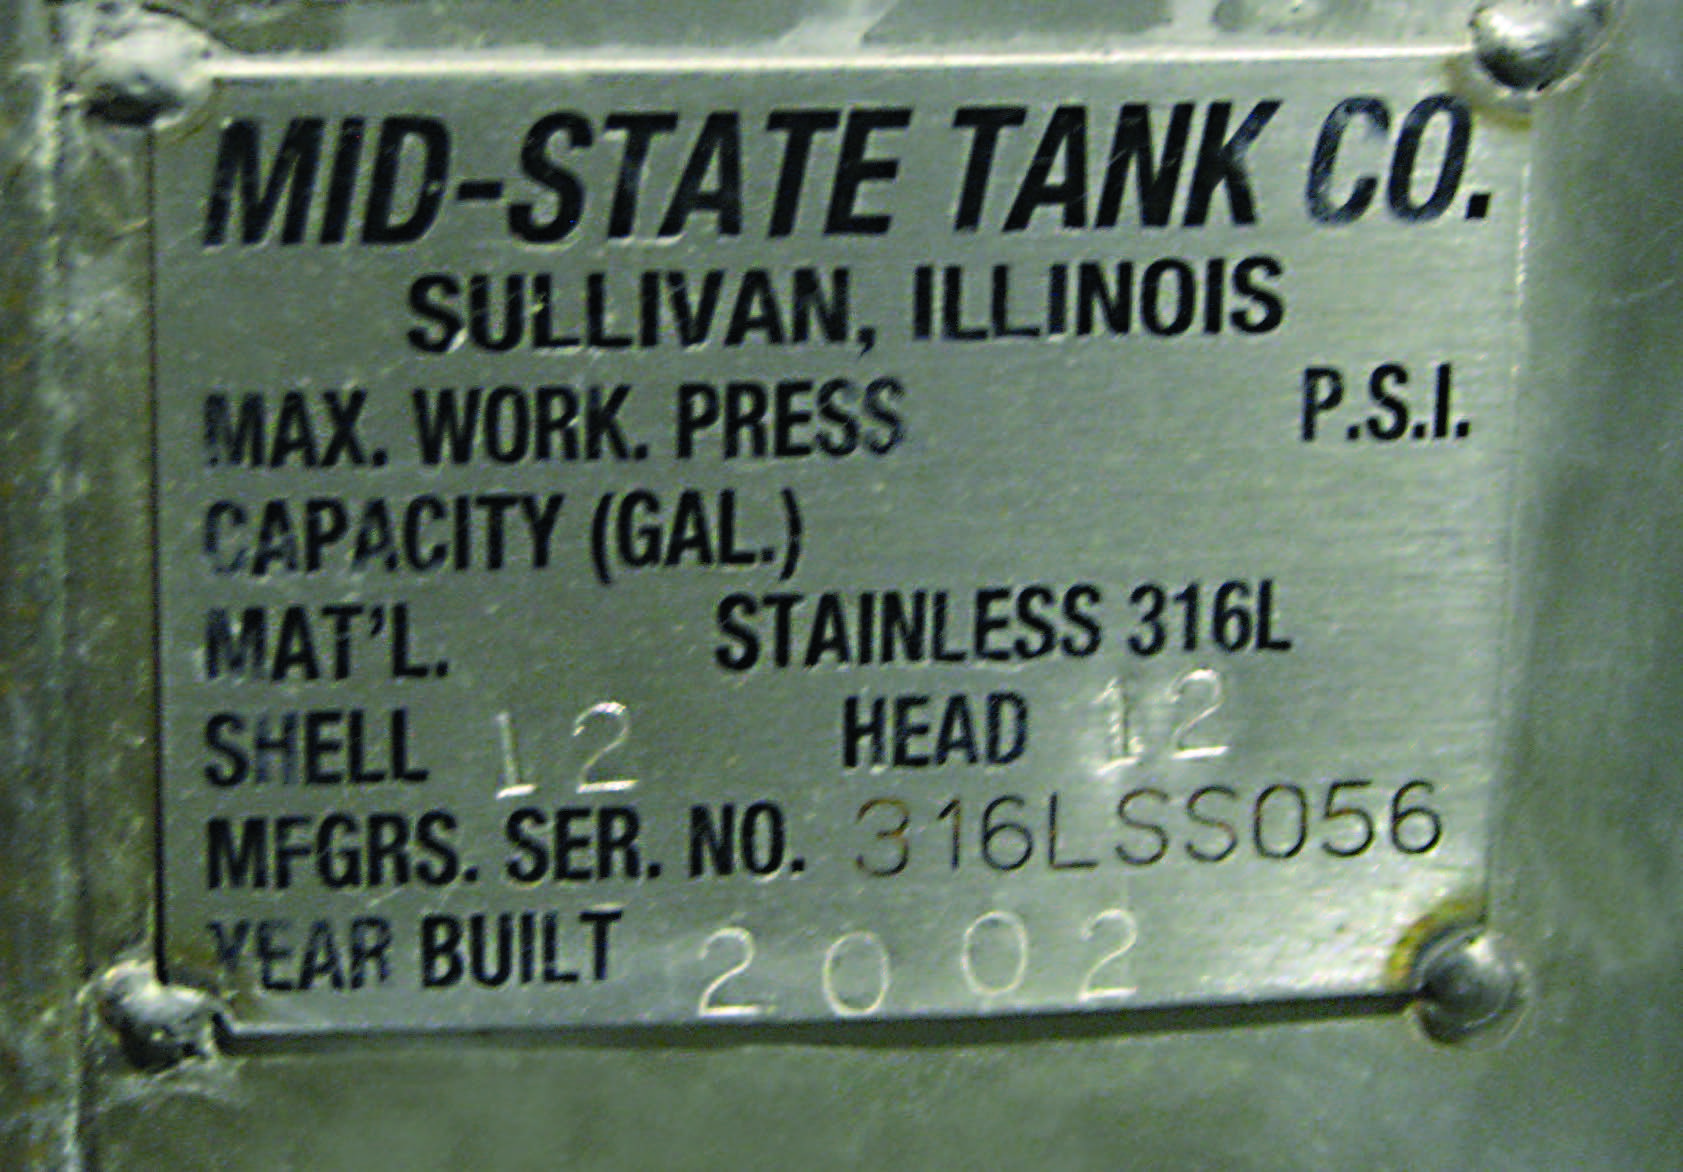
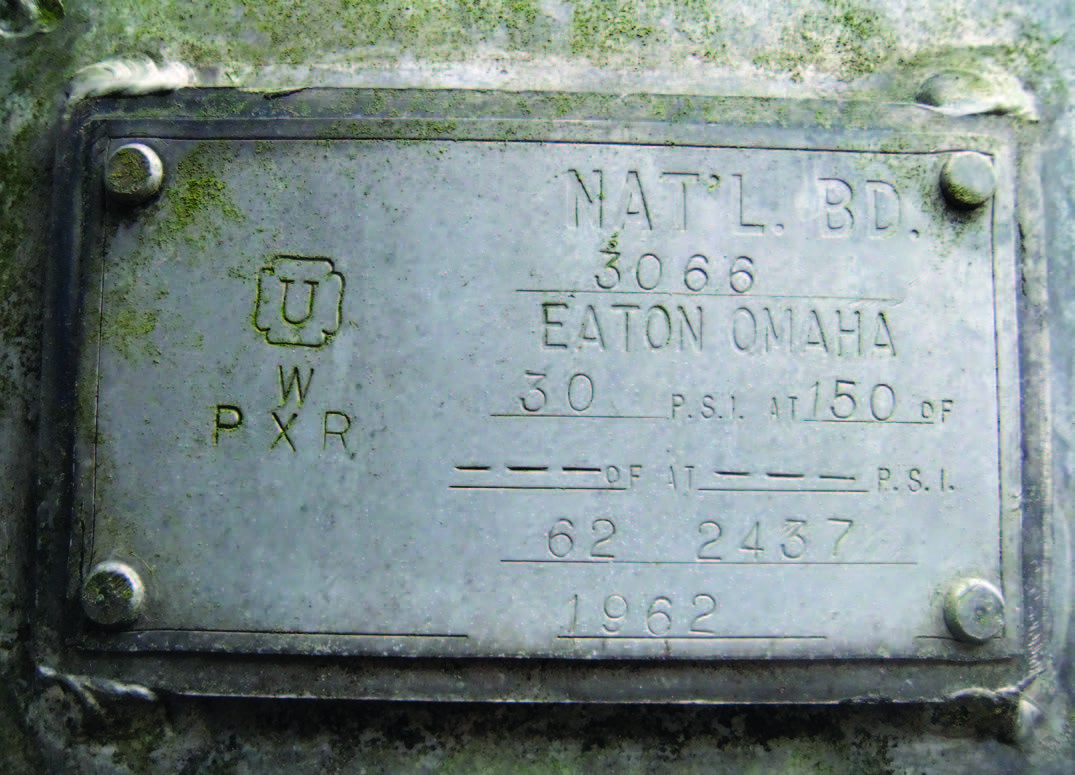
The identification plate on this tank (manufactured in 1965) can tell you a lot about its construction.
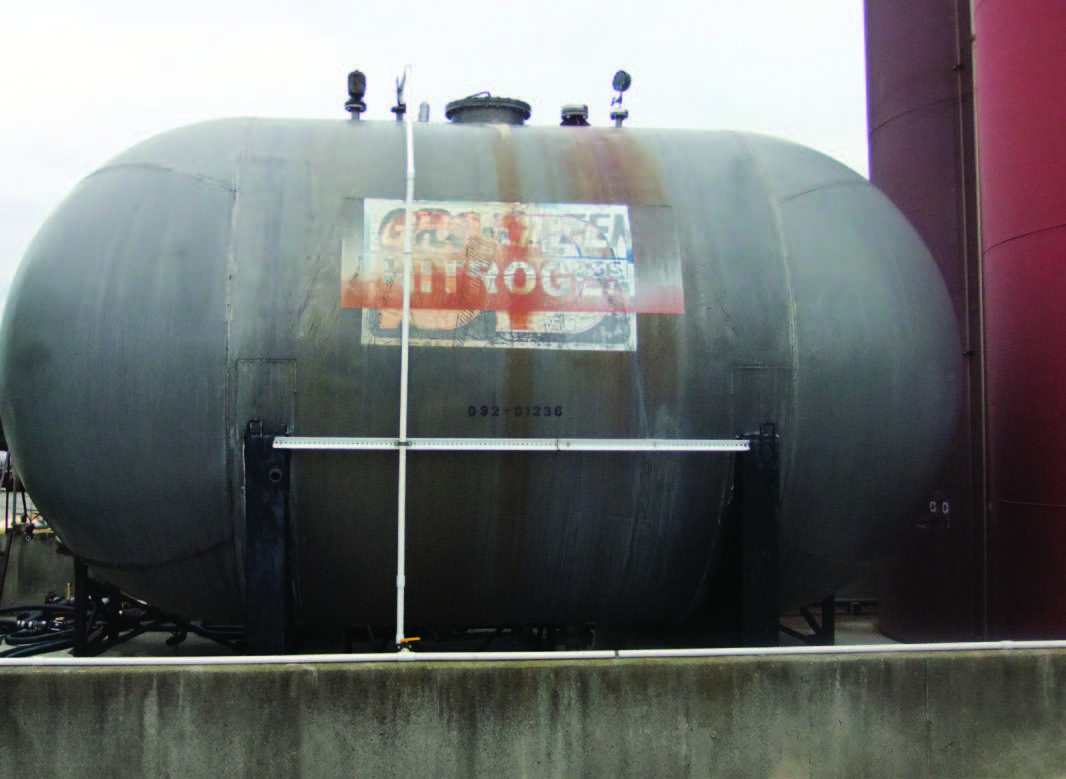
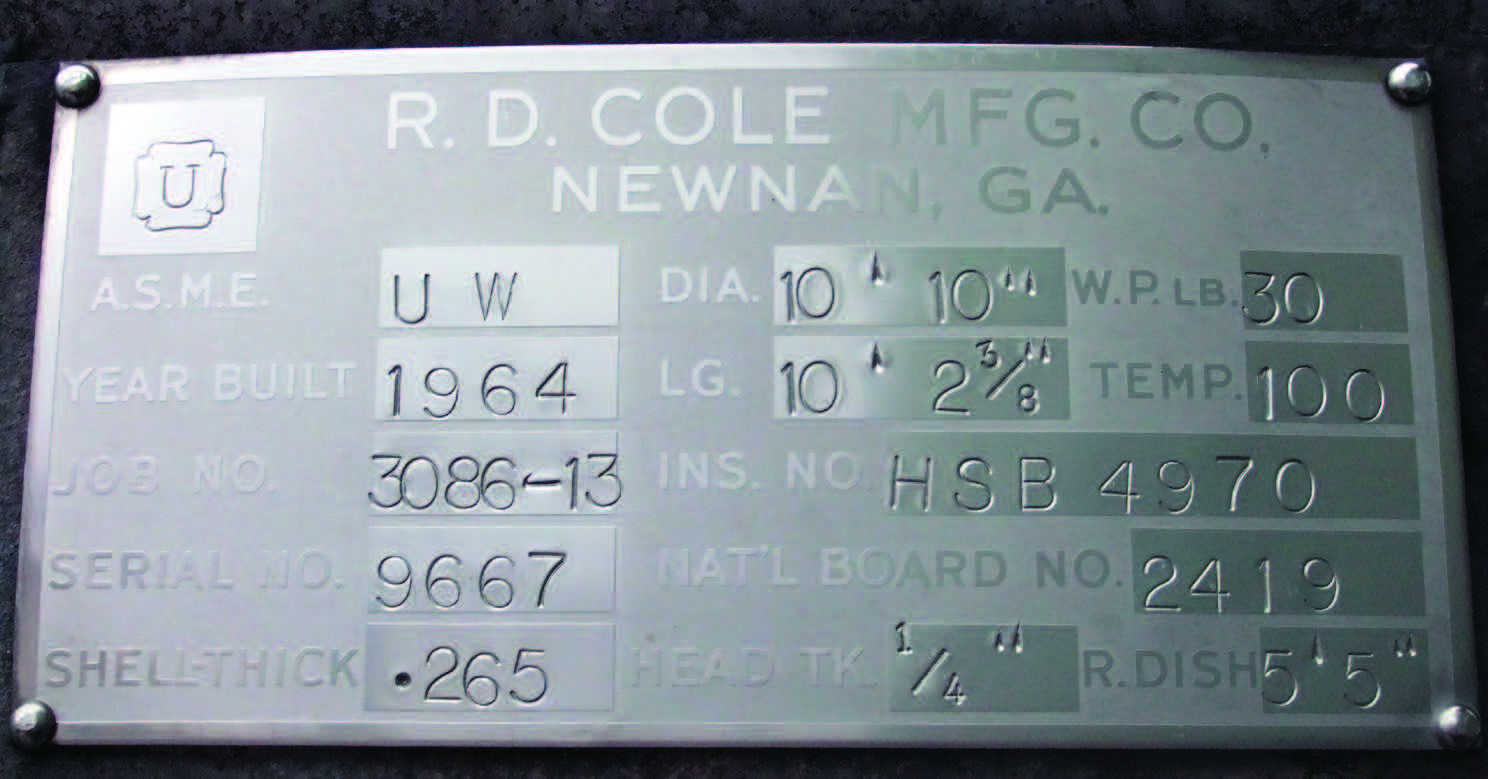
Based on the number of old decals, this tank that was built in 1964 and has been through many owners. The National Board of Boiler and Pressure Vessel Inspectors (National Board) identification number indicates the tank was built as a pressurized vessel. The concern is whether or not this is an aluminum tank. For a fee, the National Board can provide you with a tank specification sheet as long as the manufacturer’s name and the board number are available. Call the National Board at 614 888 8320.
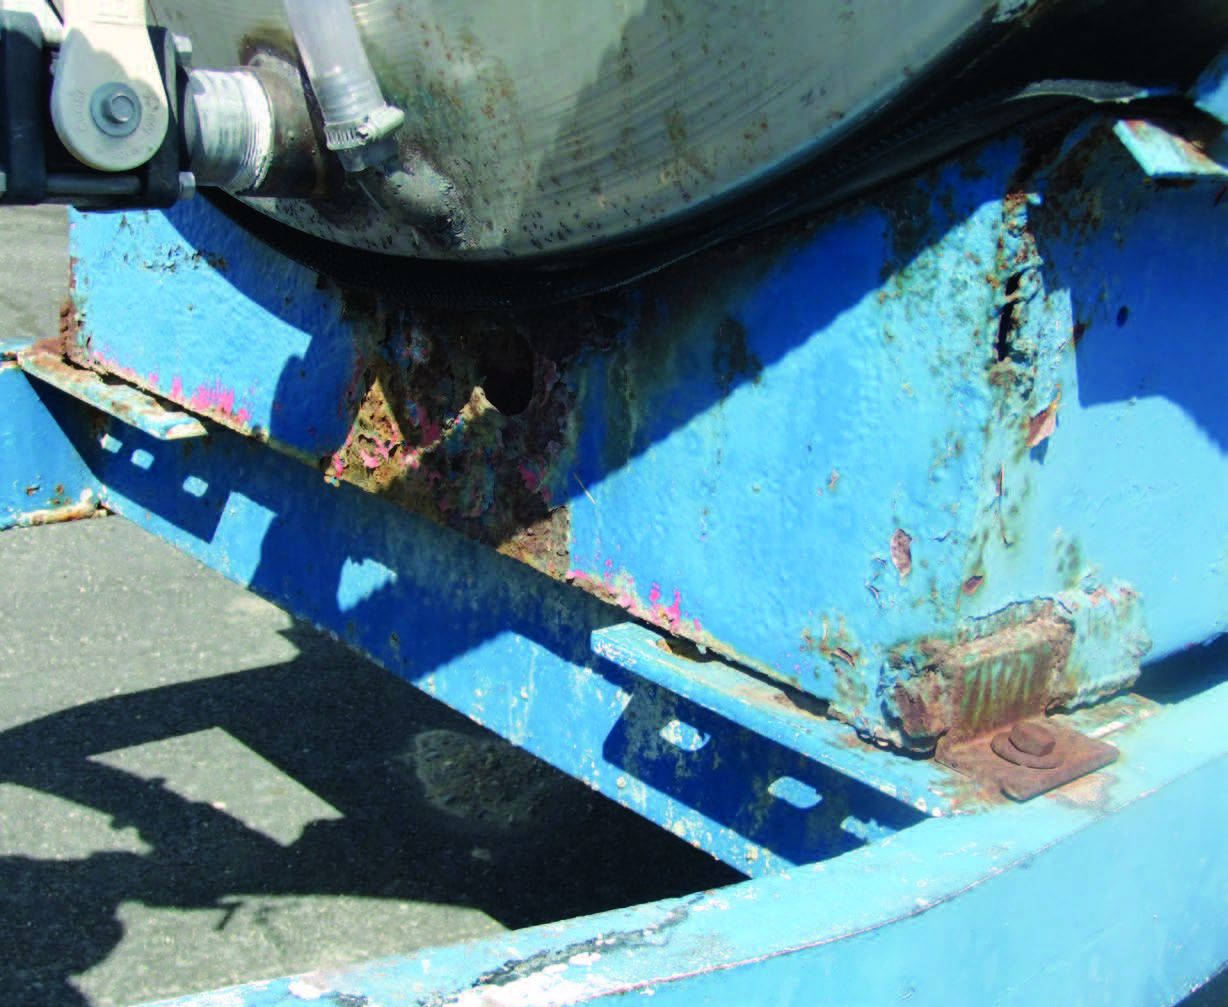
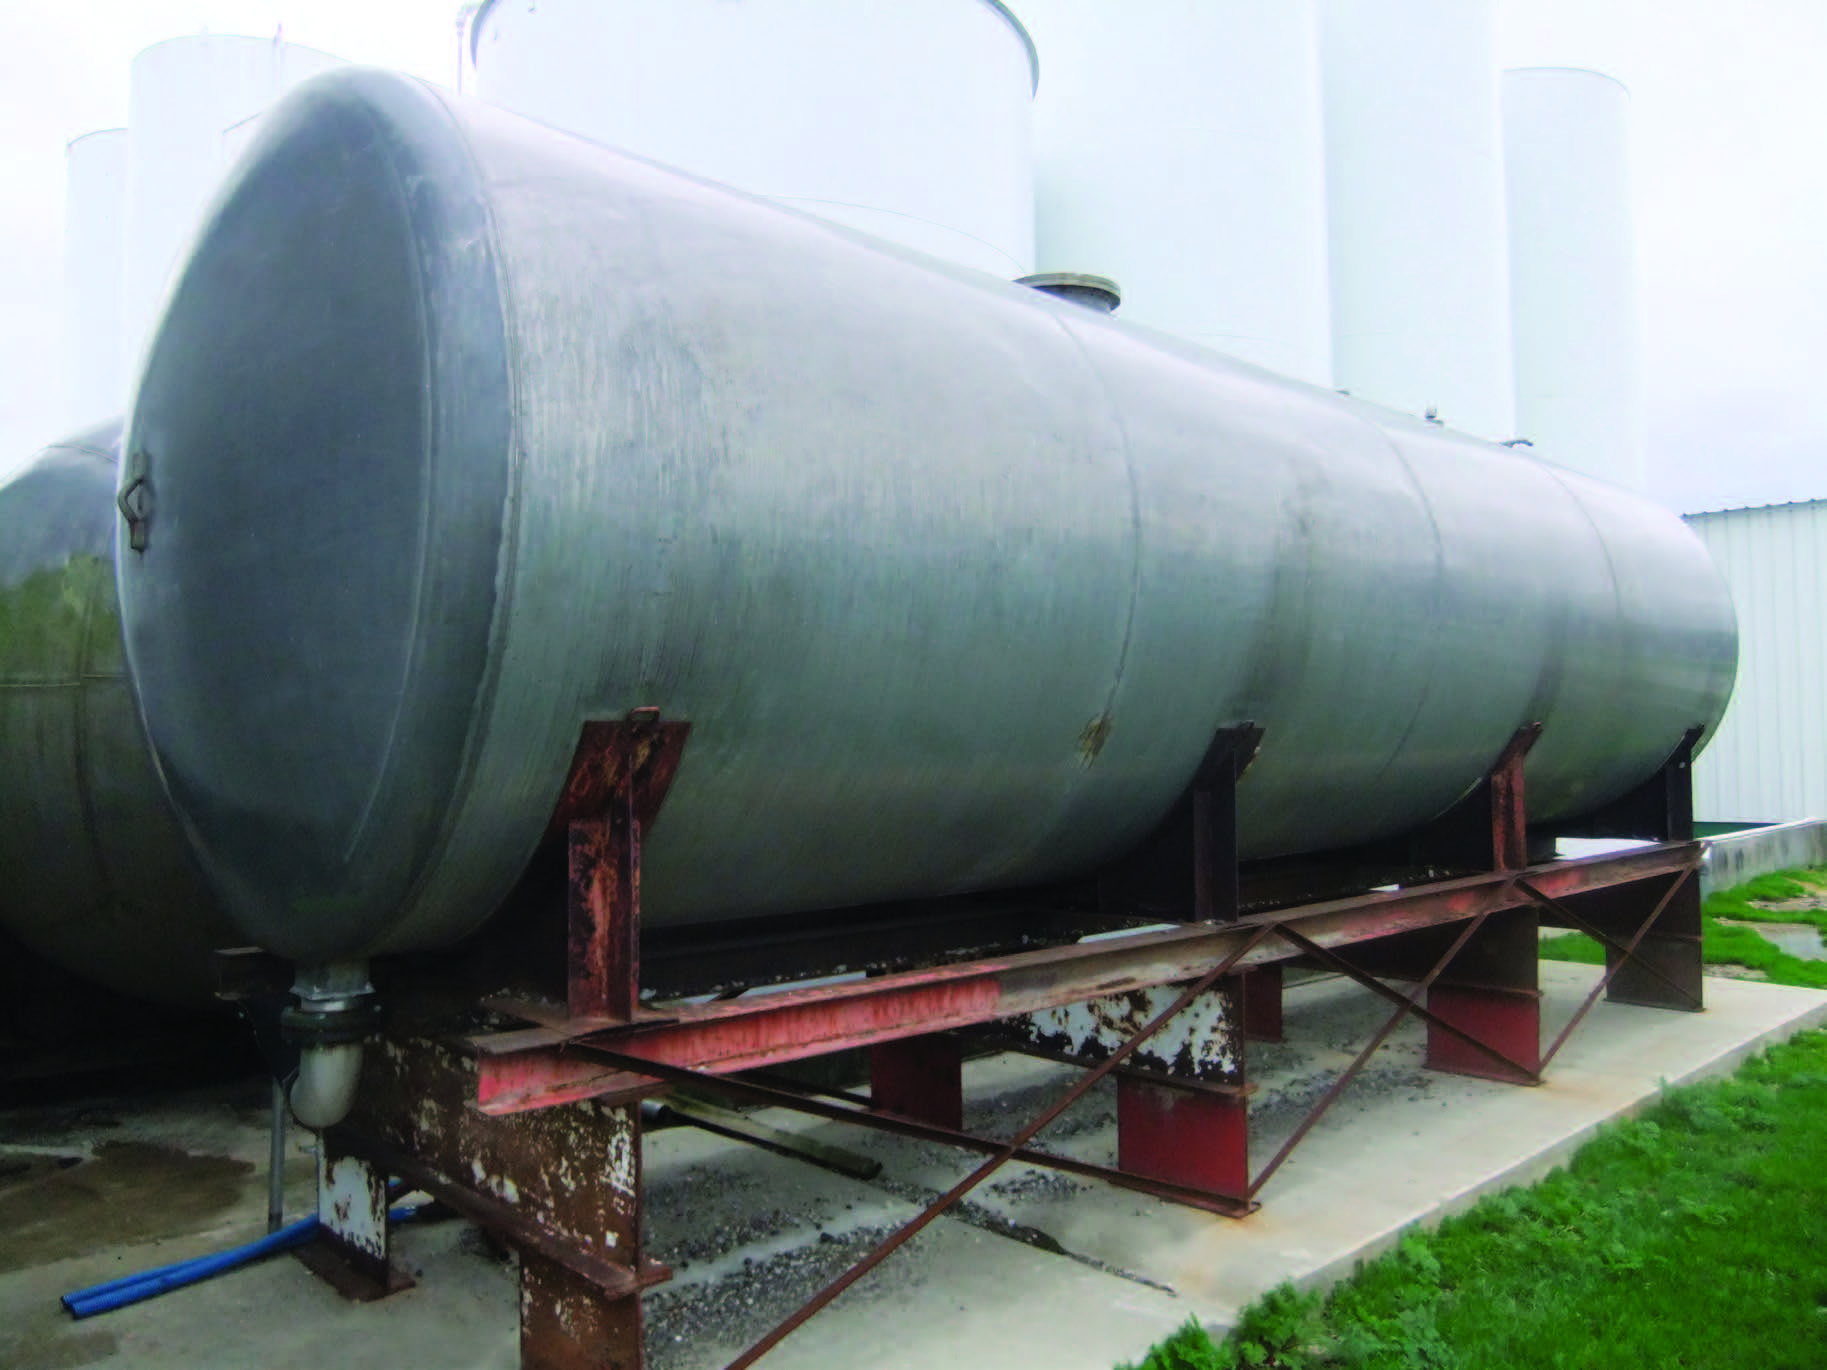
This was a vertical tank that stored 28 percent fertilizer. The base was made of mild steel. The tank leaked at a weld and poured under the base long enough to rust it out. If you buy a used vertical tank, make sure the deal is contingent on the base being solid when it is moved.
A well maintained mild steel tank can last for decades. With an appropriate inspection, used tanks offer tremendous value.
What to Look for When Buying a Used Stainless Steel Tank
Used stainless steel tanks are in great demand But without the identification plate attached to the tank, it may be difficult to distinguish a stainless steel tank from a mild steel one Distinguishing stainless from mild steel is even more complicated if the previous owner painted the tank.
- Here are a few tips that can help you distinguish stainless steel from mild steel:
- Upright storage tanks that hold more than 10,000 gallons are usually made of mild steel.
- See what steel is listed on the tank’s data plate.
- A magnet is strongly attracted to mild steel. A magnet will not adhere to 304 stainless There may be a weak attraction for 316 stainless steel but nothing compared to mild steel.
- Depending on the finish and age of a stainless steel tank, galvanized steel can look similar Steel that has been galvanized has a zinc coating that reduces corrosion to the underlying steel A magnet will firmly attach itself to galvanized steel, much like it would to mild steel.
Before you buy a used stainless tank, consider the shell thickness Many of the used tanks you’ll see on the market were originally built for the food industry Food industry tanks are often built with lighter gauge metal (such as 12-gauge).
Lighter gauge steel may work well for fluids that weigh about the same as water For instance, milk weighs 8 2 pounds per gallon and beer weighs 8 4 pounds But heavier materials like fertilizers weigh about 11 pounds per gallon and may create a problem in light gauge tanks — especially if used for transport Check the plate on the tank to see if it provides the information about the gauge If not, call the manufacturer and use the serial number to determine what gauge steel was used on the tank when new.
Never assume that a stainless tank wrapped with insulation is in good shape Insulation wrapped around a tank can hide significant problems In some cases, insulation can react with water to produce hydrochloric acid, which in turn cracks the tank’s surface Without pulling the insulation away from the tank, it is nearly impossible to thoroughly inspect the tank.
If there are stress cracks, a dye penetrant tank kit will help you determine how deep the cracks may be Dye penetrant also may expose cracks that you cannot see.
A vacuum box is an instrument that runs on electricity and requires you to apply soapy water to the suspected area on the tank If it pulls air, it will show bubbles coming from the crack This device works on any steel or fiberglass tank If it pulls air through the crack, there is usually a leak.
Other areas of the tank to inspect include:
- The baffles
- The manway (if accessible by a ladder)
- The sparger line or rinse line (if the tank has one)
Before purchasing a used tank, consider a professional service to evaluate the condition of the steel tanks you intend to purchase.
Conclusion
Plastic, fiberglass, and steel all have advantages and disadvantages. When you purchase any tank, good judgment is the most important factor Remember that a tank is just as important to your operation as a tractor, truck, sprayer, and other equipment Take the time to match the tank material and size to the intended contents and application Making a careful selection can give you years of trouble-free service.
Before you consider a used steel tank, carefully inspect and assess the tank’s history and current condition This may prevent problems later.
And don’t forget to use this publication along with our other tank publications: Poly Tanks for Farms and Businesses (Purdue Extension publication PPP-77) and Fiberglass Tanks for Storage, Transport, and Application (PPP-93) — both available from the Education Store. They will help you purchase the tank that best meets the needs of the business and farm.