Fiberglass Tanks for Storage, Transport, and Application

Designing your custom Tank
Fred Whitford
Coordinator, Purdue Pesticide Programs
Kevin Baalmann
Manager, KBK Industries
Stephen Hawkins
Assistant Director, Purdue Agricultural Centers
Jim Flanders, Jr.
Indiana Grower, Hamilton County
Kevin Leigh Smith
Editor, Purdue Agricultural Communication
Content
Introduction. . . . . . . . . . . . . . . . . . . . . . . . . . . . . . . . . . . . . . 4
How Fiberglass Tanks Are Made . . . . . . . . . . . . . . . . . . . . . . 8
Benefits of Fiberglass Tanks. . . . . . . . . . . . . . . . . . . . . . . . . . 20
Questions to Answer Before Buying . . . . . . . . . . . . . . . . . . . 22
Questions to Answer About Vehicle Tanks . . . . . . . . . . . . . . 33
Installing and Inspecting Storage Tanks . . . . . . . . . . . . . . . . 36
Installing and Inspecting Vehicle Tanks. . . . . . . . . . . . . . . . 40
Repairing Fiberglass Tanks. . . . . . . . . . . . . . . . . . . . . . . . . . 43
Buying Used Fiberglass Tanks . . . . . . . . . . . . . . . . . . . . . . . 48
Conclusion . . . . . . . . . . . . . . . . . . . . . . . . . . . . . . . . . . . . . . . 52
Acknowledgements. . . . . . . . . . . . . . . . . . . . . . . . . . . . . . . . 54
Disclaimer. . . . . . . . . . . . . . . . . . . . . . . . . . . . . . . . . . . . . . . 54
Introduction
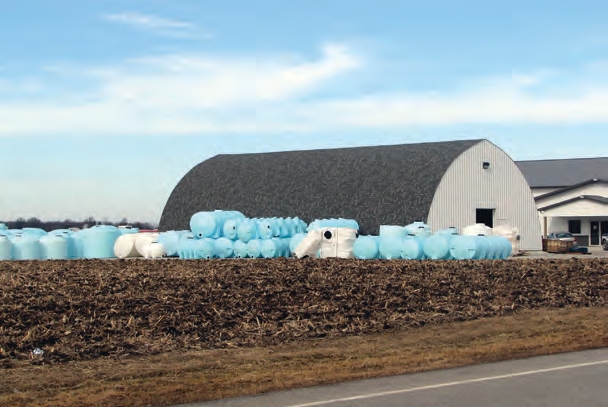
Growers, commercial industries, and government agencies depend on tanks to store, transport, and apply fertilizers, pesticides, and salts. Although tanks made entirely of plastic resins (poly tanks) have long been popular, interest in tanks made of fiberglass has been growing. That is because fiberglass tanks often last longer than poly tanks and can be repaired.
This publication examines fiberglass storage tanks; their benefits; what to consider before buying them; and how to properly use, install, and maintain them. This publication also is a companion to Poly Tanks for Farms and Businesses (Purdue Extension publication PPP-77 — available from the Education Store, www.the-education-store.com). If you are thinking about adding new tanks or replacing existing ones, review these two publications (along with other publications that examine stainless steel tanks). This information should help you decide which tanks are most appropriate for your operations.
Fiberglass tanks cost more than poly tanks, but they can store more product, which can save money. More storage capacity gives growers the opportunity to buy product when costs are low. For example, a 1,500-acre grain farm could use as much as 80,000 gallons of fertilizers in a year. If you have the storage capacity, you can make a bulk purchase when prices are at their lowest and save money.
For some, the question is how long it will take for the savings of buying in bulk to pay for the more expensive fiberglass. One grower calculated it would take three years of buying bulk fertilizers to pay for the tanks, fittings, and labor for his 700-acre grain farm. More information about bulk storage is available in Bulk Pesticide & Fertilizer Storage on Indiana Farms (Purdue Extension publication PPP-63), available from the Education Store, www.the-education-store.com.
It’s not just farmers who are interested in fiberglass tanks. For liability reasons, some commercial application companies have been switching from carrying pesticides in large poly tanks on their trucks and trailers to smaller, more durable fiberglass tanks. Companies often replace poly tanks that held 500 to 1,000 gallons of application product with fiberglass tanks that hold 100 to 500 gallons. Carrying less product on the truck means that any spills are smaller and easier to handle. In the long run, that can mean less pollution, fewer problems, lower environmental cleanup costs, and fewer headaches. But if truck tanks are getting smaller, why use fiberglass? Some companies see the move to fiberglass as an additional “insurance policy.” Many commercial insurance policies do not contain pollution coverage, may explicitly exclude pollution liability, or have very limited coverage. The more durable fiberglass tanks may be more likely to remain intact in an accident than poly tanks — the fiberglass may crack, but not break. That added peace-of-mind is one reason why some are paying more for fiberglass.
However, as farmers expand their operations and need to purchase and store larger quantities of liquid fertilizer on the farm, interest in fiberglass tanks has been renewed. Fluctuating fertilizer prices and product availability are two reasons influencing the trend of storing more product on the farm. Having inventory on hand ready to use at one’s convenience is another influence.
Today, growers are better equipped to apply products themselves. And they can save money when they can lock-in their input cost as early possible when fertilizer and chemical prices are low. As with any commodity, the lowest price usually occurs when the product is in least demand, but storage capability can give growers a 6 n opportune time to buy.

 Fiberglass, poly, and steel tanks all have advantages and disadvantages.
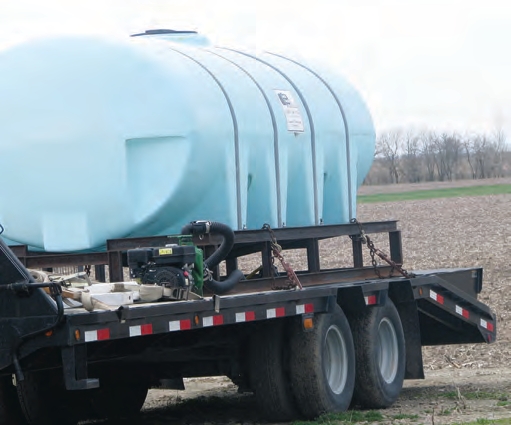
How Fiberglass Tanks Are Made
Fiberglass tanks are actually fiberglass reinforced plastic (FRP) — that is, they are plastic tanks that have been reinforced with fiberglass, similar to the way that rebar strengthens concrete. There are two methods for making these tanks: the chopper gun method and the filament winding method. Understanding how fiberglass tanks are made will give you some insight about the benefits they can provide.
Chopper Gun Method
With the chopper gun method, the manufacturer uses metal molds to form the sides, top, and bottom of a tank. They do this by passing a continuous strand of glass through a chopper gun, which cuts the glass into 3- to 5-inch pieces. Simultaneously, the gun mixes liquid resin and a hardener with the glass as it leaves the gun.
The resin a manufacturer uses for a fiberglass tank is quite important. The resin is the liquid, plastic-like material that will hold the tank’s contents and prevent it from seeping through the tank’s walls.
Not all fiberglass resins are the same. There are resins that are compatible with salts and oils, with fertilizers and pesticides, or with acids. Depending on the intended application of the finished tank, the manufacturer mixes the appropriate resin with the fiberglass. Always store products in tanks that were made with compatible resins — placing incompatible products in the tanks could cause the tanks to fail prematurely.
The fiberglass is made of several layers, and it can take up to six passes with the chopper gun to form a single layer. The uniformity of the wall depends on the gun’s operator. Depending on the resin system, it can take 10 to 40 minutes for each layer to harden. The number of layers a finished tank will require depends on the size and specific area of the tank. As a general rule, tank sidewalls are 1/2 to 3/4 inch thick, and tank bottoms are up to 1.125 inches thick.
 A manufacturer prepares the mold for the top of a fiberglass tank.
 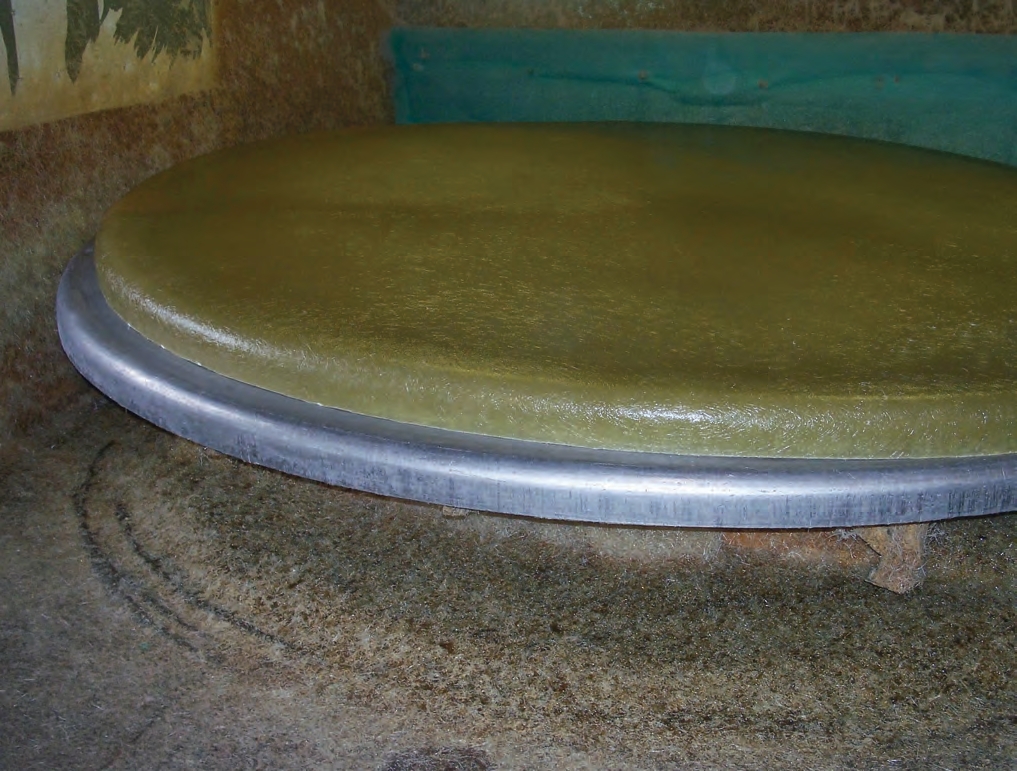 This tank bottom has just been popped off its mold.
  This chopper gun mixes resin with extruded glass as it leaves the gun.
 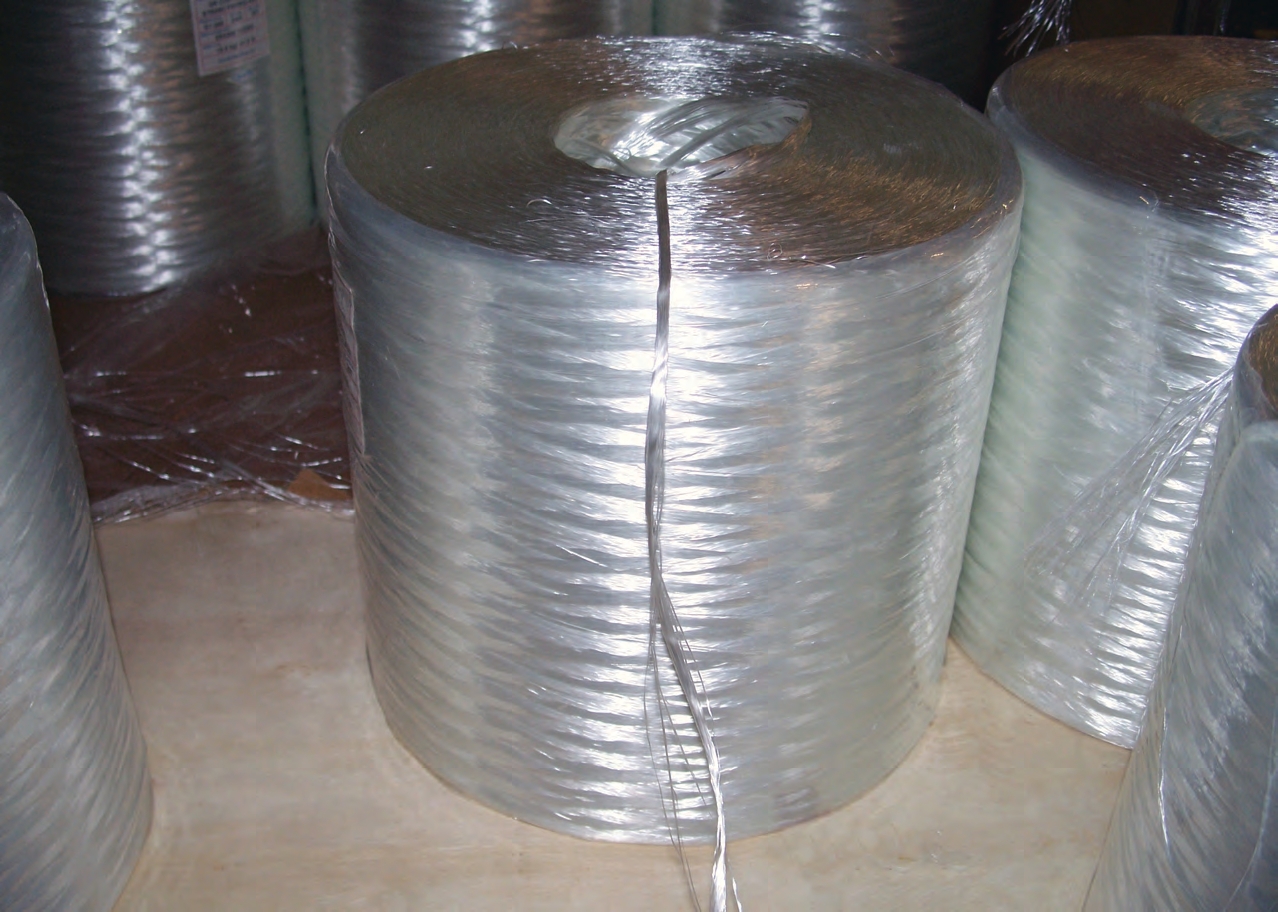 A bale of glass used in a chopper gun. The glass strand is actually several strands of glass much like the many fibers in a rope.
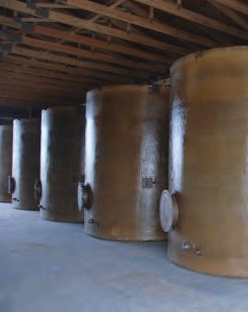
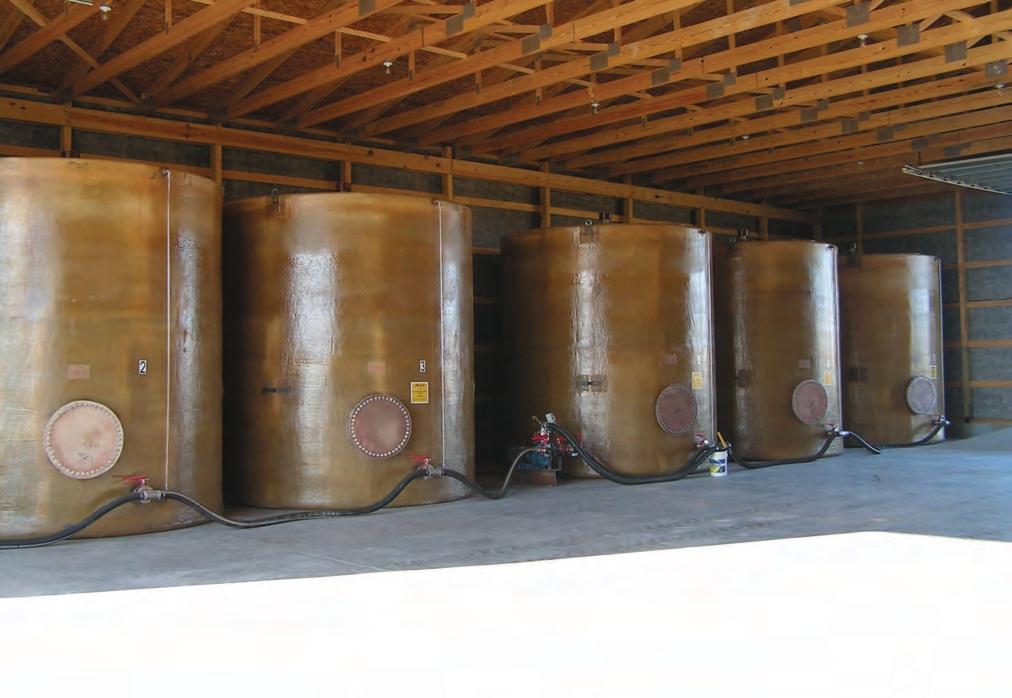
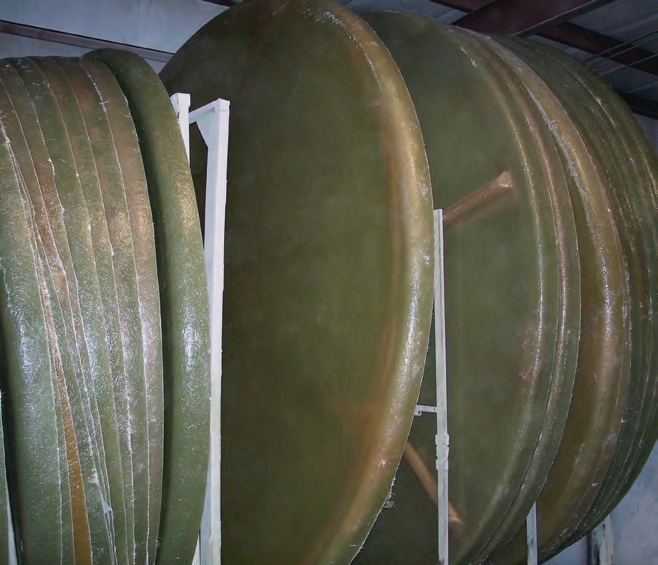 Individual rivets in a fiberglass tank. These tanks (12 feet diameter x 10 feet tall) are ready for the final fiberglass layers to be added
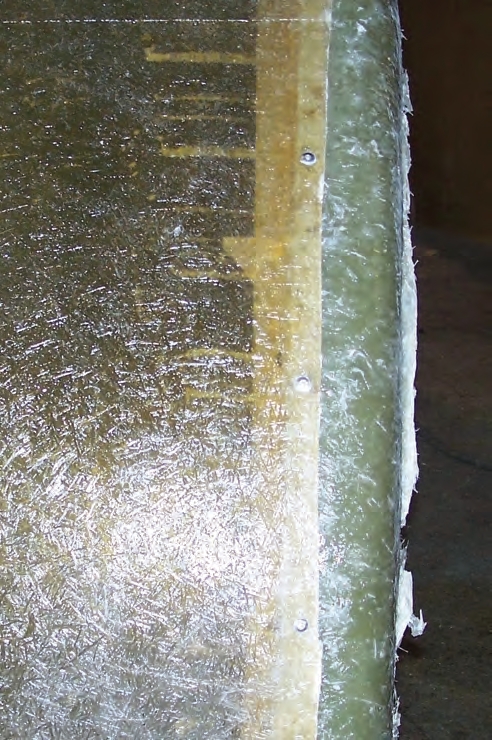
 The three main parts of the tank — bottom, sidewall, and top — are clearly visible.
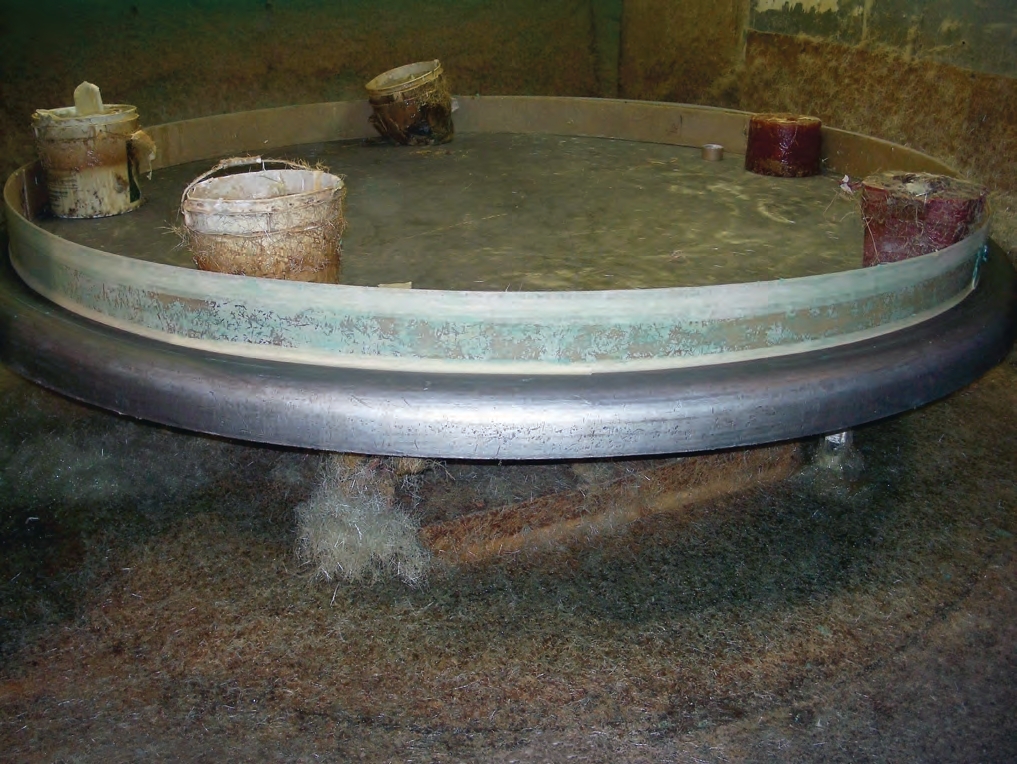
 The fitting and manway are in place and ready to be glassed in on this tank. The white areas around each opening are where grinding was done to help the fiberglass and resin adhere, or bond, to the tank.
  Once the tank is completed, the fiberglass seals the gap between the tank shell and flanged manway fitting. The darker circle in this image is a cosmetic effect from the use of different batches of resin.

 A tank receives a gel coat. To the left of the black paint, you can see how the fiberglass was lightly ground to help the gel coat bond to the finished tank.
 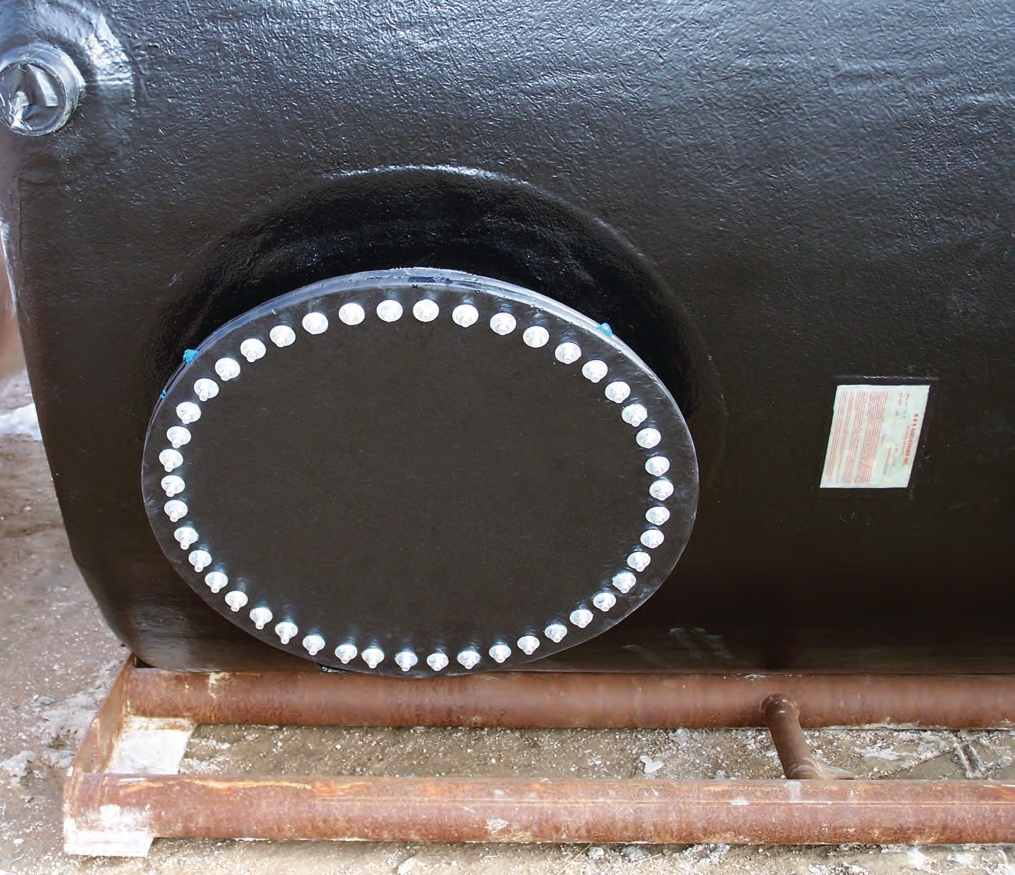 A tank that has been gel coated. The manufacturer closed off the fitting with masking tape so the threads in the fitting are not harmed when the gel coat is sprayed. Manufacturing a new fiberglass tank can take up to ten hours, depending on its size and the customer’s specifications.
 Filament Winding Method
A second option for making fiberglass tanks is called the filament winding method. With this method, the glass is wound around a rotating tank mold as a mat of long, continuous glass from a spool. The bottom of the tank is already attached to the sidewalls. Some companies hand apply a fiberglass mat around the seam created by the two pieces. And instead of mixing resin and hardeners with the glass, the filament winding method only adds resin to the bottom of each layer. Rollers press the fiberglass mat in place and remove air bubbles. The number of layers of resin and glass that a finished tank has depend on its size.
Next, the manufacturer overlays individual stands of fiberglass on top of the mat — this is called the chop hoop layer. The fiberglass strands look like ropes, but each rope is made up of about 60 individual threads. The rotating mold then pulls the strands and further wraps the tank. Once the mats and resin dry, the mold will contract and allow the tank to be removed. The manufacturer places a steel ring near the top opening to prevent the open end from collapsing. The last step in this process is to put the top on the tank, which is held in place with pop rivets. A chopper gun adds the remaining fiberglass layers. Once completed, the manufacturer cuts any openings for attachments.
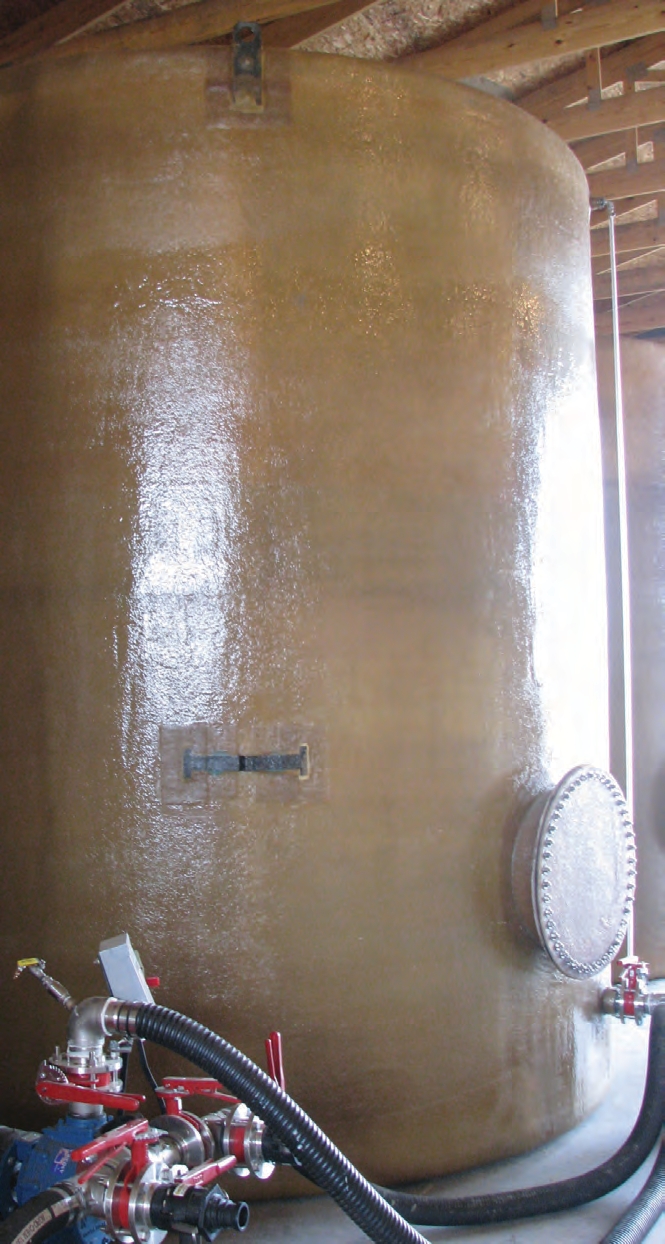
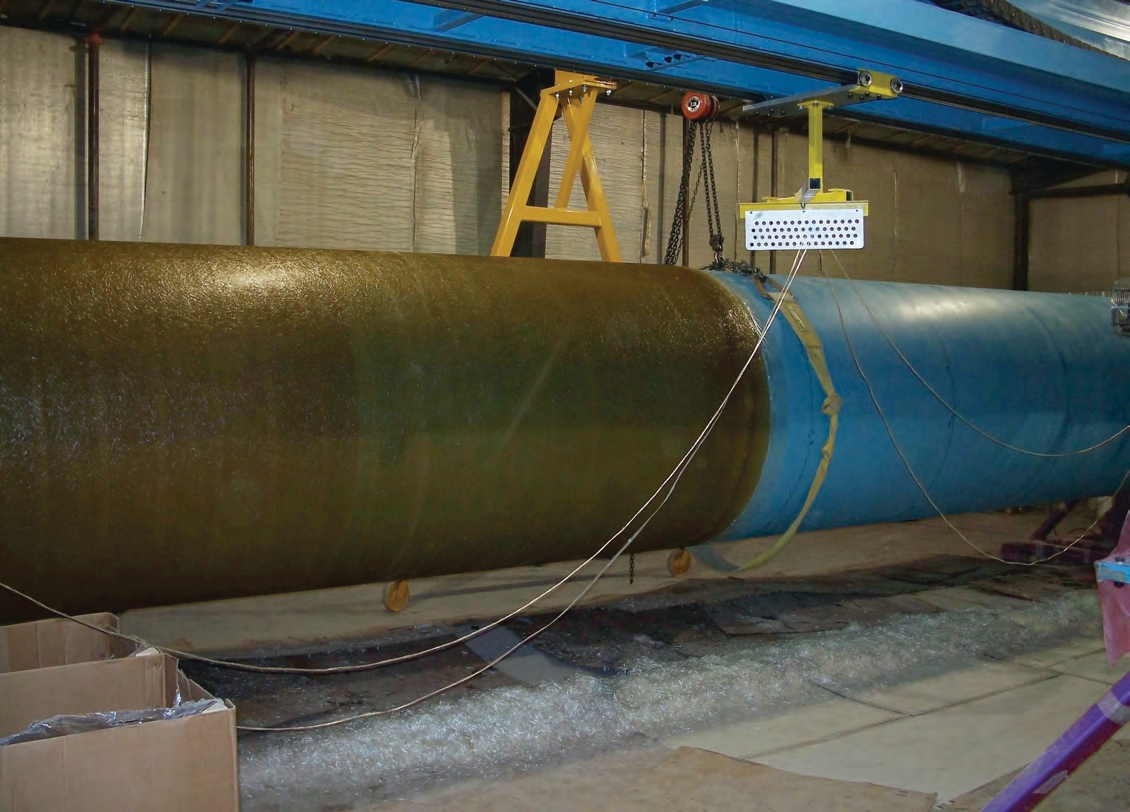
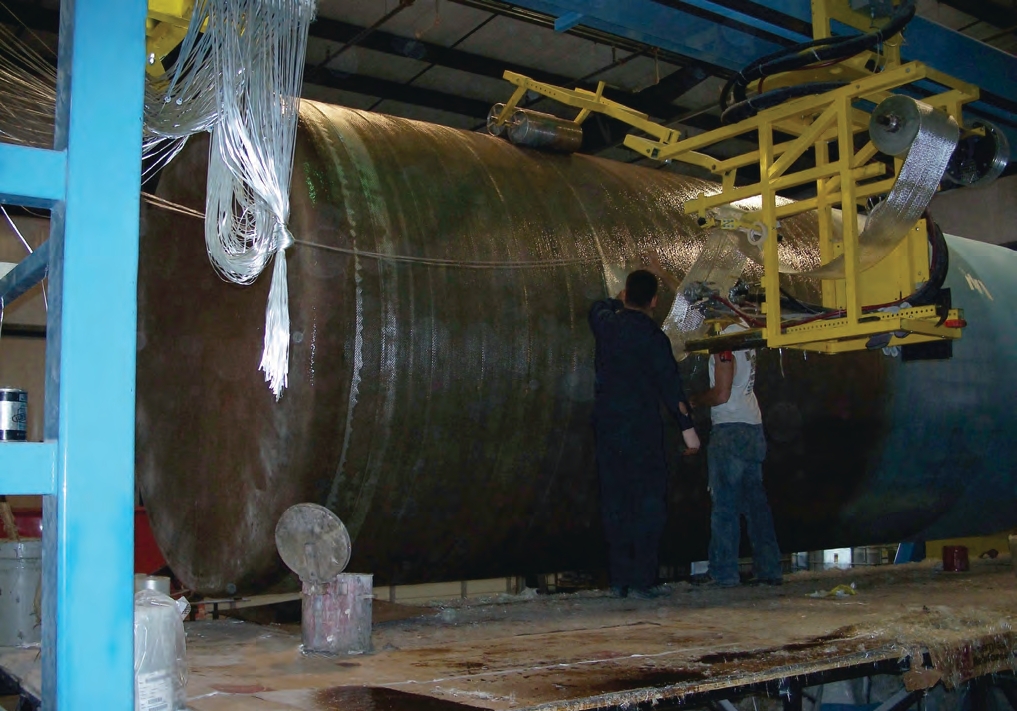 In this photo, the blue cylinder is the mold and the fiberglass tank being formed is brown. When complete, this tank will measure 10 feet wide, 15 feet tall, and hold 8,800 gallons.
 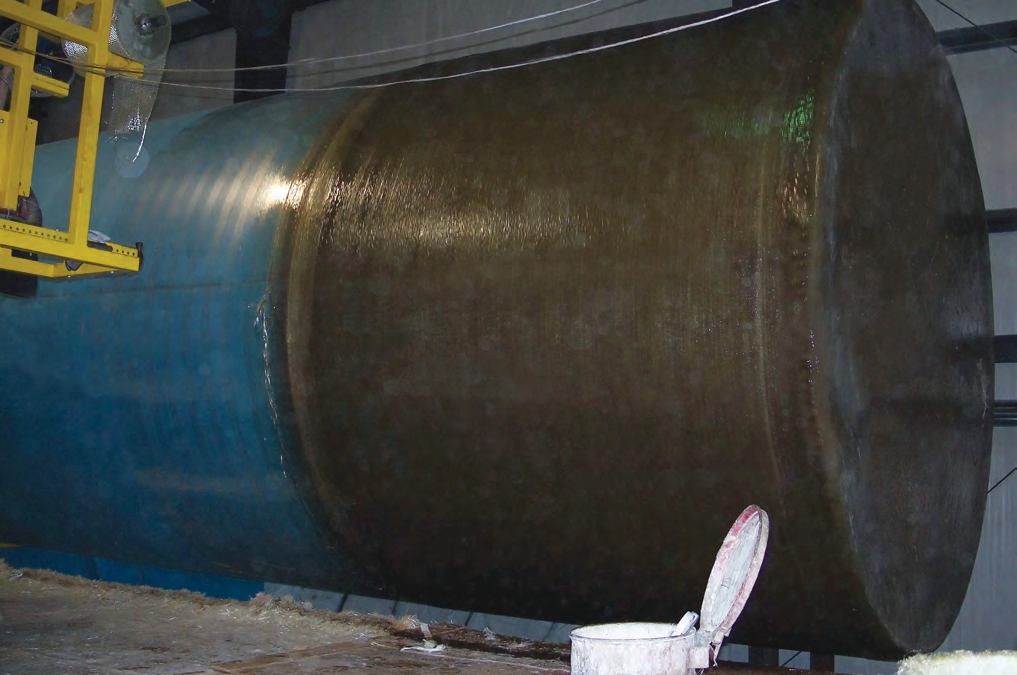 This tank has been wrapped with a woven mat and has had a hoop line added. It is now ready to be removed from the blue mold.
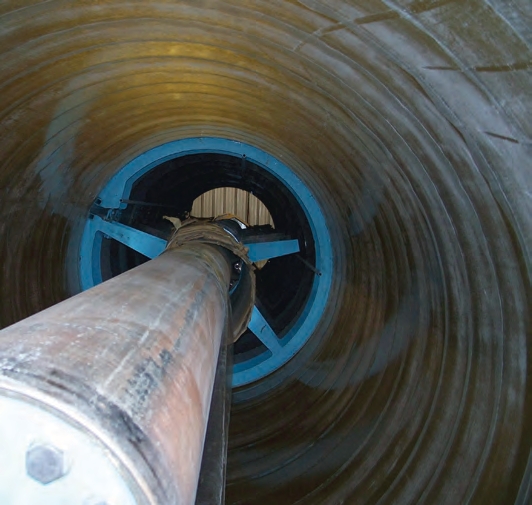
 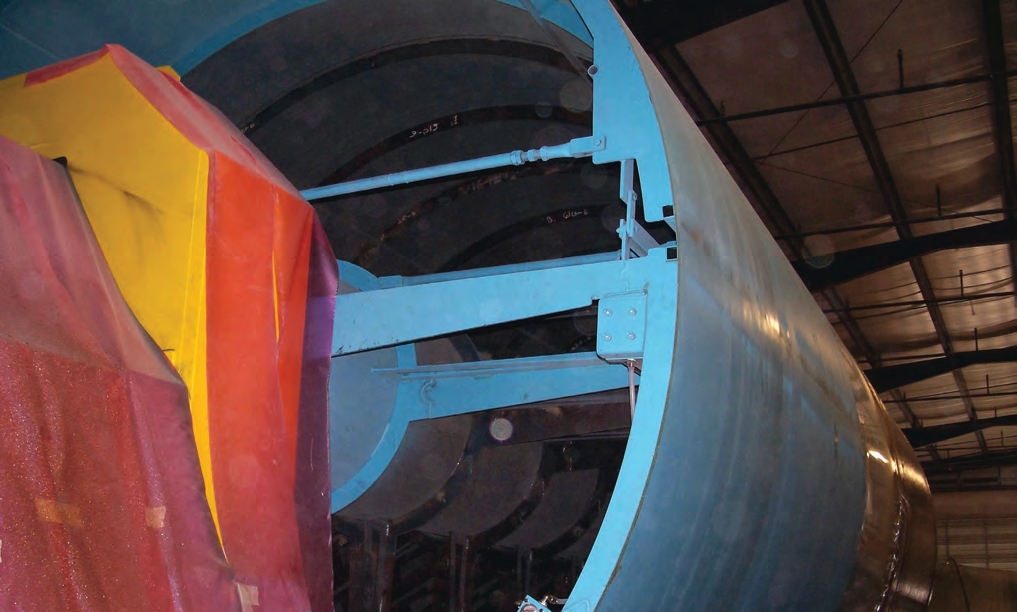 This photo shows the inside of the mold (foreground) and the brown fiberglass tank attached to it (background). Once the tank dries, the mold will contract and allow the tank to be removed.
 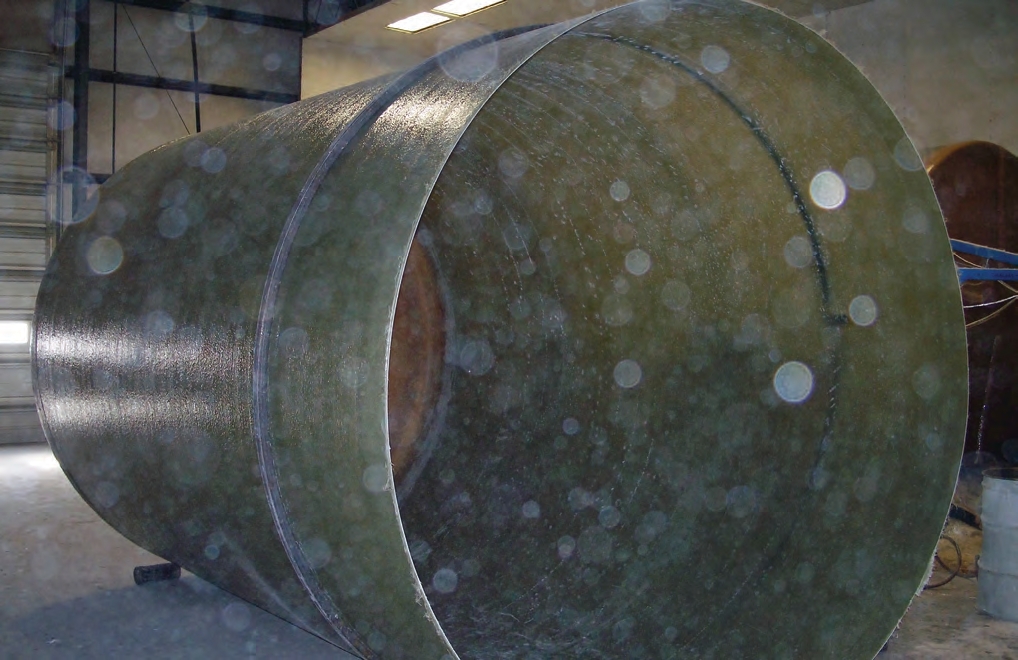 This fiberglass tank has been removed from its mold. A removable steel ring placed near the opening where the top will eventually be prevents the open end from collapsing.
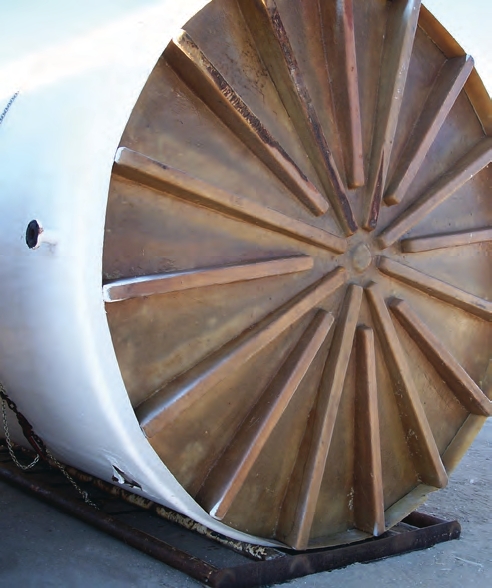
  This photo shows the bottom of the tank. Some manufacturers apply a fiberglass mat by hand around the seam that is created where the sidewall is placed into the bottom (appears as a dark brown ring around the seam).
 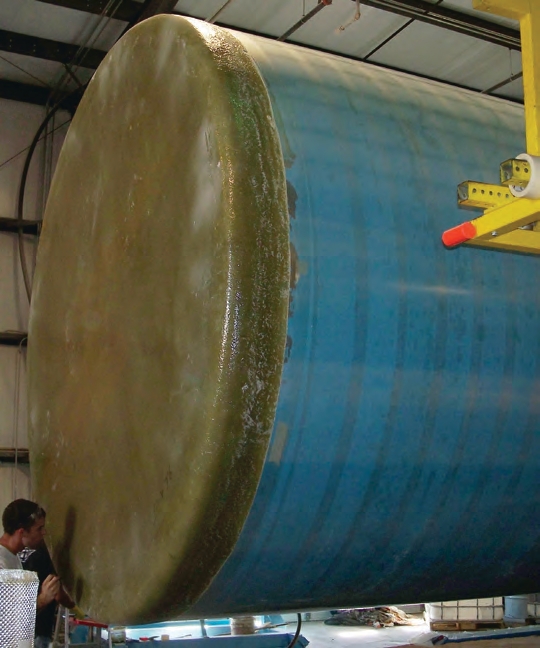 The manufacturer places a tank bottom on a mold (also called a mandrel).
 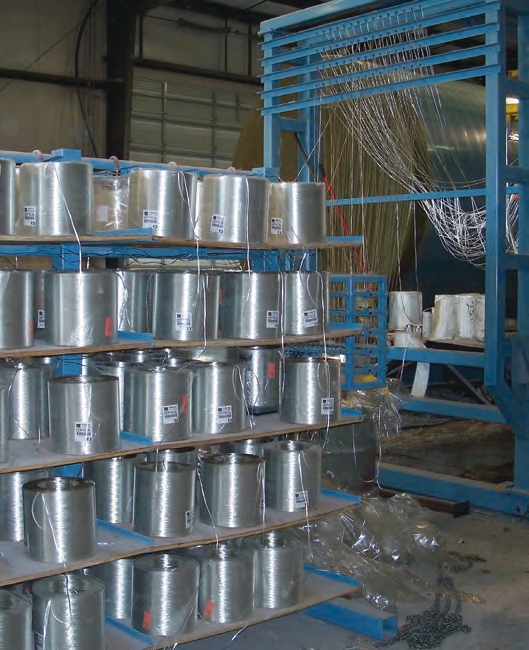 Next to the mold, spools of glass strands are lined up on racks.
 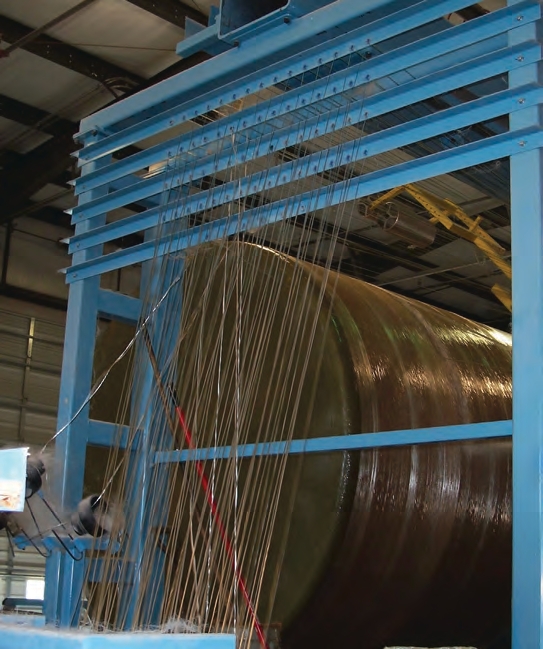 When the tank is built, glass strands are wrapped around the spinning mandrel
 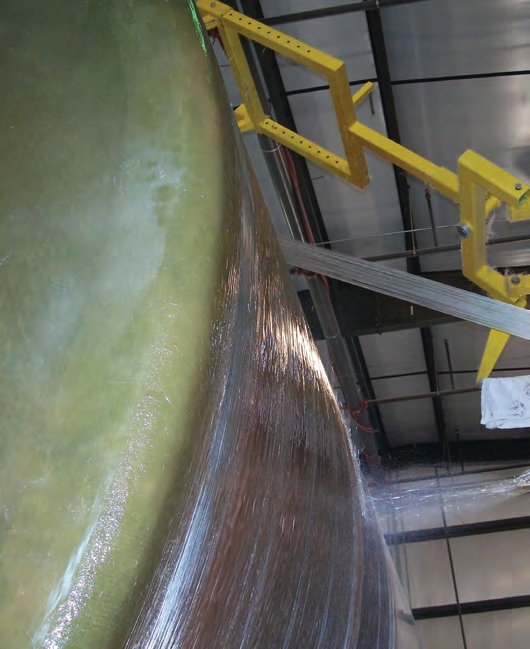 After that, the manufacturer applies the chop hoop layer, laying down “ropes” of glass that are made of about 60 strands each.
 Benefits of Fiberglass Tanks
Fiberglass tanks have many positive attributes,
including:
• They can be custom built
• They have good longevity and durability
• They can resist ultraviolet radiation longer than poly tanks if they have a gel coating
• They can be used with salts, fertilizers, or pesticides
• They can be sanded and repainted
• They can be repaired and put back into service
• They can have baffles installed in transport tanks that reduce products from sloshing around
• They can have heavier valves installed on them because the fiberglass tank frame is more rigid
• They can be equipped with mechanically driven agitator paddles to keep mixtures
suspended
• When they fail, they generally seep rather than burst
• Under normal use, high and low temperatures have little impact on their service life
• They are able to withstand rugged off-road conditions
• The opaqueness of the walls reduce algae growth
Fiberglass tanks that hold less than 10,000 gallons are more expensive than comparable poly tanks. However, as the tanks get larger, the price differential is not as dramatic. The table below compares the cost per gallon of fiberglass and poly tanks for on-farm fertilizer storage.
Chemical Tank Cost Breakdown
-
18,000 gallons
- Poly Tank: Not provided
- Fiberglass Tank (with gel coating): $11,777 total ($0.65 per gallon)
-
15,000 gallons
- Poly Tank: Not provided
- Fiberglass Tank (with gel coating): $9,715 total ($0.65 per gallon)
-
10,500 gallons
- Poly Tank: $6,000 total ($0.57 per gallon)
- Fiberglass Tank (with gel coating): $7,063 total ($0.67 per gallon)
-
8,400 gallons
- Poly Tank: Not provided
- Fiberglass Tank (with gel coating): $6,127 total ($0.73 per gallon)
-
6,000 gallons
- Poly Tank: $3,600 total ($0.60 per gallon)
- Fiberglass Tank (with gel coating): $5,370 total ($0.90 per gallon)
These prices are only estimates and subject to change.
For tanks commonly used to transport chemicals, the higher cost of fiberglass is more dramatic. In these examples, skids, fill pipes, sumps, coating, etc., have been added to the price of the fiberglass tank.
Chemical Tank Cost Breakdown
-
400 gallons
- Poly Tank: $900 total ($2.25 per gallon)
- Fiberglass Tank (with gel coating): $2,301 total ($5.75 per gallon)
-
300 gallons
- Poly Tank: $700 total ($2.23 per gallon)
- Fiberglass Tank (with gel coating): $2,153 total ($7.18 per gallon)
-
250 gallons
- Poly Tank: Not provided
- Fiberglass Tank (with gel coating): $2,043 total ($8.18 per gallon)
-
200 gallons
- Poly Tank: $600 total ($3.00 per gallon)
- Fiberglass Tank: Not provided
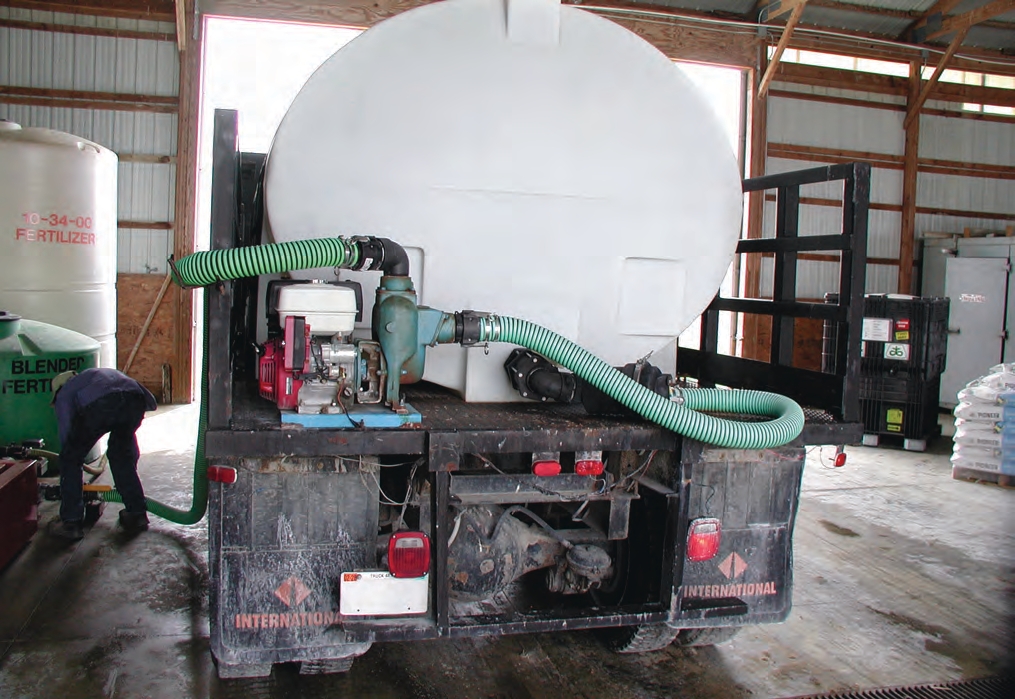
If you need a tank immediately, that may be difficult for a fiberglass tank. It can take two to five weeks between order and delivery. The multiple layers of fiberglass that prevent sunlight from penetrating the tank also prevent you from seeing through the tank walls. That can be a problem if you can’t see sediment and sludge accumulating on the bottom, or if you can’t see whether a fertilizer (such as 10-34-0) has “salted-out” during the winter.
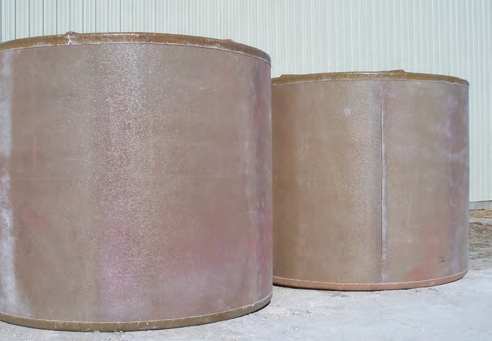
 Poly tanks (left) and fiberglass tanks (right) each have advantages and disadvantages.
Weighing the pros and cons of each are an important step in the selection process.
Poly tanks (left) and fiberglass tanks (right) each have advantages and disadvantages.
Weighing the pros and cons of each are an important step in the selection process.  Poly tanks (left) and fiberglass tanks (right) each have advantages and disadvantages.
Weighing the pros and cons of each are an important step in the selection process.
Poly tanks (left) and fiberglass tanks (right) each have advantages and disadvantages.
Weighing the pros and cons of each are an important step in the selection process. 

Questions to Answer Before Buying
Fiberglass tanks are engineered to hold the pressures that the fluids inside them exert. The heavier the fluid stored in a tank, the thicker the fiberglass shell will be at those high-pressure areas. For example, on a 10-foot tall tank that has 12-foot diameter, a manufacturer may add an extra piece of woven glass material to the first 6 feet from the bottom. This adds strength to the portion of the tank that is likely to experience more pressure. Because fiberglass tanks are made to order, customers must make a few decisions before they order. This section provides 12 questions you should answer when deciding whether fiberglass tanks are appropriate for your operation.
- What Are the Different Tank Designs?
There are three common fiberglass tank designs: flat-bottom, cone-bottom, and dish-bottom. The less expensive flat-bottom tanks can hold more product than cone-bottom tanks of the same height and diameter. Flat-bottom tanks are best-suited when you plan to refill the tank with the same product. Flat-bottom tanks are known for the difficulty of removing the liquid from them. This can be a problem if the tank will hold different materials, or if sludge builds 22 up in the bottom of the tank.
Installing a fitting about six inches from the bottom of the tank that has threads on both ends can help pull more product out of the tank. Even so, there can be areas on the bottom of the tank where the fluid or sludge can’t be removed.
You can also install drain fittings that allow more fluid to be drawn out. By installing couplings higher on the tank, you can can pipe them on the inside with suction tubes to drain the fluid off the bottom. In other cases, you can use sump pumps or wet-dry vacuums to remove material lying on the bottoms of tanks through the manway. Cone-bottom tanks are ideal if you need to hold different products during a growing season — such as 28 percent fertilizer, starter fertilizer, water, or pesticide.
Cone-bottom tanks have walls that taper toward the center bottom, which allows for full drainage, and allows you to more easily clean tanks between fillings. Remember, because a cone-bottom tank has tapered walls, it will hold less material than a flat-bottom tank with the same height and diameter. Be sure to account for this reduced volume when making your decision.
Dish-bottom tanks are a hybrid of flat- and cone-bottom tanks. Dish-bottom tanks have a 3- to 6-inch slope at the center, which allows their contents to be fully drained. They hold more than cone-bottom tanks with similar dimensions, but still hold slightly less than flat-bottom tanks.
 A chopped mat is made of glass that has been chopped and laid into a mat.
 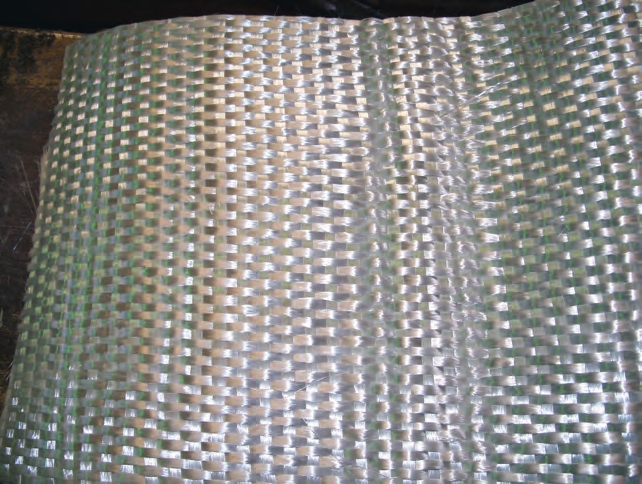 Woven mats woven are made of glass strands that have been woven together.
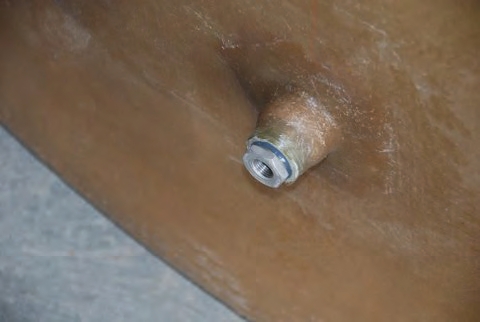
 The underside of this dish-bottom tank has a 3- to 6-inch slope to the center, which allows its contents to be fully drained.
 2. How Much Storage Should I Plan For?
Often, the amount of storage capacity you should have depends on whether your fertilizer or product vendors can offer you a price breaks for bulk purchases. If vendors do not have to accept delivery of loads at their retail facilities, and then reload them back onto smaller trucks to bring to your farm, they can often reduce the costs for fertilizers or other products by delivering them directly to you.
Another factor is how much inventory you want on hand at the start of the season and how much you will need over the growing season. You have to consider the trade-offs between having product readily available on the farm and the price break you get for a semi load, versus paying a little more for having the bulk plant store the material and deliver it as you need it.
Think about having enough capacity to take that 5,000-gallon load of liquid fertilizer at one time. For example, one semi load can fill two 2,500-gallon tanks if they are empty. It might be best to have more capacity so you can enjoy the price breaks of taking full semi loads of fertilizer in the event the tanks are not emptied at the time of delivery. These then become backup tanks.

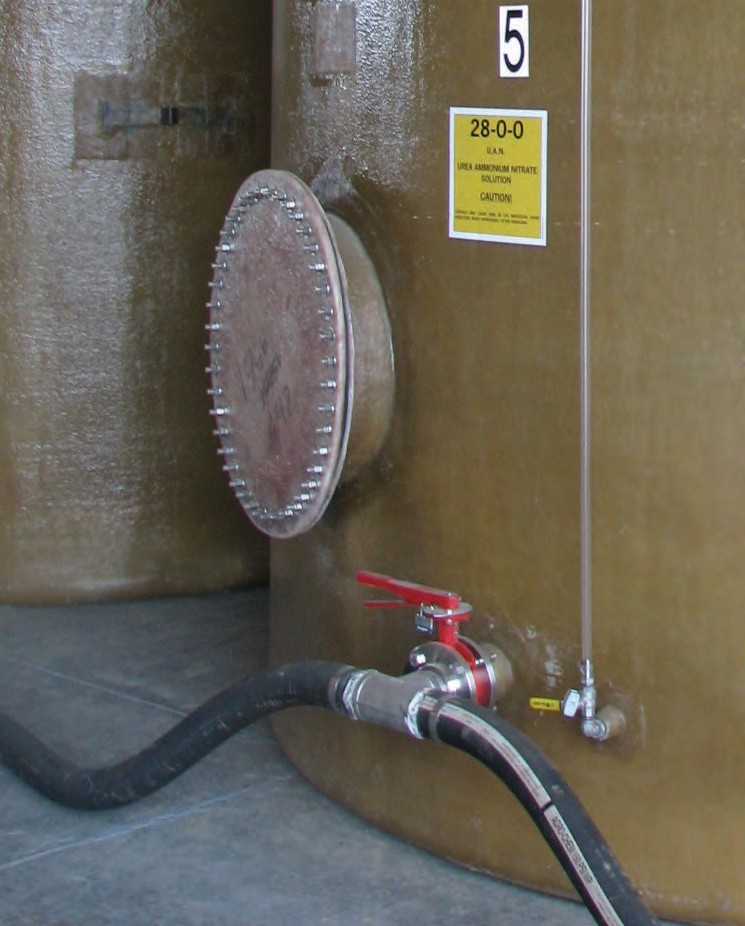
3. Is Bulk Containment
Required? State and federal regulations require containment structures if you store certain quantities of pesticides or fertilizers. In Indiana, the law indicates that growers must meet fertilizer containment regulations when one of the following criteria are met:
• The operation stores a total of more than 7,500 gallons of fertilizer
• The tanks are plumbed together to exceed the 7,500 gallon threshold
• The operation has any single fertilizer tank that holds more than 2,500 gallons
• The operation requires (at a minimum) a 750-gallon mixing and loading pad
What this means is that you must include the cost of containment when you analyze the costs of storing large volumes of product. When building containment structures, you should double the size of the area under containment. This will allow for future expansion to plan for more tanks within containment.
Having larger storage areas also allows for you to inspect and maintain both the tanks and containment structures provided that the tanks are set away from containment walls and from each other.
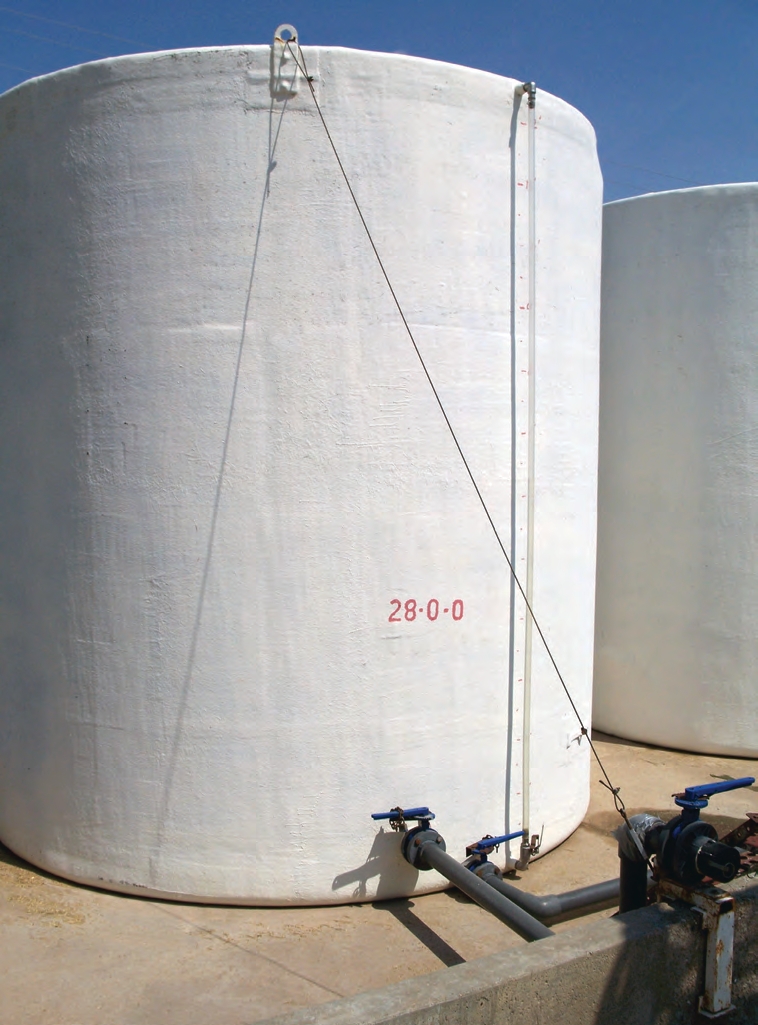
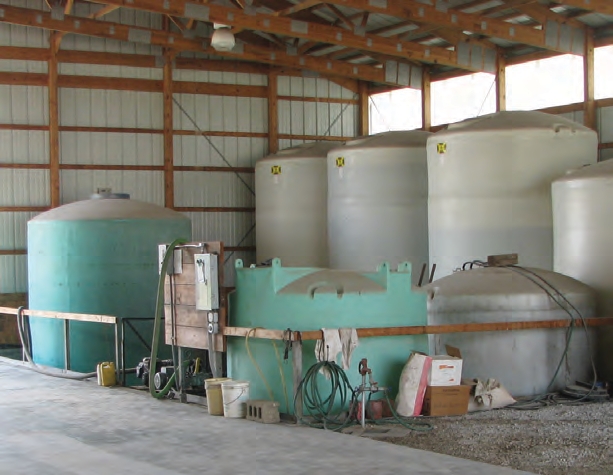
 In some states, a tank within a tank is considered containment. A fiberglass tank within a tank.
  A poly tank within a tank. Check with your state department of agriculture to see if these types of tanks meet the state’s containment regulations.
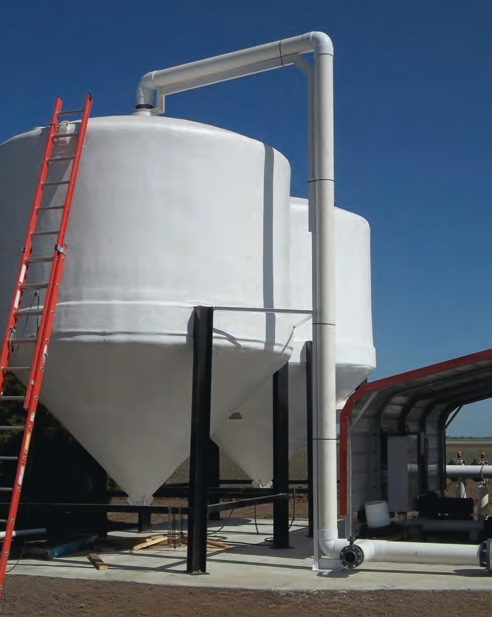
  The large white storage tanks are contained in a concrete pit that goes below ground level.
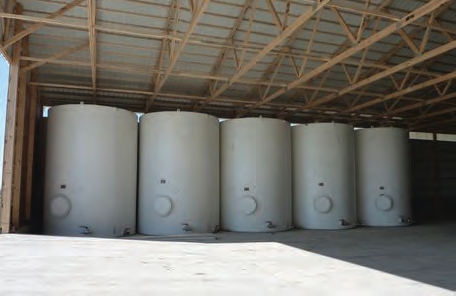
 4. What Size Tanks Should You Consider?
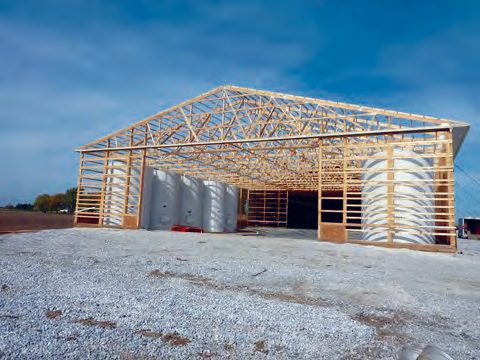
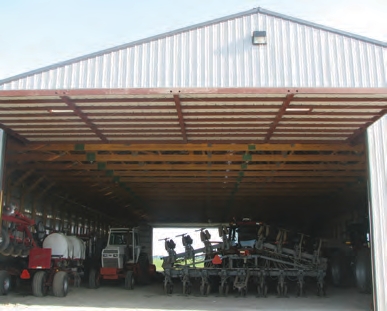
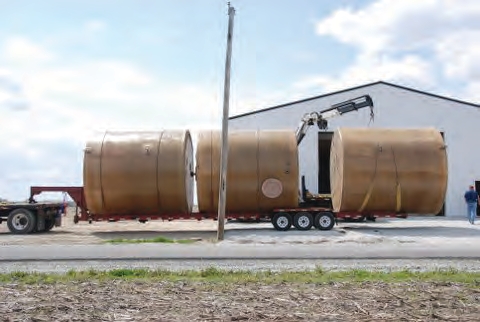
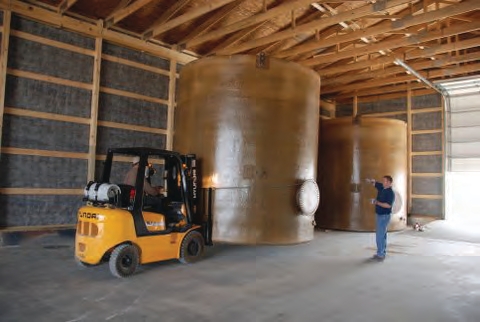
The amount of storage may be limited by the building’s size. The area of the flat space relative to the size of the tanks will determine how many tanks you can place on the site. One large tank may take up less surface area than two smaller tanks.
However, a single large tank (such as one with a capacity of 18,000 gallons) will take nearly twice the containment area of two 10,000-gallon tanks.
It also is important to consider the height of the tanks along with surface area. One larger tank will be taller than two smaller tanks. However, many older barns are not tall enough to hold some of the taller fiberglass tanks.
When considering height, think about excavating and dropping below the existing floor level to allow tanks with greater heights to be used indoors.
Building a pit to accommodate larger tanks in a smaller barn seems easy enough. However, consider the following when contemplating digging down in a pre-existing building:
• What is the seasonal water table?
• How am I going to pump water out of the pit?
• Where is the best place to dig the pit?
• If I have a spill in the pit, how will I clean it up?
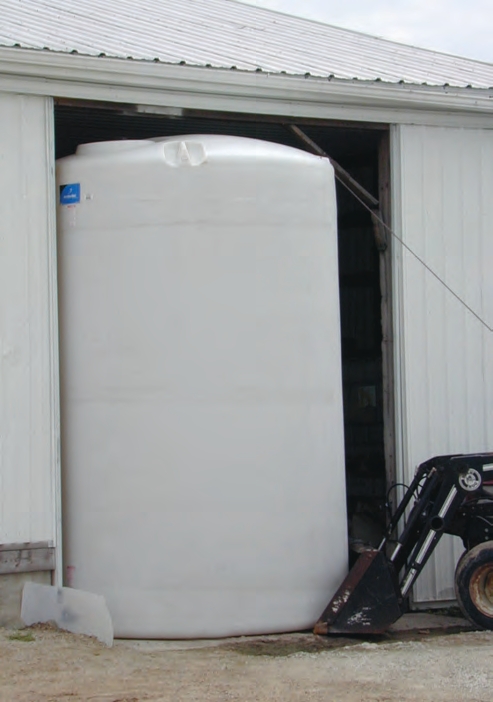
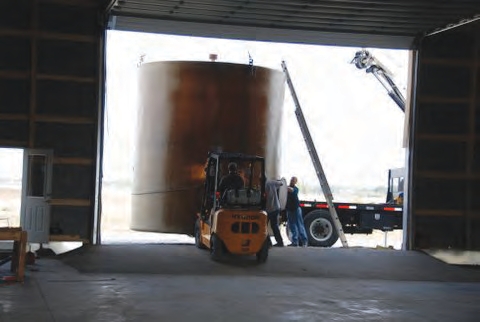
Another important consideration is to factor in the door dimensions. Doors have to be wide enough and tall enough to allow the tank to be brought into the building with a forklift standing up vertically. Each manufacturer has information about the dimensions for each tank that will help you calculate volumes, diameters, heights, and weights. Check with the manufacturer for exact dimensions.
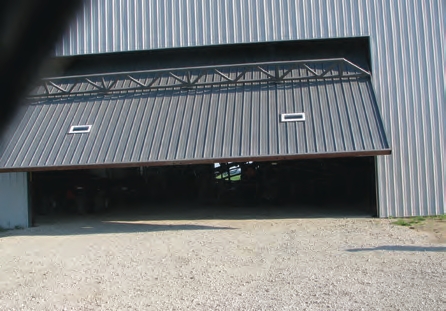 Don’t forget to leave enough room for the overhead doors to slide into the building and have enough clearance for the tanks.
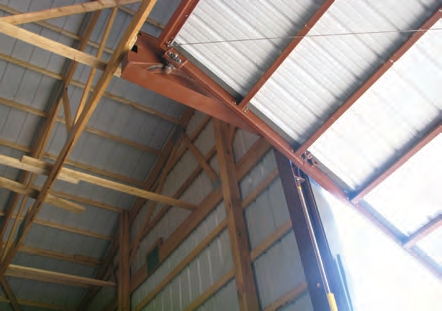
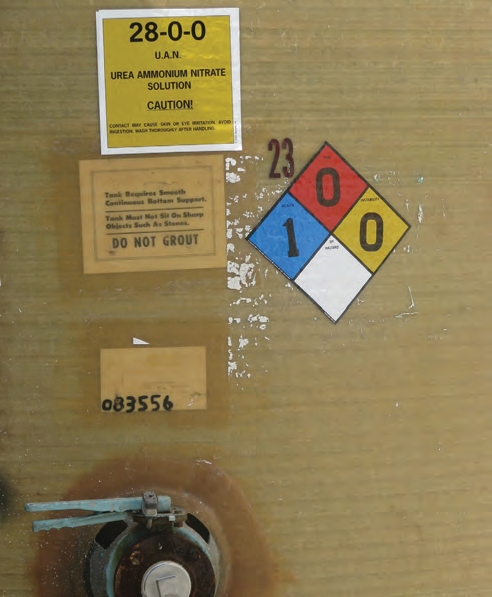
5. What Materials Will the Tank Hold?
The resins used to manufacture a fiberglass tank are designed to use with a group of specific chemicals. For instance, fertilizer requires a different resin than those used with pesticides and salts. The resin, corrosion liner, and wall structure may vary depending on the product the tank is designed to hold.
It is important to consider all the possible products the tank may hold during its life, which allows the manufacturer to select the correct resins to fit your needs. When examining whether fiberglass tanks are feasible, be sure to discuss with the dealer what you will store in them.
6. Is the Expensive Gel Coat Necessary?
The final coating on the outside of a storage tank that protects it from the elements does add additional expense. It can cost $200 to $400 to gel coat a 10,000-gallon tank. Some growers decide to skip the coating when they store their tanks indoors. However, if you store a tank outdoors where it will be exposed to ultraviolet light, applying the gel coat is a must.
7. How Much Will the Fully Loaded Tank Weigh?
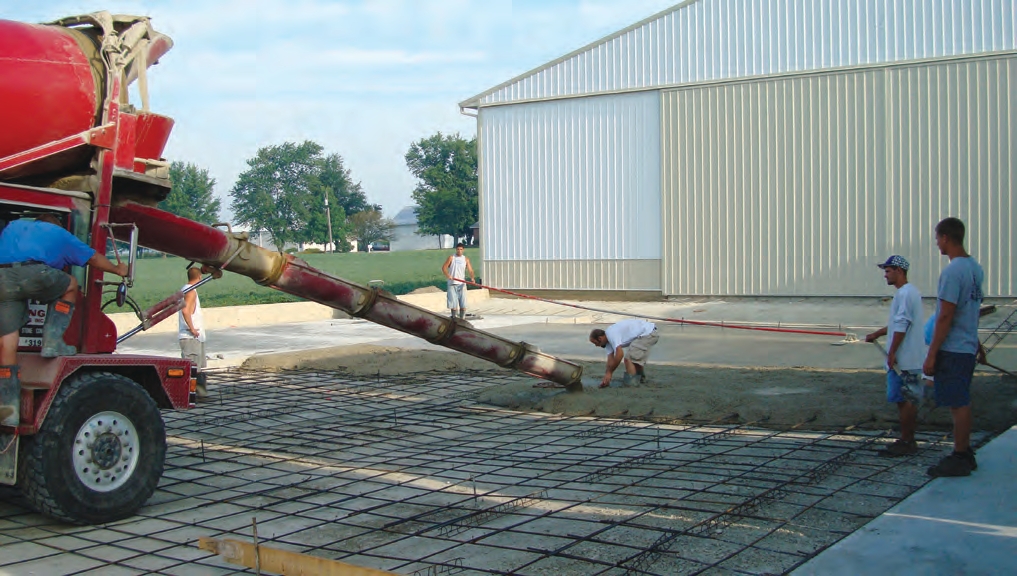
The amount of pounds per square foot the concrete pad will have to bear will not be an issue if the concrete is designed properly and its bedding has the proper gravel base. In addition, the area under the concrete must be well-drained to prevent water from freezing underneath it, which can cause it to crack and fail.
When tanks are full of product, that places a significant load in pounds per square foot on the concrete pad. Make sure the concrete is strong enough to handle that load before ordering tanks. The thickness or quality of the existing concrete may limit the size of the storage tanks, which may require several small tanks rather than just a few large tanks. In some cases, if you remove existing concrete, you can pour a new slab that will support the increased weights with larger tanks.
When considering the concrete pad, ask yourself these questions:
• How much weight will the completely filled tank exert on the concrete?
• How thick does the concrete need to be?
• Will the added cost of concrete be worth the benefit of larger tanks?
• What reinforcements will be needed?
• How much slope will be needed to allow for complete drainage into a sump?
• What surface finish is best?
• Are concrete sealers helpful?
 Make sure the concrete can hold the weight of filled tanks. If not, you will always be repairing cracks.
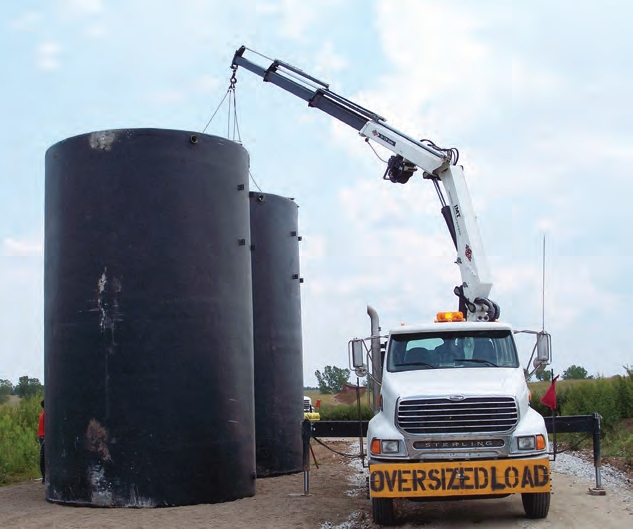
8. How Will the Tanks Be Unloaded?
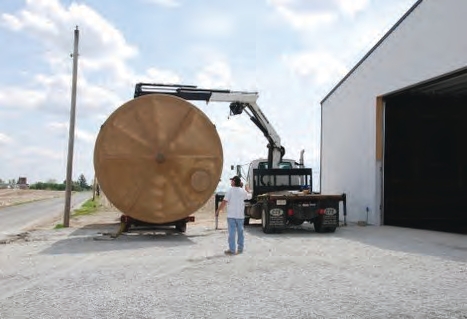
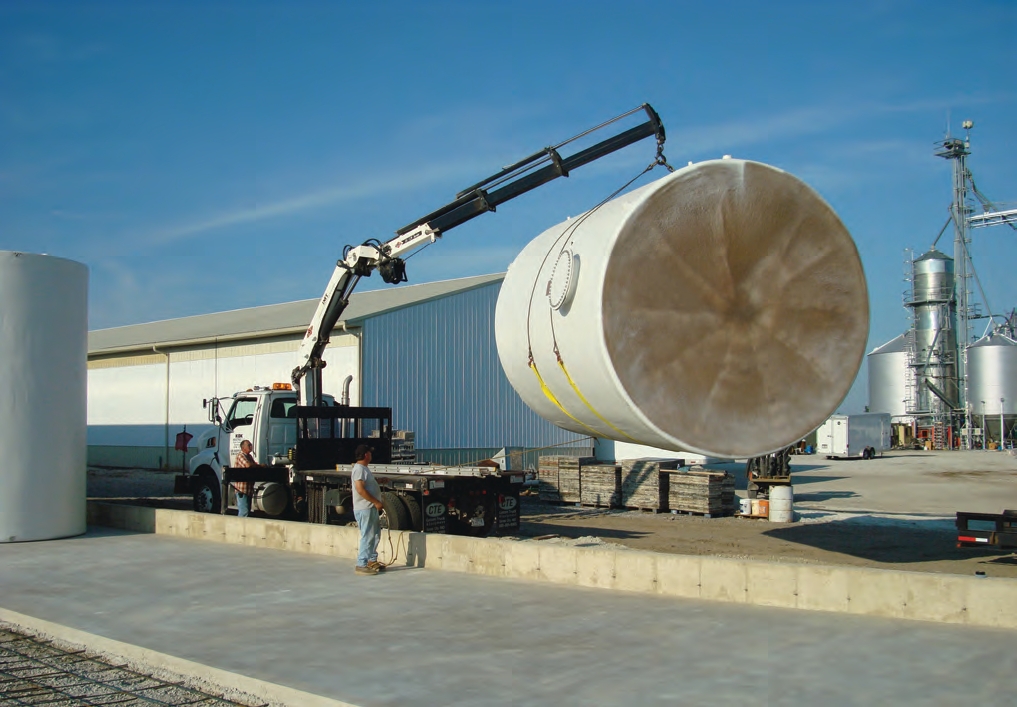
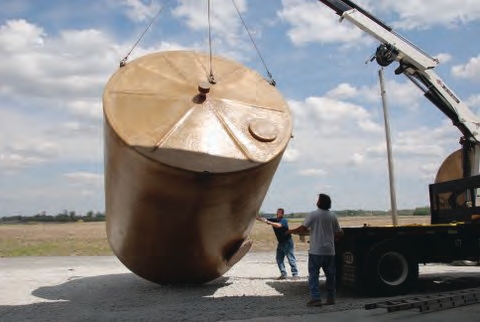
Delivery trucks may come equipped with knuckle booms to unload the tanks, but don’t assume that delivery drivers will have the equipment to unload them. Some companies do not have this capability, which requires the customer to have someone else bring out their equipment. If you must hire someone to unload the tanks, that will add significant cost. Current rates range from $150 to $300 an hour for cranes. When you price a tank, be sure to ask whether the total includes taking the tanks off of the semi trailer and whether the contractor is insured.
9. What Accessories Are Important?
Manufacturer catalogs list many different options you can purchase for a fiberglass tank. One of the more important considerations is where to place the manway, since it will allow access to the inside of the tank for cleaning it. The higher you can place the manway, the better, because there is less pressure at higher points. You even need to consider the manway’s shape. Curved shapes are stronger than flat shapes. Don’t forget to get the proper-size vent for your tank. Tanks without vents (or those with undersized vents) collapse when adding or removing fluids, or even heat expansion in the spring.
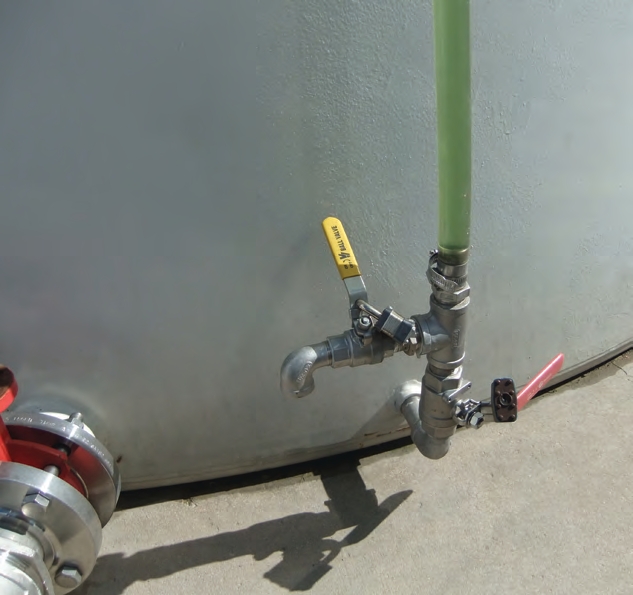
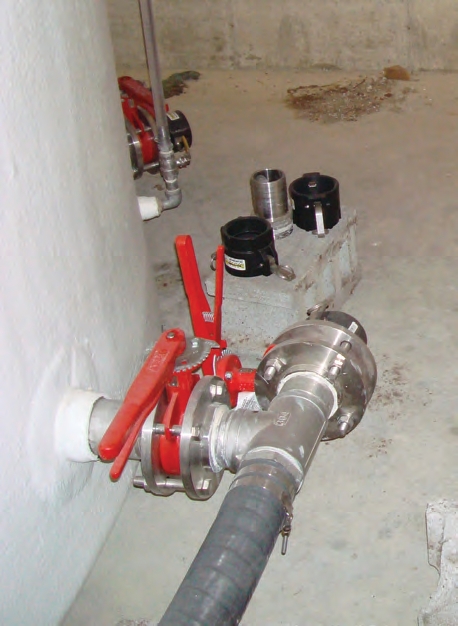
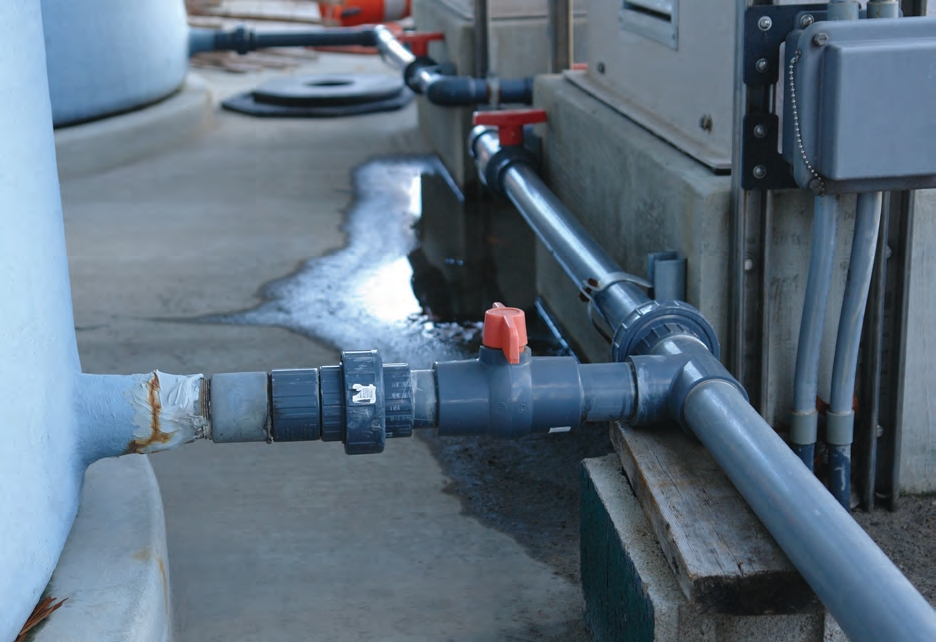
10. Where Do I Want the Plumbing Fittings Placed?
Place plumbing fittings where you want them. There’s no point in custom-making a tank that you’re going to have to twist and turn to line up the plumbing. Consider installing two separate fittings that will allow the tank to be filled and unloaded at the same time. Adding a second flange or fitting to your custom tank will allow recirculation of the contents. This allows stirring, which can decrease the build up of material on the bottom, and help keep a uniform product.
An often forgotten aspect of placing valves and fittings is how low they can be plumbed on the tank. If you place fittings too low, you may not have enough clearance from the ground to fit your valves or other fittings. So think about how close to the floor the fitting can be and still give you enough clearance to attach your equipment.
11. What Type of Inventory Monitoring Gauges Do You Want?
The choices for inventory monitoring gauges may include a sight gauge, a float, or even an ultrasonic system. State or federal law my regulate the gauge you select, so be sure to ask plenty of questions. A sight tube is simply a 1-inch clear vinyl hose hooked onto two, 90-degree threaded couplings.
at the top and bottom of the tank. For safety, you should replace these inexpensive tubes every two years. The standard external fittings are PVC elbows. Consider upgrading to stainless steel fittings at a cost of about $10 per tank.
For outdoor tanks, consider ordering embedded studs or hooks so you can secure external sight gauges to the tanks at intervals. Storm winds can whip the tubes, which can cause them to fail — these studs can help hold the tubes in place. Use a locking stainless steel valve at the bottom of the sight gauge in case the sight gauge hose gets a hole in it. Keep the valve locked when not using the tank to avoid vandalism.

12. What Tie-downs Do I Need? Today, there is more emphasis on securing outdoor tanks. Strong winds can knock tanks over, which can crack tanks or cause them to fail. Anchoring is also important to prevent tanks from floating in water. Just a few inches of rain can float an empty tank within containment, which could strike other tanks or other equipment and cause serious damage. More information about flood safety is available in Plan Today for Tomorrow’s Flood (Purdue Extension publication PPP-87), available from the Education Store, www.the-education-store.com.
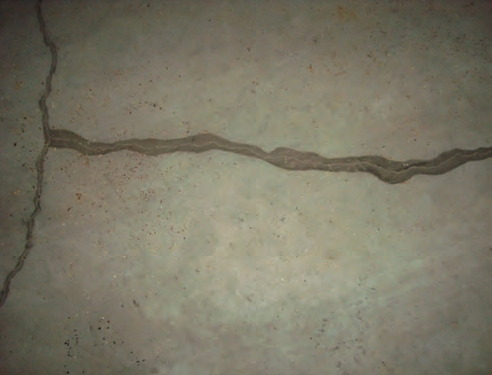
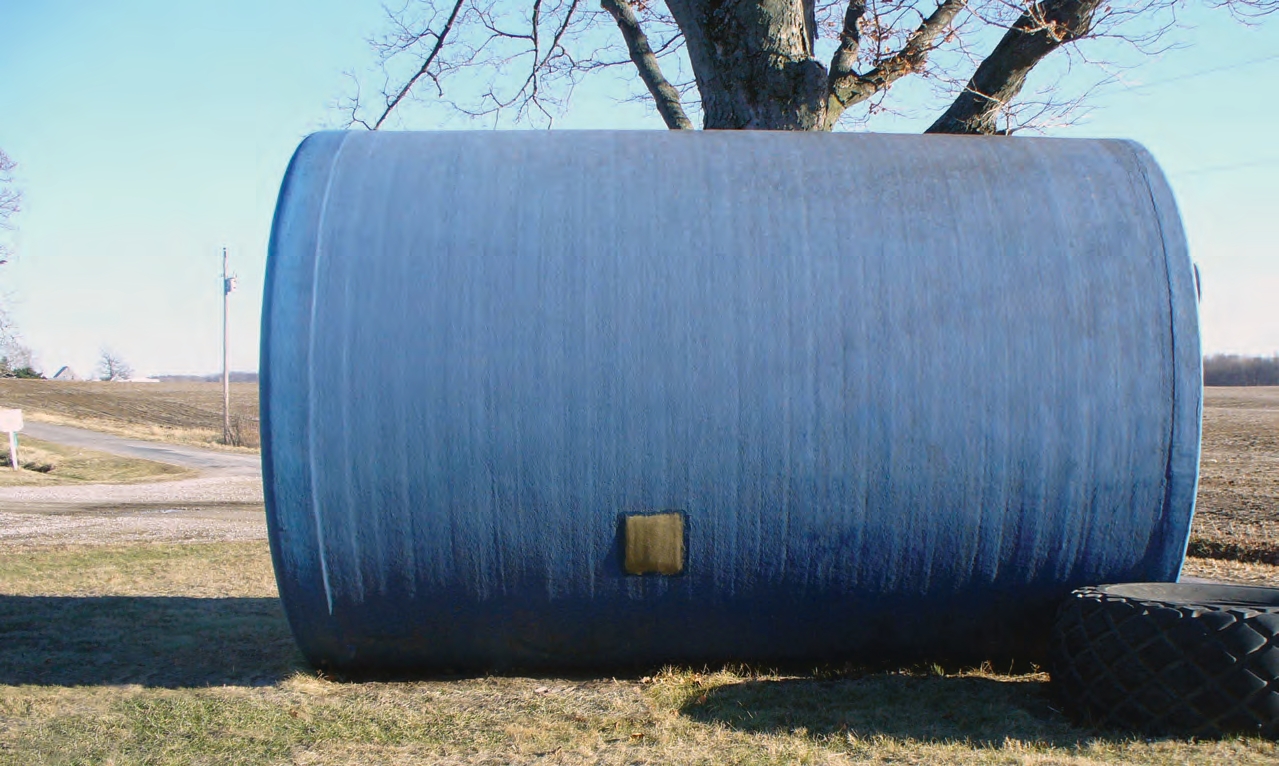
 This storage tank was not anchored and blew over when a storm passed through. The fiberglass tank struck the concrete containment wall, which produced a 4-foot long crack. In the brown sanded and fiberglassed area, the lighter colored crack has been repaired, but can still be seen.
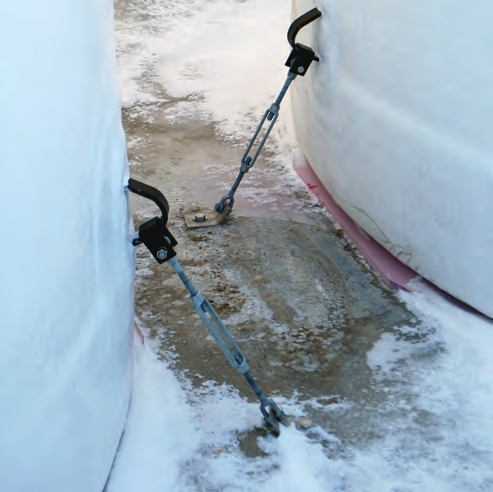
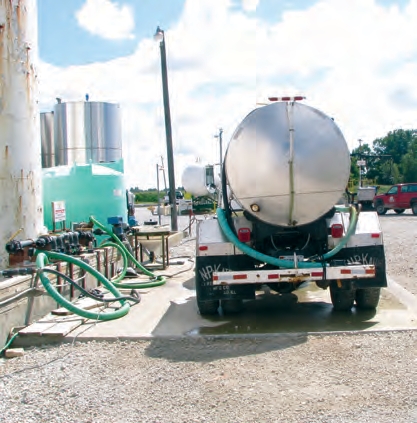
Questions to Answer About Vehicle Tanks
Fiberglass tanks for vehicles are specifically engineered for highway use. The end caps are designed thicker, due to the force that fluids sloshing back and forth exert on the tank walls. Before buying a fiberglass tank for a vehicle, be sure to answer the questions below.
Do I Want Baffles?
You should have baffles installed in tanks that will be used for transport. Liquid loads will shift during transport, especially when tanks are partially loaded. If a tank does not have baffles, the fluid will move to the front of the tank, which can push the truck forward and make it more difficult to stop. The sloshing liquid also places tremendous pressure on the tank walls.
You can add baffles to any size tank as a way of slowing down that sloshing fluid in the tank. Generally, the larger the tank, the more important baffles are.
Will Low Center of Gravity Tanks Be Safer?
Fiberglass tanks for highway transportation can come in different heights, widths, and lengths. Calculating the size of the available space on a truck or trailer, will help narrow down which tank to purchase. Dimension sizes are available from tank manufacturers.
Elliptical tanks have lower centers of gravity than round tanks. When mounting a tank on a truck with a frame that is higher off the ground, consider an elliptical tank. This will keep the vehicle’s center of gravity lower to the ground, and make it less likely for it to roll over. This is why it is important to custom-make the transportation tank so that it has a low profile on the truck.

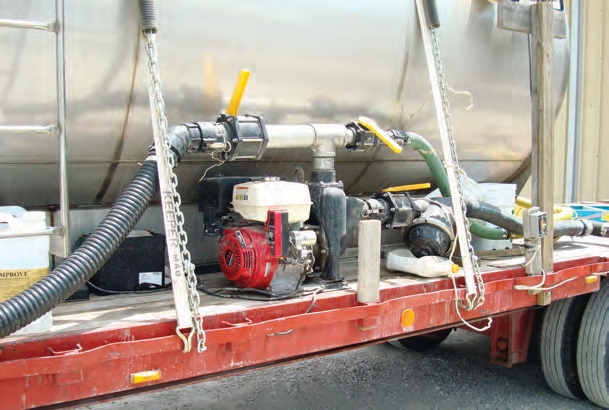
This vehicle-mounted tank is being outfitted with full-length and -width baffles.
Do I Have to Consider the Weight?
A tank’s weight can be an important (and often overlooked) piece of information. Fiberglass tanks are heavier than poly tanks. Not only are fiberglass tanks heavier, but the skids they are mounted to also add weight to the vehicle. Ask the manufacturer to provide you with the weight of the tank, skid, and any attachments you are considering.
To get a rough estimate for the loaded weight of a tank on the truck, multiply the total gallons the tank can hold by 10 pounds per gallon (a precise number for 10-34-0 is 11.4 pounds per gallon). Add up the weight of the tank and its contents to get a total weight that the truck will have to carry in the bed or tow on a trailer.
Make sure the weight of a full tank, its mounting skid, pumping equipment, and empty truck weight do not exceed the truck’s gross vehicle weight rating. If the tank is on a trailer, the total weight of the load and trailer should not exceed any of the hitch devices, the trailer’s gross vehicle weight rating, or the truck’s maximum towing capacity. More information about trailer safety is available in Keep the Trailer Connected to the Truck: Understanding the “Hitch” System (Purdue Extension publication PPP-92), available from the Education Store, www.the-education-store.com.
Do Multiple Compartments Offer Any Advantages?
A split tank can be divided into completely separate compartments. For example, one compartment can hold an herbicide, while another holds an insecticide. This allows you to use one tank with multiple hose reels to deliver different products at the same job site. The additional cost of having multiple compartments in the same tank might be offset by not having to buy two tanks and two pumps to deliver the same service. Consider how products will actually be delivered in your operation.
How Many Accessories Can Be Added?
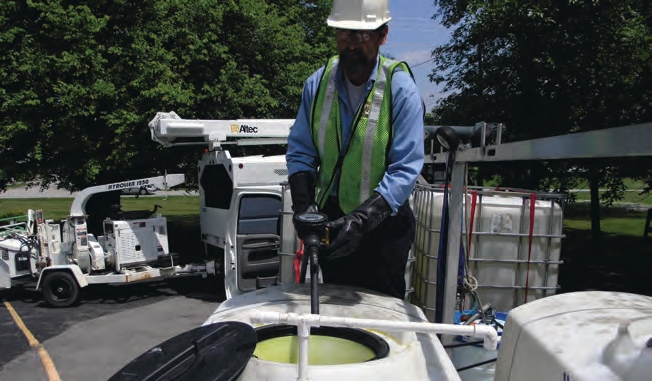
You can add many important accessories to transportation fiberglass tanks, including baffles, sight tubes, threaded flanges, skids, sparge tubes, sumps, lift brackets, ladders, steps, tool boxes, manways, fill ports, fittings, and lights. One of the more important accessories to consider is an agitation system. Without agitation in the tank, some products will ultimately settle out on the bottom of the tank. Manufacturers can outfit tanks with the fittings, pipes, and agitators (for example, paddles) at the time of construction. Another important question is how to estimate the volume of fluid in the tank. Because fiberglass tank walls are opaque, it is nearly impossible to estimate how much product it contains. Some tanks have clear sight tubes. Graduation marks on the side of a tank will indicate how much fluid remains in the tank.
However, this clear tube will break down over time or break off. Another problem is that the clear tubes can discolor and stain, which makes it impossible to see the fluid level in them. Some manufacturers have an option to construct tanks that have built-in clear windows with gallon markings along their lengths.

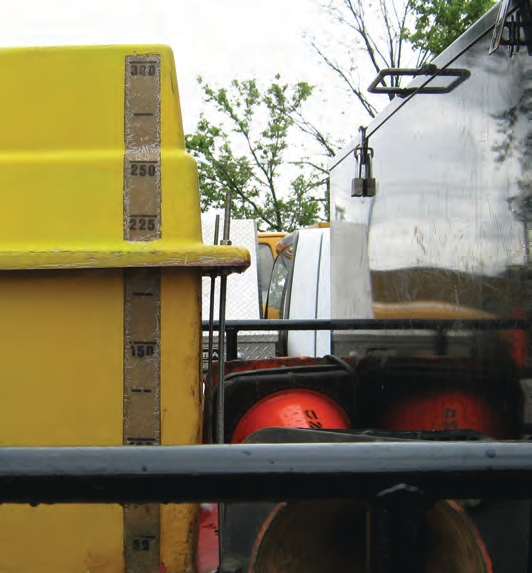 A translucent area with graduated markings allow you to estimate a tank’s contents.
 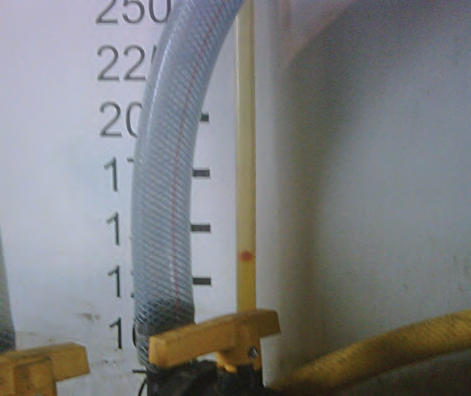 The red ball floating in the liquid helps you gauge how much is left in the tank.
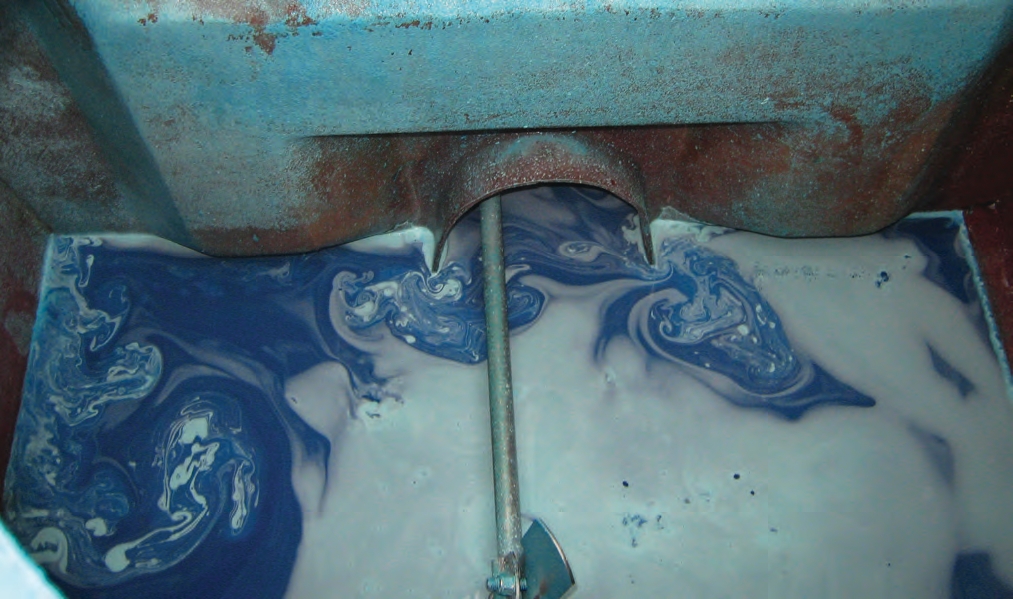
Installing and Inspecting Storage Tanks
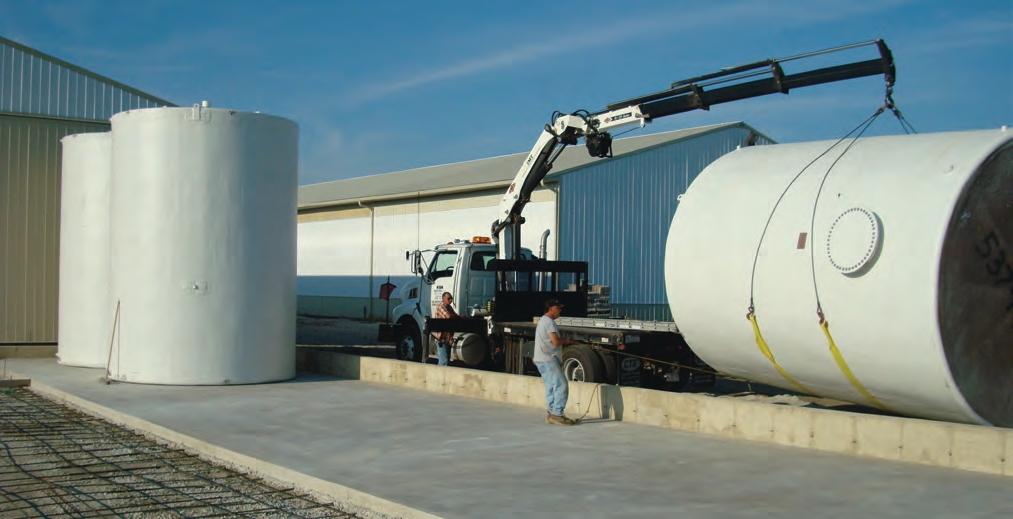
Unloading storage tanks and moving them to their final locations can be major operations. Before installing a tank, make sure the ground where it will be placed is level so that the pressure is evenly distributed within the tank. Concrete, sand, or pea gravel work well as flooring substrates. It is very important to make sure the floor has no jagged edges that the tank will sit on.
Knuckle booms that unload tanks from semi trucks make your job much easier. Each tank will have lift points near its top and along the sides, and can be physically lifted straight up, and then placed on the ground. The boom operator then switches the hooking to the top and brings the tank up vertically to allow the forklift to move the tank indoors.
You will need a forklift or front-end loader to position the tank and place it upright once it is unloaded. Know how much each tank weighs and make sure you have a forklift that can handle the weight. To move, strap tanks to the forklift, and use spotters to bring them indoors.
Valves and other plumbing fixtures are installed after tanks are delivered. While there are many choices for valves and fittings, be sure to chose materials that are compatible with the materials that will be stored in the tank. In addition, ask the manufacturer how much compression force (torque) you can apply on the fiberglass as you tighten up the fittings and valves. Once the system is plumbed, fill one of the tanks with water for a day or two, and check for leaks around the plumbing or through the tank. Once a tank passes this test, simply pump the water from that tank into the next tank and repeat the process until you evaluate all your tanks.
If the storage tanks remain outdoors, tie them down to prevent the wind from tipping them over and potentially cracking them or damaging valves. Again, make sure to secure the tanks to the ground with tie downs — just a couple of inches of rain accumulating in an outdoor containment area can lift tanks. However, be careful not to over tighten the tie downs. These are glassed in like all other additions to the tank, and it’s possible to tighten the cables so much that they pull the metal hooks away from the tank. Tighten the cables just enough to keep the tanks in place during a storm. Check the cables annually for tension, and retighten as needed.
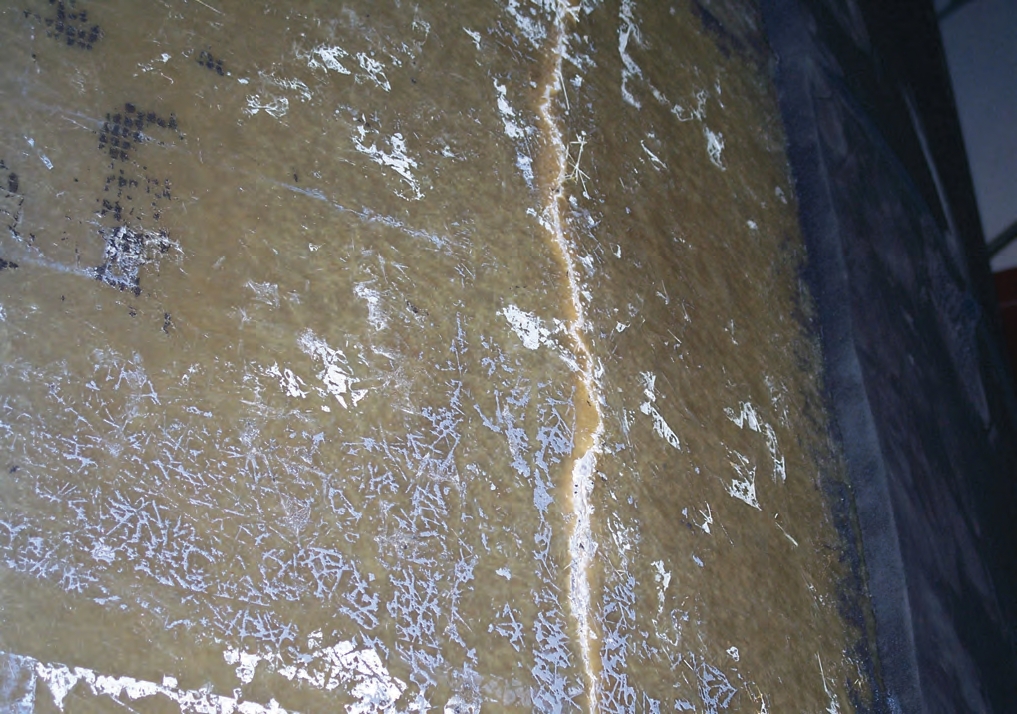
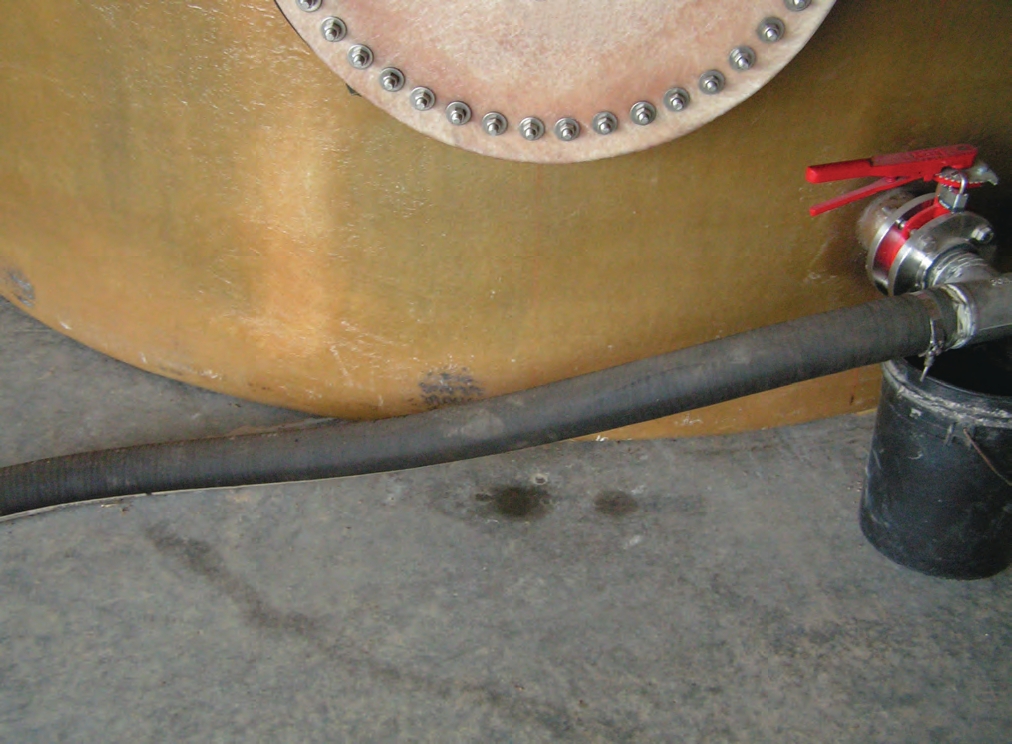 A small leak from this tank’s manway allows the contents to accumulate on the concrete.
 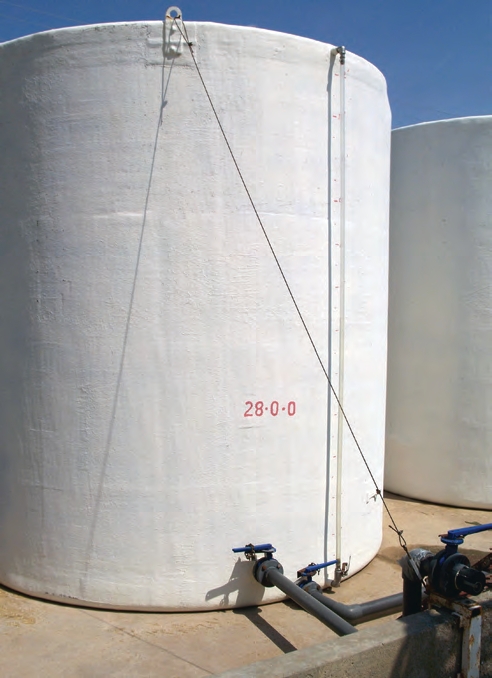 Tie-downs can secure tanks in the event of flooding or high winds.
 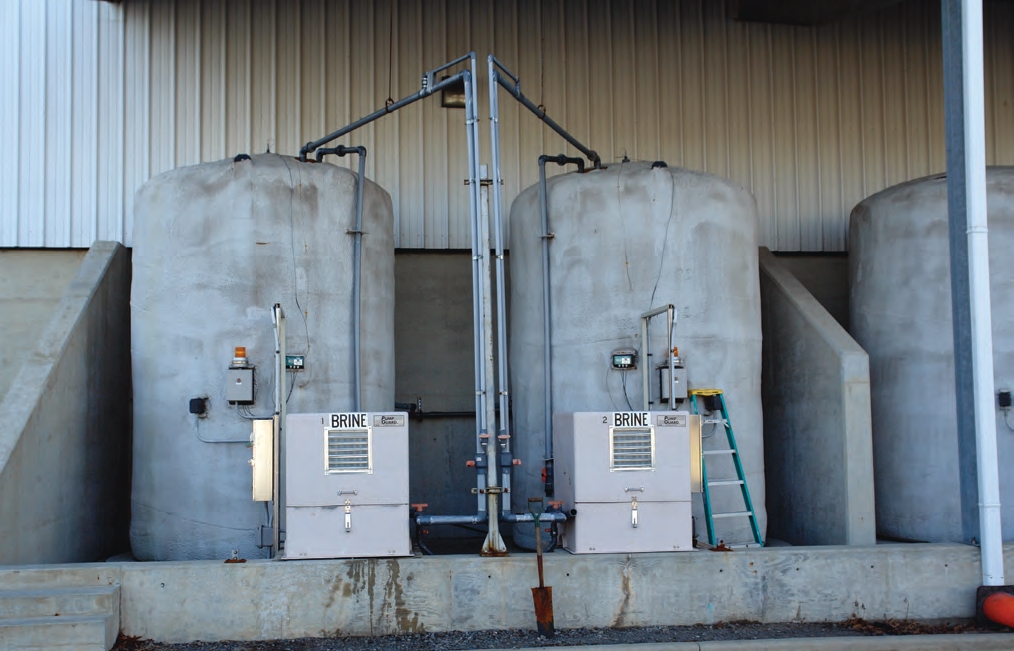 These brine tanks have been coated with insulation to protect their contents from cold weather.
 Installing and Inspecting Vehicle Tanks
When mounting a tank to a truck or trailer, it’s important to answer these questions:
• How will I keep the tank from moving around?
• How will I keep the tank from rubbing against metal and sharp objects?
• How will I keep the tank from vibrating?
Failure to properly address these three issues will cause your new tanks to fail prematurely.
Normally, fiberglass tanks have skids that have been glassed to the tank. You can bolt the skids to a truck or trailer frame for a more permanent attachment. If you do secure the tank to the frame, use stainless steel bolts of grade 5 or greater. Securing a tank to the frame prevents the tank from moving and keeps the tank from rubbing against other objects.
Once a tank is installed on a vehicle, completely inspect the tank, including the nuts and bolts, to make sure all of the attachments are tight. Fill the tank with water, and check it for leaks. Turn the pump on at a low pressure for a few minutes. Then apply a higher pressure and let it run for 30 to 60 minutes. Look for signs of leaks around any fittings and seepage through any crack that may have occurred during transportation from the manufacturer to your operation.
If you will occasionally remove a tank during the season, secure the tank with web tie downs. Be aware the tank may still move, which may allow it to come in contact with sharp objects. For more information about tie downs, see Securing the Load (Purdue Extension publication PPP-75), available from the Education Store, www.the-education-store.com.
Another securement option is to place fiberglass tanks into saddles. If you use a saddle, it is important to make sure the tank does not rock back and forth against the metal frame during transport, which would allow the fiberglass tank to rub against the metal. As an extra precaution, you can place a piece of rubber liner (or some other soft insert material) between the tank and the metal frame.
It is very important that you mount tanks on surfaces that are not going to flex during operation. Transport tanks under flexing stress can crack. Fittings on the tank can often be overlooked. The fittings need to be in safe places where they are not going to be broken off. Be sure to provide plenty of clearance between the fittings and the vehicle bed to avoid damaging the fittings.
You need to inspect the tank each day, making sure that there are no leaks around the truck or Adding material between the tank and frame helps prevent unwanted rubbing between the fiberglass and the metal. It also acts as a shock absorber. residues in the bed. If a fiberglass tank has a crack, it will seep product very slowly. Remove and thoroughly inspect every tank (and the pumps and hoses) each off-season. The off-season is also a good time to check the bottoms and sides of tanks to see if any portions are rubbed.
For more information about hoses, see The Inspection and Selection of Hoses (Purdue Extension publication PPP-89), available from the Education Store, www.the-education-store.com.
 Bolts that hold the frame to the truck are critical stress points. Replace bent bolts with bolts that are graded for such stress.
  These metal rods link the fiberglass tank to the metal frame.
 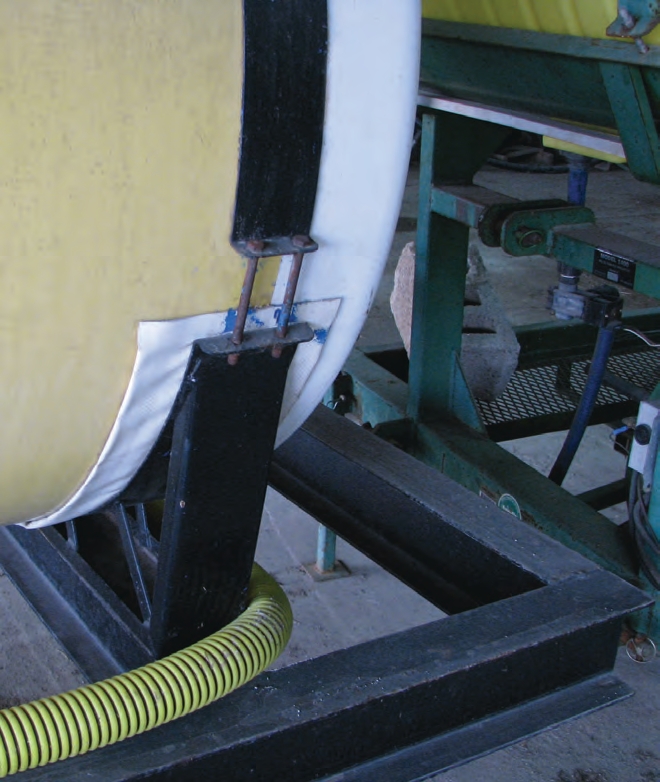 A soft insert separates this tank from metal.
 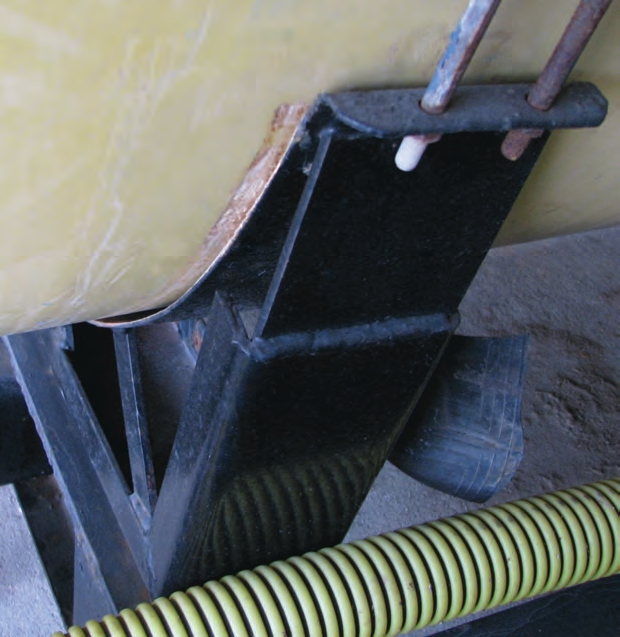 The soft insert for this tank fell out and the tank was damaged when it rubbed against the metal frame.
 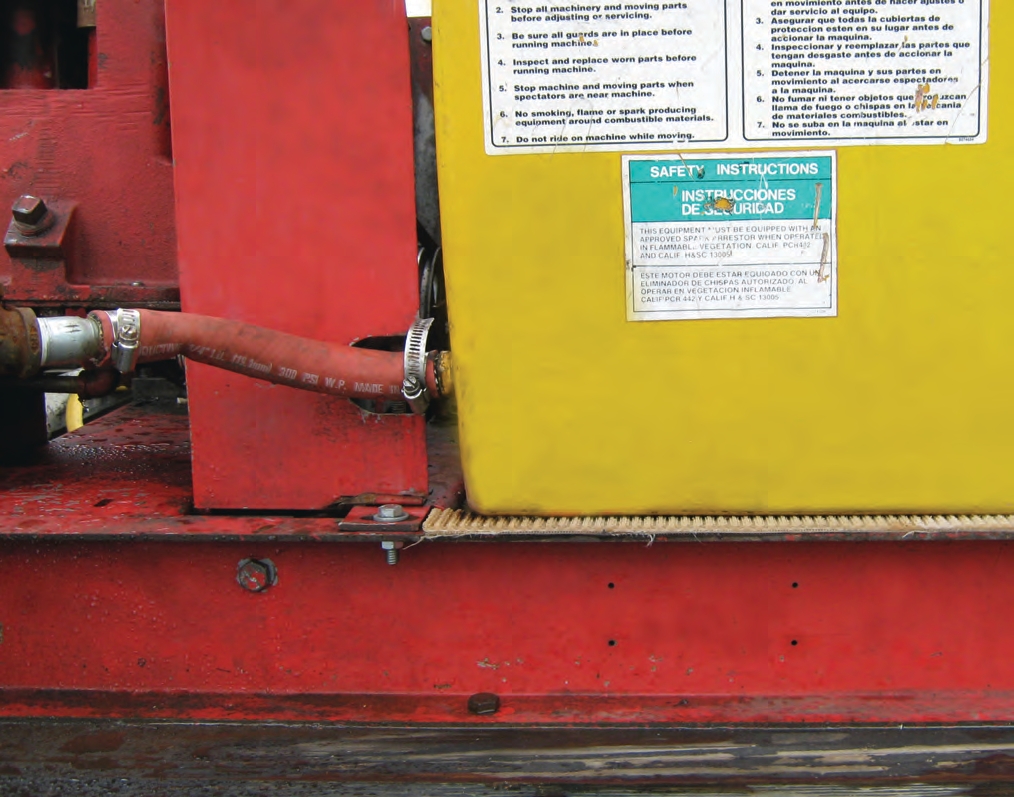 Adding material between the tank and frame helps prevent unwanted rubbing between the fiberglass and the metal. It also acts as a shock absorber.
 Repairing Fiberglass Tanks
While fiberglass tanks can withstand extreme temperatures, over time, ultraviolet light will degrade the resins that hold the glass in place. As the paint or gel coat breaks down and gets thinner, small glass particles that once were embedded in resin will begin to stick out.
Ultraviolet damage is a surface phenomenon. Simply applying a coat of paint or gel coat will “refasten” the fibers into the paint or gel coat. Gel coatings are more expensive than regular paints, but are preferred because they are resin-based.
When recoating, it is best to completely restore the entire tank instead of just a section that needs attention. Lightly sanding the entire tank before applying the paint or gel coat will help the coating adhere to the surface better.
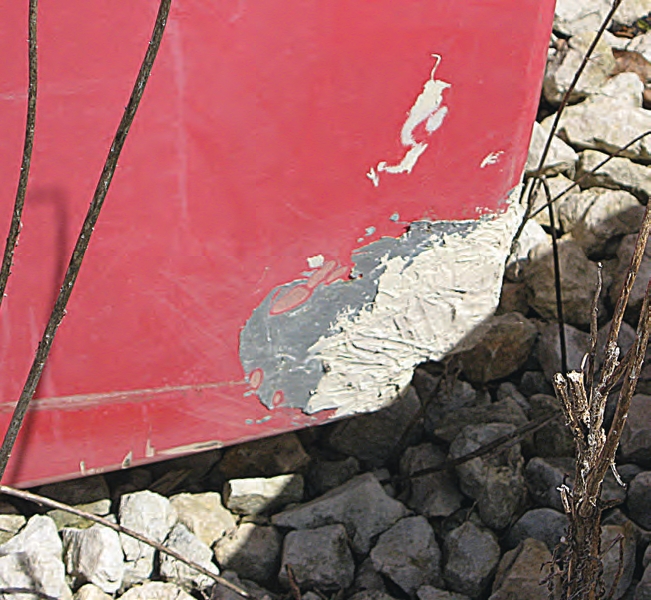
Another sign that a tank may need attention is when the walls on the outside of the tank show a spider web pattern. Such patterns are often caused when something hits or bumps a tank (such as a forklift). You will need to repair these cracks from the outside.
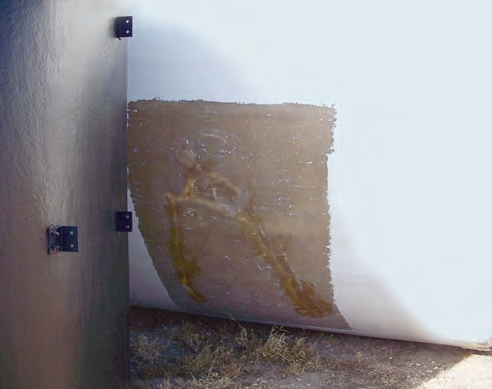
If you observe seepage through a fiberglass tank or wet areas on an outside wall, that indicates that the liquid from the inside has broken through the resin. The liquid may be following a small crack in the tank wall.
Repairing an internal leak or external crack takes more patience than just painting over a tank’s surface. If you see a crack from the outside, fix it from the outside. If you see seepage in an area, you’ll want to fix that from both the inside (if you can access that area) and the outside. The best repairs are done both inside and outside.
Fiberglass repair kits often contain three basic materials: resin, hardener, and fiberglass patches — the same materials used in the tank’s original construction. The resin will be a thick liquid, while the hardener has the consistency and color of water.
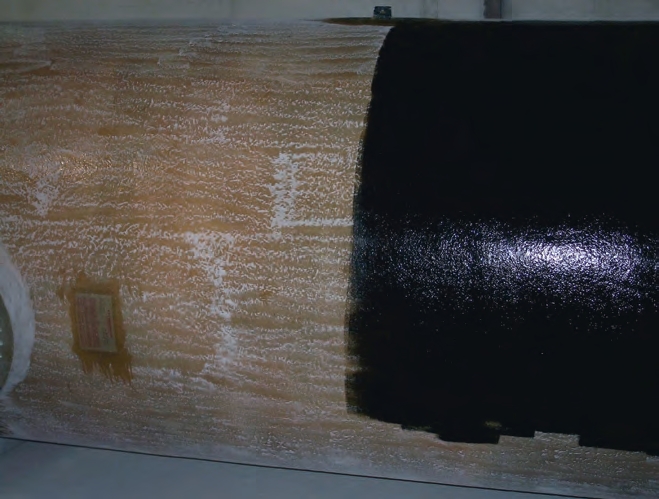
Pay attention to the amount of hardener you mix with the resin. One gallon of resin only takes a few tablespoons of hardener to set up. When combined, the hardener and resin undergo a chemical reaction that turns the resin into a gel-like material. As it gels, the resin gets hotter. Too much hardener can create a burn spot, which A simple fiberglass repair. Painting over the fiberglass patch would have helped protect it against ultraviolet light. in turn can create leaks. Carefully read and closely follow all repair kit directions.
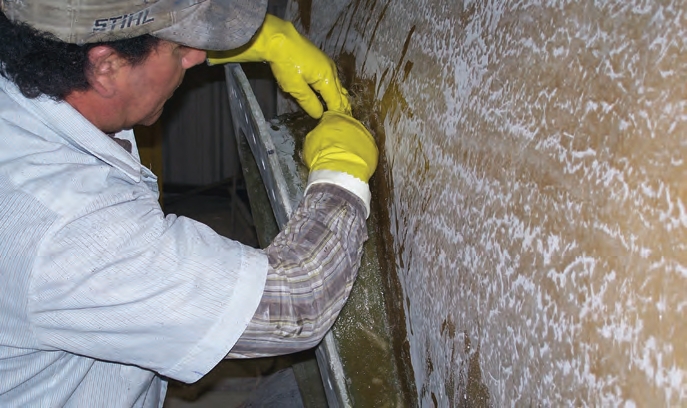
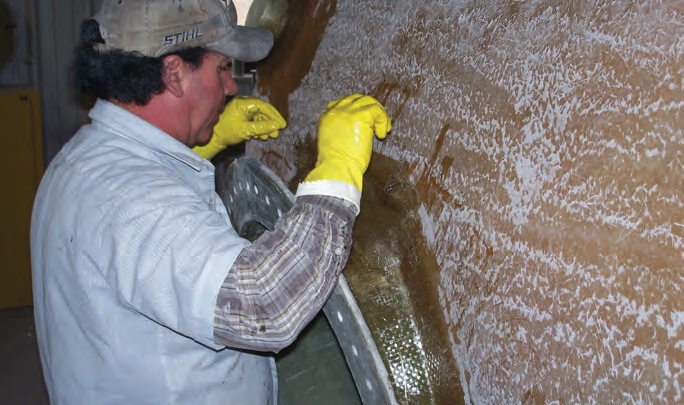
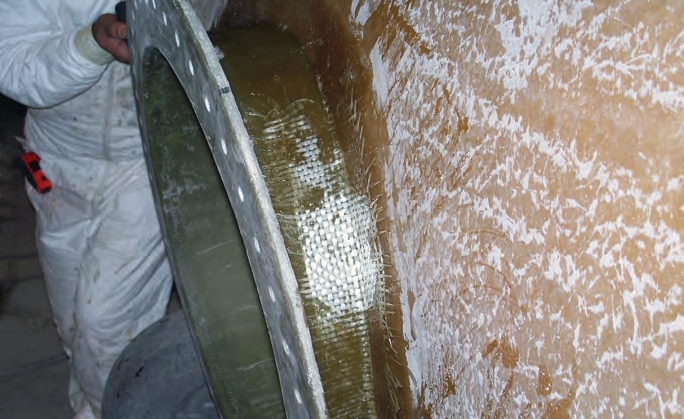
How should you go about repairing a tank? The rule of thumb when you patch an area is to make a patch that’s at least twice the size of the cracked or seeping area. For example, if you have a 4 x 4-inch spider web or wet spot, sand and create a patch for an 8 x 8-inch area around it.
 Inspect tanks for cracks that can appear anywhere, particularly if something hits the tank.
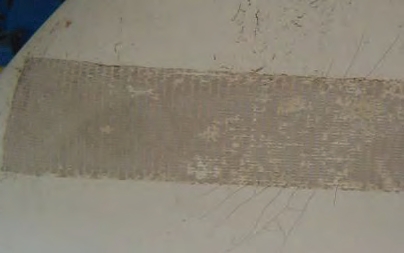

 A simple fiberglass repair. Painting over the fiberglass patch would have helped protect it against ultraviolet light.
Before patching a tank, completely drain the tank and let it air dry. This is a crucial step — fiberglass applied to wet surfaces will not cure properly (and you’ll have to repair your tank again). Cut the fiberglass to the proper dimension to cover the sanded area. Once you mix the resin and hardener, they immediately begin to react with each other. Add the precut fiberglass repair strip to the resin until it is completely saturated. Remove the fiberglass and squeeze it out like a wet towel.
Then, apply the repair piece of fiberglass to the sanded area. Once applied to the tank, roll out any air bubbles while the area dries. The patch will be tacky to the touch and harden over time. It can take 10 to 40 minutes for the repaired area to dry. The actual curing time depends on the temperature in the shop and the amount of hardener used with the resin. Once the fiberglass dries, apply a good quality paint or gel coat over the surface. A general rule of thumb is to allow new fiberglass to cure two to four hours before allowing fluid to touch the repair. Again, always follow the instructions in the repair kit.
Cracks in the corners of transport tanks can be difficult to repair. Generally, corner cracks are caused when the protective bumpers between the skids and tanks have come out, slid down, or worn out. These conditions allow fiberglass tanks to rub against metal, which causes a weak spot or crack. Weakened areas will look like they have been sanded and will often have a dull, worn appearance.
For such cracks, try to fix the tank from both sides. If the crack is on the end of the tank where the fill is located, you will be able to fix it from both the inside and outside. However, the crack may be inaccessible from the inside because of the baffles. If that is the case, you can choose to only fix the tank from the outside, remove the baffles so you can repair from the inside, or have a tank repair shop fix the tank.
 This unvented tank cracked when the operator was pulling liquid out of the tank. The sidewall cracked on the outside
 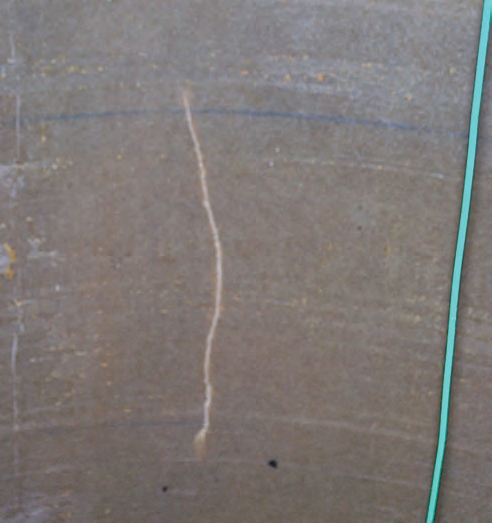 The tank was repaired, but not painted when these photographs were taken.
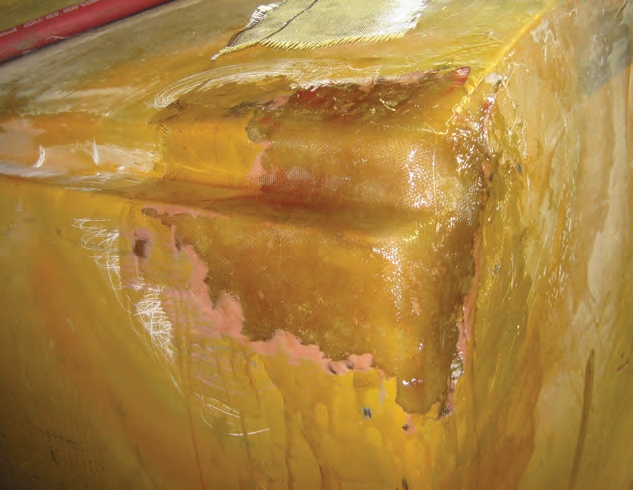
 Make sure to support plumbing to limit pressure on tank fittings. A crack that’s been repaired with putty is only a temporary fix.
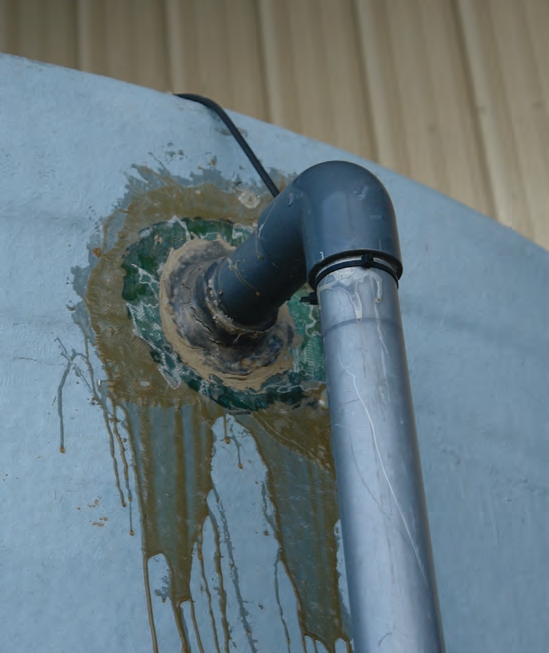

Buying Used Fiberglass Tanks
Because of their durability and long service life, you can buy used fiberglass tanks, usually for a fraction of the cost of new tanks. But if you buy a used tank, be sure to do your homework. If the used tank stored fertilizer at a bulk fertilizer plant, then it’s probably a good tank to store your fertilizer. Or if a turf company is selling a fiberglass tank that stored a pesticide, then buying the tank for your turf operation is probably fine. In other words, find used tanks that have contained the same materials you will be using.
Another thing to consider with used tanks is how much of the stored material has penetrated into the tank itself. For instance, it would be risky to buy a used tank that stored 2,4-D if you plan to use the tank in your horticultural or nursery business. The odds of a used tank being suitable for your application decrease when you buy a tank from another industry.
Most used tanks are sold at auction. Before you bid, know what material you want to put in the tank and what resin was used to build the tank. Knowing the resin can make buying a used tank difficult. You can’t tell by looking at a tank what resin was used, so you cannot know what the tank was meant to hold. If you can’t find out what resin material is in a used tank, then it is not a good idea to purchase it.
Examine used tanks and look for manufacturer stickers. These stickers may include serial numbers. A call to the manufacturer with an identification number may provide important information about the tank’s age, its construction, and the types of resins it uses. It will be difficult to know if a tank will work in a specific application without the manufacturer’s tag.
When possible, take a strong flashlight and look inside the tank to make sure it is in good working condition and free of residue or any defects.
Ask Before You Buy
Before you buy a used tank, ask these questions:
• What material did the tank hold before?
• Did it hold the same material you are going to store in it?
• Is the manufacturer’s sticker still attached to the tank?
If so, call the manufacturer to get information about the tank.
• What resin is the tank made of?
• Can you examine the inside of the tank by taking off the manway?
• How much will needed repairs cost?
 Inspect used tanks carefully before you buy them.
  In this case, an inspection would reveal this tank’s broken baffle and an improperly repaired leak.
 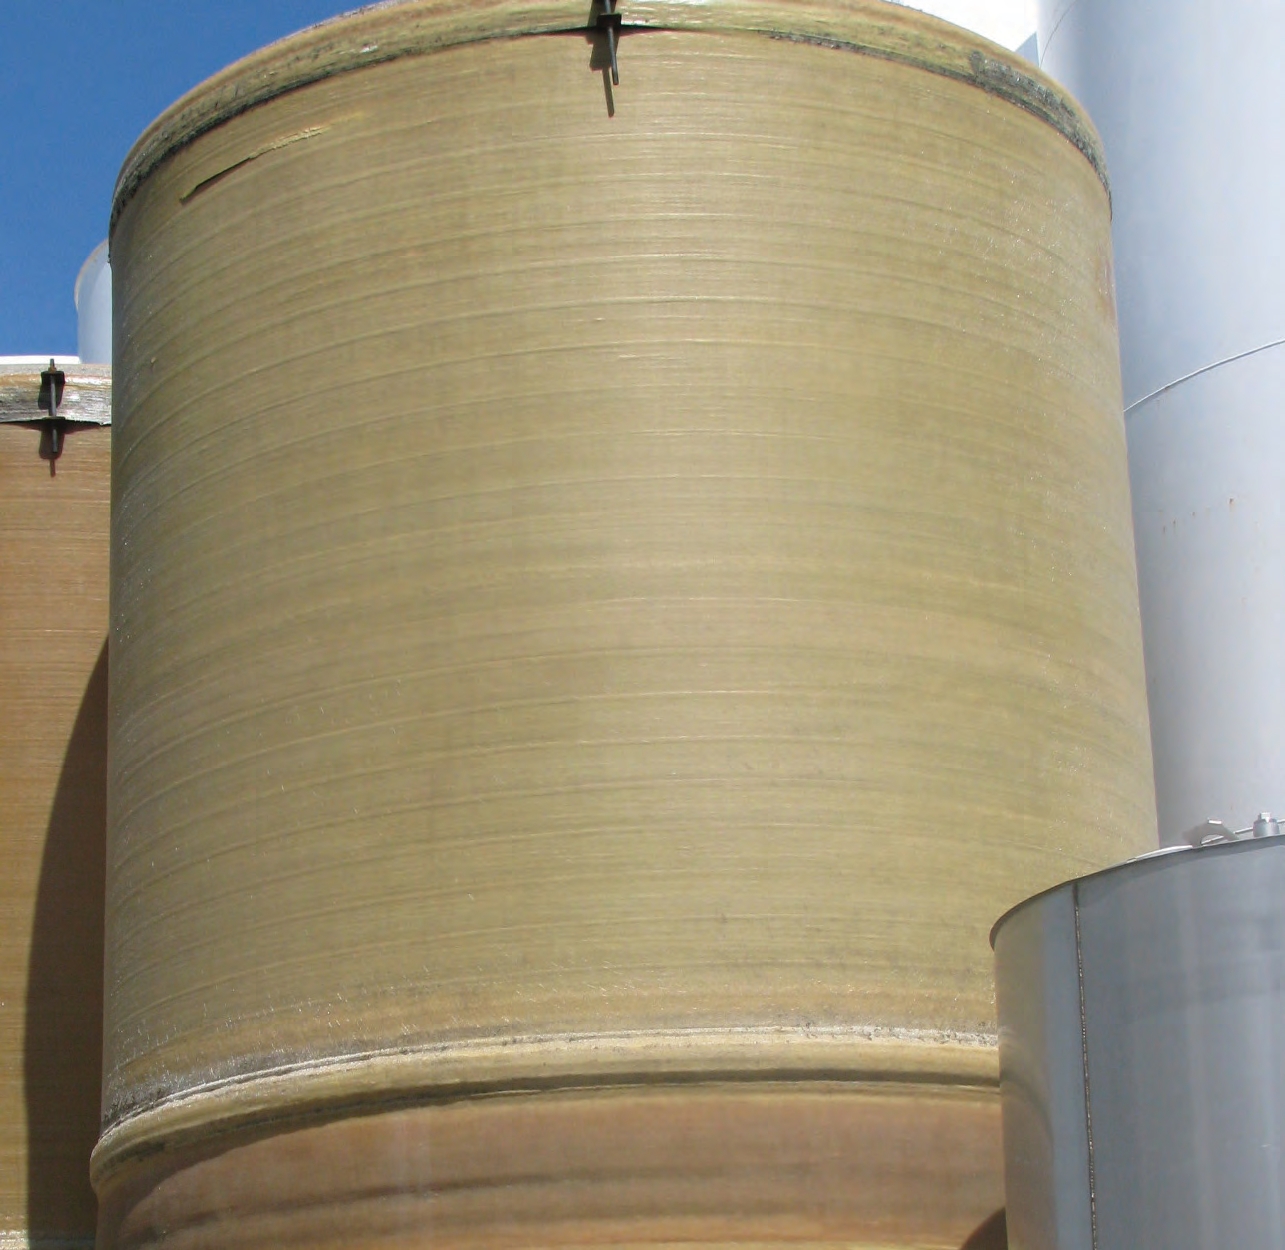 Make sure to inspect any used tanks you are considering purchasing. The top of this tank has an obvious crack. Also notice that the top is beginning to separate from the sidewall, and the fiberglass is easily seen on the tanks.
 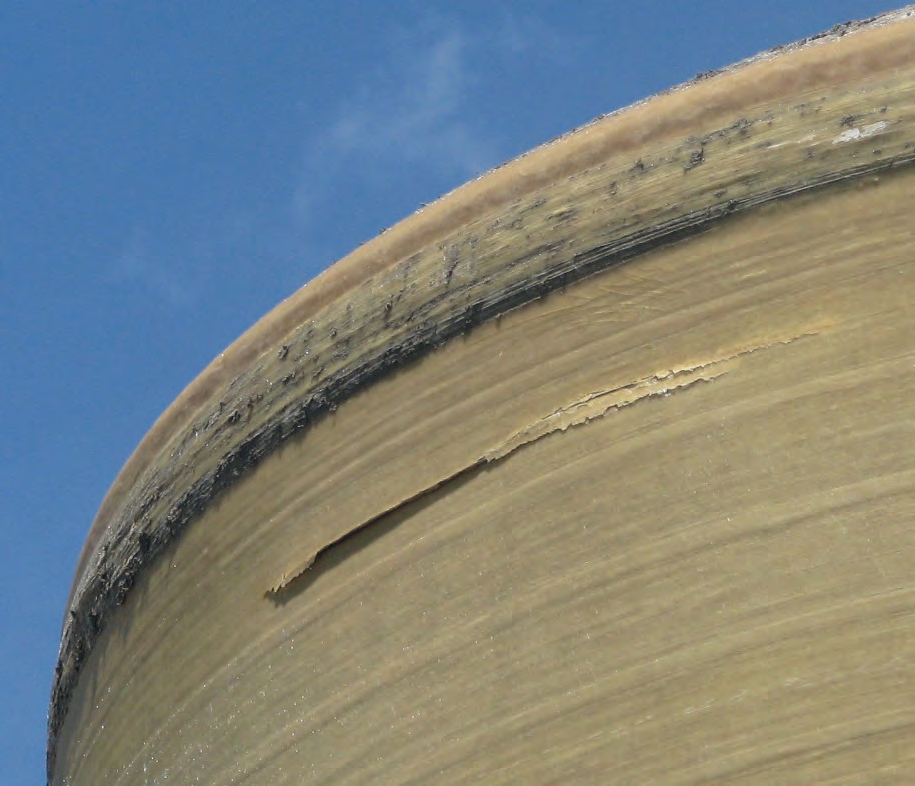 More importantly, this tank has been sitting outside, and it does not have a gel coating to protect it against UV damage. If you were to buy this tank, you would have to consider the costs to have the top seams resealed, the crack repaired, and a gel coat applied. While these are rather easy fixes, there is still an expense associated with these repairs.
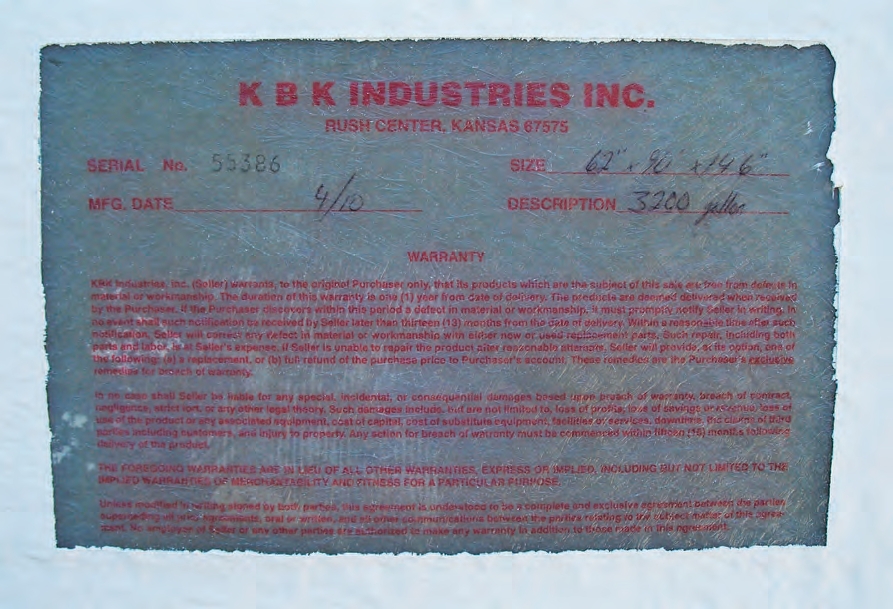
 This used truckmounted fiberglass tank is up for sale. Its inside sidewalls have been wiped clean of residue (red circular patch), and the fibers appear to still be embedded into the resin, suggesting that the products carried in the tank have not hurt the resin.
 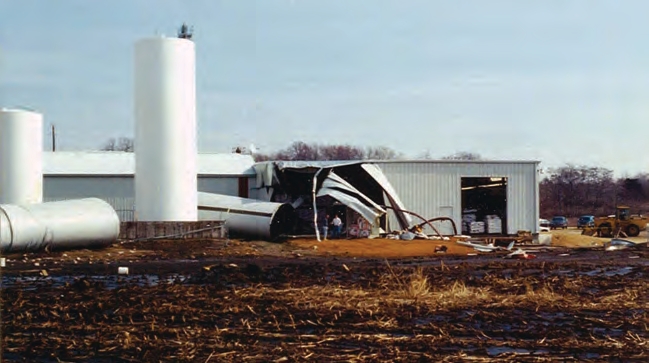 Show caution when buying used tanks because there is a lot at stake. These two, 40,000-gallon tanks failed. One of the tanks damaged a nearby building as it fell. Saving a few dollars up front might cost you a lot more in the long run.
 Conclusion
Farms and businesses use a wide variety of fertilizers, pesticides, salts, and other chemicals. While these products provide tangible and measurable benefits, a ruptured tank that releases its contents around the storage site or along a highway often leads to serious legal, medical, regulatory, and insurance issues.
This is why you need to regularly and thoroughly inspect the tanks that store and transport of these products. Tanks that store and transport these products are made from three basic materials: plastic, fiberglass, and steel. Each tank material has its own strengths and weaknesses, so it is important for you to examine both sides of the ledger before you purchase any tank.
Acknowledgements
Thanks to Dawn Minns for graphic design. Thanks also to those who offered constructive comments during the development of this publication:
Bob Avenius • TrueGreen
Scott Case • KBK Industries
Steve Dlugosz • Harvest Land Co-op
Harold Enger • Spring-Green
Nancy Fitz • U.S. Environmental Protection Agency
Chad Frank • Synergistic Solutions
Paul Hardy • Orkin
Erich Hasler • Beck’s Hybrids
Matt Kraushar • Purdue University
Mathew Laak • Wisconsin Department of Agriculture,
Trade and Consumer Protection
Kip Landwehr • Winfield Solutions
Dan Matteson • Townsend
Doug Mohney • RPX Composites
Dennis Nowaskie • Purdue University
Matt Pearson • Office of Indiana State Chemist
Brad Peas • AgroChem
Darrell Oltman • Snyder Industries
Doug Quear • Co-Alliance
Mark Utendorf • Emerald Lawn Care
Phil Walker • Purdue University
Work on this publication was partially supported with outreach funding from the Indiana Water Resources Research Center at Purdue University.
Disclaimer
This publication is intended for educational purposes only. The authors’ views have not been approved by any government agency or business. The publication is distributed with the understanding that the authors are not engaged in rendering legal or other professional advice, and that the information contained herein should not be regarded or relied upon as a substitute for professional consultation. The use of information contained herein constitutes an agreement to hold the authors harmless for liability, damage, or expense incurred as a result of reference to or reliance upon the information provided. Mention of a proprietary product or service does not constitute an endorsement by the authors or their employers.
Find Out More
Purdue Pesticide Programs offer a number of publications on related topics to help you manage your operations better.
All publications are available from the Purdue Extension Education Store:
www.the-education-store.com
(888) EXT-INFO (496-4636)
• Poly Tanks for Farms and Businesses (PPP-77). Learn more about selecting and using poly tanks.
• Bulk Pesticide & Fertilizer Storage on Indiana Farms (PPP-63). Understand the factors to consider if you want to buy in bulk.
• Plan Today for Tomorrow’s Flood (PPP-87) Learn about protecting your business in
the event of a disaster.
• Keep the Trailer Connected to the Truck: Understanding the “Hitch” System (PPP-92) Be safer on the road by better understanding how trailers and trucks are attached.
• Securing the Load: A Guide to Safe and Legal Transportation of Cargo and Equipment (PPP-75). Make sure loads don’t fall off your vehicles.
• The Selection and Inspection of Hoses (PPP-89 ). Know the rules and right ways to transport equipment on highways.
 Poly, fiber, and steel tanks have been around for a long time. Each has its own set of advantages and drawbacks. Choose wisely when investing in a storage or transport tank.