


Removing Herbicide Residues from Agricultural Application Equipment
Authors
- Fred Whitford, Director, Purdue Pesticide Programs
- Dennis Nowaskie, Superintendent, Southwest Purdue Agricultural Center
- Bryan Young, Associate Professor of Weed Science, Purdue University
- Kirk Foreman, Commercial Certified Applicator, Falmouth Farm Supply
- Ples Spradley, Associate Professor, Pesticide Safety Education, University of Arkansas
- Thia Walker, Extension Specialist, Pesticide Safety Education, Colorado State University
- Joseph Becovitz, Pesticide Program Specialist, Office Indiana State Chemist
- John Obermeyer, Integrated Pest Management Specialist, Purdue University
- Daniel Reynolds, Professor of Weed Science, Mississippi State University
- Bill Johnson, Professor of Weed Science, Purdue University
What this publication will cover:
- Invest a Little Now; Avoid Big Costs Later
- Factors That Lead to Herbicide Injury
- Where Do Residues Hide?
- Tank Cleanout: Turning a Lot Into a Little
- The Steps for Removing Herbicide Residues
- Eliminating Residues from Tender or Nurse Trucks
- A Procedure Checklist for Cleaning a Sprayer
- Conclusion: Water Is Your Friend
- Acknowledgments
- Disclaimer
Invest a Little Now; Avoid Big Costs Later
All of us say that quality is important, but it is easy to cut corners when we’re pressed for time. Consider the following example: Everyone at our agricultural retail store was under pressure to spray a bunch of backlogged acres, one applicator recalled. Two weeks of rain kept us from spraying, and it really put us behind the eight ball.
We started early in the morning and worked late into the night seven days a week until we caught up. We were spraying fields like there was no tomorrow. Late one day, I sprayed my last field of corn and was eager to start spraying soybeans. I knew I needed to rinse the tank because the chemicals I’d been spraying on corn could damage soybeans. But I thought I could save a little time, so I made an executive decision to quickly flush the sprayer at the edge of the field instead of completely rinsing it.
Time Constraints with Weather Delays
Many of today’s herbicides are active at very low rates. If you cut corners when cleaning application equipment, it can cost thousands of dollars in damage claims even when there are only small amounts of herbicides left in the spray system.
“We don’t have time during the busy season,” should never be the excuse for not cleaning out sprayers. As the old adage says: “You can pay me now or pay me later.”
Time Constraints with Weather Delays Many of today’s herbicides are active at very low rates.
If you cut corners when cleaning application equipment, it can cost thousands of dollars in damage
claims even when there are only small amounts of herbicides left in the spray system.
“We don’t have time during the busy season,”should never be the excuse for not cleaning out sprayers.
As the old adage says: “You can pay me now or pay me later.”
“We don’t have time during the busy season,” should never be the excuse for not cleaning out sprayers. As the old adage says: “You can pay me now or pay me later.”
“I was trying to save time,” was all I could answer.
When we got to the field, all we could do was stare and gasp at the acres of damaged soybeans. I could hear the farmer tell my manager and an agronomist who had been called to explain the damage, that he paid our company to kill the weeds not his soybeans.
Then I heard the farmer ask my manager, “Who is going to pay for the damage to my soybeans?”
Unfortunately, and more to the point, he threatened to take his business to one of our competitors. This meant not only a loss of sales for future applications, but for sales of fertilizer, fuel, chemicals, and seed. I could see from the expression on my manager’s face that losing the income from a 5,000-acre farm would put a serious strain on year-end profits.
About that time, the farmer turned to me and shouted,“What were you thinking?”
I knew the answer, but decided it would be more prudent not to say anything. The conversation shifted back to the manager, which gave me time to relive the week before I had pulled into the soybean field.
I recalled that we got enough rain the two weeks before, that we had to stop making applications until the soils dried out. The sprayers were sidelined.
If only I could go back and undo that decision to cut corners. But that was no longer an option. My manager told the farmer he would immediately contact the insurance company and start the process of getting the crop damage complaint resolved. Thankfully, it seemed to be enough to pacify the farmer. Now, all we could do was wait until the insurance company settled with the farmer to see if he would remain one of our customers.
Obviously, this situation could have been prevented if the applicator took the time to clean and flush the entire sprayer system — tank, hoses, screens, booms, and nozzles. However, bad things happen when we rush or take shortcuts to save time. Using contaminated tanks seldom ends happily.
Saving a few minutes by taking shortcuts during the cleanout process can almost guarantee that you will spend more time in the long run resolving contamination issues. It is much smarter to spend the time to do it right the first time.
This publication discusses and describes the proper procedures to remove residues from pesticide application equipment. These cleaning procedures can help prevent applicators from unintentionally introducing damaging herbicide residues to sensitive or nonlabeled crops.
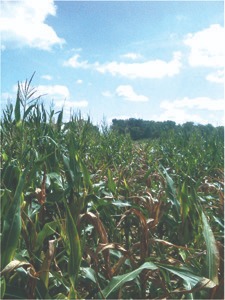
(right) This non-Roundup Ready® corn was damaged after being sprayed by a tank contaminated with glyphosate.
Insurance Claim on Garbanzo Beans
An applicator treated a 210-acre garbanzo bean field with a combination of an herbicide and fungicide in two different loads. The beans sprayed with the first load looked stunted and dying, while the beans sprayed with the second load appeared normal.
As it turns out, the applicator was spraying barley before he sprayed the beans. After spraying the barley, he brought the rig into the plant and triple rinsed the tank. But the chemical that damaged the beans was caught in a line that he did not rinse. The insurance company paid $30,000 to cover the damage.
Do not make arbitrary decisions to cut corners when it comes to cleaning out a sprayer. Even if a manager tells you not to rinse the sprayer, always be sure to let them know what you were just spraying to avoid costly mistakes.
Factors That Lead to Herbicide Injury
Herbicides can damage crops in many ways.
Applying the wrong herbicide can damage susceptible crops, so can herbicides that drift from nearby applications, and so can excessive water runoff that contains herbicides. Herbicides also can injure crops when applicators don’t follow the application directions specified on product labels or when they spray under abnormal environmental conditions.
And, of course, herbicides can damage susceptible crops when applicators do not thoroughly clean sprayer equipment before spraying different crops. Even very small amounts of herbicide residue left in tanks, hoses, screens, fittings, or booms can seriously damage crops.
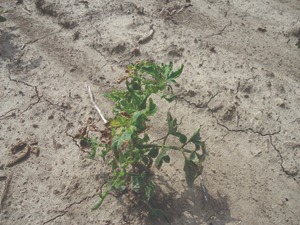
This tomato field was damaged when herbicide drifted onto the field.

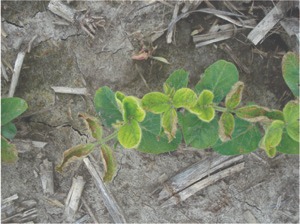
This non-Roundup Ready® corn was damaged by a sprayer contaminated with a soybean grass herbicide plus glyphosate.
If you leave herbicide residues in the spraying system, you will not only pay up-front to settle the claim, but there may be other costly long-term repercussions. For example, if you damage a crop, the farmer might decide to take his or her business elsewhere. That same farmer might also tell everyone about your mistake, which could turn away potential customers. Neither of those repercussions is good for business.
This tank was cleaned with cleaner, but the screens were not properly cleaned.
Why the Issue?
There are several reasons why unwanted herbicide residues continue to find their way onto the wrong crops.
Herbicides Are Active At Low Concentrations
Some herbicide products still call for applying pints or quarts of herbicide per acre, but many herbicides now have application rates measured in ounces per acre. Residues from products with these lower application rates can affect crops even when trace amounts are left in the application equipment.
Post-emergence Herbicide More Common
By definition, post-emergence herbicides are applied over an existing crop. So if there are any unwanted herbicide residues in the equipment, future applications can damage or kill crops that you didn’t intend.
Dry Formulations Are Popular
Herbicides formulated as dry products have become quite popular, because they are easy to handle, ship, and store. Most dry formulations create suspensions of the herbicide (similar to mixing clay in water), so they do not dissolve completely into the spray mixture. So unlike most liquid formulations, dry formulations require constant agitation to evenly suspend the product.
 When applicators fail to allow enough mixing time, larger particles of the dry product can get trapped in a series of screens. The particles may remain in the sprayer system until applicators run enough water through the screens or another product solubilizes them into smaller pieces — which can then pass through the screens and out the nozzles.
Be aware that the low use rates, longer breakdown time, and mixing requirements of dry formulations pose challenges when preventing crop damage.
Adjuvant Use Is Growing
Adjuvants, such as surfactants and crop oil concentrates, are products that make foliar-applied herbicides work better. Many herbicide products are formulated with adjuvants to improve their effectiveness.
But adjuvants also may dislodge old herbicide residues that are embedded in tank walls or hoses, or they may help break down particles in screens. When they do, the adjuvants may cause an old, unwanted herbicide residue to be part of the spray liquid. For more information, see Adjuvants and the Power of the Spray Droplet (Purdue Extension publication PPP-107), available from the Education Store.
Farmers Have Choices, Retailers Don’t
Everyone with an interest in a crop takes pride in watching it grow during the season. No one likes to see a crop damaged by herbicides.
When farmers are pressed for time, they may decide that some crop damage can’t be avoided — there are thousands of acres to treat, and waiting is not an option. Farmers who are behind schedule know that if they don’t apply the herbicide before it rains, taller weeds will become more difficult to control and reduce crop yield.
Yields also may be affected if sprayer tanks are not thoroughly rinsed or not all of the screens get cleaned. The decision is whether to have a weedy field that will yield less, or have a field in which the farmer has some yield loss from herbicide residue injury.
These are tough choices farmers have to make. Every hour is critical. Farmers can decide to quickly flush their sprayer systems instead of spending the time to break down the system for a complete cleaning. They can do this because they are spraying their own fields.
Retailers never have the flexibility or choice of not cleaning the sprayer system — they are spraying someone else’s fields.
Tank-mixes of Herbicides Are Common
 Glyphosate-tolerant crops (Roundup Ready® soybeans, corn, and cotton) simplified weed control by allowing one active ingredient to control a broad spectrum of weed species. As glyphosate-resistant weed populations have grown, it has become common to use multiple herbicides to control resistant weeds. It is important, of course, to learn which herbicides can be tank–mixed to control these resistant weeds. This practice also makes cleaning application equipment between sprays more important than ever.
Products Can Be Incompatible
Problems with product hiding or building up in application equipment can be traced back to how different products get along. If you do not mix agricultural chemicals in the correct order, they can settle out of solution or form a paste. If such things happen, there are going to be problems. It is important to pay attention to compatibility issues, especially when field mixing. If you’re receiving premixed “hot loads” from a mixing facility, always tell the people at the facility if youobserve potential compatibility issues.
 In recent years, pre-emergence herbicide use has increased as a resistance management strategy. Using pre-emergence herbicides is reminiscent of the weed-and-feed days of the past when applicators used UAN as a carrier for preplant and pre-emergence herbicides. The differences are that the herbicide formulations today are different from those in past, and there is an increased interest in adding sulfur to these mixtures.
Incompatibility problems can arise when you use new herbicide formulations, mix products in the improper sequence, and add plant nutrients beyond just nitrogen, phosphorus, and potassium. These incompatible mixtures often leave difficult-to-remove residues inside spray equipment.
Application Timing Is More Crucial Than Ever

Optimum performance of post-emergence herbicides often depends on the size of the weeds at the time of the application. As weeds get larger, the herbicide’s effectiveness is greatly reduced, which is why herbicide labels provide maximum weed size restrictions. When weather delays early-season herbicide applications, controlling weeds becomes more challenging. With little time to spare, applicators may gamble and only partially clean sprayers in order to save time and cover more acres.
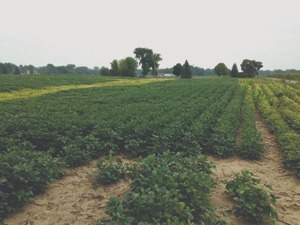
Uncontrolled weeds will reduce crop yields.
Plumbing Is Complicated and Interconnected
Modern sprayers have many places where herbicide residues remain trapped, even after flushing hundreds or thousands of gallons of water through the system. Simply not opening one valve might leave quarts or gallons of herbicide in a hose. When the applicator opens the valve to that hose during the next application, the remaining residue will then be mixed with the new product and pushed out the boom.
We know that cutting corners to save time can increase the chance for herbicide injury to crops. It’s a false priority to think that herbicide application timing is more important than stopping to thoroughly clean possible herbicide residues.
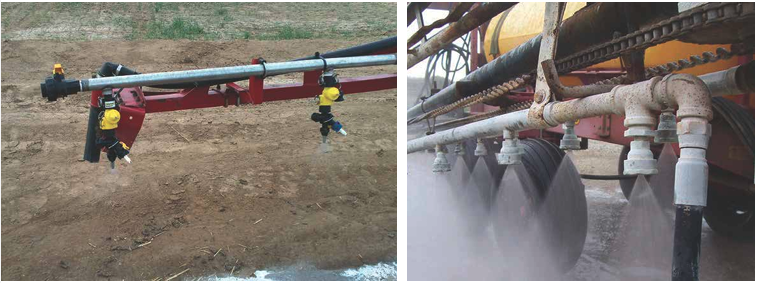
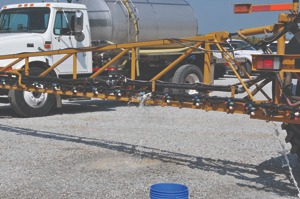
WHERE DO RESIDUES HIDE?
Self-propelled sprayers are becoming more popular than pull-type sprayers with farmers, and they have become standard for agricultural retailers. In crops, sprayers are sophisticated machines that are outfitted with the latest technology including: rate controllers, chemical injectors, up to 120-foot booms, 1,800-gallon tanks, boom section controls, boom levelers, state-of-the art nozzles, advanced tires, computer recordkeeping, global positioning with light bars, and auto-steering. These advances in application equipment enable applicators to get more work completed more efficiently and effectively throughout the season.
Underneath these self-propelled sprayers, you will see a sophisticated system of interconnected valves, pumps, screens, hoses, nozzles, and boom sections. Although flushing the system with clean water will remove most remaining herbicides from the system, clean water will not remove it all. Most and all definitely have different meanings when we are talking about potentially damaging herbicide residues.
Clean water removes most suspended herbicide residues as they flow from the tank into the pump and out through the hoses, pump, screens, and nozzles. Some may assume that the water moving through the system has access to all of a sprayer’s plumbing components — that is, they think every valve is open and every inch of hose will have clean water running through it to remove leftover residue.
Introducing clean water will remove most remaining residues. However, if you only rinse with clean water, you will not remove larger, undissolved clumps of herbicide particles or areas of heavy residue buildup. Those particles could remain trapped on the interior of the boom’s end caps or in a screen no matter how many thousands of gallons of water have already run through the system.
Think of rinsing sprayer equipment like using just water to wash grease from your hands. If you just run your hands under water, the grease isn’t going to come off; nor will the residue come out of spray equipment if you just flush a few hundred gallons of water through it. Furthermore, to get the system completely clean, you must remove the filters and nozzles to remove the particles or paste from the screens at the ends of the booms.
Advice From an Applicator
Most of the dirty spray issues I have seen were caused by:
- Lack of dilution — a failure tocompletely drain the machinebefore and between flushes.
- Dead ends on wet booms — a failure to remove end capsfor thorough cleaning.
- Screen contamination — a failureto completely clean screens —flushing doesn’t remove putty.
Places Where Residues Remain Hidden
There are a number of locations where residues can remain trapped within the sprayer.
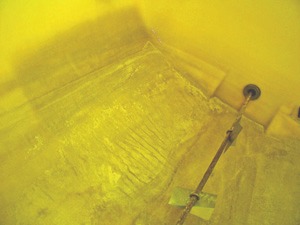
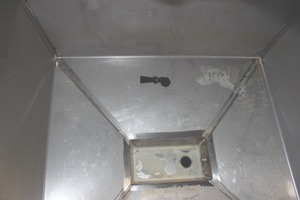
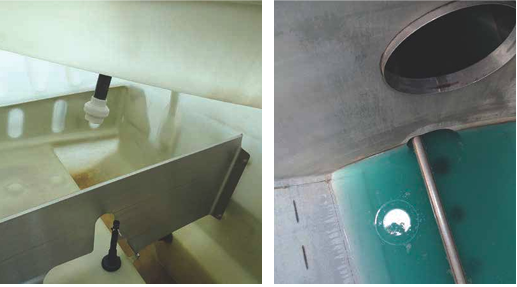
Spray Tanks
A sprayer tank has a large surface area that can retain product on its interior surface. Sometimes, herbicide residue can embed in the tank’s lining (see Steel Tanks for Storing and Transporting Pesticides and Fertilizers (Purdue Extension publication PPP-105), Fiberglass Tanks For Storage, Transport, and Application (PPP-93), and Poly Tanks for Farms and Businesses (PPP-77), all available from the Purdue Extension Education Store). If you don’t clean the inside surface, residues can remain behind and accidently become part of the next spray mix when you refill the tank with water.
 A tank’s design can also play a factor in how much herbicide remains trapped inside it. Flat-bottom tanks have ledges and corners that can hold product. More importantly, many tanks do not drain completely. The suction or drain port leading out of the bottom of a tank is usually not flush with or below the tank’s bottom. Typically, a tank’s drainage opening is slightly above the bottom of the sump. The size of the sump and the area below the drain opening will determine how much residue may remain on the bottom of a tank.
Hoses
Hoses, particularly rubber ones, may hold embedded residues. While plastic hoses may also trap residue, plastic is much less porous than rubber. In addition, rubber hoses may develop small cracks and rough edges on the inside, which can also hold residue.
A general problem with hoses is that many do notmake a straight run from one attachment point to the other. Some hoses sag between sections of the boom pump, which creates a trap for liquid or suspended products in a manner similar to the trap under a sink. Many formulated herbicides can settle out of suspension in as little as 45 minutes. If this happens, the liquid remains in the trap until more water pushes it forward. Invert U-shaped hoses with the help of a tarp strap or zip tie so that they become self-draining.
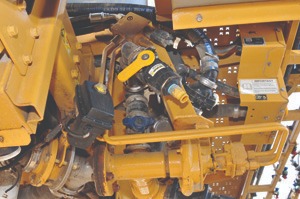
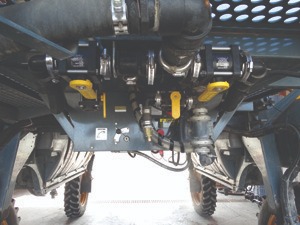
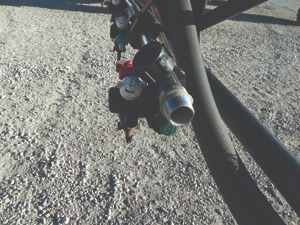
Valves As ‘Blind’ Alleyways
Depending on the system, you can turn valves on and off manually or electronically. By opening and closing valves, clean water and tank cleaners can flow through all hoses, removing trapped products and residues.
You might think after a pump loses its prime that hardly any product would remain in the system. A 120-foot boom may hold 35 gallons of liquid, a 90-foot boom 25 gallons, and an 80-foot boom 18 gallons. Depending on the application rate, that’s one to three acres of product left in the boom and hoses — a lot of potential damage waiting to happen!
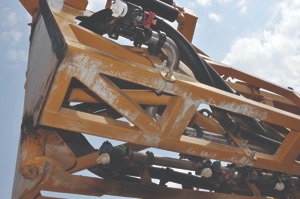
Booms
Once the tank is empty, the pump will lose prime and cannot force all of the spray mix out of the booms. The only way to completely force the remaining herbicide mix out of the boom is to refill the tank with water and reprime the pump to build pressure. The clean water that runs through the system will push out any remaining herbicide from the pump to the hoses and booms, but any mixture that returns to the tank through the bypass could be contaminated with herbicide.
Many newer spray rigs are equipped with air systems that force air into the booms to push out any remaining spray mixture before adding clean water. Most of these systems clean one boom section at a time. These air systems do not necessarily help remove residues. Blowing out the booms is a first step, but you still need to flush the system.
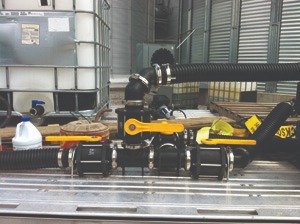
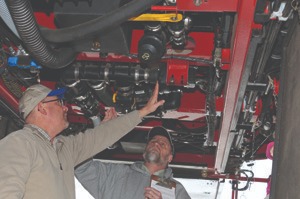
Screens
Screens (also called strainers and filters) capture large pieces of herbicide products, undissolved bags, plastic shavings, sand, and grit before these large objects can reach and plug nozzle tips. Some spray systems also have suction screens on the fill lines going into the tanks. Suction screens pull liquid from the tank into and out of the pump and then the liquid passes through another screen. Whether this screen is before or after the pump depends on the manufacturer’s design.
Cleaning and Flushing Are Different
Flushing water through a screen removes much of the herbicide residue, but is not the same as taking off the screen and manually cleaning and removing the solid herbicide residue out of it. If the residue didn’t come out with all of the water already used, what makes you think that adding more water is going to do the job?
Screens are sized and classified by the number of squares per inch or millimeter — the smaller the mesh number, the larger the mesh hole size. The mesh should be slightly smaller than the exit orifice of the nozzle. Fill screens often have relatively large holes designed to filter out larger objects. The screens before or after the pump are often 50-mesh, which means more holes that are smaller in size than the fill screen. As the fluid flows toward the nozzles, it will often pass through screens in the booms or at the nozzle tip.
In this example, any product smaller than the last screen before the spray tip will pass through the spray system, while the screens that preceded the nozzles will trap larger pieces. The trapped material will form a film on screens. Even if continuous agitation breaks down the dry product formulation into acceptable smaller particles, these fine particles can continue to build up on the screens because of the film or skin created by the larger particles. While this process protects the nozzle tips and does not affect the spray operation, the presence of herbicide residue lodged in the screens can result in coverage issues and pose a real problem for crop damage later.
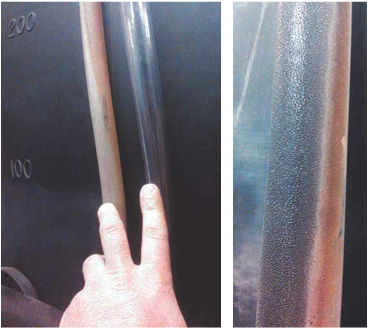
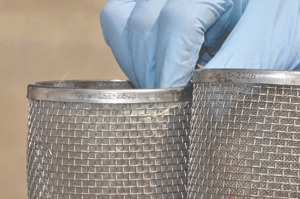 An 80-mesh screen (left) and a 30-mesh screen (right).
 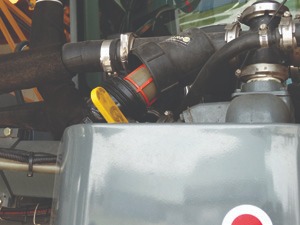 Screens may look different, but they all serve the same purpose: they prevent clogging of the nozzle tips by filtering out larger pieces of herbicide and other foreign materials.
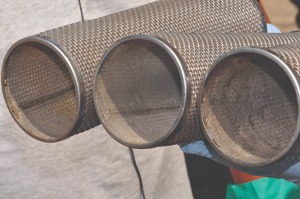 This photo shows the differences in screen mesh size. The mesh is the fine screen under the coarse structural part of the screen.
  Screens immediately after the pump.
 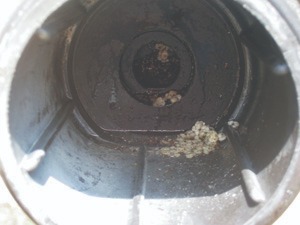 Materials accumulated in the filter between the tank and pump
 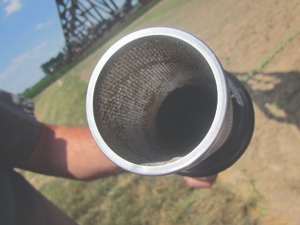 The screen associated with this filter shows debris captured by the screen
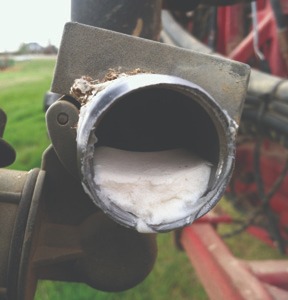
 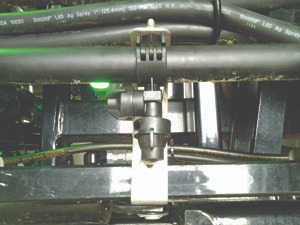 This photo shows herbicide residue that was left in a drop nozzle from a previous use
 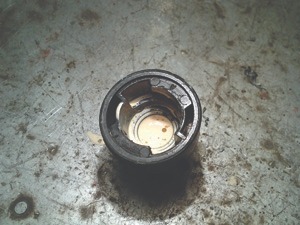 There will be residue in the tip and the pressure shut-off
  There are screens inside each nozzle of this multiple-nozzle turret. Nozzle turrets can often hold herbicide residues even after you rinse the boom, so always rotate the turrets during the flushing process.
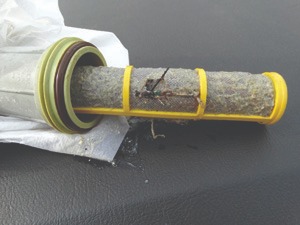
 This photo shows a 10-inch spacing sprayer between nozzles, but the producer used a 20-inch spacing. Field damage was traced back to unused nozzle clusters that had not been rinsed. They were only using a 20-inch spacing on their 10-inch nozzle arrangement boom. After they started turning the unused bodies and cleaning them out, they reduced contamination.
 End Caps or Cleanout Caps
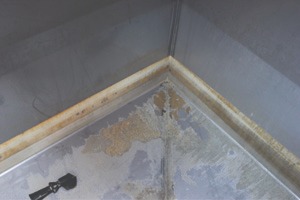
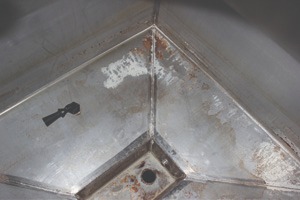
Whether it’s one boom or a series of sectional booms, each “pipe” has caps on the ends to contain the flow of water within the pipe so that the spray mix is forced through the nozzle tips. The last nozzle is often 2 to 4 inches from the end cap, which means that the area beyond the last nozzle to the end cap allows suspended herbicide to collect and remain undisturbed. These undisturbed particles can collect, gather, and bind together and form a milky, gummy, and sticky substance with a toothpaste-like consistency.
Sprayers will normally have end caps on boom sections. End caps (also called cleanout caps) are designed to be taken off. You can clean the paste on the cap and inside the boom. If you do not remove the end cap and clean it, you can leave significant residue buildup trapped just inside the cap.
 Considerable herbicide residue can build up on the inside of the end cap or in the boom. See page 37 for end caps that are easier to remove and clean.
 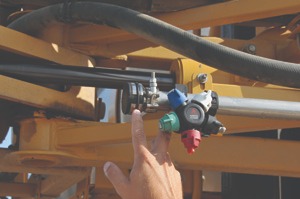 This nozzle body is still a few inches from the end cap.
  This nozzle body goes out to the end of the boom section.
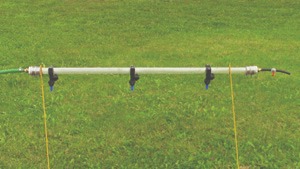
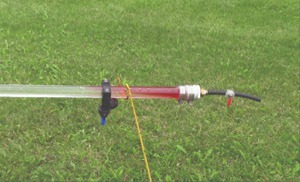
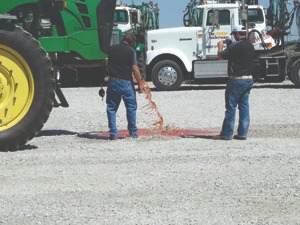
The accumulation of product at the end cap is a major problem (right). A transparent boom demonstrates sprayer boom end cap issues during cleanout (left and middle. The operator fills the boom with red dye (representing an herbicide) and attaches it to a sprayer boom via a nozzle body and quarter-turn attachment. The operator flushed the boom with water for 15 minutes while jostling and shaking the boom to emulate sprayer turns. The dye, compressed at the boom end, never moved, but slowly mixed and was emitted from the final nozzle. Once we opened the small valve at the far end (representing any number of end-cap valves) it took two seconds to clear the dye. This demonstration really drives home the end-cap accumulation issue.
Insurance Claim on Winter Wheat: The Shuttle
Two fields of winter wheat were treated for annual grasses. The applicator used shuttles for a water source mixed with fertilizer. One of the shuttles previously held glyphosate and had not been rinsed well.
After the application, one field was killed and the other field stunted. The insurance company paid nearly $14,000 in damages to settle the two claims.
Additional Sources of Herbicide Contamination
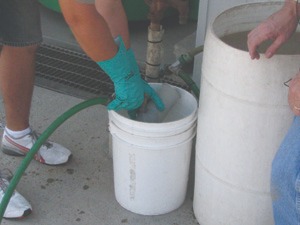
Shuttles and minibulks can be sources of herbicide contamination. Only use dedicated, labeled minibulks. Reusing a minibulk tank that has not been thoroughly cleaned can damage crops.
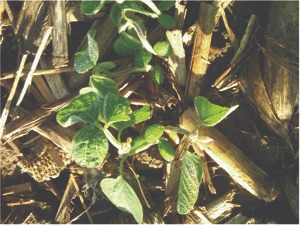
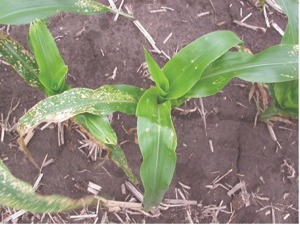
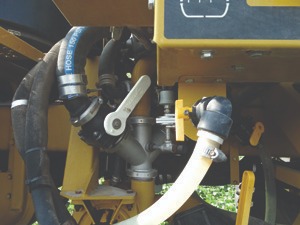
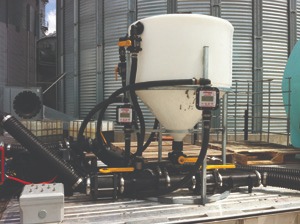
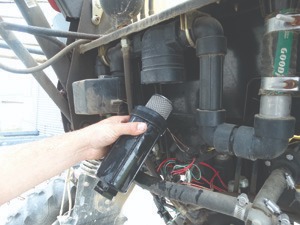
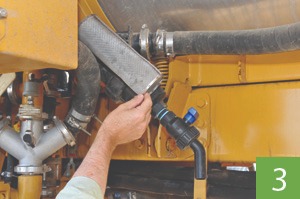
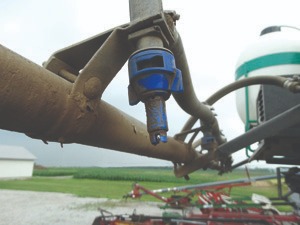
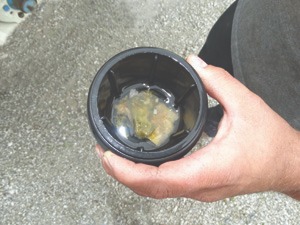
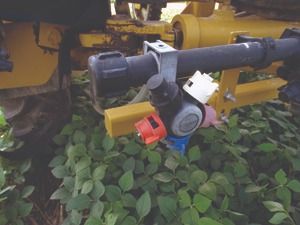
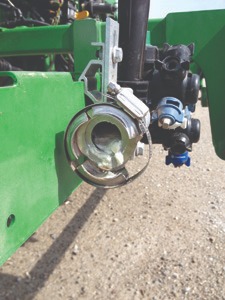
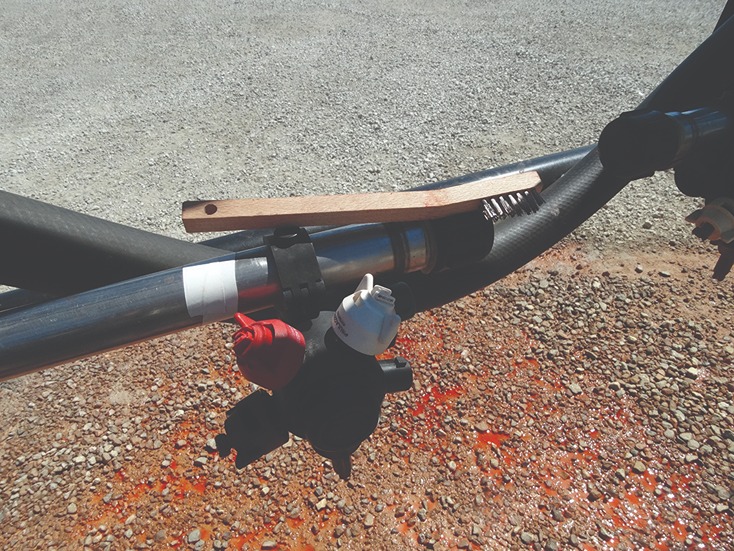
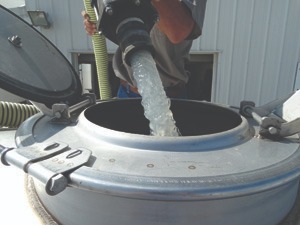
Inductor cones can be sources of herbicide contamination. Most of them have a valve that allows operators to rinse the tank with fresh water. The middle image shows soybeans damaged by residue that remained in the inductor.
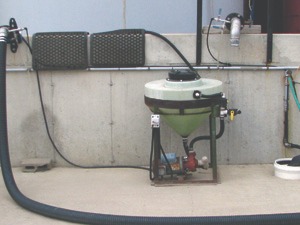 Thoroughly clean the pumps and screens on inductor cones
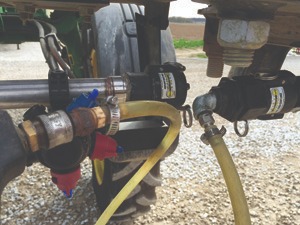
  Hoses used to fill tanks with water can be sources of herbicide contamination. Typically, permanently mounted hoses move herbicide from bulk tanks and water. Most often, you can color-code these hoses: a yellow hose might indicate products used on corn, while a black hose might carry products used on soybeans. Color-coding hoses ensures that any residues remaining in the lines are applied only to a nonsensitive crop.
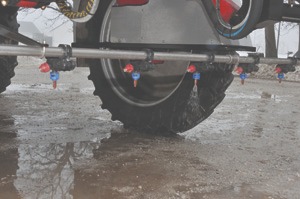
  Tires on sprayers designed with booms in the front can be sources of herbicide contamination. Some applicators use tank cleaner and a brush to scrub the front tires and remove any residue.
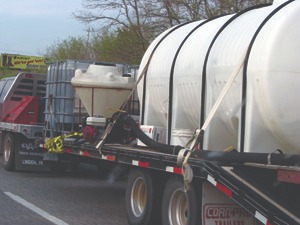
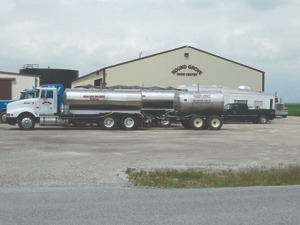
 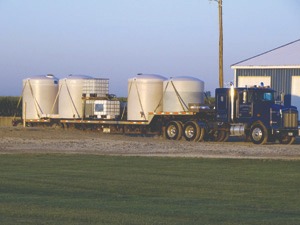 Nurse tanks on trucks can be sources of herbicide contamination. Tender trucks are used to take premixed “hot loads” to the sprayer. If you use the same tender truck to haul multiple loads to an applicator spraying different crops without cleaning the tank, it could lead to crop damage.
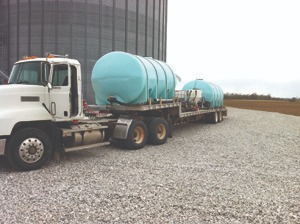
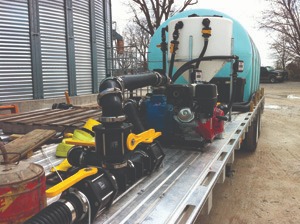
Take care to not introduce contaminants from the trucks that fill up the sprayers. There are a lot of separate lines to flush with this setup. Open and close each valve handle as part of the rinsing process.
Tank Cleanout: Turning a Lot Into a Little
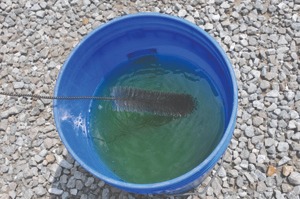
The procedure for removing herbicide residue from the inside of a sprayer tank is no different than the procedure for cleaning the inside of a 2.5-gallon plastic container or a 250-gallon minibulk. Each procedure relies on moving enough water over the interior surface to dislodge and dilute what’s left inside the container.
Powered sprayers have additional components such as screens, hoses, pumps, and filters that may trap herbicide particles. In most instances, you may need to add a tank cleaner to help remove residue from the interiors of hoses and tank walls, especially for powered sprayers. This complete flushing, cleaning, and neutralizing process has proven to be the most effective method for removing herbicide residues from sprayers.
Sprayers have complicated interconnections of hoses, filters, and valves to control flow and pressure. A standard operating procedure and cleanout checklist will ensure that you omit no step.
“Cleanout” is a somewhat misleading term, because it implies we can remove all the residue. Actually, we can really only reduce the herbicide concentration to levels that don’t injure crops or result in antagonism in the next mixture.
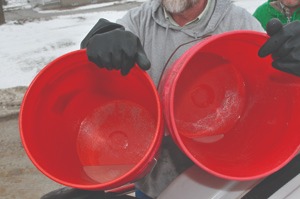
The red buckets shown in the photo below contained antifreeze that had been used to winterize a sprayer in the fall. The antifreeze was drained the following spring to be recycled for the next year. After the operator drained the recycled antifreeze from the buckets, herbicide residue from the previous year was evident even though the sprayer had been thoroughly flushed. This just demonstrates that completely removing all traces of herbicide is virtually impossible.
 The important, but difficult question to answer is: How clean is clean enough?
We know with certainty that it is impossible to completely purge a sprayer system of all herbicide residues. We also know from experience that, properly done, any herbicide that remains can be reduced to such a low
concentration that it is unlikely to injure the nontarget crop. So, equipment is “clean enough” when the herbicide residues are diluted to concentrations low enough to prevent injury to sensitive crops.
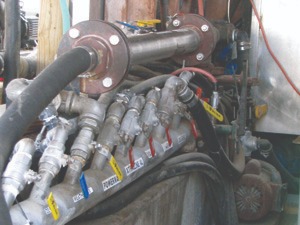
Removing residues is all about paying attention to the smallest of details. This is especially true with today’s sophisticated sprayer systems where the herbicide mixture doesn’t just flow from the tank, through the pump, and to the booms. There are many pathways the tank mix moves to the booms. All of this mixture moves through a series of hoses interconnected by opening and closing valves. Forgetting to flush these hidden areas may contaminate the next tank mix. Operating from a checklist will ensure that you flush your sprayer equipment systematically and completely.
Forgetting a single valve may mean that you leave enough herbicide in a section of hose to contaminate the next load. A few areas that are easy to forget are the front and side loaders, flow meter hoses, and induction hoses. Knowing how your sprayer equipment is plumbed and what each valve controls is as important as the actual process of decontaminating the sprayer with water and cleaning agents.
Don't forget that you should always consult the herbicide and tank cleaner labels for specific information about how to use them.
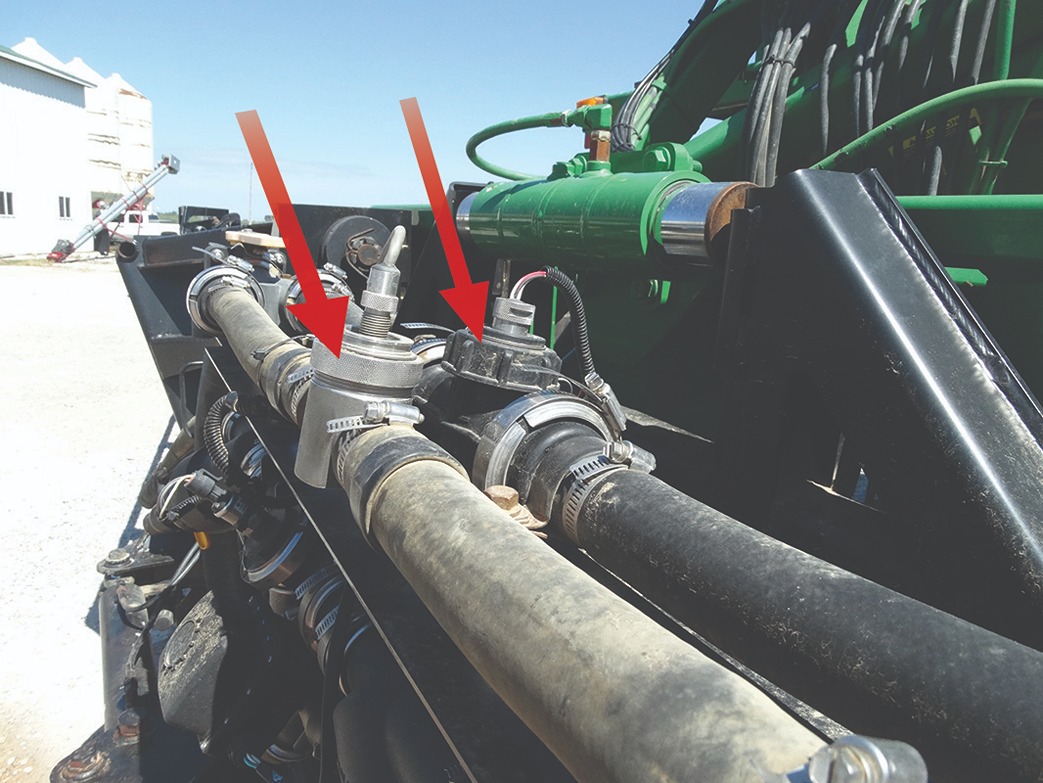 An often-overlooked part of cleaning a sprayer is the system of hoses that move liquid through the flow meters (meters marked with red arrows).
 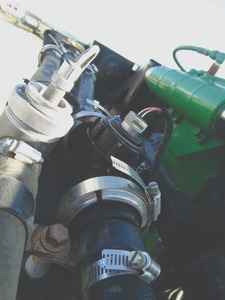 Some sprayers are equipped with dual flow meters for high- and low-flow rates. If you do not use the second flow meter, the herbicide may get trapped on the outlet side of the valve. If you do not flush the inlet after use, it is possible that the herbicide will sit in that section until you open the valve.
  Notice the flow then comes together at a Y juncture (red arrows). Flow from one side of the Y can actually back up into the other. Unless you run clean water in each side, the remaining herbicide can become a contaminant.
 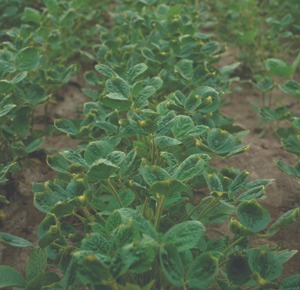 Cutting corners and skipping steps when removing herbicide residues from sprayers has repeatedly caused crop injury, yield loss, and in some cases, crop destruction.
 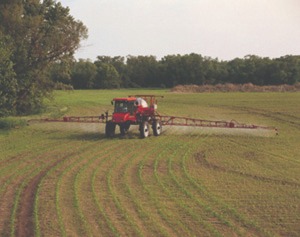 Paying attention to detail, flushing the sprayer with clean water, cleaning the screens, and adding a tank cleaner significantly lessens the possibility of injuring a crop. This level of detail is something everyone should expect and demand.
 The Steps for Removing Herbicide Residues
Properly cleaning a self-propelled or pull-behind sprayer may take an hour or more. If you cut corners, you increase the probability that the next field you spray may exhibit an unwanted result.
Step 1: Spray Out Booms Every Night
Applicators often comment that sprayers that sit overnight with herbicides in the hoses and booms for extended periods (more than eight hours) can result in crop injury issues even after they are properly cleaned. Mississippi State University research shows that when applicators leave herbicides overnight in rubber hoses, the herbicide can penetrate and reside in the hoses and ultimately become more difficult to remove.
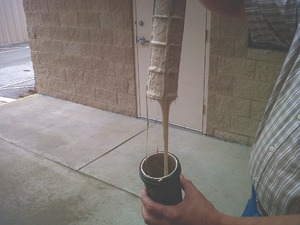
The Power of Three
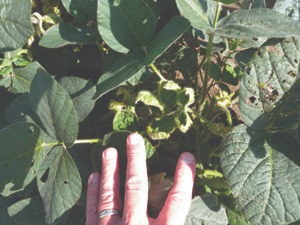 First Rinse. This photo of the first rinse applied to soybeans shows stunted plants and cupped leaves.
 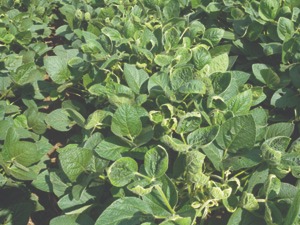 Second Rinse. This photo of the second rinse applied to soybeans shows no stunted plants, but cupped leaves are still evident.
 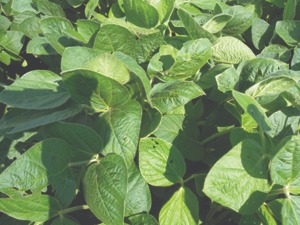 Third Rinse. This photo of the third rinse applied to soybeans shows no stunted plants or cupped leaves. Examples such as these demonstrate why herbicide labels require you to triple-rinse your sprayers.
 Ghost Damage
Sometimes, crop damage can appear a few days after you the rinse the sprayer equipment. The damage might come from herbicide residue that is released from hoses or fittings and works itself back into solution. That’s why removing herbicides from equipment at the end of the day may be an important step in preventing this damage.
The herbicide was left in outside boom sections
while the rig sat out for two summer days.
Some herbicide products can settle out in 45 minutes if they are not agitated. Leaving sprayers idle overnight or longer allows more time for herbicides to penetrate into the linings of the hoses or tanks. It also allows more time for herbicide residue to settle out and become more cemented to interior surfaces.
Even if you flush more water and run tank cleaners for a few minutes, it may not be enough to remove this type of residue from the hose interior. Completely empty the sprayer while in the field. It’s OK to cover a previously sprayed area, because herbicides (as a general rule) are safe to crops at twice the labeled rate. Second, add 10 times the sump’s remnant of clean water, circulate and spray it out in the field as well. Repeat. These two rinsing steps will take care of the majority of the cleaning and won’t take very long.
This sprayer was traded in to the dealer. You can see the condition of residues that have dried in the tank that was described as tacky like varnish (left). The same tank after soaking in a commercial tank cleaner followed by a rinse of 150 gallons of rinse water (center). Pressure washing peeled off much of the crusted material from the side walls (right).
Step 2:
Perform First Rinse in the Field
The highest herbicide concentration left in the tank can be found when the pump looses its prime. It’s important to remove as much of this concentrated spray mixture as possible before starting the actual cleaning process.
 These booms contain foam, which can hold herbicide residues.
 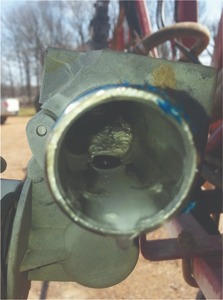 Inside of boom after the first flush with clean water
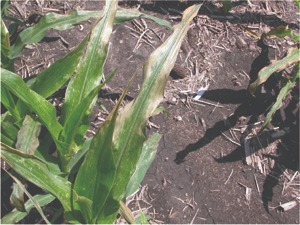
 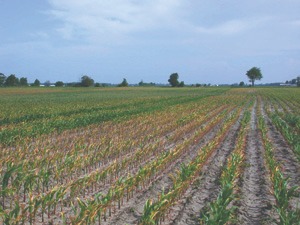 The applicator applied a soybean pre-emergence product to another field before moving to this cornfield. However, the applicator did not flush the boom first. It is evident there is a distinct straight pattern (based on the boom width) where the boom was charged from the previous soybean application. The crop injury tapers off within several hundred feet as the soybean product was flushed from the booms. Depending on the plumbing configuration, it is common to see injury in a V or W pattern corresponding to the plumbing. It might not seem like much, but this is lost revenue for a grower.
 How much water should you flush through sprayers in the field? A general rule of thumb is to use 10 percent of the tank’s capacity per rinse. Another general rule says to add at least two to three times the amount of gallons applied per acre. Each rinse of the boom will range from 30 to 50 gallons of water.
For example, if a spray application used 15 gallons per acre, 30 to 50 gallons should be sufficient to flush the sprayer. Add more water if the spray coming out of the nozzles during the flush process doesn’t look clean.
Some applicators drain as much product as possible out of tanks before circulating clean water. They will open the main valves to drain the tanks and hoses. They will put in 3 to 5 gallons of clean water and recirculate to get the remaining material out of the tank by reopening the tank valve. This tactic will make the first rinse a cleaner rinse, because the water is circulated between pump and tank.
How much water you use during the first rinse is based on experience. In all cases, water coming out of the nozzles needs to pass the eye test. In other words, water should be clear without any evidence of a tint or sheen (top). Be sure to open the end nozzle during the first flush. Continue to add water to the tank until the water exiting the nozzles is clear.
For systems equipped with inductor tanks and sparger tubes, it is important to open the valves to the sump, bypass, and inductor during the first flush. Activate the sparger tube to stir the bottom of the tank and the tank rinser to spray water over the sides of tank, and allow enough time for the water to circulate through this closed loop of the system.
 Side wall cleaners (left) and sparger/agitation bar (right).
 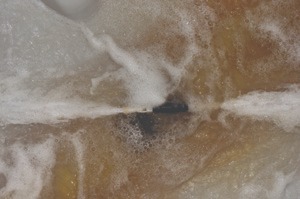 Aggressively moving clean water will help dislodge any remaining herbicide residue from the equipment into the moving water. Some retailers go the extra step to steam clean tank interiors to optimize residue removal.
 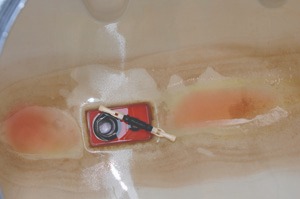 Some tank designs do not allow complete drainage. In this case, there is liquid contained below the drain opening that the pump will not be able to pull through the system
 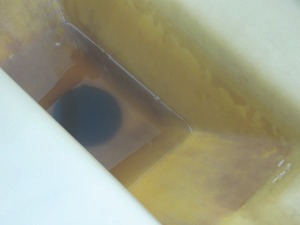 Other tank designs allow for liquids to completely drain out of the sump. The first 30 to 50 gallons of clean water will remove much of the tank mixture left in the sump area and in the hoses and booms.
  Replace sight gauges several times during the season. It’s only a few bucks, but replacing these gauges can eliminate residues that can embed in the plastic. It’s been suggested that unhooking the top and pulling the hose down will allow any trapped herbicides to exit.
 The photo on the left shows a discolored sight gauge (left) and an undamaged sight gauge (right). The photo on the right shows a clear sight gauge that was damaged by chemicals and sunlight.
 If a tank does not have a sparger tube or side rinser, use a hose with a pressure nozzle to wash the inside of the tank. Continue to recirculate the water as you rinse the inside of the tank with clean water.
There’s no question that you should spray the first rinse over the last crop you treated. Research from Colorado State University evaluated sequential spray tank rinses and found that the first rinse contained nearly the same herbicide concentration as the original solution.
The two most common active ingredients in the spray solutions from this study were 2,4-D and dicamba. The first rinse contained an average of 92 percent and 91 percent of the original 2,4-D and dicamba solutions, respectively. Due to the high concentrations of active ingredients removed during the first rinse, you should apply this rinsate to a labeled site.
What To Do With Sprayer Rinse Water
For many retailers, one of the most pressing issues is where to dispose of sprayer rinse water. The question becomes even more complicated when you consider a statement included on many pesticide labels: “Do not contaminate water when cleaning equipment or disposing of equipment wash waters.”
The question of where to dispose of the first rinse is easy to answer: you should apply the rinsate to the outer rows of the field where you just made the last application. The question of where to clean booms, screens, and end caps and to dispose of the rinse waters is more complicated and is up to the discretion of the applicator in most cases.
The best-case scenario is to perform the second and third rinses (Steps 5 and 7) in the application field away from any ditches, streams, and other water sources. If you choose to perform the second and third rinses back at the retail center, take care to avoid contaminating any water sources. Ideally, you should perform such rinses over a contained area such as a mix/load pad. If a mix/load pad is not available, rotate the cleanout site to different areas of the facility so you do not concentrate herbicide residue in one particular spot.
Important Message
Check with your state department of agriculture to determine if the suggestions presented in this publication are valid in your state.
Farmer comment: “Some farmers will not want retailers to dispose of rinse water in their fields. They think the retailers are making an unnecessary trip over the field, possibly knocking down more crops, possibly overapplying chemicals, and possibly causing crop injury. Retailers need to be able to address these issues.”
(middle) This tank held rinsate from sprayer cleaning operations. Continually dumping even small amounts of herbicides (as might be found in second or third rinses) in the same spot can lead to off-site contamination. In this case, the residue flowed from the tank into a pond just north of the trees shown here. Water samples from the pond revealed low levels of many different herbicides. This represents a label violation because the wastewater contaminated a water source.
(right) It can be acceptable to apply second and third rinses to gravel areas as long as the herbicide residues do not get into waterays.
Protecting water sources is key when cleaning out sprayers.
Newer self-propelled sprayer models may be engineered with an air purge system to blow out the boom sections. Normally, each boom section is purged independently. Depending on the unit, you can retrofit some older sprayer models with this air purge equipment.
The photos above show an example of a retrofitted air purge system designed by a farmer. It is best used when the pump loses its prime. Forcing products out of the hoses allows for the first flush of clean water to do a better job of removing any leftover residue.
Step 3:
Remove and Clean All Screens
After performing the first rinse in the field, it’s time to remove the conce
ntrated herbicide from your sprayer equipment screens. Most of this is usually a pasty material that did not completely dissolve when it was added to the tank or that settled out of solution during the spray operation. This material will remain trapped in the screens until the next chemical is added or a solvent breaks down the herbicide residue.
Some sprayer units have only one screen, while others have multiple screens. Screens can be found before the pump, after the pump, in the boom sections, or at individual nozzles. Screens also capture rust, grit, debris, and even the occasional aluminum foil cap liners from containers. It’s important to clean off all of these materials before the next application.
Why Clean Screens So Early?
Currently, most applicators clean sprayer equipment screens just before or after adding a tank cleaner. But if you clean screens earlier in the sprayer cleaning process, it allows you to eliminate the last source of herbicide residue that might be in the sprayer system.
When you clean screens earlier, it allows you to use the rinse water in later steps and the tank cleaner to move and break down smaller particles of herbicides that may have escaped the cleaning and rinsing process.
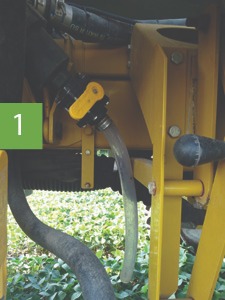
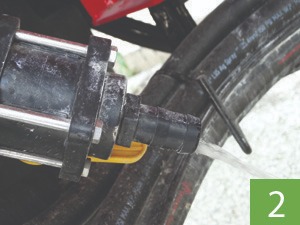

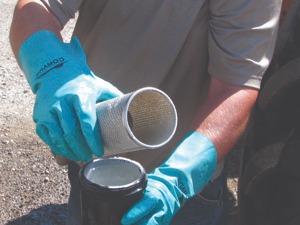
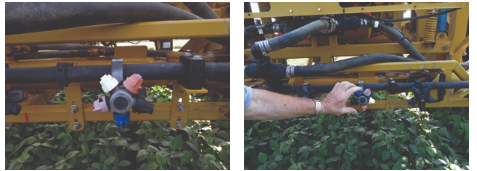
Some application equipment may have a ball valve at the end of the screen nearest the pump (photographs 1 and 2). The ball valve allows the screen to be easily flushed when you open the valve. While opening the valve can remove a significant amount of residue from the inside of the filter, you should never just open the valve and skip manually cleaning the screen (photographs 3 and 4). The only way to thoroughly clean a screen is to remove it and to use a brush with tank cleaner and hot water.
Note that the applicator is wearing personal protective equipment.
A Tip From a Commercial Applicator
This is one way a commercial applicator cleans screens in his sprayer equipment:
“Always have two complete sets of all screens for your sprayer equipment — from the largest ones to those on the nozzle. Keep one set in a bucket of tank cleaner. Put the set you’re pulling from the sprayer back into the bucket containing the tank cleaner. This allows you to quickly replace the screens and help speed up the cleanout process. If you keep the bucket with the extra screens on the outside of the sprayer, the sprayer movement will continually agitate the tank cleaner through the screens.”
When changing to a different tank mix, it is important to actually remove and clean all screens — never just flush them. No amount of water flushed through the screens will remove large particles that have become lodged in the wire and coat the mesh.
 Always wear gloves and eye protection when you work around pressurized water or air while handling screens. The screens may contain concentrated product that has not dissolved.
 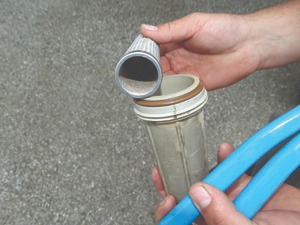 The buildup in a screen may not always contain active herbicide. This image shows a screen with clay particles from formulations and CaSO4 from adding AMS for hard water.
 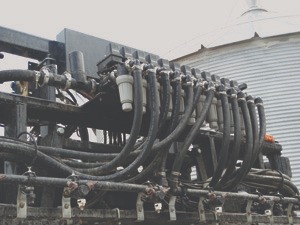 The number of screens a sprayer has and their locations in the system vary by make and model. (Right) The gray cylinders are a bank of screens. Some argue that it takes hours to remove and clean all these screens. And at $20 per hour, spending three hours cleaning screens will cost you $60. However, damaging a customer’s field will cost you much more. When you do not clean each screen, you are rolling the dice.
  Side Fill
  Front Fill
 Suction filters are shown from two different viewpoints.
The best way to clean screens is to scrub the screen inside-out with a brush and soapy water to loosen particles. Then, rinse the screens with clean water.
After cleaning the screens, replace them in your equipment. If you are still using screens (strainers) in the individual nozzle bodies, do not place them in your equipment until the very end of the cleaning process. This will allow you to push out any remaining particles instead of trapping them in the clean nozzle strainers.
 Hot soapy water and a brush can remove trapped herbicide.
 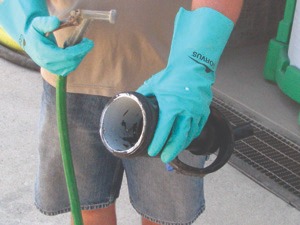 Be sure to clean the housing that holds the filter in place, because herbicide residues can also build up on the inside walls. Use a nozzle attachment on a hose (like the one shown here) to finish rinsing.
  This applicator is not using pressurized water to clean the screen. Pressurized water is best for forcing herbicide particles out of screens.
 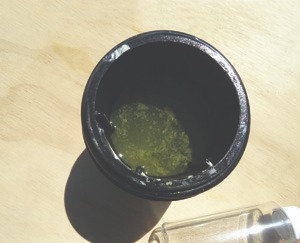 Herbicides and other materials collected in the housings of screens.
  Herbicides and other materials collected in the housings of screens.
 There are other reasons why you should regularly remove and clean screens. Screens that become clogged with debris and algae can reduce the flow rate and alter the spray pattern and distribution.

Fewer applicators are using screens at the nozzle tips than they once did, because it takes too much time to clean that many screens. There are 96 nozzles on a 120-foot boom. Most manufacturers of new sprayers rely on the other screens to remove debris before it gets to the tips. However, for those other screens to be effective, they must be 50- or 100-mesh to do the job. Check the manufacturer’s instructions — they suggest screen sizes.
The screen in this water tank shows a buildup of algae (middle) and rust (right).
Step 4:
Remove and Clean Boom End Caps
An end cap is the section of a boom between the last nozzle and the end of the boom. In many cases, there is about a 2-inch section of boom that extends beyond the last nozzle. Spray solutions can become stagnant in the end cap areas. This stagnation can cause thick layers of herbicide residue (which has a toothpaste consistency) to pack into the end cap and coat the surface of the pipe. Just like screens, you need to remove and clean end caps before using your spray equipment again.
To clean the boom section of your equipment, first remove the end caps and scrape away any debris and residue inside them with a brush, tank cleaner or detergent, and water. If you have seven boom sections, you will have 14 end caps.
After thoroughly cleaning the end caps, replace one on each section of the boom. This will prepare you for the next cleaning step, which is to perform a second rinse with water. When you replace the end caps, it will probably be necessary to replace the rings because they are easily damaged. If your sprayer’s end caps leak, the cause is often a damaged ring.
 This end cap has been modified with a quick coupler to allow for easy removal and cleanout. Make sure to use a plastic tie on the lock rings to secure the coupler.
 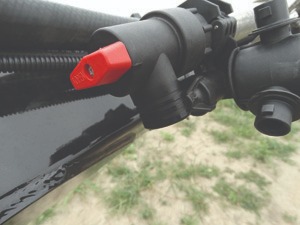 This boom section has been modified. The owner has removed the end cap and replaced it with a valve that can flush the end of the boom.
  Attaching a quarter-turn valve at the end of each boom section allows for easy flushing.
 Some companies clean out the boom sections of their equipment with steam.
They will put the extended wand into the right end of the boom and extend it
through the entire boom section. They will repeat the process by inserting the wand
in the left end of the boom and again extend it through the entire boom section.
Step 5:
Perform Second Rinse With Water
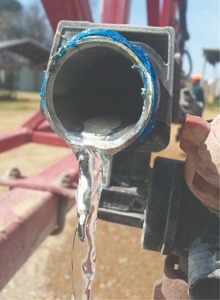
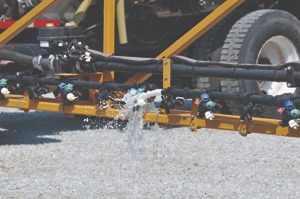
A second rinse of water will dislodge most, if not all, of the loose residue that remains on the tank walls, lines the hoses, or is trapped in low-lying places. Circulate the water through the hoses, pumps, tanks, fill lines, and flow meter lines.
Turn on each boom section separately to flush out the water in each. Once you’ve flushed all the sections, replace the end caps and remove the caps on the opposite side of the boom section. Continue to run water through the boom, section by section. If you flush each section separately, it provides enough water volume and pressure to remove any remaining sludge built up in the system and booms. After you’ve rinsed the boom sections, replace and tighten all end caps.
If your sprayer does not have end caps or quick couplers mounted on the boom or boom sections, leave the end
nozzle out of each section, or consider installing a valve or quick coupler device to help with future cleanouts.
After thoroughly flushing each boom section, replace and tighten the end caps.
 Nozzle bodies with multiple tips need to be rotated to ensure that you flush out any trapped residue in the body. Always wear gloves during the process.
 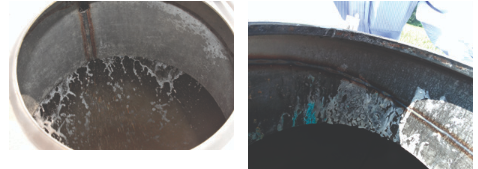 Some tank openings have locations that the side wall cleaner and agitation device cannot fully reach (left). In this example, a piece of metal runs around the rim of the tank opening where residues have built up (right). The only way to remove this residue is with a hose or high-pressure sprayer.
Step 6:
Add Tank Cleaner
 Tank cleaners are sophisticated products that neutralize (break down) the herbicide molecule, increase the herbicide’s solubility (so it can be flushed more easily), and remove any residues that may have penetrated into the walls of hoses, tanks, or fittings.
However, tank cleaners have limitations. Remember that tank cleaners only work on herbicides that are vulnerable to alkaline hydrolysis. And never forget that tank cleaners are no substitute for a thorough cleaning.
View tank cleaners as the last step to break down or neutralize small amounts of residual herbicides that remain in the sprayer.
Putting Tank Cleaner In the Rinse Tank
Some retailers add tank cleaner directly to clean water rinse tanks. They believe that having tank cleaner throughout the whole process from beginning to end helps break down residues. For these retailers, the extra cost of the cleaner is insignificant relative to crop damage claims.
There are various tank cleaner ingredients. One of the most widely used is sodium hydroxide, better known as caustic soda or lye. Most tank cleaners contain an ingredientdesigned to neutralize acids. Typically, these ingredients are alkaline-type constituents that have a pH value greater than 12 in concentrated form. Because many pesticides are neutral or acidic, contact with alkaline-based tank cleaners help break down pesticides and make residues more soluble in water.
Typically, tank cleaners team caustic materials with detergents made from a variety of surfactant ingredients that are designed to keep residue suspended in the rinsate and to interact with oil substances to remove them from lines and tank walls.
Two important factors to remember when you use any tank cleaner are (1) how much to use and (2) how much time to leave them in the system for optimal cleaning.
How Much Cleaner to Use
As for the first factor, you normally add tank cleaners as pints or quarts of cleaner per 100 gallons of water. Add water to the spray tank, then add the appropriate rate of cleaner. Next, turn on the agitation and sparger tube and recirculate the solution between the pump and tank so the cleaner goes through all of the internal plumbing. Make sure the cleaner goes through all of the hoses, including the same pathways used to flush the system in the field.
Ongoing research from Mississippi State University has shown that some herbicides penetrate sprayer hoses. These hidden residues in hoses can injure crops even after sprayer equipment has been thoroughly rinsed, which is why using a commercial tank cleaner is important.
Some operators use ammonia or bleach as tank cleaners(you should never use these products together or they will create toxic fumes). However, ammonia and bleach are rather simple products and are poor substitutes compared to commercial tank cleaners. When properly formulated, tank cleaners are far superior to ammonia or bleach in their ability to clean sprayer equipment.
Spray system cleaners should:
- Increase and hold rinsate pH levels above pH 12.This facilitates the chemical breakdown of herbicides that are vulnerable to alkaline hydrolysis and solubilizes residues for better rinsing.
- Contain detergents to penetrate and remove dried-on residues.
- Include surfactants to emulsify oil residues that can serve as anchoring sites for other oil-soluble herbicides.
- Protect equipment from corrosion by includingcorrosion inhibitors in the formulation.
The Longer You Leave the Tank Cleaner In, The Better It Works
One tank cleaner provides important insights on its label:
“Cleaning your tank is not always as easy as it may seem. With the tremendous amount of chemicals and adjuvant combinations, add to this the difference in water quality and fertilizer components, you have a large range of residues that can be formed. This creates a major challenge for the cleaner product.”
On another part of the label it reads:
“The solution should be allowed to remain on all surfaces to be cleaned so that the solution can have time to penetrate all existing residues. This process can take as little as a few minutes to as long as a day depending on the physical state of the deposit. Since it is impossible to know how long to wait, a person must use their best judgment. Since this is not 100% certain, you must determine whether the last rinsate is ‘safe.’ You can do this by applying a test solution to the next crop and determining by visual symptoms if it is safe to be used.”
Detergents can also help to clean any chemicals contained in oil adjuvants that might be stuck on tank walls or hose linings. While ammonia and bleach act as oxidizers and break down some residues, they may not be able to remove products that are embedded in hoses and tank walls.
Oily Residue Removal Test
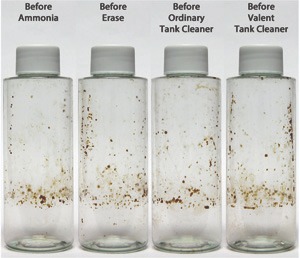
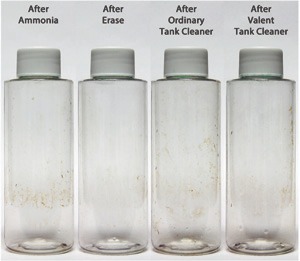 Oil sludge can be difficult to remove as is shown by using only ammonia. There are also differences in a tank cleaner's ability to remove oil residues.
 Dried Residue Removal Test

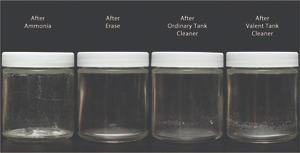 Ammonia has difficulty removing dried-on herbicide residues. It is important to use high-quality tank cleaners that contain surfactants and other materials that can break down dried residues found in sprayer systems.
 How Long to Let Cleaners Work
There is an ongoing debate about how long tank cleaners should remain in sprayer systems. One thing is certain: you need to give cleaner products enough time in the tank and lines to effectively do their job. Too many operators immediately move the cleaning solution through sprayer systems after mixing. This limits effectiveness. Thus, the key to using tank cleaners effectively is to leave products in tanks long enough to allow them to do the work they were designed to do.
Tank cleaner labels typically list a time that is relative to breaking down herbicides vulnerable to alkaline hydrolysis. However, allowing extra time may be very valuable to help break drown dried-on or oily residues. If you are cleaning out a system at the end of the day, we recommend that your tank cleaner work the “second shift” — that is, leave it in overnight and drain it the next morning.
After you hold the tank cleaner in the sprayer system for the specified time, flush out the tank cleaner with another 30 or so gallons of water (or follow the cleaner’s label recommendations). Many operators believe that the only true way to remove residues trapped in hoses and tank walls is to let the sprayer sit overnight filled with tank cleaner. Regardless, it is vital to properly flush the tank cleaner from the sprayer system. Not doing this could reduce the efficacy of the next application.
 When circulating the tank cleaner through the sprayer system, make sure to open the valves to allow the cleaning solution to move into the inductor hoses. Some applicators add a small amount of tank cleaner directly to the inductor as an extra precaution.
  Agitating and swirling help tank cleaners work better. A full list of tank cleaners and other adjuvants is available in Compendium of Herbicide Adjuvants (available from Southern Illinois University, www.herbicide- adjuvants.com).
 Step 7:
Perform Final Rinse and Flush
Some retail operators perform one last flush of water to ensure the system is as clean as possible. Others even go an extra step by removing the screens again and using a pressure washer to clean residues from the sprayer surface. And still others use a tank mix surfactant or fertilizer additive, which are good at removing herbicide residue that commercial cleaners can leave behind.
Advice From an Ag Retail Manager
“On rainy days, we clean out empty trucks and sprayers. We do this as a precaution. It also makes sure our equipment is ready to go wherever they are needed as soon as the fields are dry.”
 You can readily see dried herbicide residue on the equipment.
 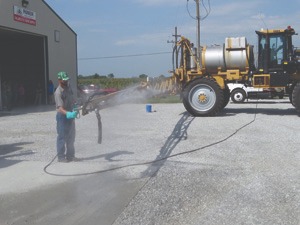 This operator uses a power washer to clean the outside of the sprayer.
 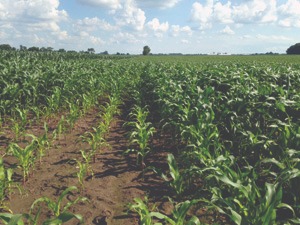 Is it worth the time and effort? Consider this 32-acre field of non-GMO popcorn that was damaged by glyphosate residue left in an improperly cleaned tank. Properly cleaning a sprayer is time well spent. In the long run, you’ll spend far less time and money cleaning a sprayer than you will be dealing with this public relations and financial nightmare.
 ELIMINATING RESIDUES FROM TENDER OR NURSE TRUCKS
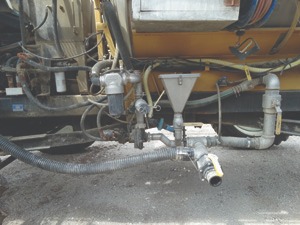
Transports (or as they are commonly called, tender or nurse trucks) are not nearly as sophisticated as herbicide sprayers. However, in some ways they are more difficult to decontaminate and clean. Many nurse trucks are not equipped with any type of internal mechanical agitation or side wall rinsers.
Rinsing such tanks will take considerably more water to ensure you remove all the herbicide residues from inside the tank. On the other hand, nurse tanks have no filters, screens, booms, or end caps to clean. These are reasons why many retailers use tender trucks dedicated to popular herbicides throughout the season.
Do Not Add Herbicide to the Last Transport Load
When you use a transport or tender truck to supply tank mixes to the sprayer, don’t make the last load that the transport carries of a particular tank mix a premixed (or “hot mix”) load. Sometimes, that’s easier said than done.
As one farmer asked, “My transport holds 6,500 gallons of water. What am I to do with 3,250 gallons of water?”
The answer is to use less water.
When you clean a tender truck, fill the tank only with water, activate the transfer pump, and then circulate the water through all the hoses back into the opening at the top of the tank. Drive the vehicle around the field or on a road to get the water to slosh around the tank. Then, use this water as fill water for the sprayer and add the chemical directly to the sprayer tank or inductor.
Add Tank Cleaner to the Transport
After bringing the water to the sprayer, fill the nurse truck’s tank half full of water. Add tank cleaner according to the label, and then circulate this solution well through the hoses back into tank. Drive around again to circulate the tank cleaner solution around the inside walls of the transport tank. Release the water in the field away from streams, ponds, and other bodies of water.
A plastic sight gauge may help you determine if a tank has been cleaned. A cloudy sight gauge may indicate there is still herbicide residue in the tank.
A PROCEDURE CHECKLIST FOR CLEANING A SPRAYER
When performing any type of maintenance, it is better to follow a sequence of steps outlined on a written checklist or standard operation procedure (SOP). Whether the task is winterizing equipment, conducting an annual truck inspection, or checking multiple levels of fluids at the time of an oil change, following a checklist or SOP ensures nothing is missed.
Retailers should implement SOPs to keep their operators from having to memorize steps, processes, and other important items. It’s true that you can do the work without a written plan, but working through the listed steps ensures you don’t miss anything.
Most farms and retailers do not have written SOPs for cleaning sprayers. You would think that cleaning the sprayer would be as high a priority as changing the oil in equipment. Following an SOP for cleaning a sprayer will ensure that you complete all tasks in a certain order and leave nothing to chance. By following the procedures step-by-step, you can clean the system each and every time so you can safely treat subsequent crops with an herbicide. Following an SOP also will make cleanings more time efficient.

Different Equipment, Different SOPs
Equipment makes and models differ significantly in what parts need to be rinsed.
Retailers should ask those who are familiar with each sprayer rig to help develop an SOP checklist for their machine. Even if the exact machines are at different locations, it will be useful to compare the checklists and look for similarities and differences.
Combine the best from each checklist into a single one that incorporates the best ideas from your experienced applicators.
CONCLUSION: WATER IS YOUR FRIEND
One thing remains constant from one year to the next: if something can go wrong, it probably will. Spring is about waiting for the soil to warm and dry enough to plant crops, apply fertilizers, and spray herbicides. While you can plan the work for a day or a week on paper, the weather inevitably will play a factor. Weather is one thing you can’t control — Mother Nature always wins.
In any given season, weather is usually the biggest obstacle. While a slow 2-inch rain may help a crop that’s already planted, it wreaks havoc on those acres that still need to be tilled, planted, or sprayed. Rain will make you wait a day or two or longer to complete the work you feel should have already been done.
Farmers aren’t the only ones feeling pressure at certain times of the year. Agricultural retailers feel that same pressure when fields get backlogged and put on the waiting list for applications due to weather delays. Each day that fields go unsprayed means that weeds will be tougher to control.
Field and environmental conditions like wet soils and winds prevent applications, which causes delays. So once the ground dries, retailers are compelled to move quickly. All customers want their fields sprayed first. It’s understandable that growers want things done in a timely manner (and sometimes yesterday). Time is money, and delayed applications translate into lost dollars. So when customers call, it’s obvious that their first question will be: “When can you spray my fields?”
“I am going to have my operators read through this, and together we are going to put together our own checklist per machine,” said one applicator after reviewing this publication.
This photo shows herbicide residue damage. The herbicide was left in outside boom sections while the rig sat out for two summer days.
Time is of the essence. What could have been plenty of time to get the thousands of acres sprayed, becomes shorter with rain or excessive wind delays. Weather delays force changes to the workday. It means starting before the sun comes up and ending while the moon lights the way across the fields. The workweek expands to the weekend as applicators try to spray all the acres in a timely manner.
The last thing any commercial applicator needs or wants to do during these stressful and hectic days is to divert time from working those acres. Thoroughly cleaning sprayer equipment by the book and by the company’s checklist means being down for an hour or two, but with more rain in the forecast, spending time in the fields may seem more important than thoroughly cleaning a sprayer; that decision may cost you dearly.
The most common mistake applicators make is when they arbitrarily decide to skip a few steps in cleaning the sprayer tank, screens, hoses, and booms. For some, spending a few minutes doing a quick rinse to get the majority of the residues out of the tank seems like the right thing to do. How can it be wrong when it allows you to get back in the field and spray the acres assigned to you?
Sometimes you get lucky. But when your decision damages crops, it is costly and embarrassing.
Proper cleanouts are time-consuming. There is nothing that can be done about that. It takes a lot of effort to ensure that sprayer equipment does not contain any herbicide residues that can injure the next crop. When crop injury does happen, it can result in a face-to-face confrontation with a farmer whose crops have been damaged by contaminated applications. Taking the time to clean out the sprayer properly, not only keeps customers happy, it keeps them coming back.
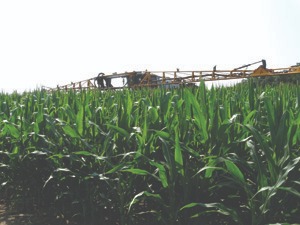 There is no place to hide when the wrong herbicide shows up on the crop.
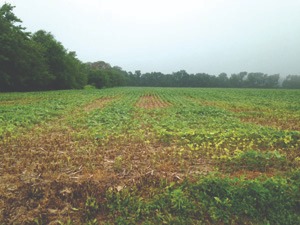

Would you rather take time to get it right the first time or deal with farmer complaints? This applicator sprayed a pre-emergent herbicide for soybeans. He then switched to spraying corn without cleaning the sprayer.
ACKNOWLEDGMENTS
Thanks to Dawn Minns for graphic design. Funds for printing this publication were partially provided from Indiana Water Resources Center at Purdue University, Monsanto, and Dow AgroSciences. Thanks also to those who offered constructive comments during the development of this publication.
- Erin Bauer, University of Nebraska
- Larry Bledsoe, Purdue University
- Betsy Bower, Ceres Solutions
- Roger Boyd, Harvest Land Co-op
- Hal Brown, Windy Lane Farms
- Ty Brown, Windy Lane Farms
- Jeff Bunting, Growmark
- Dennis Carrell, Lamb Farms
- Chuck Champion, KALO
- Michael Childress, Indiana farmer
- Dan Childs, Monsanto
- Jason Davis, University of Arkansas
- Jason Deveau, Ontario Ministry of Agriculture,
- Food and Rural Affairs
- John Dulin, BASF Corporation
- Mike Edmondson, Indiana farmer
- Corey Gerber, Purdue University
- Pierce Hansen, Colorado State University
- Kevin Harness, Indiana farmer
- Marc Hasenick, Indiana farmer
- Steve Hawkins, Purdue University
- John Hiatt, Crop Production Services
- Joanne Kick-Raack, The Ohio State University (retired)
- Matt Kraushar, Wichita State University
- Andrew Landers, Cornell University
- Travis Legleiter, Purdue University
- Patrick McMullan, United Suppliers
- Bryan Overstreet, Purdue University
- John Pickering, Indiana farmer
- Jim Reiss, Precision Laboratories
- Craig Stevens, Ceres Solutions
- Brian Thompson, Thompson Grain Farm, Inc.
- Andy Vangilder, University of Arkansas
- Bill Vieck, Indiana farmer
- Bob Wolf, Wolf Consulting & Research
- Kent Woodall, Rosen’s, Inc.
- Brian Wooddell, FDS
Disclaimer
This publication is intended for educational purposes only. The authors’ views have not been approved by any government agency, business, or individual. The publication is distributed with the understanding that the authors are not rendering legal or other professional advice to the reader, and that the information contained herein should not be regarded or relied upon as a substitute for professional consultation. The use of information contained herein constitutes an agreement to hold the authors, companies or reviewers harmless for liability, damage, or expense incurred as a result of reference to or reliance upon the information provided. Mention of a proprietary product or service does not constitute an endorsement by the authors or their employers. Descriptions of specific situations are included only as hypothetical case studies to assist readers of this publication, and are not intended to represent any actual person, business entity or situation. Reference in this publication to any specific commercial product, process, or service, or the use of any trade, firm, or corporation name is for general informational purposes only and does not constitute an endorsement, recommendation, or certification of any kind by Purdue University. Individuals using such products assume responsibility that the product is used in a way intended by the manufacturer and misuse is neither endorsed nor condoned by the authors nor the manufacturer.
IT IS THE POLICY OF THE PURDUE UNIVERSITY COOPERATIVE EXTENSION SERVICE THAT ALL PERSONS HAVE EQUAL OPPORTUNITY AND ACCESS TO ITS EDUCATIONAL PROGRAMS, SERVICES, ACTIVITIES, AND FACILITIES WITHOUT REGARD TO RACE, RELIGION, COLOR, SEX, AGE, NATIONAL ORIGIN OR ANCESTRY, MARITAL STATUS, PARENTAL STATUS, SEXUAL ORIENTATION, DISABILITY OR STATUS AS A VETERAN. PURDUE UNIVERSITY IS AN AFFIRMATIVE ACTION INSTITUTION. THIS MATERIAL MAYBE AVAILABLE IN ALTERNATIVE FORMATS.
Purdue Pesticide Programs offer a number of publications on related topics to help you manage your operations better. All publications are available from The Purdue Extension Education Store: 765-496-4636
 The Impact of Water Quality on Pesticide Performance (PPP-86). Understand how your mixing water influences pesticides.
  Measuring Pesticides: Overlooked Steps to Getting the Correct Rate (PPP-96). Understand effective measuring techniques that ensure success.
 Benefits of poly tank ownership are well established, the risk of tank failure is real
  Fiberglass Tanks for Storage, Transport, and Application: Designing Your Customized Tank (PPP-93). Get all the necessary information about fiberglass tanks before you buy.
  Steel Tanks for Storing and Transporting Pesticides and Fertilizers (PPP-105). Learn all the pros and cons of steel tanks.