
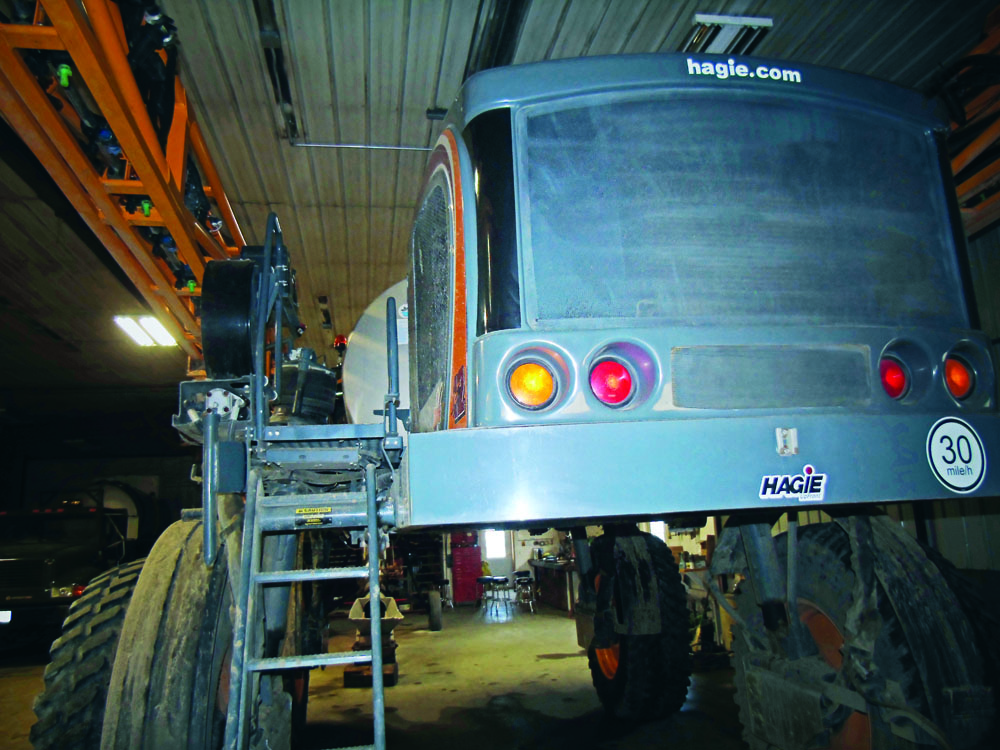
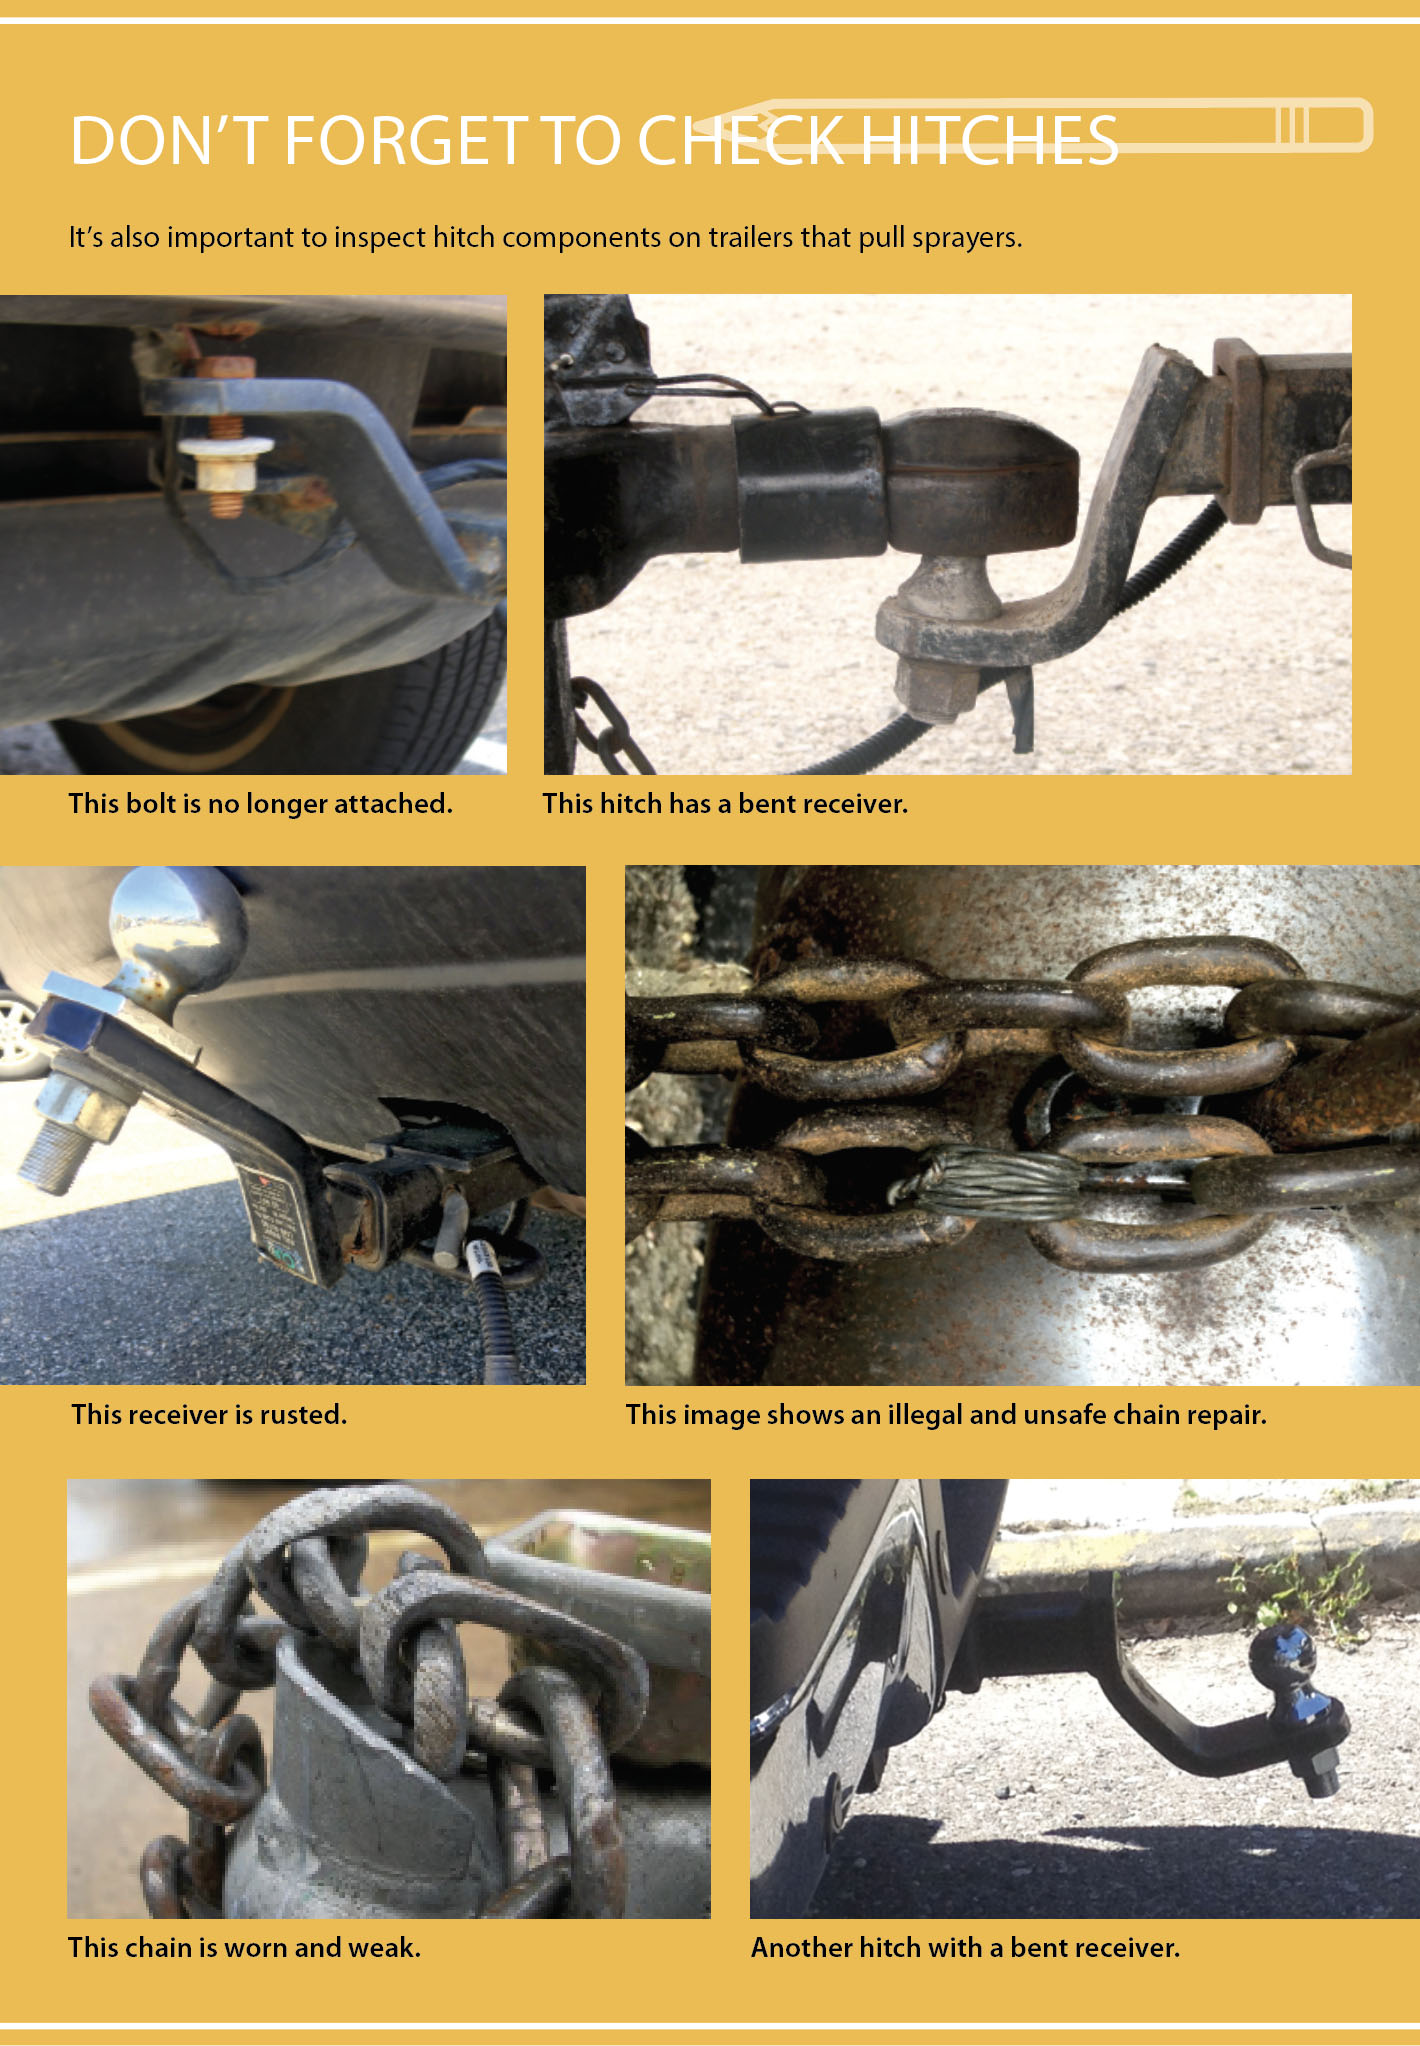
Reparing Spray Equipment For Winter Storage And Spring Startup
Fred Whitford, Director, Purdue Pesticide Programs
Corey Gerber, Director, Purdue Diagnostic Training and Research Center
Dennis Nowaskie, Farm Superintendent, Southwest Purdue Agricultural Center
Steve Hawkins, Director of Purdue Research Farms, Purdue University
Pete Illingworth, Mechanic, Purdue Throckmorton Purdue Agricultural Center
Aaron Kreider, Assistant Manager, Daniel Turf Center, Purdue University
Jon Leuck, Farm Superintendent, Purdue Pinney Purdue Agricultural Center
Kevin Shirk, Facilities Mechanic, Beck’s Hybrids
Kevin Leigh Smith, Editor/Continuing Lecturer, Agricultural Communication/Youth Development and Agricultural Education, Purdue University
What this publication will cover
Prepare Equipment for Winter Storage and Spring Startup
Review the Warranty Requirements
Fall Inspection and Maintenance
Check Lights and Flashers
Change Fluids and Filters
Lubricate Grease Fittings
Fill Fuel and Hydraulic Oil Tanks
Inspect Engine Belts
Remove, Clean, and Store Batteries
Inspect Hoses for Wear and Deterioration
Upgrade to Better Hose Clamps
Tighten Straps, Hoops, and Bolts on Tanks
Look for Signs of Sun Degradation
Pay Attention to Other General Items
Consider Rodent Traps and Bait Stations
Winterizing Means Removing Water
Choose the Right Type of Antifreeze
Check Freeze and Burst Pressures
The Three Steps of Winterizing
Be Ready in the Spring
Recycling Antifreeze
Conclusion
Acknowledgments
Disclaimer

Prepare Equipment for Winter Storage and Spring Startup
After a long season of applying pesticides to keep insects, weeds, and diseases at bay, it can take a lot of effort to make any needed repairs, complete fall maintenance, and winterize your sprayer. But with the ever-increasing cost of today’s equipment, avoiding or improperly servicing your sprayer for winter storage can be a costly mistake.
You need to prepare your sprayer for winter and complete routine maintenance for a quick startup in the spring. This is simply part of the responsibility of owning and operating the equipment.
The reality is that the season is not really over until you properly clean your spray equipment, inspect it, complete any necessary maintenance, and winterize it. A few productive moments and timely repairs in the fall can save hours or days of delays in the spring.
This publication is meant to help you develop a plan for end-of-season maintenance on your spray equipment to keep it running at its best the next season and for many seasons after.
Scheduling and performing fall maintenance has tangible benefits, including improved reliability, productivity, quality, and safety. Successful companies and farming operations consistently strive to attain these benefits. One of the most important advantages of performing maintenance in the fall is that you have more time to get the work done during the off season. If you delay maintenance until spring, that could be the difference between making a timely, early-season application or waiting to apply until repairs are made.
Here are some other advantages of performing sprayer maintenance in the fall:
• It is easier to remove pesticide residue from tanks, hoses, and screens. If you wait until spring, the residue will have dried and hardened, making it much more difficult to remove.
• When you remove water from the system before temperatures drop below freezing, you ensure pumps, pipes, fittings, and flow meters will not be damaged by frozen water.
• You will extend the life of the sprayer when you routinely change fluids and filters.
• When changing fluids and filters at the manufacturer’s intervals, you not only uphold equipment warranties, you keep the equipment running at maximum efficiency.
• You can reduce the need for emergency repair calls and unscheduled downtime in the spring and early summer.
• Properly maintained equipment is safer for employees to operate.
• Fully functional spray equipment ensures revenue potential and customer satisfaction by meeting scheduled applications.
• Repairing small problems now often prevents larger and more expensive repairs later.


 Dirty oil and clogged filters lead to premature engine failures.
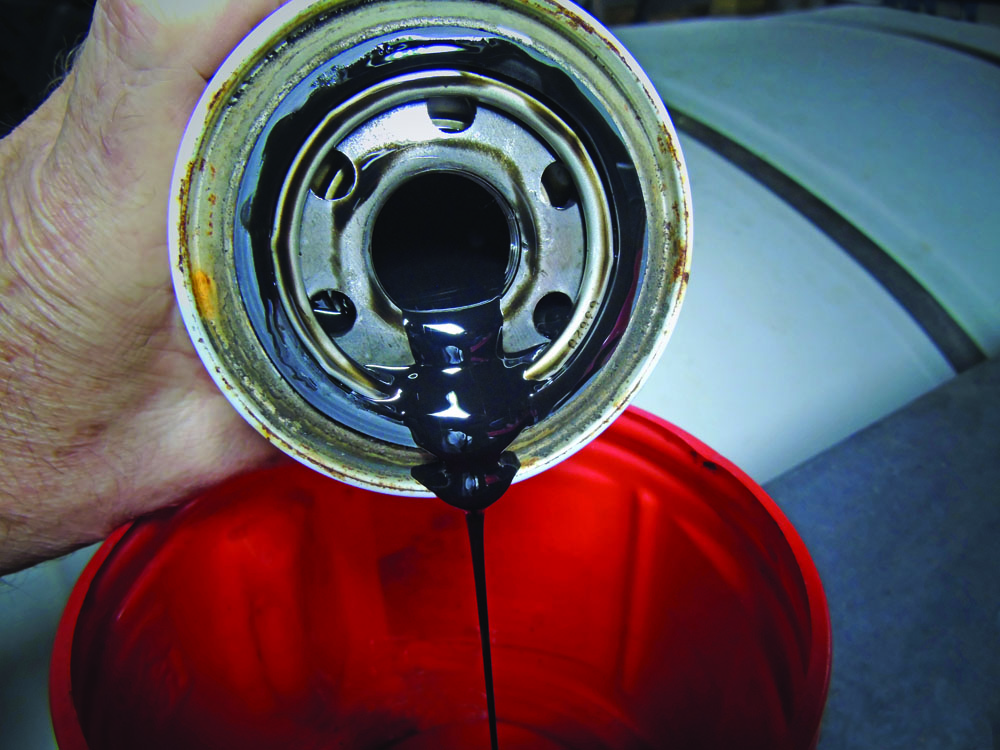
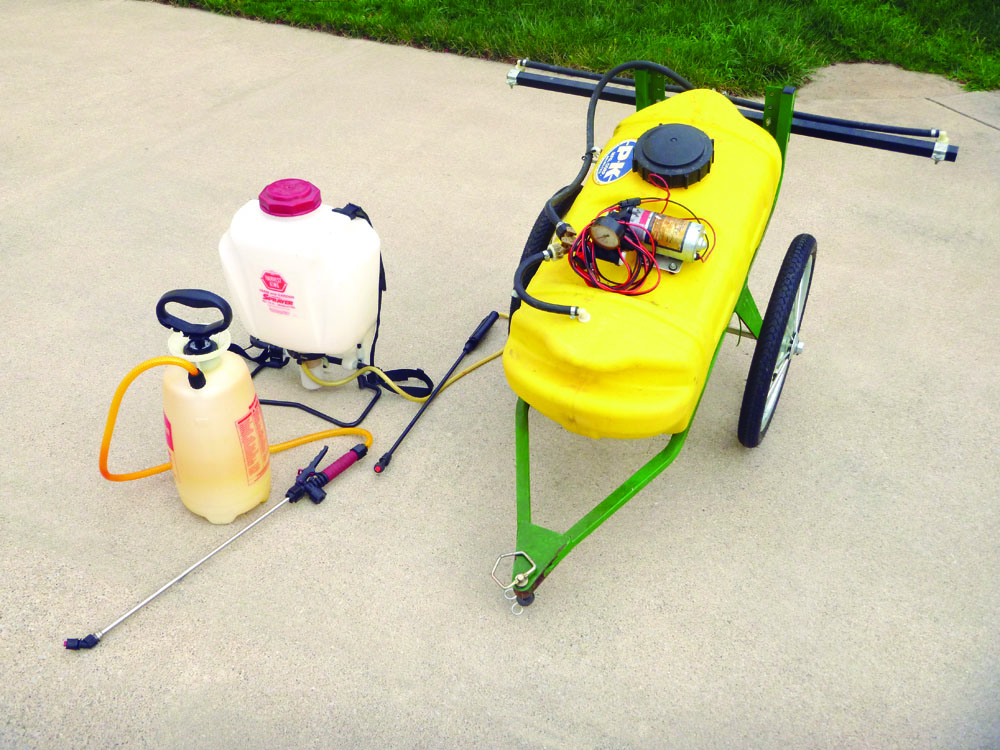
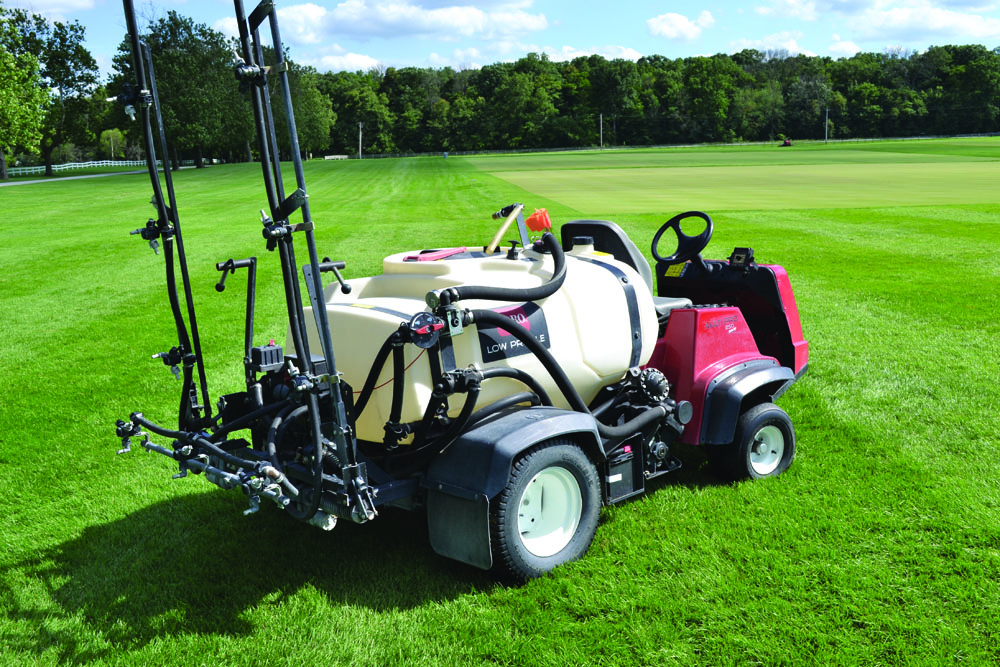
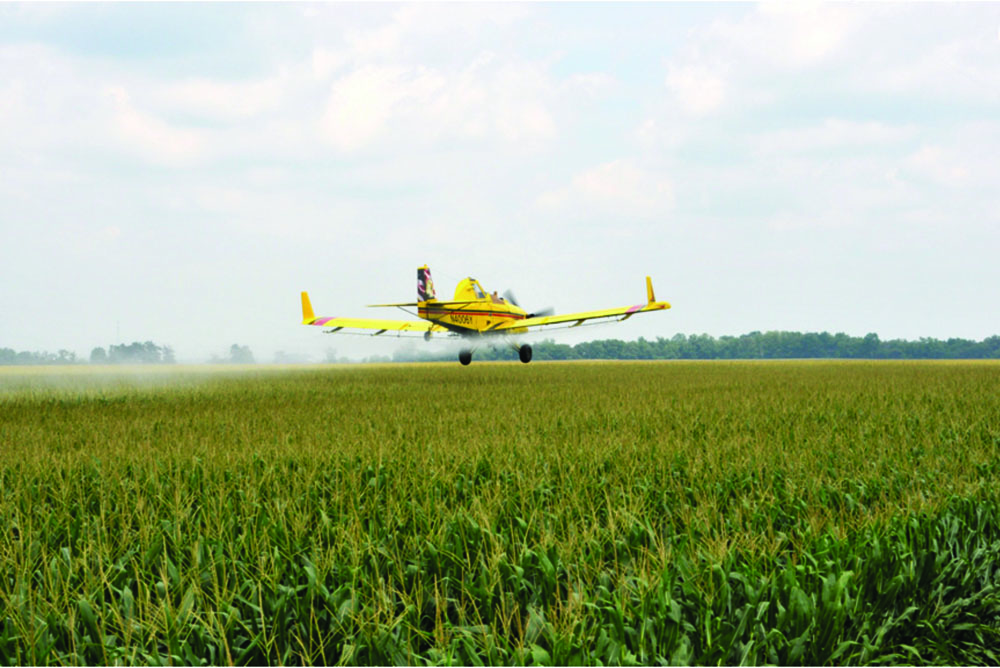
Maintenance and winterization are important for all sprayers (small and large, inexpensive and expensive) and across
all industries (commercial applications, farms, golf courses, or even backyards).
Review the Warranty Requirements
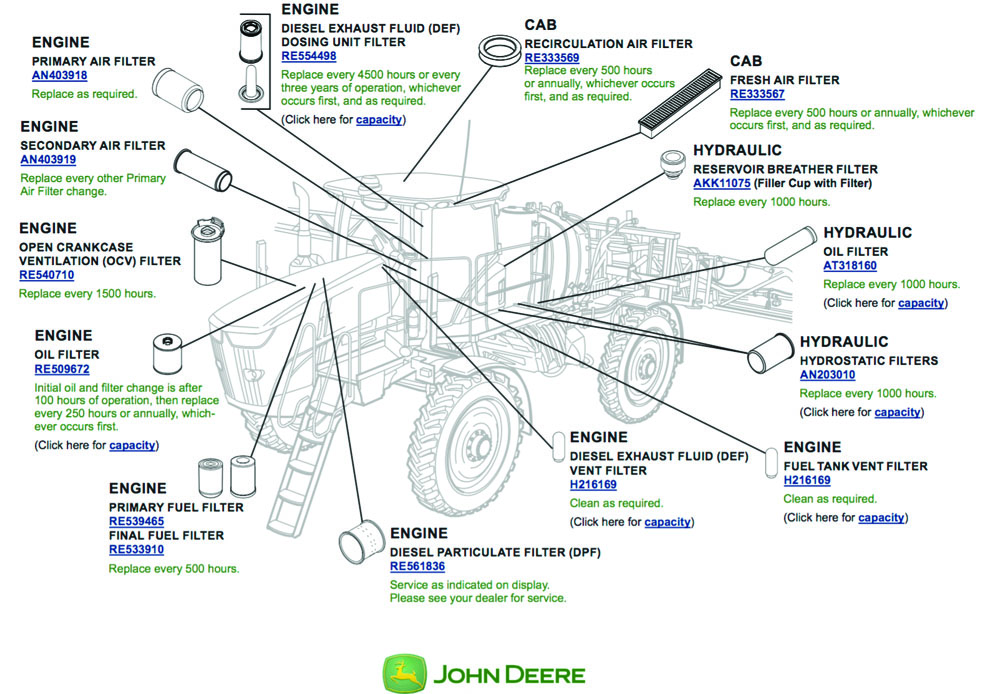
At a minimum, you should begin any maintenance program by reviewing the owner’s manual maintenance schedule. By following this schedule, you keep the equipment covered by the manufacturer’s warranty. You should always follow the manufacturer’s recommendations on how to properly maintain and store spray equipment. It may require you to access multiple manuals to review what and when you should complete the work. Manuals can either be on paper or digital.
The manual recommendations provide information about fluid capacities, recommended fluid types, maintenance or scheduled intervals on when to change fluids, filters, and screens and lubrication of pivot points. If you follow these recommendations,it should prolong and preserve the life of the sprayer. At a minimum, always follow the routine maintenance schedules outlined in the owner’s manual.

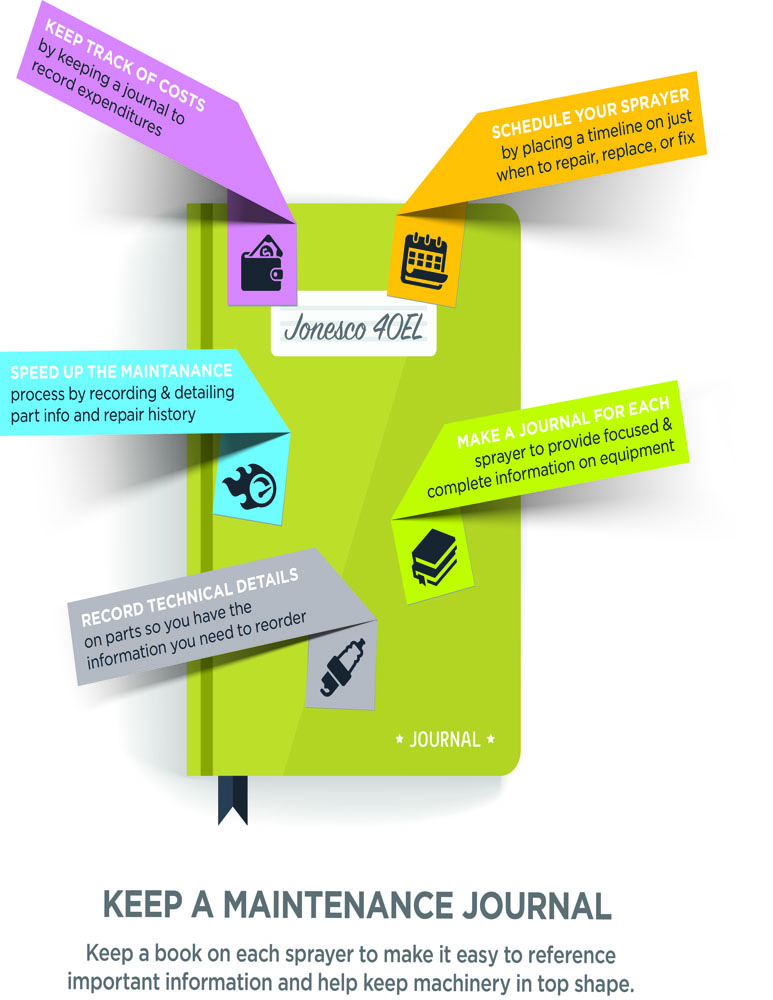
KEEP A MAINTENANCE JOURNAL
Keep a book on each sprayer to make it easy to reference important information and help keep machinery in top shape.
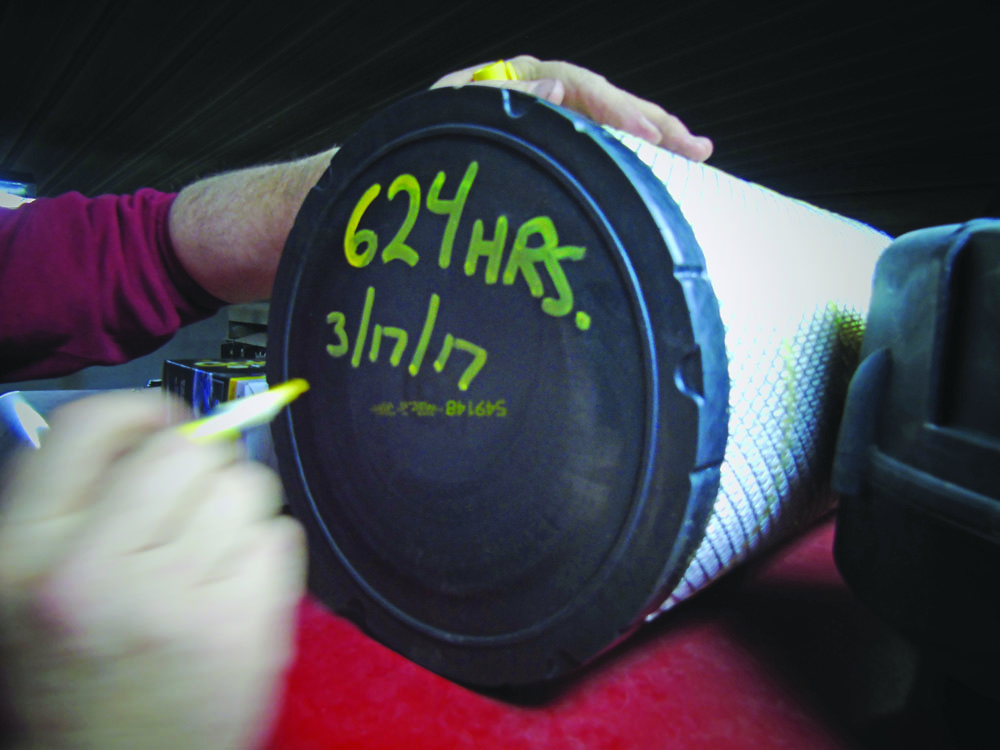
Don’t just perform the maintenance; be certain to keep maintenance records. Create a paper or electronic folder for each sprayer to document the maintenance and repairs you completed. Keeping up-to-date maintenance records is critical if you want to keep track of costs. The records should quickly answer any questions about when and what type of maintenance was completed.
Service records also provide quick access to information. For instance, your own records should easily tell you how many quarts of a fluid you needed to add and what filter you used without needing to look it up in the owner’s manual. In your records, be sure to write down part numbers, hours of service, serial numbers, model numbers, and VIN numbers. The VIN number allows someone to find the exact part that matches a specific sprayer.

Handle all waste fluids in an environmentally sound manner.
Fall Inspection and Maintenance
All is an excellent time to prepare your equipment for spring applications. In spring, your equipment needs to be in the field rather than sitting idle while waiting for ordered parts to come in.
Fall inspection and maintenance includes changing fluids, lubricating seals, replacing broken parts, adding antifreeze, and protecting electronic components from freezing temperatures. You should also thoroughly inspect the entire spray rig. Such an inspection should include the chassis and frame; the engine compartment; the electrical, hydraulic, and hose connections; the spray tank; and the mounting brackets.
As part of your fall routine, we recommend that you:
• Check lights and flashers
• Change fluids and filters
• Lubricate grease fittings
• Fill fuel and hydraulic oil tanks
• Inspect engine belts
• Remove, clean, and storebatteries
• Inspect hoses for wearand deterioration
• Upgrade to better hose clamps
• Tighten straps, hoops, and bolts on tanks
• Look for signs of sun degradation
CHECK LIGHTS AND FLASHERS
Warning lights and flashers alert other drivers that large, slow-moving spray equipment is on the road. Make sure all the lights on your equipment are working before you put the sprayer up for the winter.
Turn on all of the lights (including the flashers) and walk around the sprayer. Visually inspect each light and flasher to ensure they are functioning properly.
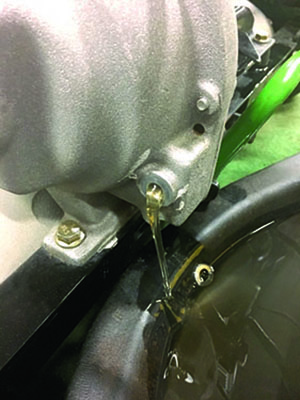
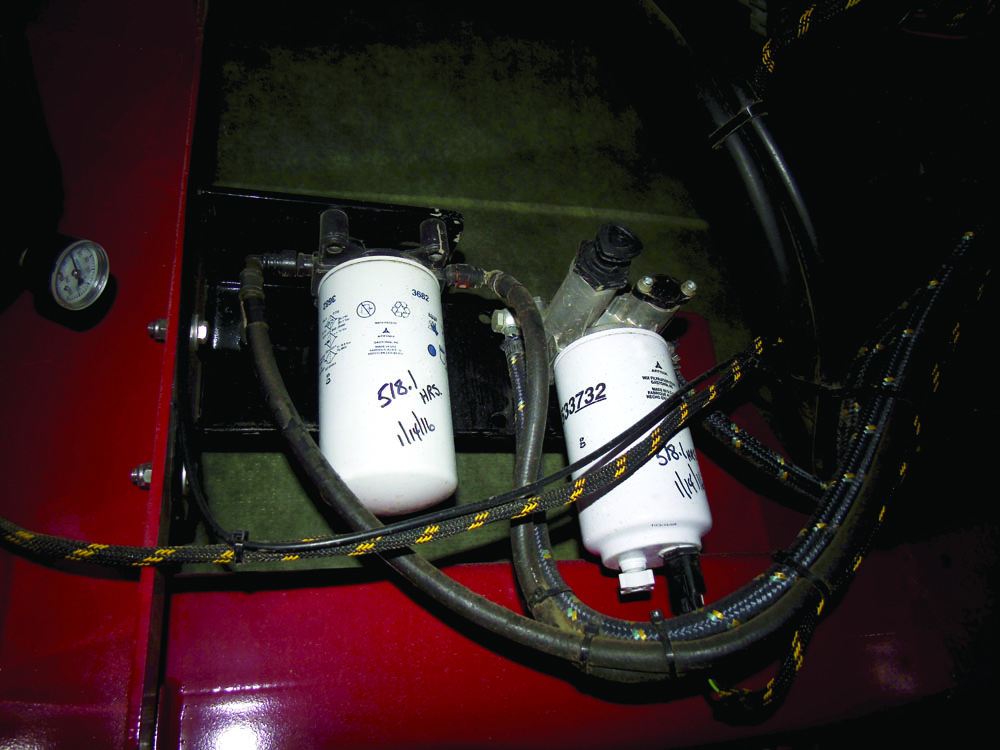
CHANGE FLUIDS AND FILTERS
The intervals for changing fluids and filters depend on the make and model of the sprayer.
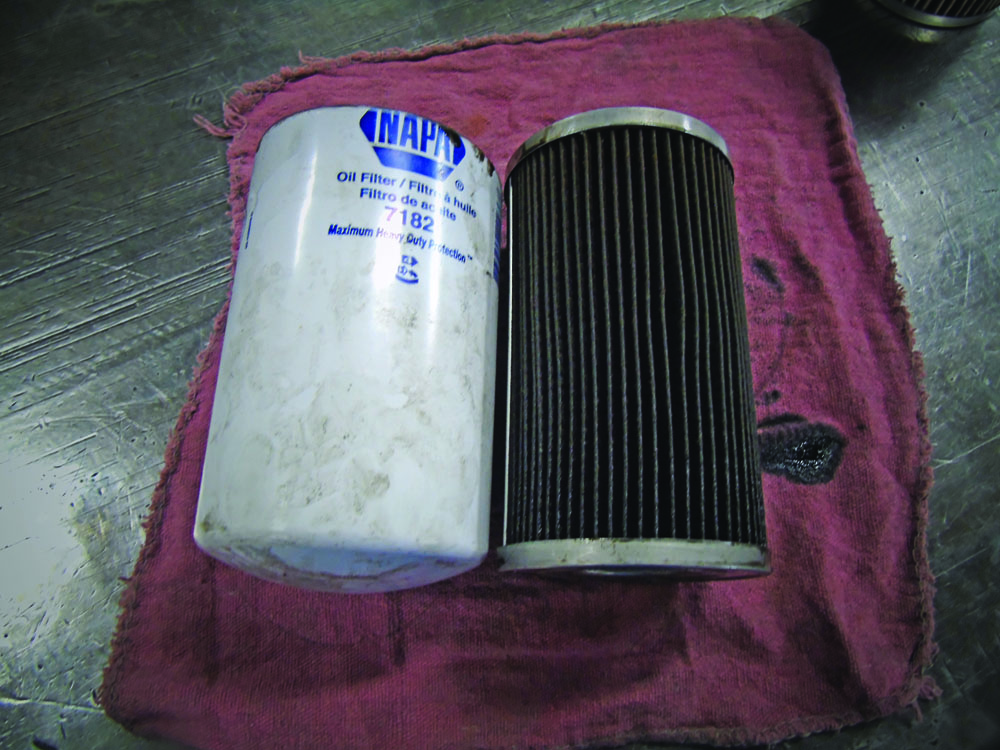
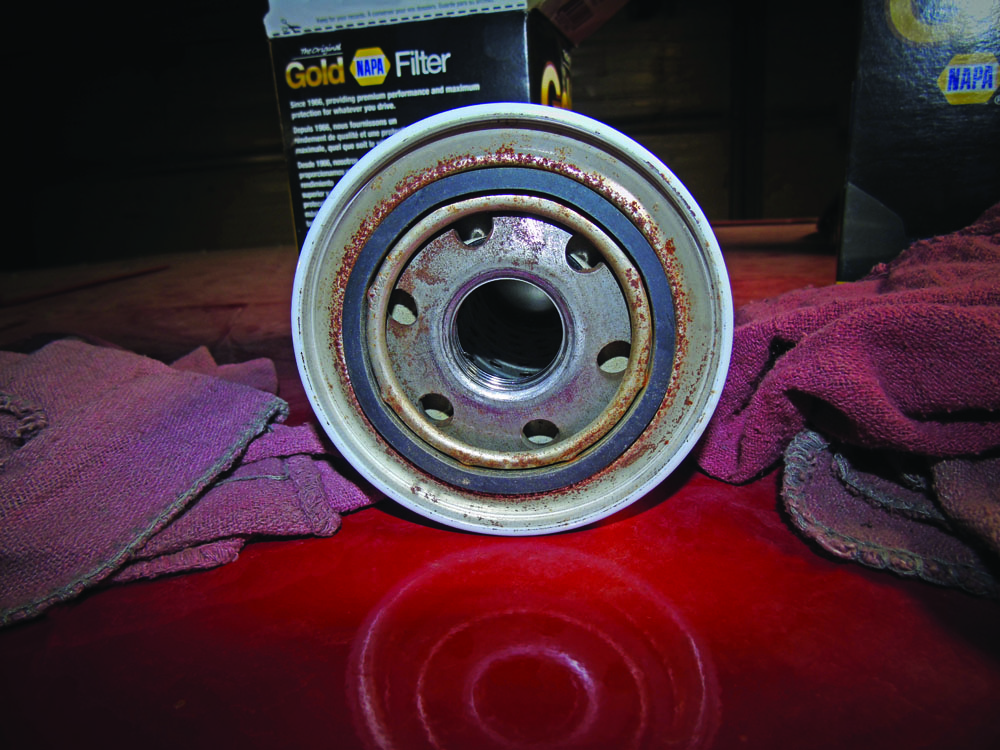
Routine maintenance (such as changing oil and filters like this one) will keep equipment running longer. Always double-check the oil filter surface that screws onto the filter base. Make sure you removed the old filter gasket from the equipment and didn’t leave it behind. Leaving the old gasket will prevent a tight, secure seal. Apply new oil to the new gasket to improve the seal.
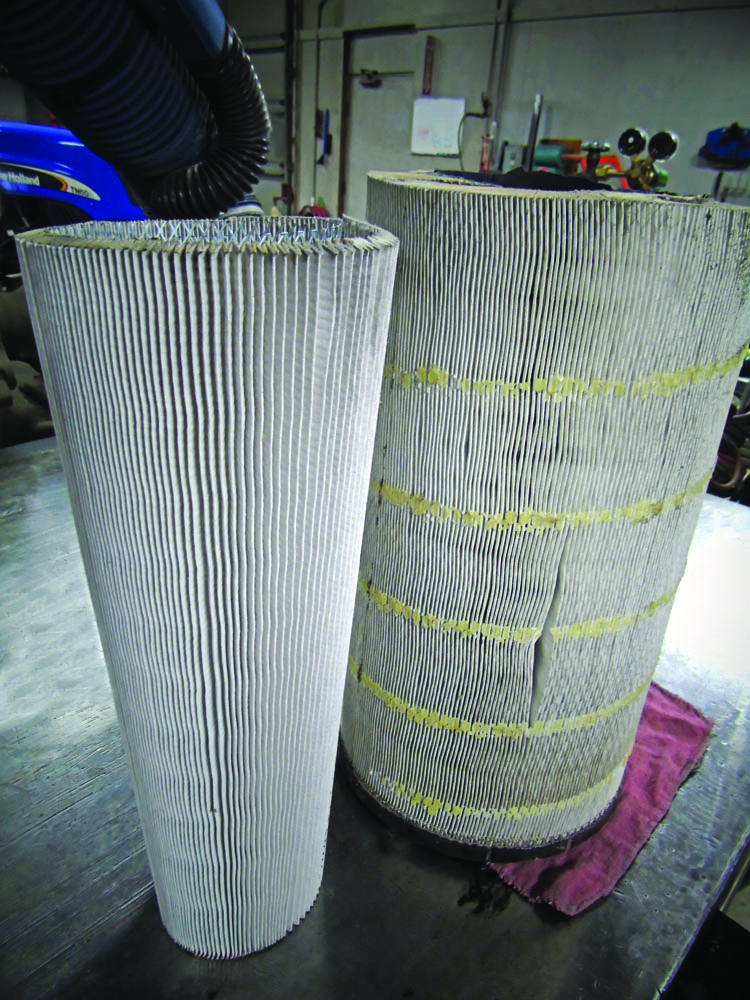
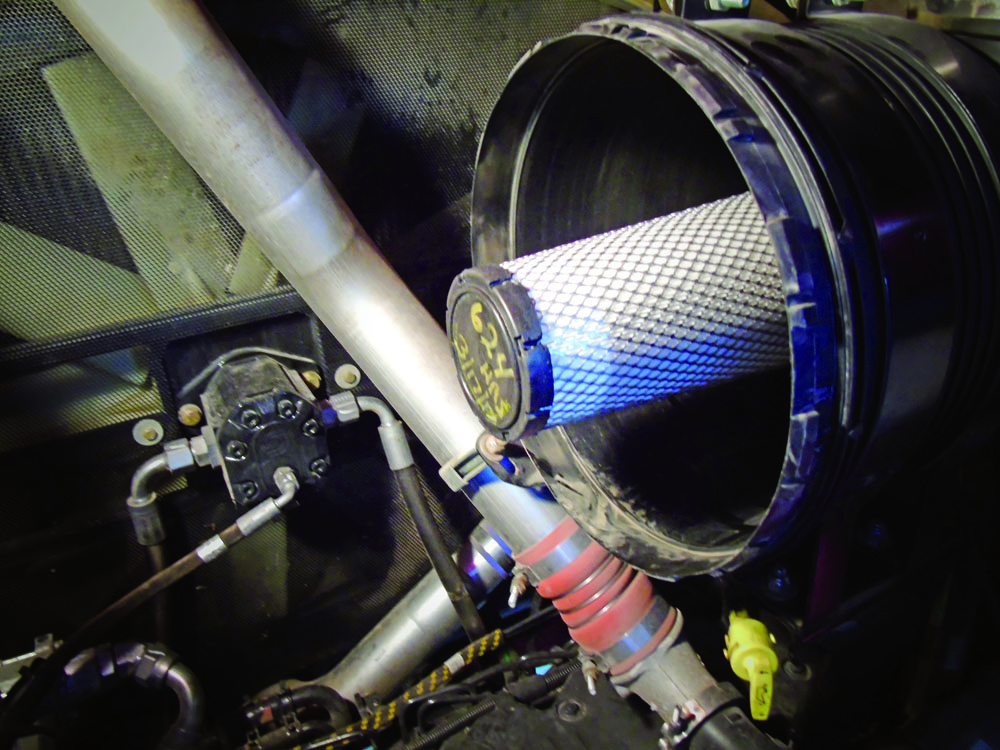
Many engines are equipped with a dual element engine air filter (left). Such designs keep the engine cleaner and help them run at peak efficiency. The outer filter removes larger particles, while the smaller (inner) filter removes smaller particles (below left). Usually, the outer filter traps most of the particles found in “dirty” air. Follow your manufacturer’s recommendations for replacing air filters.
It is acceptable to blow out the larger (outer) air filter, but be sure not to use too much pressure, because it can destroy the paper element. Many air compressors blow air at up to 150 psi, which can destroy a filter (below). Never blow out the smaller, inner filter. Replacing air filters is much cheaper than taking a chance of damaging your engine.
When you clean filters, always blow the air from the inside to the outside of the filter. If you blow from the outside in, it will only force the dirt particles into the filter material and permanently embed them into the element.
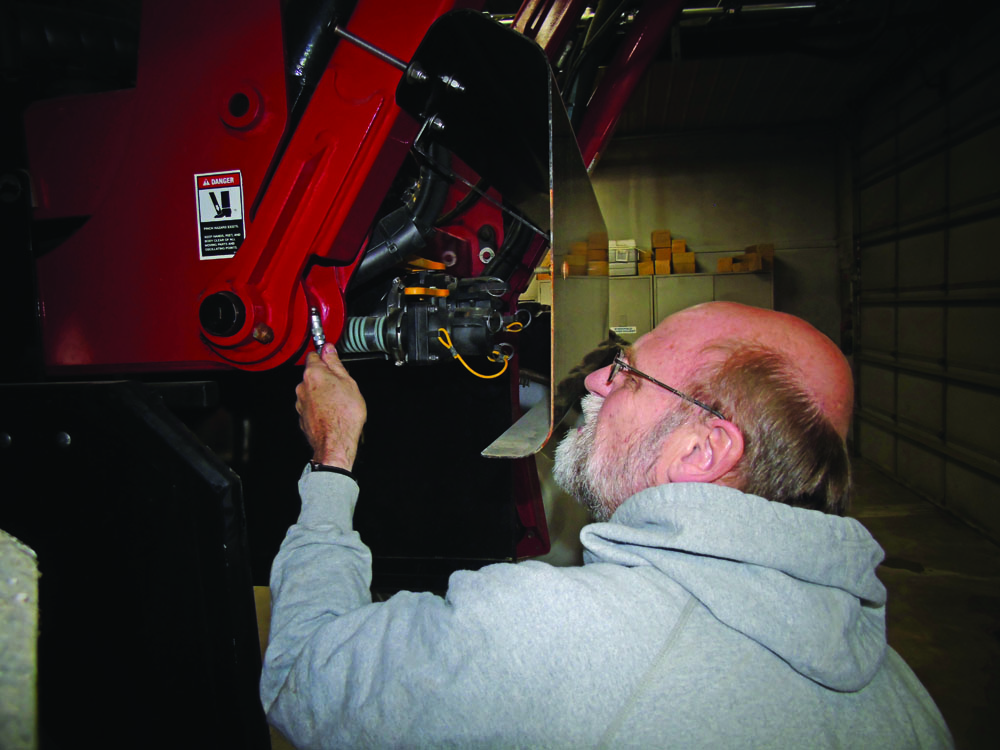
LUBRICATE GREASE FITTINGS
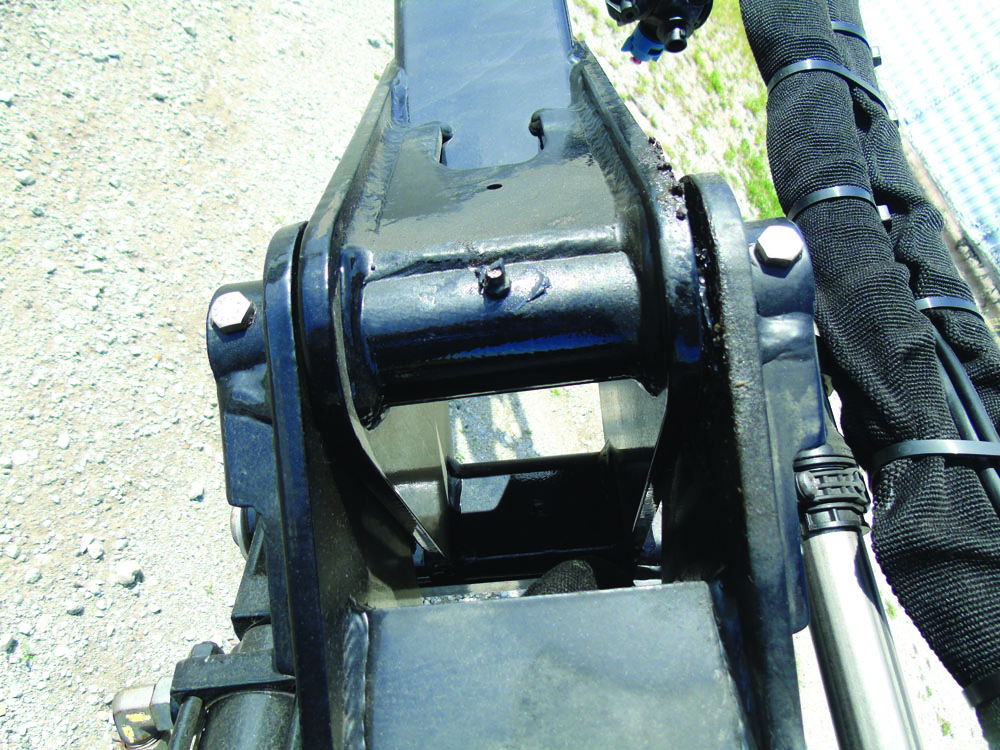
A grease fitting means there is a pivot point of some kind that routinely needs to be greased. Bearings, bushings, hinge pins on folding booms, ball joints, and tie-rods with grease fittings continually lose grease during routine sprayer use. Replenishing grease minimizes the friction from metal-to-metal contact. Without grease, this friction will wear joints and lead to loose hinge points.
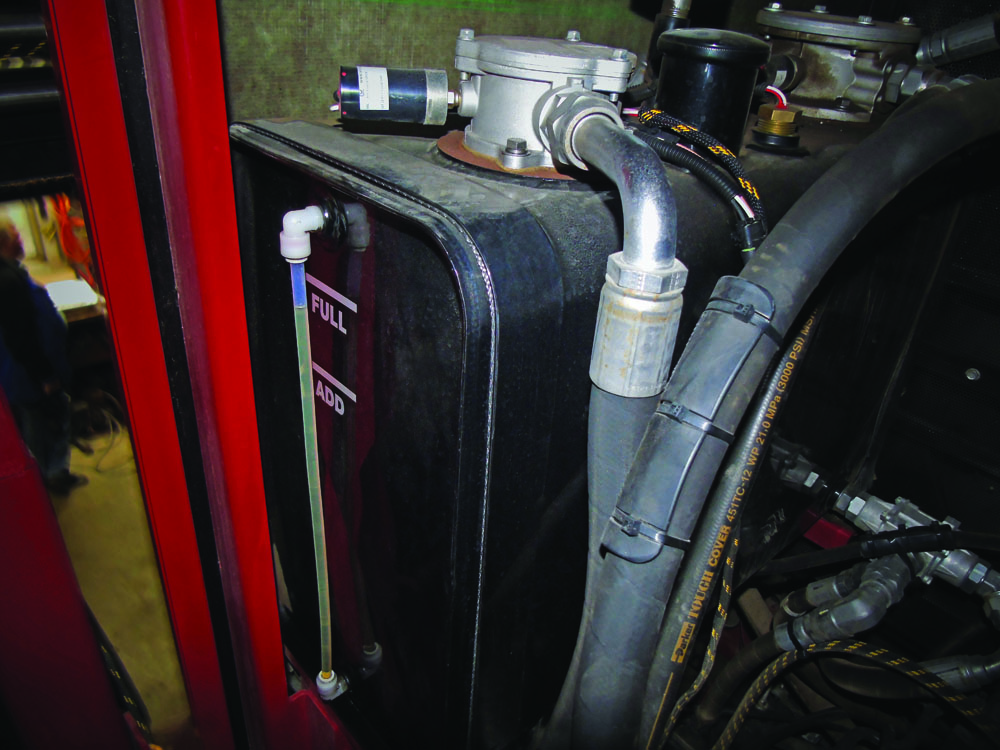
FILL FUEL AND HYDRAULIC OIL TANKS
Keep tanks full with fuel or hydraulic oil to help eliminate condensation. It can also help to add a fuel stabilizer to gasoline engines before you put them up for the season. Stabilizers will keep the gas from getting “old.” After you add a stabilizer, make sure to run the engine long enough for the stabilizer-mixed fuel to work through the entire fuel system.
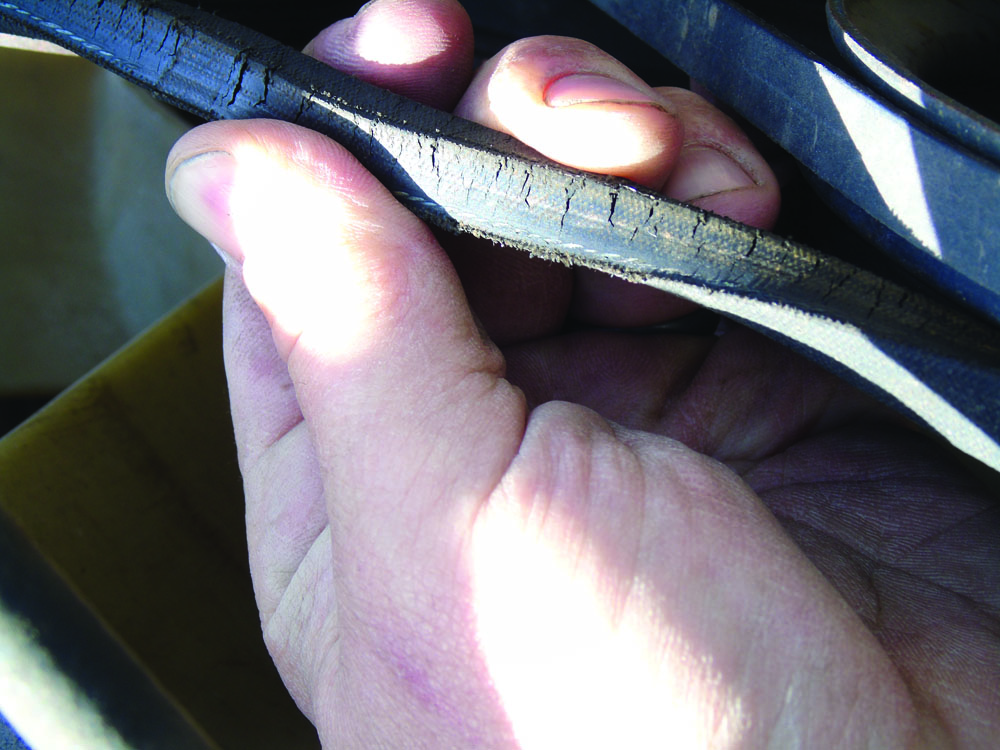
INSPECT ENGINE BELTS
Engine belts weaken and crack because of routine use, tension, heat, vibrations, chemical contamination, and age. Whether it is a V-belt that operates on separate pulleys or a serpentine belt that connects all of the engine components, it is important to check the condition of all belts.
A squeaking noise or grinding sound could indicate that the belt needs closer inspection. When inspecting belts, look for cracks, brittleness, and fraying. If belts are loose, tighten them and make sure they are in alignment. You might consider carrying spares of some of the smaller belts, especially the alternator.
While you inspect belts, be sure to inspect the pulleys and idlers for rough surfaces. A rough pulley or idler can scrape against a belt and cause it to wear out prematurely. Replace rough or worn pulleys and idlers to get the most life from your belts.
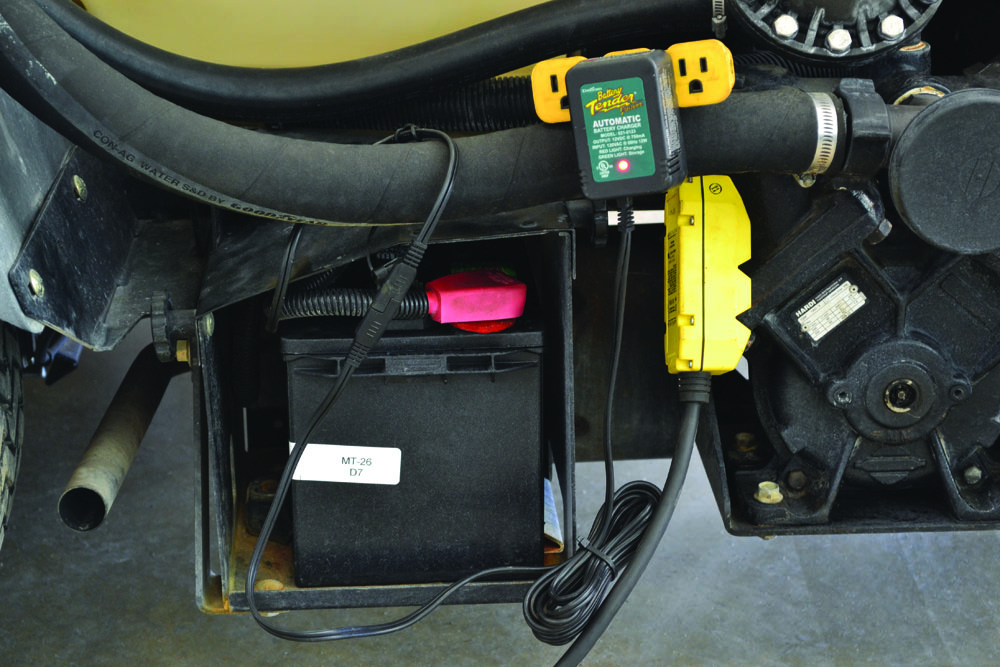
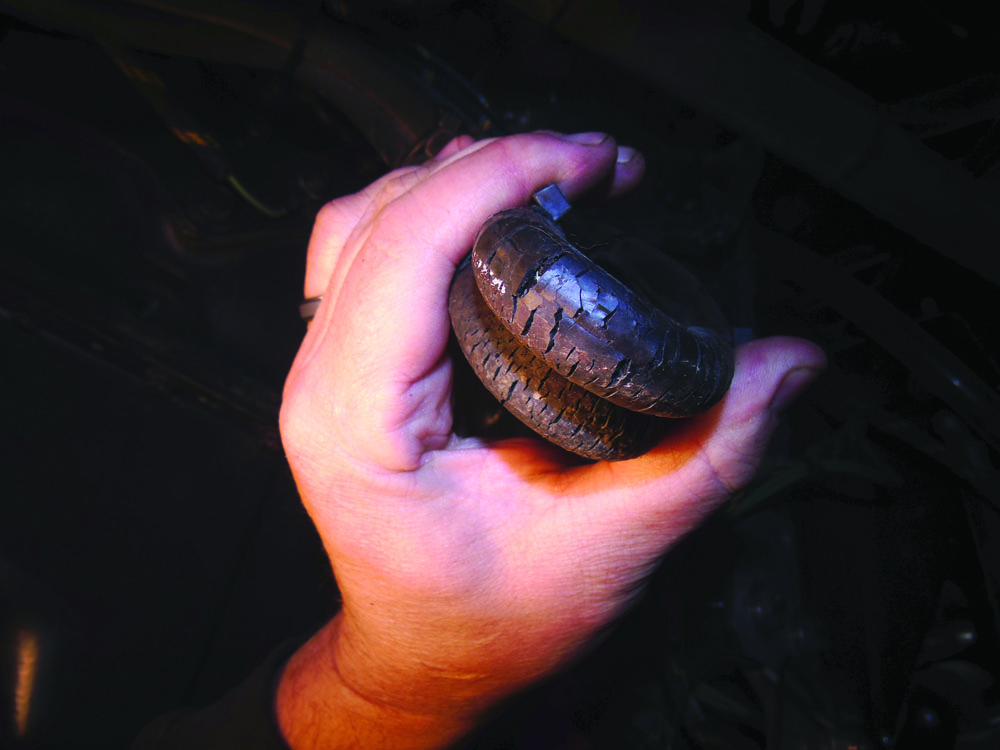
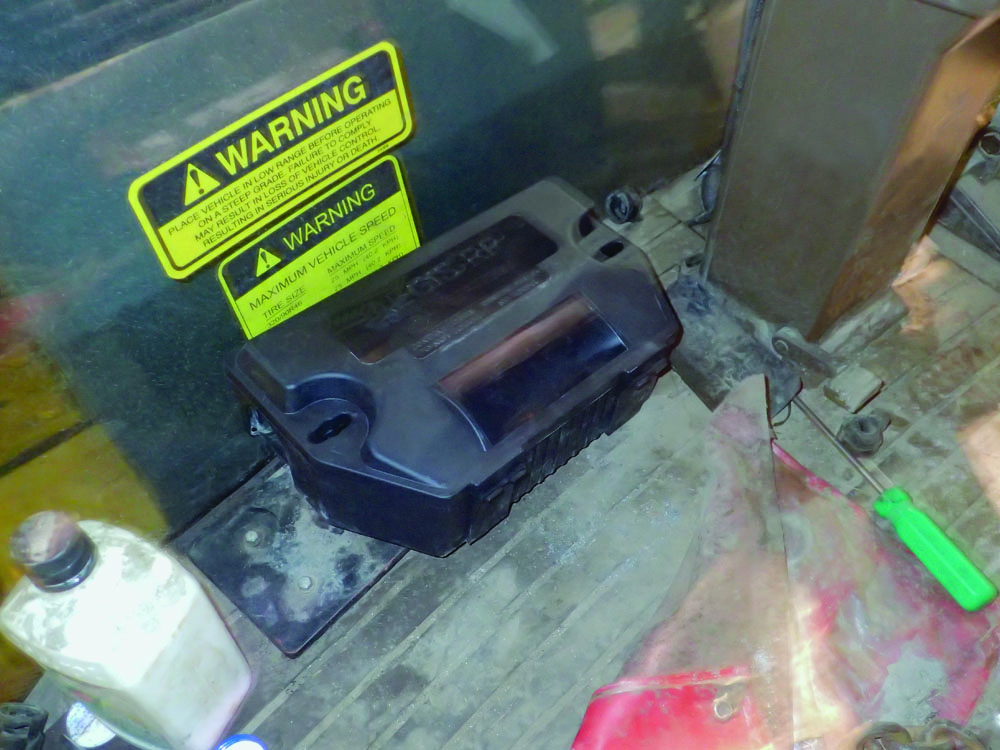
REMOVE, CLEAN, AND STORE BATTERIES
Since batteries are very important (and rather expensive) parts, it is a good idea to take good care of them. Today’s sprayers have advanced electronics, so it becomes more important to maintain the batteries. Computers can drain a battery even while the sprayer is in storage. For long-term storage, remove the battery from your equipment and store it in a heated location. At the same time, be sure to clean battery cables, connectors, and posts to remove any corrosion buildup.
Before storing a battery for the winter, make sure it is fully charged. It is best to connect a trickle charger to the battery over the winter to keep it fully charged. If the batteries in your rig are difficult to access, you can purchase and attach leads that will make it easier to connect a trickle charger.
A partially charged battery will freeze at 32ºF, but a fully charged battery can go as low as -76ºF before freezing. A frozen battery can crack the housing, which can then release caustic acid into the surrounding area and damage brackets, hold downs, and battery compartments.
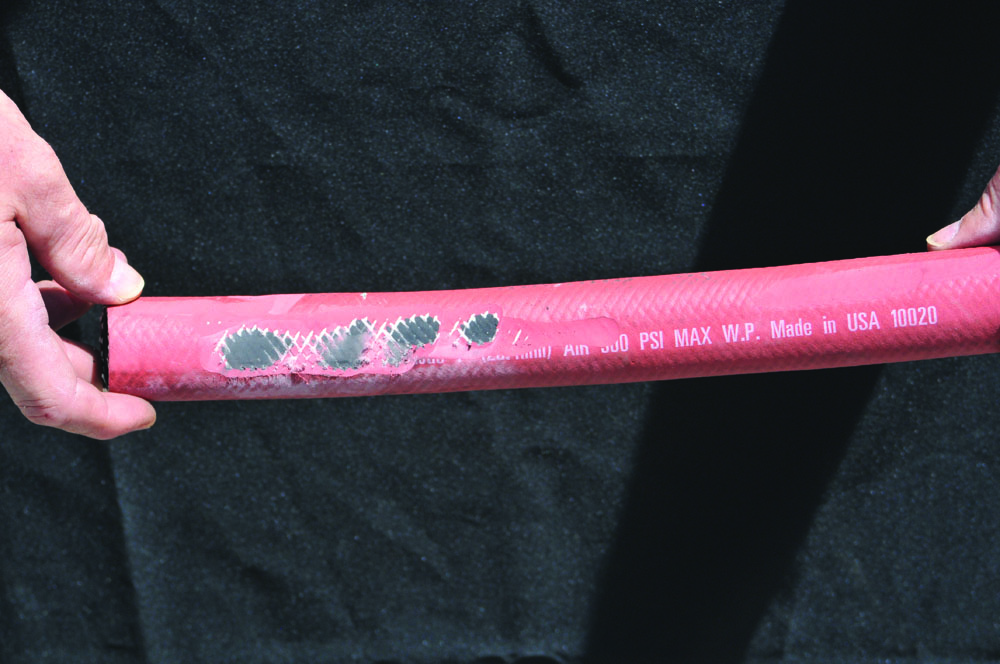
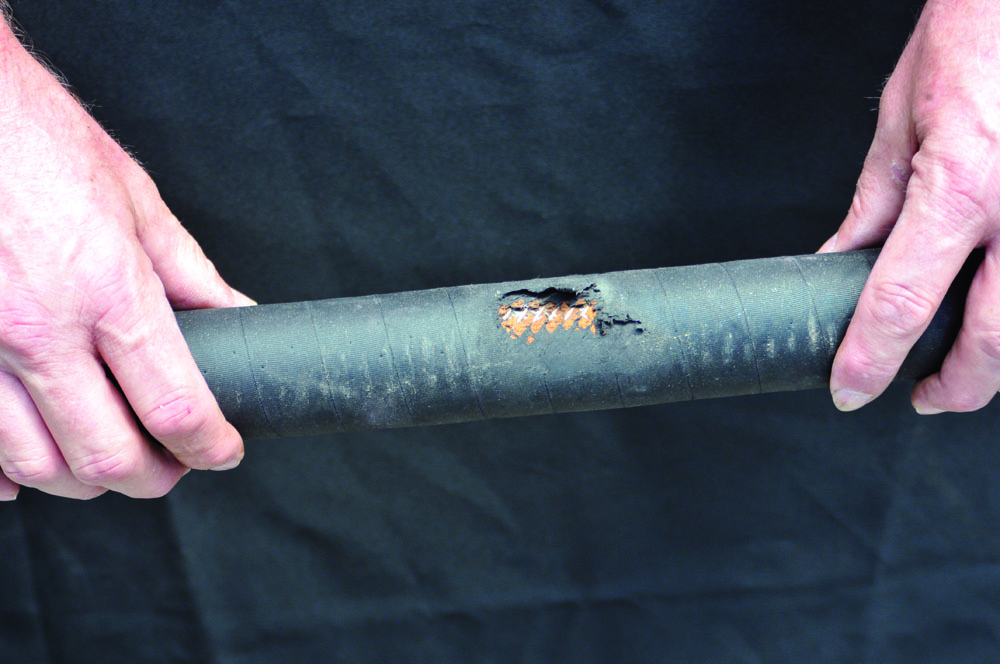
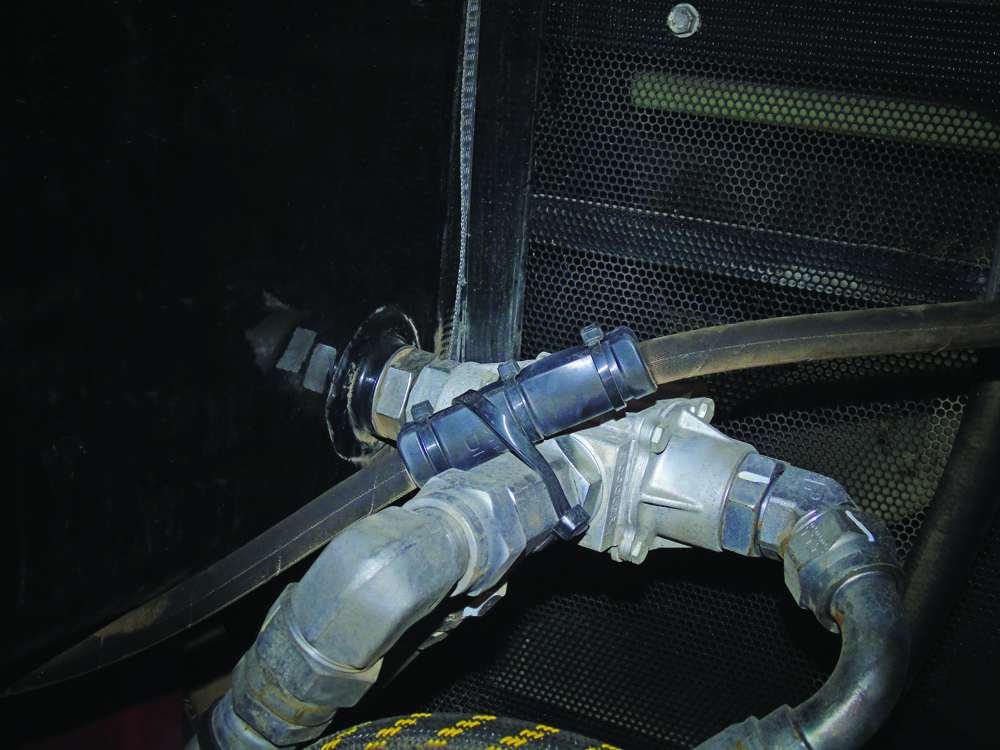
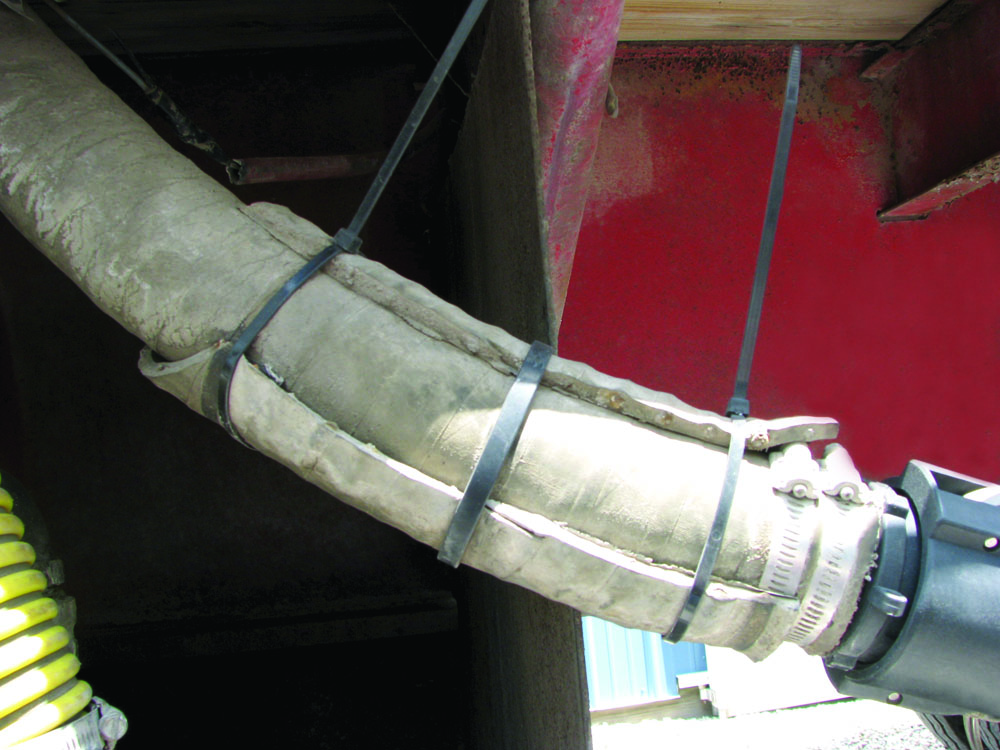
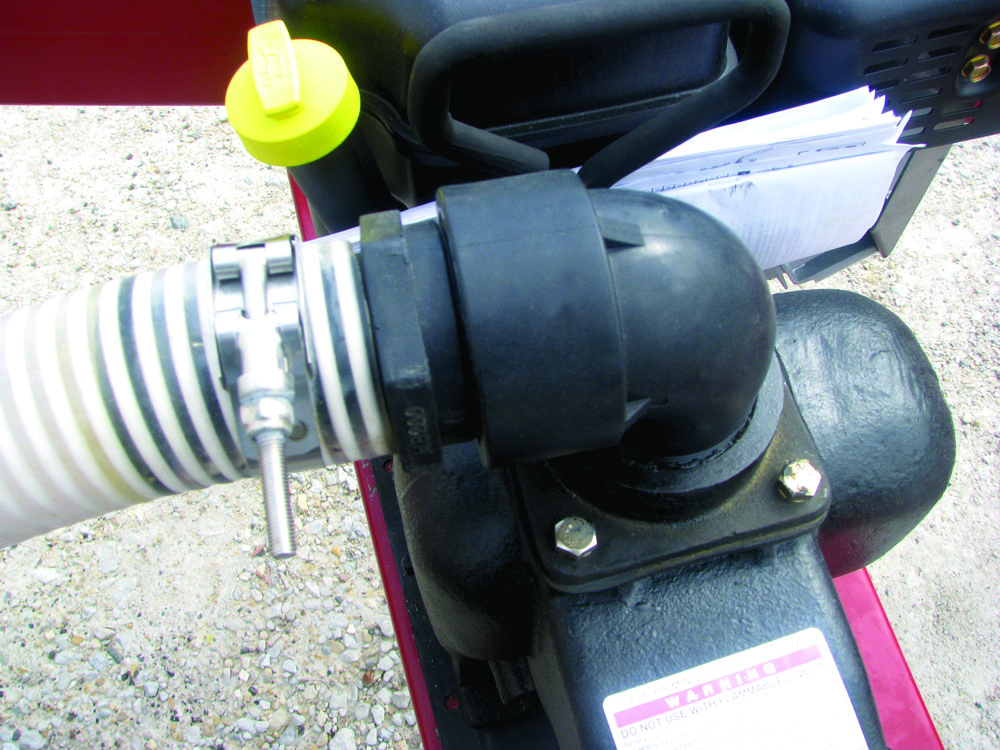
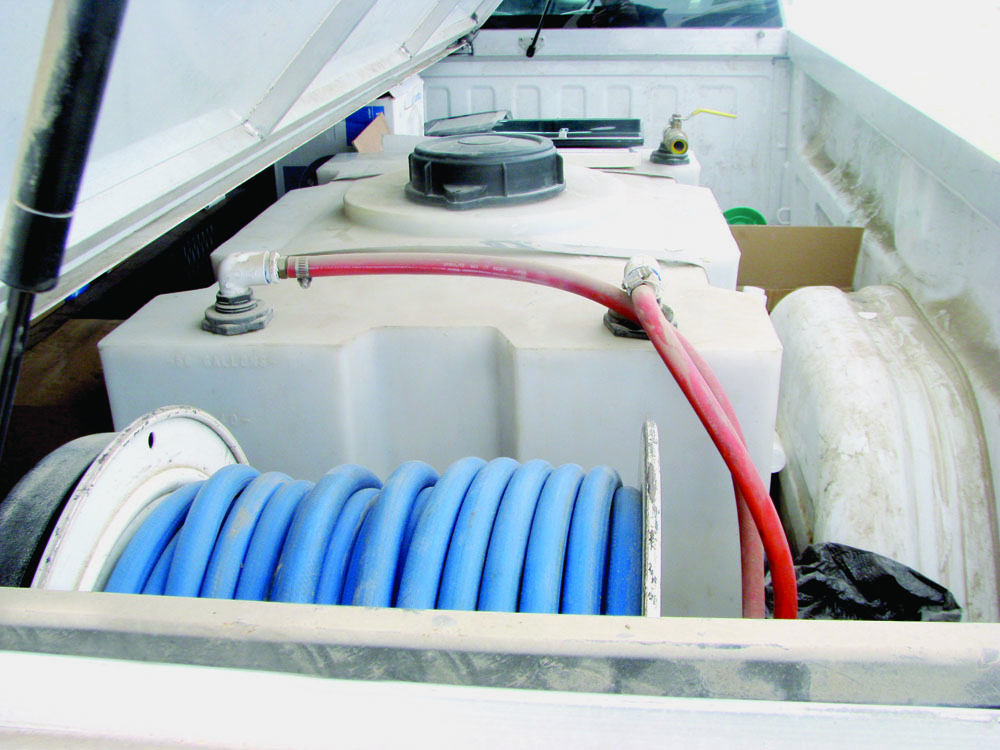
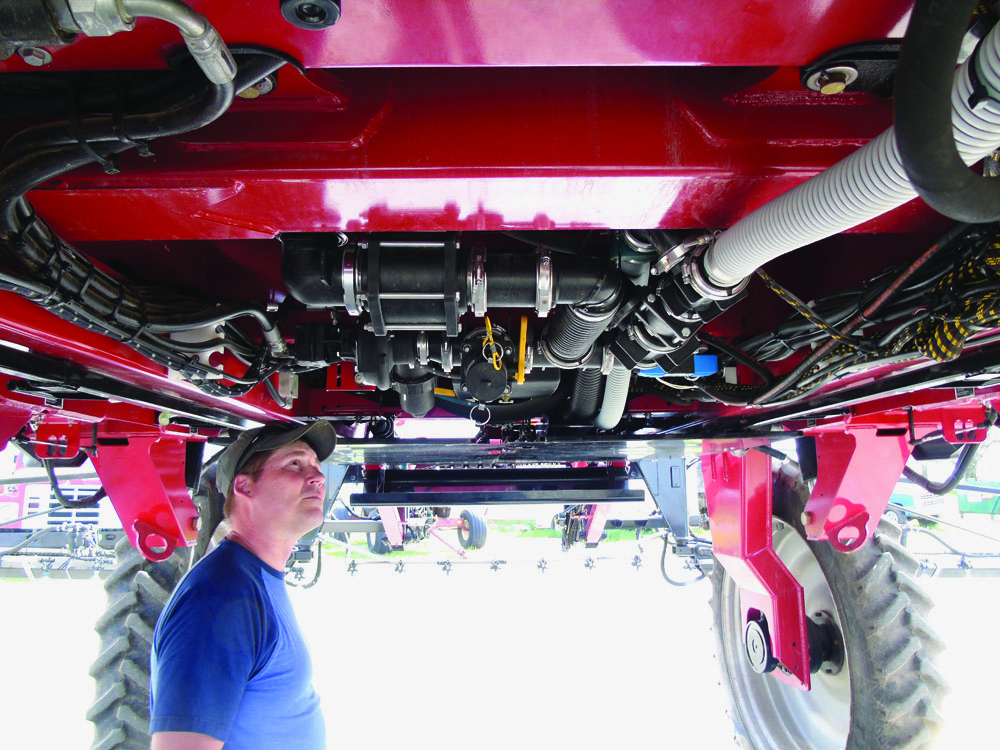
INSPECT HOSES FOR WEAR AND DETERIORATION
Hoses serve as the arteries of spray equipment. They move chemicals from the tank through the pump, out toward the boom, and eventually to the nozzles. When hoses fail, not only do you lose product, it can create an environmental hazard. In any case, a broken hose will definitely alter and delay your schedule.
It is important to understand that most accidental releases of pesticides or hydraulic oils originate from hoses that burst or blow off fittings when clamps fail to secure them tightly. This is why you must thoroughly inspect all pressure hoses and clamps as part of a routine equipment maintenance program.

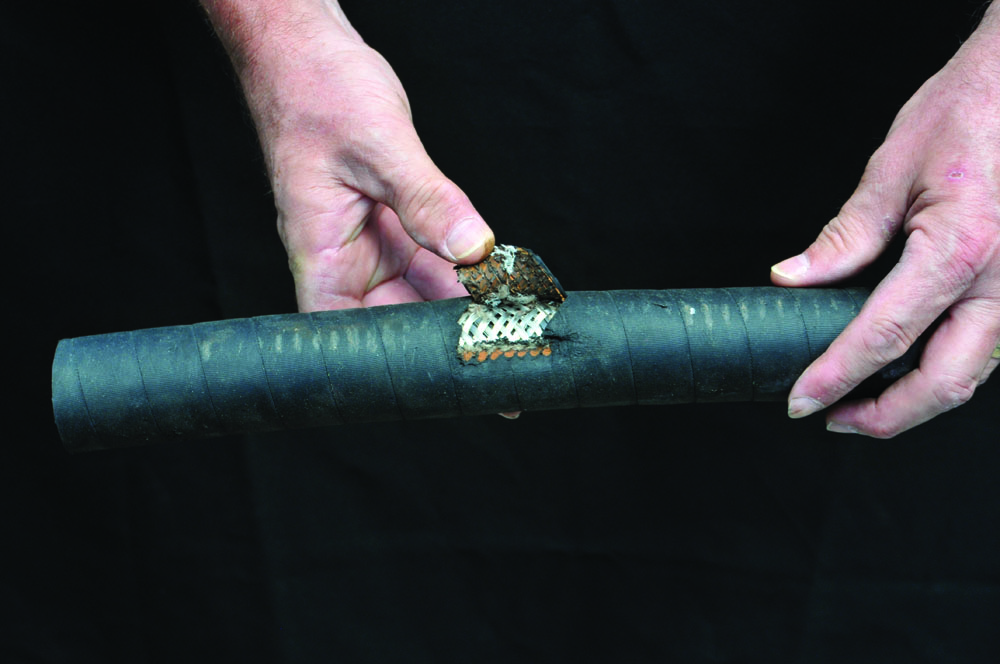
(Left) This cross-section of a new hose shows that it has an inner core surrounded by rubber and reinforcement strands. (Right) Cutting away a layer of the hose reveals reinforced materials.
At some point, all hoses will fail. They fail for a variety of reasons, including:
• A hose can rub against an object that abrades the outer cover, the underlying layers of wire, and fiber that surrounds the inner core. The core (sometimes called the intertube) will not handle high pressures. Once the surrounding layers give way, the core will form a bubble and burst.
• Sharp objects can press onto and into the hose over time.
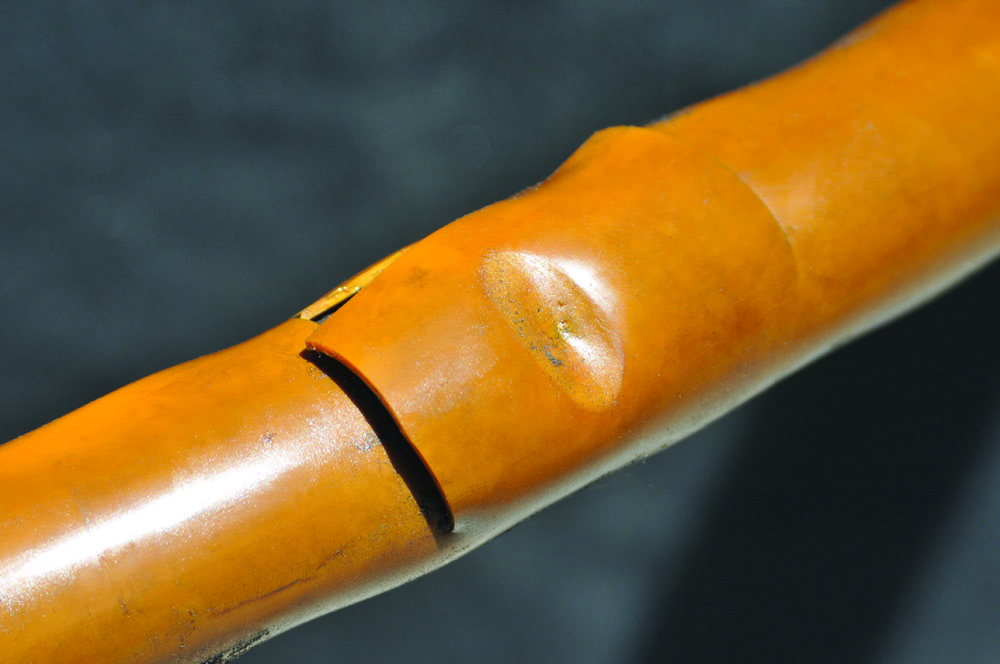


• Sunlight or heat generated by an engine or pump can degrade the hose.
• Diesel fuel or oils can saturate the hose, which can then “soften” the rubber. Unlike gasoline, diesel fuel does not dissipate quickly.
• A hose with some kind of constriction (such as a kink) will not only reduce flow rate, but also weaken the hose at the restriction point. That’s because the reinforcing wires in the hose will not return to their original shape.
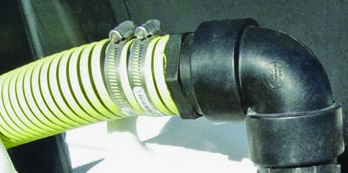
You should also look for hoses that rest, rub, or vibrate on metal, wood, bolts, or other sharp objects. Closely inspect these points of contact to check if the hose is showing any signs of external abrasion and wear.
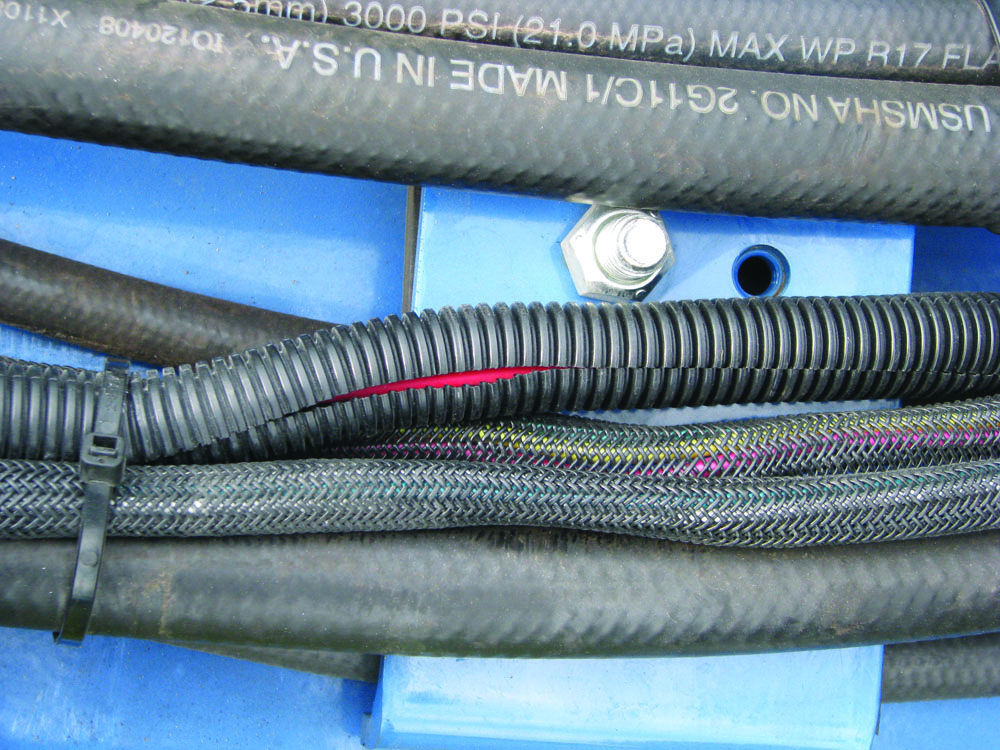

You should always replace a hose that shows serious abrasion. When you do, reroute the replacement hose to bypass the point of contact or cause of failure. When rerouting is not possible, place something between the hose and the point of contact, such as a used hose split down the middle and wrapped around the new hose.
These hoses have a protective sleeve.
 The operator has wrapped a suction hose around a pressure hose to act as a protective cover.
 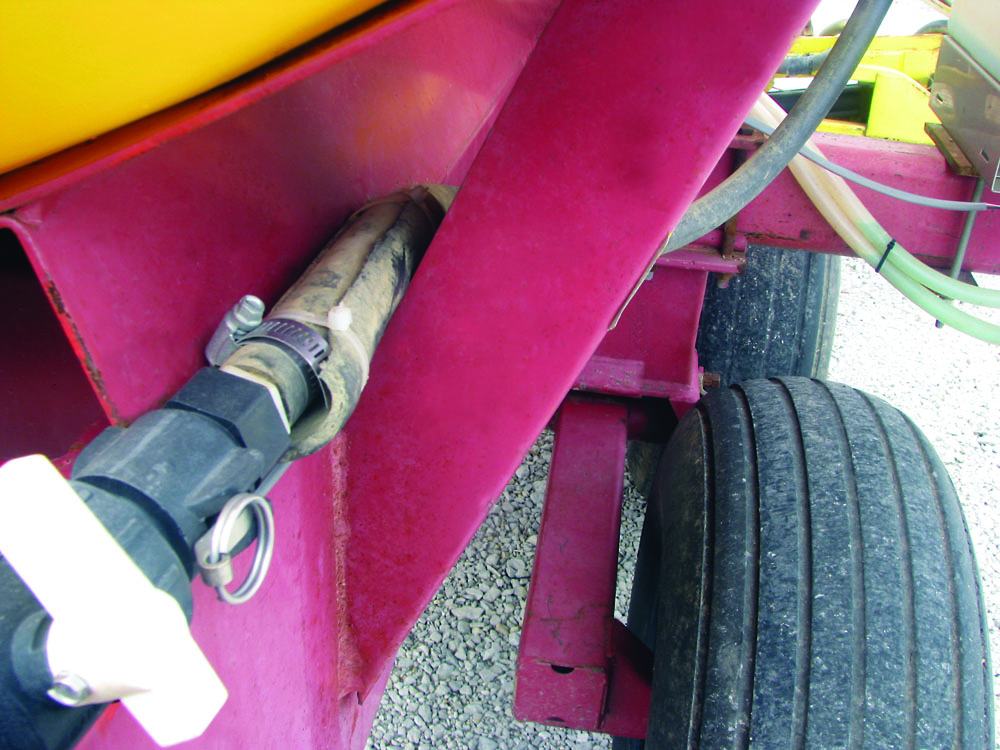 This operator created a barrier between the hose and the metal frame.
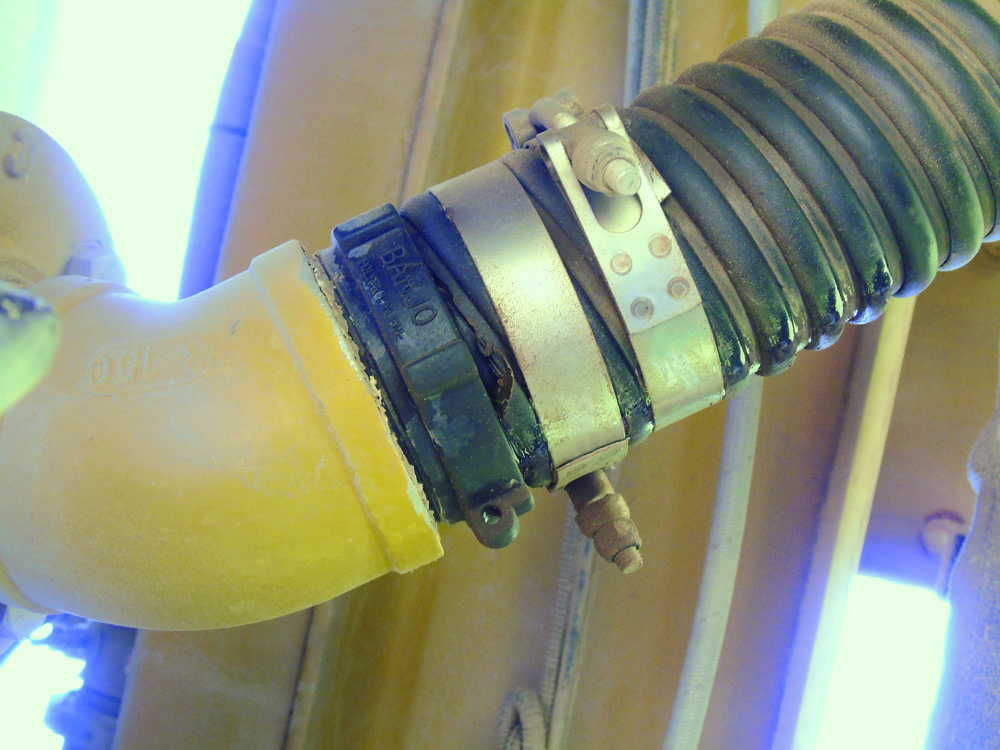
 UPGRADE TO BETTER HOSE CLAMPS
When you select hose clamps, it is important to consider what the environmental consequences and repercussions would be if the clamp failed to hold the hose. Like hoses, clamps are different designs that serve specific purposes.
A standard worm gear hose clamp is popular due to its versatility, accessibility, and cost. It uses a screw to loosen or tighten the clamp around the hose. However, overtightening the screw can strip the slots in the band, which renders it ineffective.
Worm gear clamps are made from different materials. Clamps made of mild steel can corrode from water, fertilizers, and pesticides. When you replace worm gear clamps for spray equipment, be sure they use stainless steel in the construction of the band, screw, and housing.
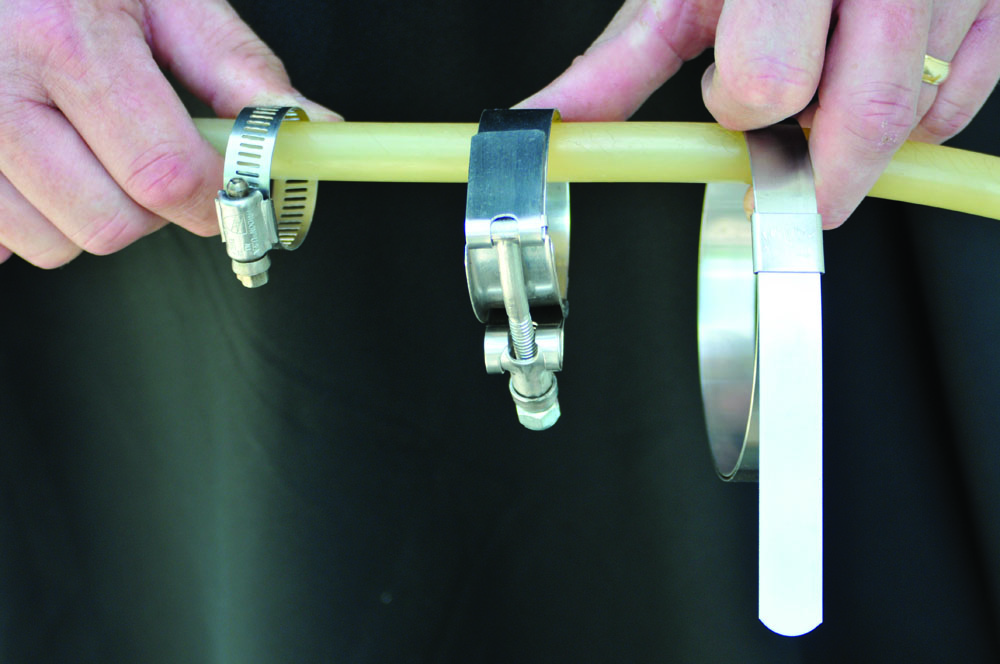 (From left) A worm gear clamp, a T-bolt clamp, and a Band-it clamp.
 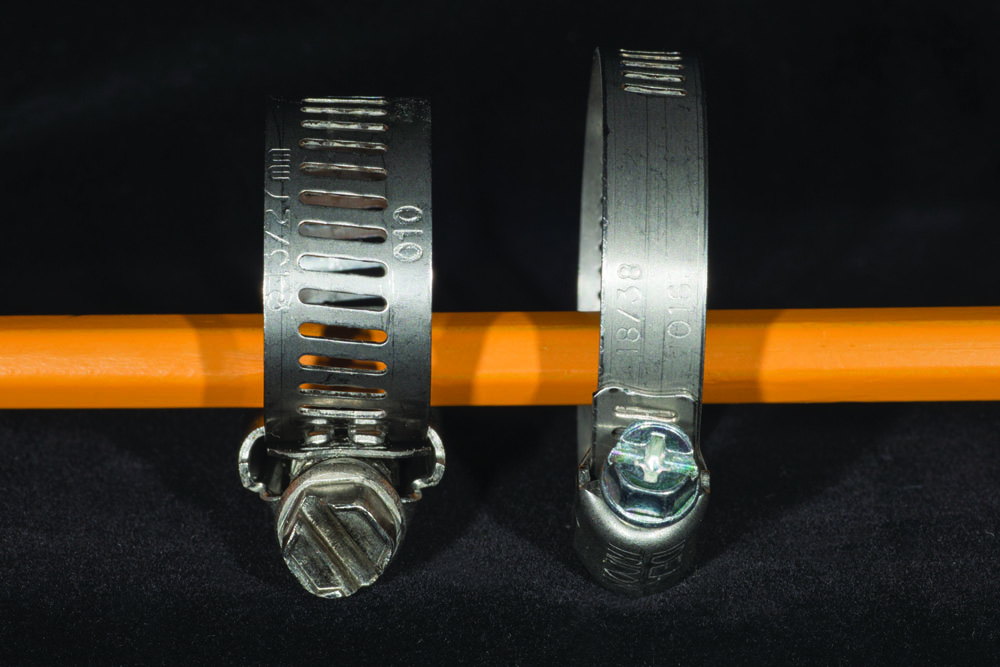 The wider the band on a worm gear clamp, the stronger the hold.
 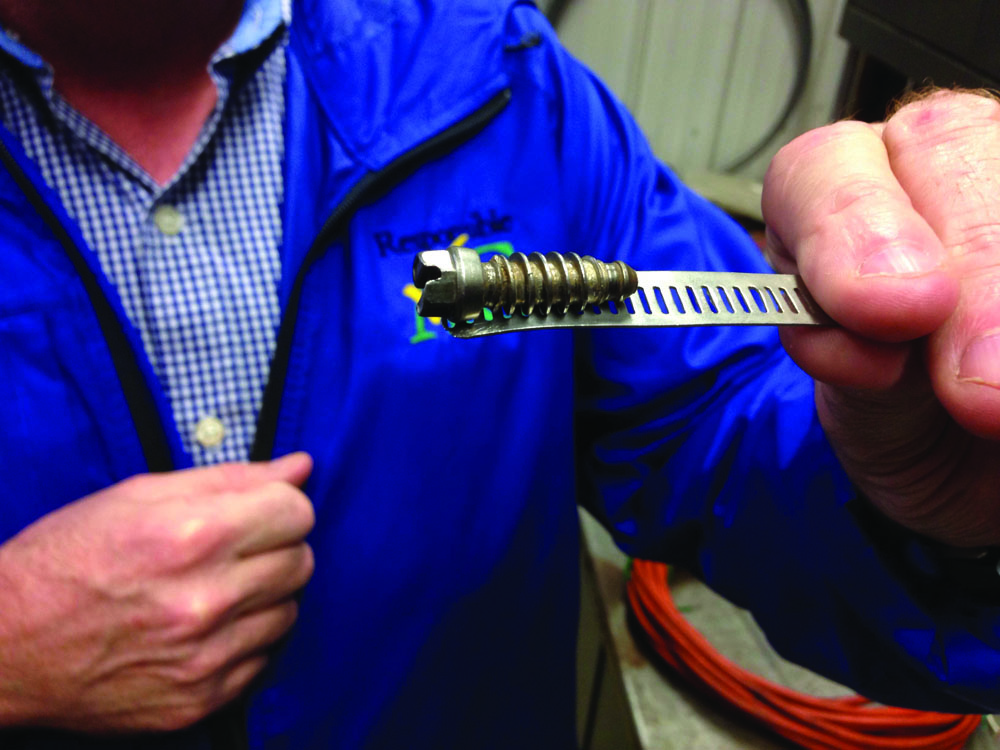 This disassembled worm gear clamp shows the interaction of the screw and the metal band.
 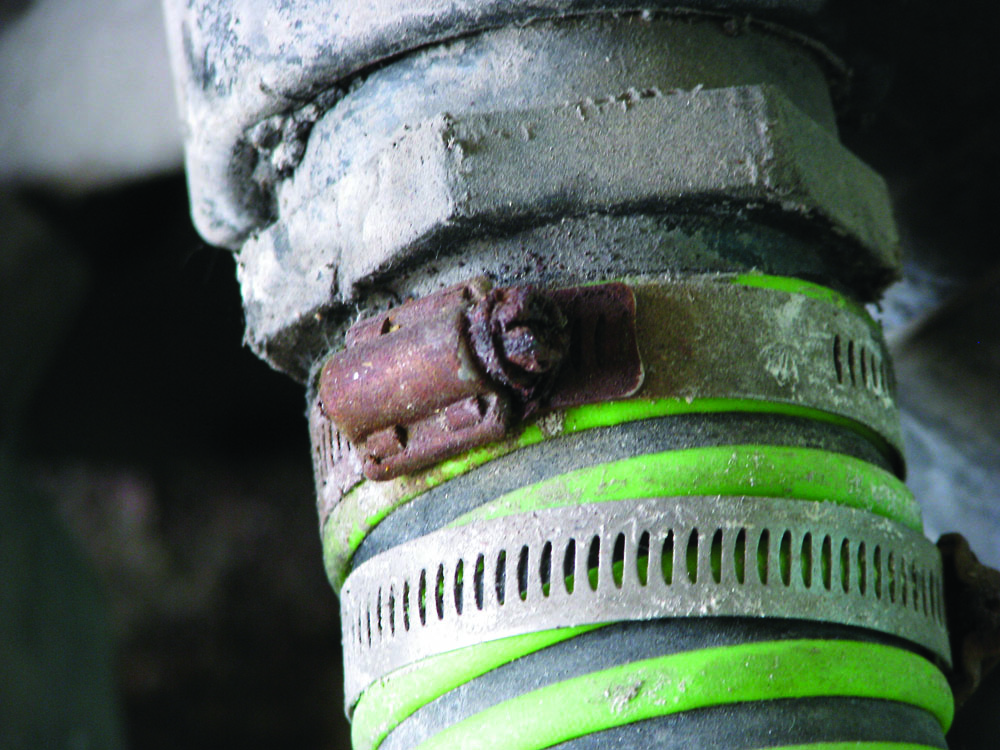 This rusted clamp needs to be replaced immediately.
 In many industries, T-bolt clamps have become the clamp of choice (currently, the smallest T-bolt clamps are 3/8-inch). While more expensive, these clamps offer a more heavy-duty design and rigid frame to retain its tight fit around a hose. T-bolt clamps normally have wider bands that allow them to clamp down tighter than other clamps and to distribute the “squeeze” pressure more uniformly over a wider area, which produces a tighter seal.
In many instances, there is often a second clamp to hold the hose to the fitting as an added safeguard. Using a second clamp requires a longer hose barb. When double clamping, offset the clamps by having the tension portion of the clamps opposite of each other by 180 degrees.

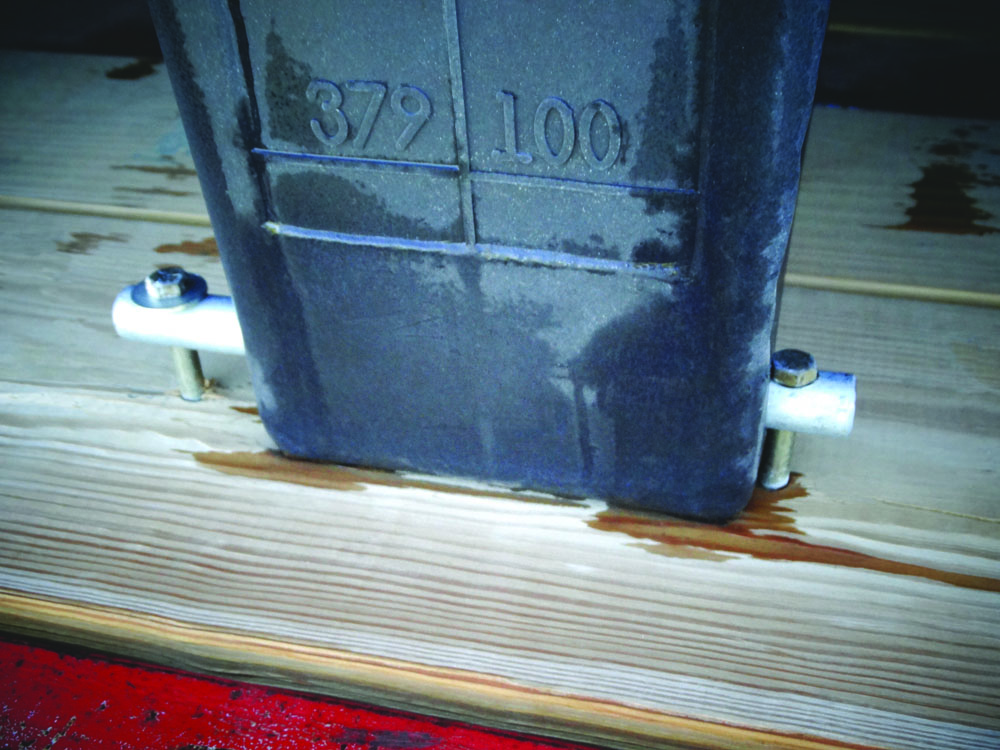
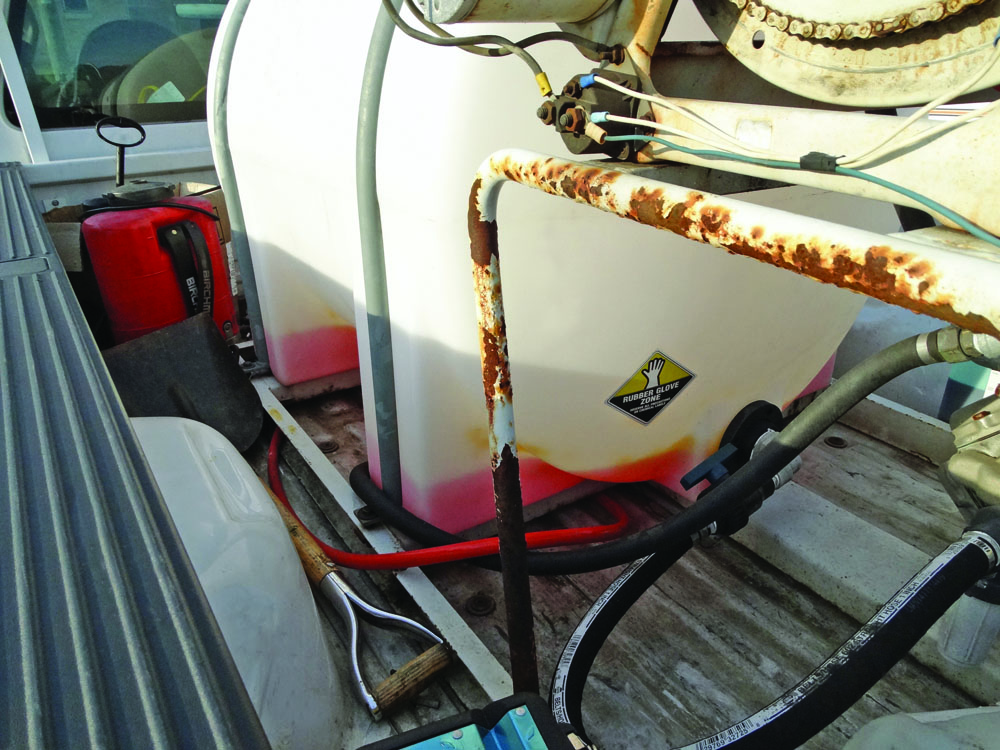
TIGHTEN STRAPS, HOOPS, AND BOLTS ON TANKS
It is not unusual for the bolts and straps that hold the tank to the frame to loosen during the spray season. At least once a year, retighten the bolts to make sure they hold the spray tank tightly to the frame.
You should also inspect the tank baffles or cushions. Check for wear, chafing, and evidence of shifting. Before you tighten the straps or pipes, make sure the tank is full. This ensures the clamps function properly when the tank is at its most vulnerable shape.
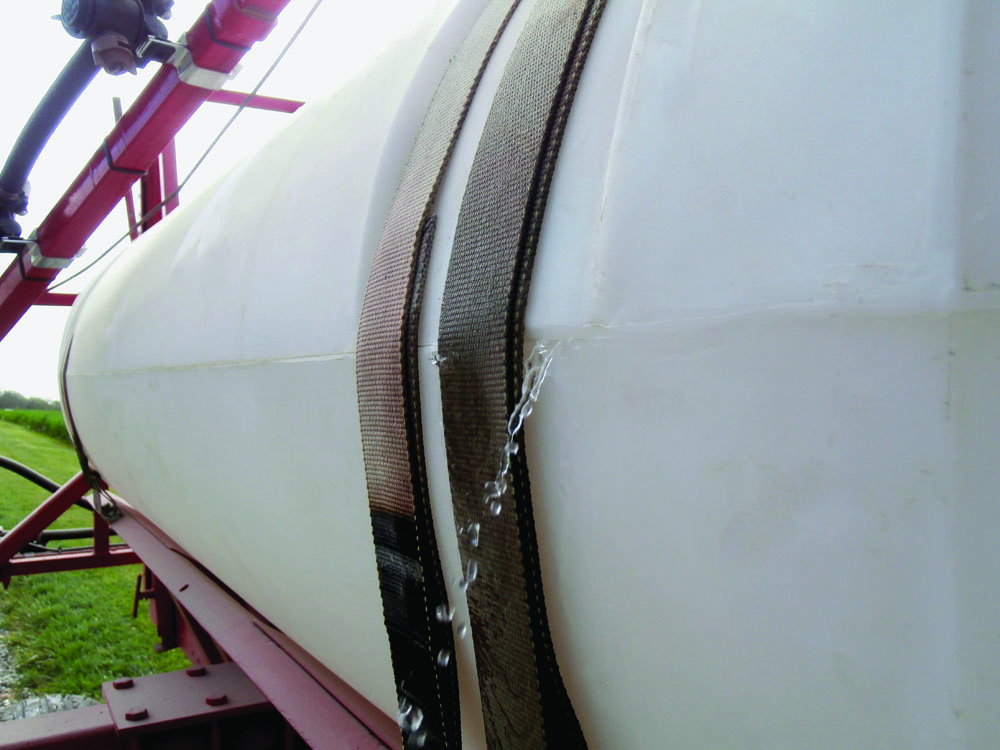
LOOK FOR SIGNS OF SUN DEGRADATION
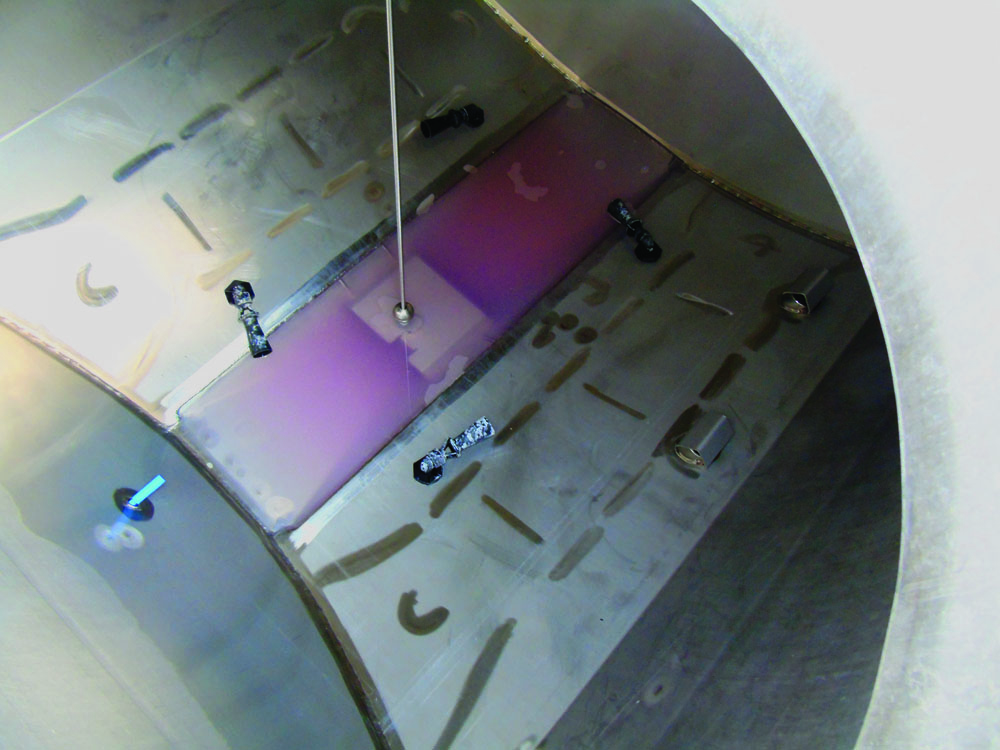
The number one enemy of poly tanks is sunlight. Ultraviolet (UV) radiation degrades the tanks, which is difficult to see. Using a water-soluble pen will make it easier to detect micro cracks in the plastic. First, rub the water-soluble pen over several six-inch by six-inch sections on the sides of the tank that are most exposed to the sun, on top of the tank, and around fittings.
Second, quickly rub off the ink with a dry cloth or paper towel. The ink that remains has penetrated the surface of the tank through small cracks. What you often see is a pattern that looks like spider webs, dry rot, checkerboard squares, or alligator skin.
These signs indicate that the tank is showing signs of UV damage and that the tank is losing elasticity. When a tank loses its elasticity, it becomes hard and brittle. Once this happens, the water moving back and forth in the tank or twisting the tank can cause it to break apart.
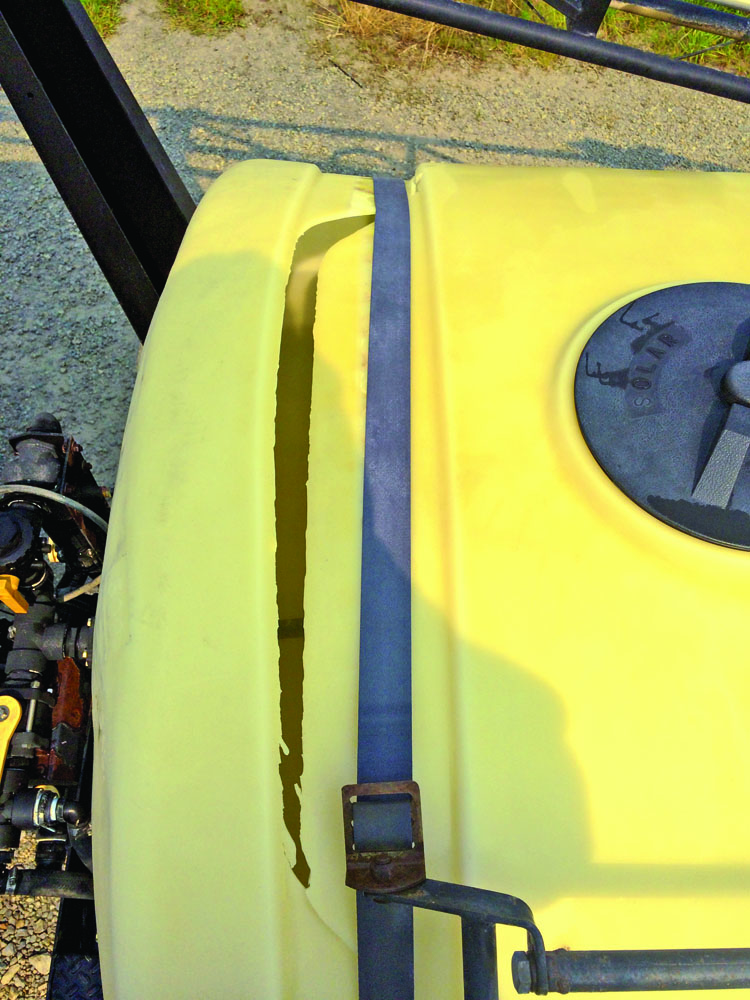
Always replace a tank that shows evidence of cracking — at a minimum, don’t use such a tank for fertilizers or chemicals.
Just looking at a poly tank won’t always indicate an imminent failure. If a tank shows signs of cracking or other sun exposure, test it by hitting it with a baseball bat. If the tank is hard and brittle, the force of the bat striking it will cause the tank to shatter. If the bat bounces off the tank, then it still has enough flexibility to continue use as long as you feel comfortable with a tank that is showing its age.
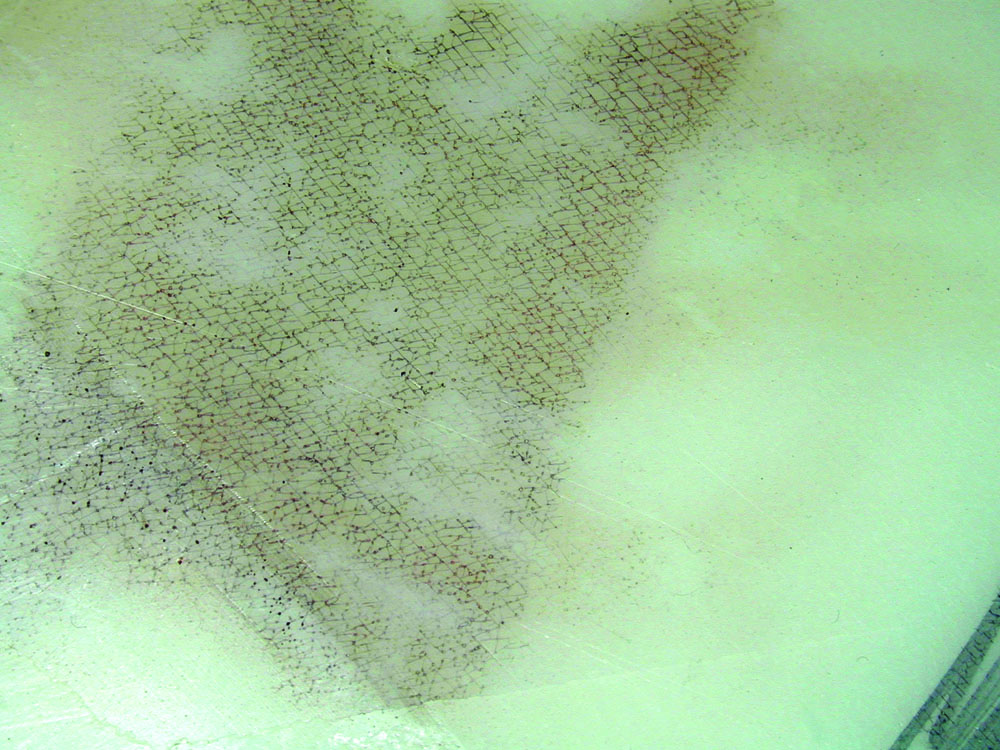 The walls of this spray tank show initial signs of ultraviolet radiation damage.
  This tank shows advanced stages of ultraviolet damage — note how the plastic is breaking down.
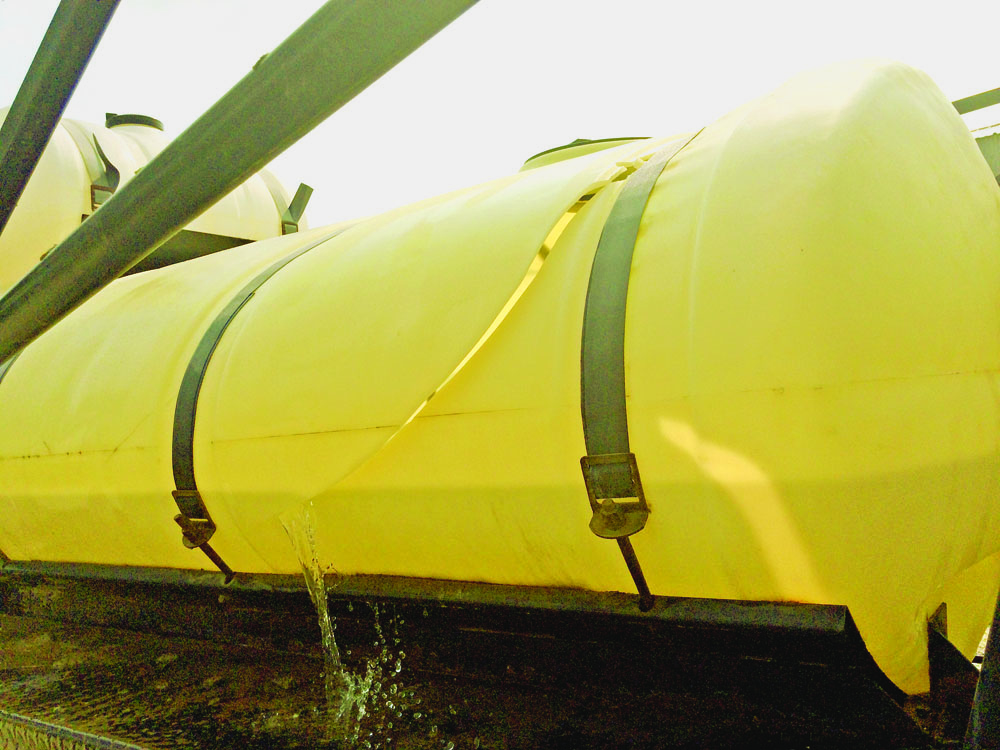

PAY ATTENTION TO OTHER GENERAL ITEMS
Don’t forget to pay attention to other general tasks during your fall inspection. These tasks include:
• Wash off grease and grime. Use a high-pressure washer to clean the outside of the sprayer. If you wait to wash the grime, dirt, grease, and chemicals off the sprayer in spring after they have dried all winter, it will take a lot more work and time. Furthermore, leaving residues on equipment for extended periods can accelerate corrosion and rust. Avoid putting high pressure water directly on bearings and seals.
• Replace lost and damaged decals. Slow-moving vehicle decals are vital for communicating potential hazards to the public. Decals wear and fade over time, but take the time to replace old decals.
• Touch up areas where paint has been scratched. During the course of the season, equipment gets scratched. By touching up these areas with spray paint, you will minimize corrosion and rust.
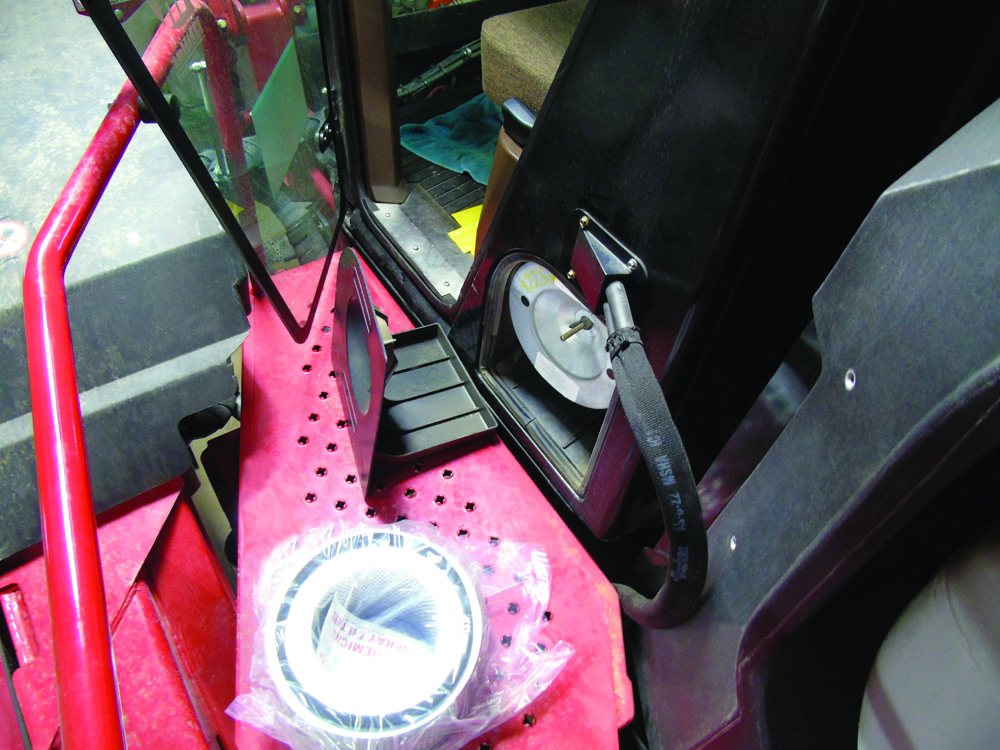
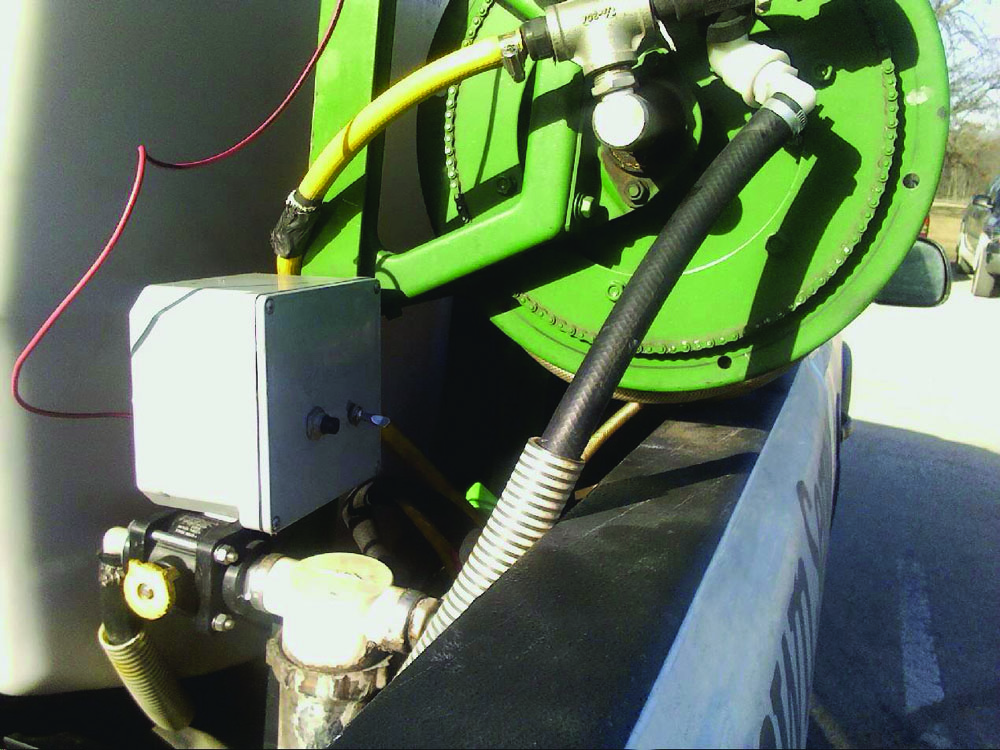
• Protect electronic equipment. Upload all the data you recorded this year for safe keeping. If possible, remove electronic components from the rig (which can include rate controllers and monitors), and store them in a dry and warm location for the off-season.

- Check tire pressure and tighten lug nuts. These are small details, but this will give you one of the most valuable commodities you need in spring: time.

Check sprayer air bags. Once you store the sprayer, lower the pressure in the air bags.
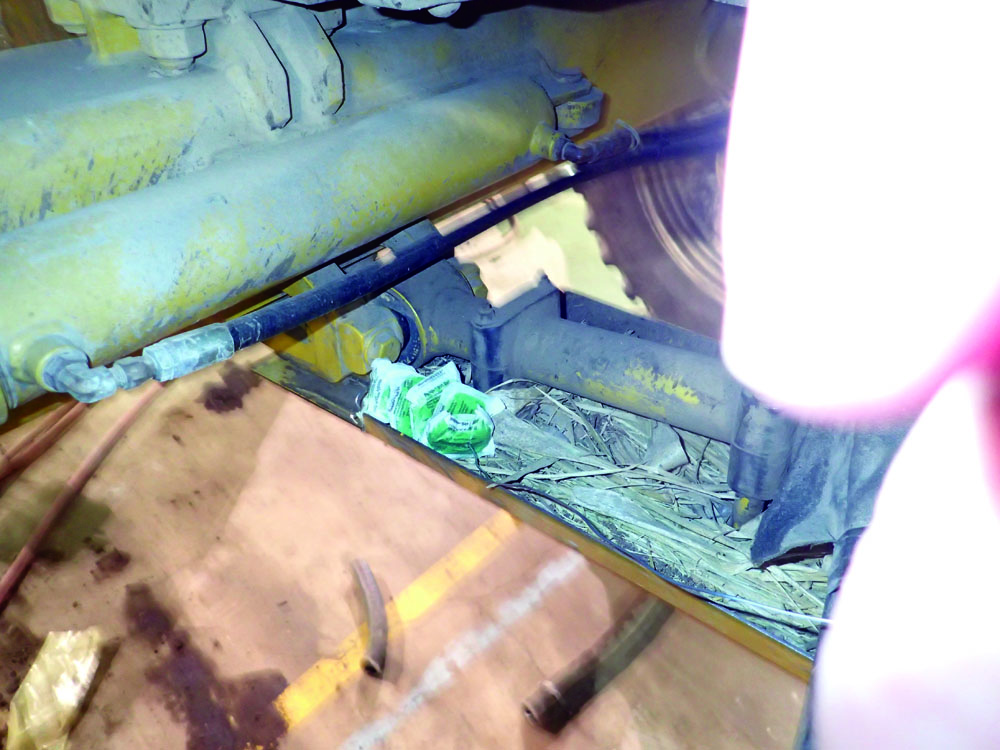
Consider Rodent Traps and Bait Stations
Farm equipment can provide multiple resources to rodents. Grain and plant material can accumulate in the machinery’s nooks and crannies. And rodents often chew on electrical wires, mistaking the wires for plant stems.
Air filters and engine components are also excellent nesting sites for small rodents. Cabs and the foam insulation that surround them are also places rodents might take residence. To prevent unwanted tenants and to protect your equipment,you need to consider using some deterrent.
If you think about using rodenticides to protect equipment, your first consideration should be to minimize exposure to nontarget animals. Farm dogs and cats may eat rodenticides placed in and around farm machinery. Protect those animals by placing the packets or bars in areas only rodents can access.
If you store your machinery in an enclosed building:
• Control clutter so rodents have fewer places to hide or nest
• Maintain well–stocked, tamper-resistant bait stations around the exterior and interior perimeters of the storage building
Whether indoors or out, you can secure rodenticides in inaccessible areas inside machinery, such as trucks and combines. Secure the boxes in place with wire. Do not place loose baits in the open cab.
Here are a few places you can secure baits out of reach of nontarget animals:
• In engine compartments, but away from objects that get hot enough to ignite a wax block or soft bait pouch
• Inside control panels and other compartments
• In latched glove compartments
• In tamper-resistant bait stations in truck cabs and next to the wheels of machinery stored outdoors for long periods

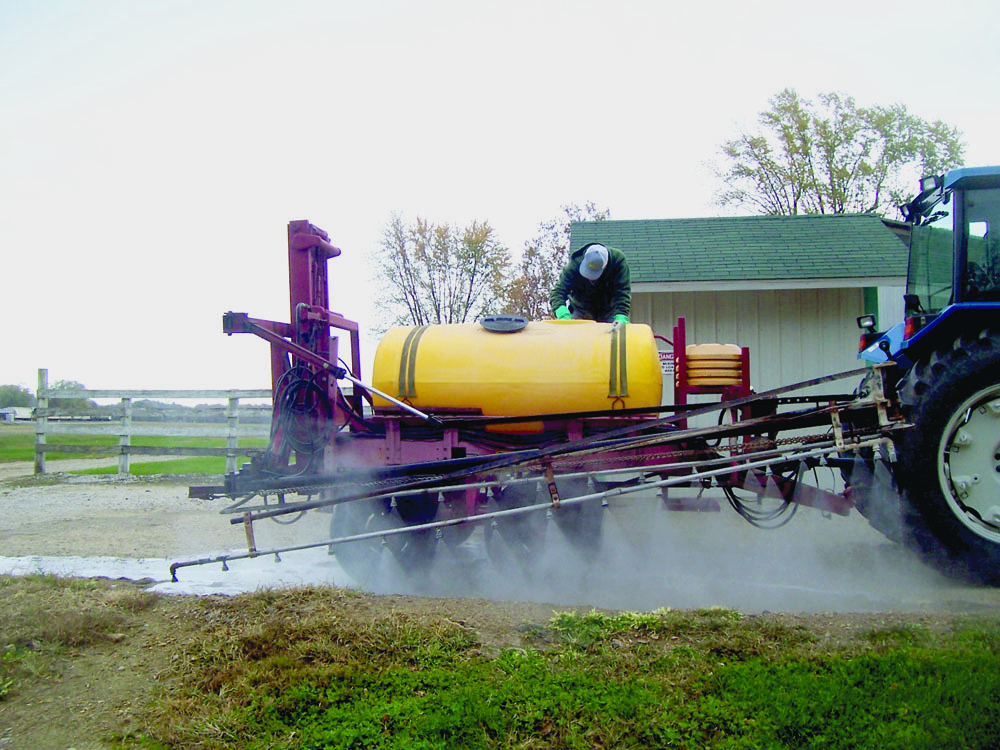
Winterizing Means Removing Water
You should have two goals when you winterize spray equipment. The first should be to remove as much water as possible from the system (including the tank, hoses, and booms). The second should be to add antifreeze to prevent the water that couldn’t be drained from freezing and damaging sprayer parts. When water freezes, it expands (this is different than other liquids that contract when they freeze).
As water freezes and expands, it can apply enough pressure to crack steel and plastic parts
including valves, pipes, nozzles, pumps, flow meters, and filters. If you add antifreeze, you lower water’s freezing point. Removing water and adding antifreeze to a clean sprayer is the one-two punch
for winterizing sprayers.

CHOOSE THE RIGHT TYPE OF ANTIFREEZE
There are a number of different antifreeze products available. Choosing the one most appropriate for winterizing your sprayer depends on your specific needs.
The three main ingredients in most antifreeze products are:
1. Ethylene glycol (called automotive antifreeze)
2. Propylene or ethanol glycol (called RV antifreeze)
3. Diethylene glycol (called deicers)
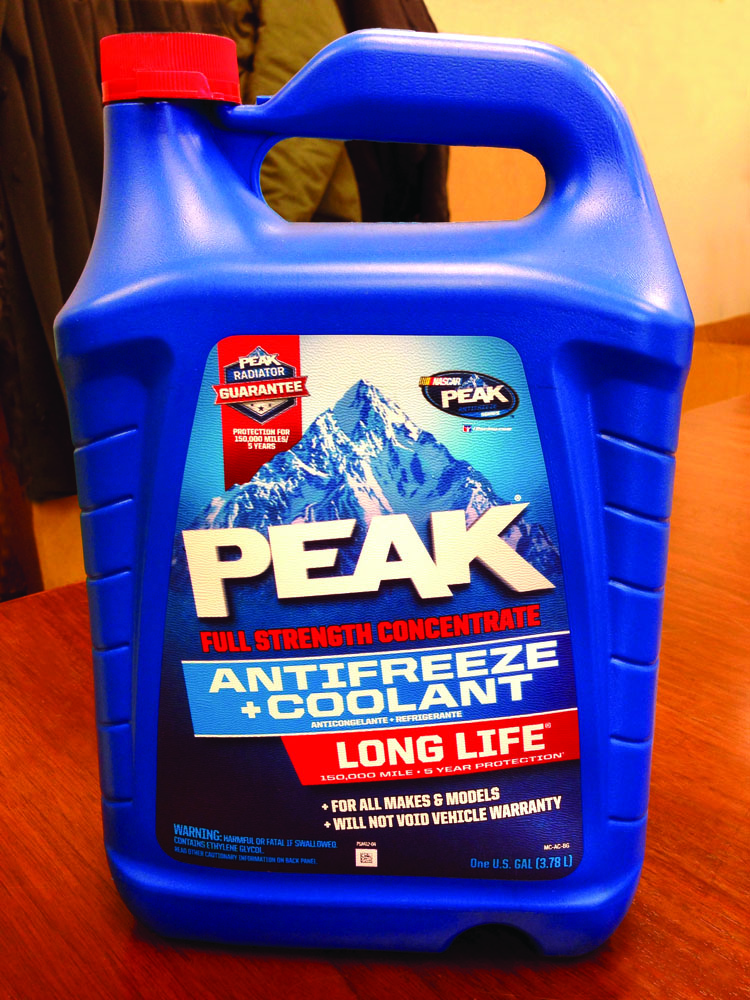
Ethylene glycol, which contains corrosion inhibitors, is typically used in truck and car radiators, where the coolant is expected to remain for many years and thousands of miles. In most cases, manufacturers do not recommend ethylene glycol antifreeze as a winterizing agent for sprayers, because the chemicals that prevent corrosion can deteriorate plastic parts and pump seals.
Another concern is that ethylene glycol has been a source of accidental poisonings. Ethylene glycol is a colorless and odorless substance, but it tastes sweet, so it is attractive and deadly to pets and wildlife that may ingest the material. This is why it is important to properly dispose of ethylene glycol.
RV antifreeze usually contains propylene glycol. This form of antifreeze lacks the corrosion inhibitors found in engine coolants; therefore, the product should only remain in the system for short periods before being flushed out.
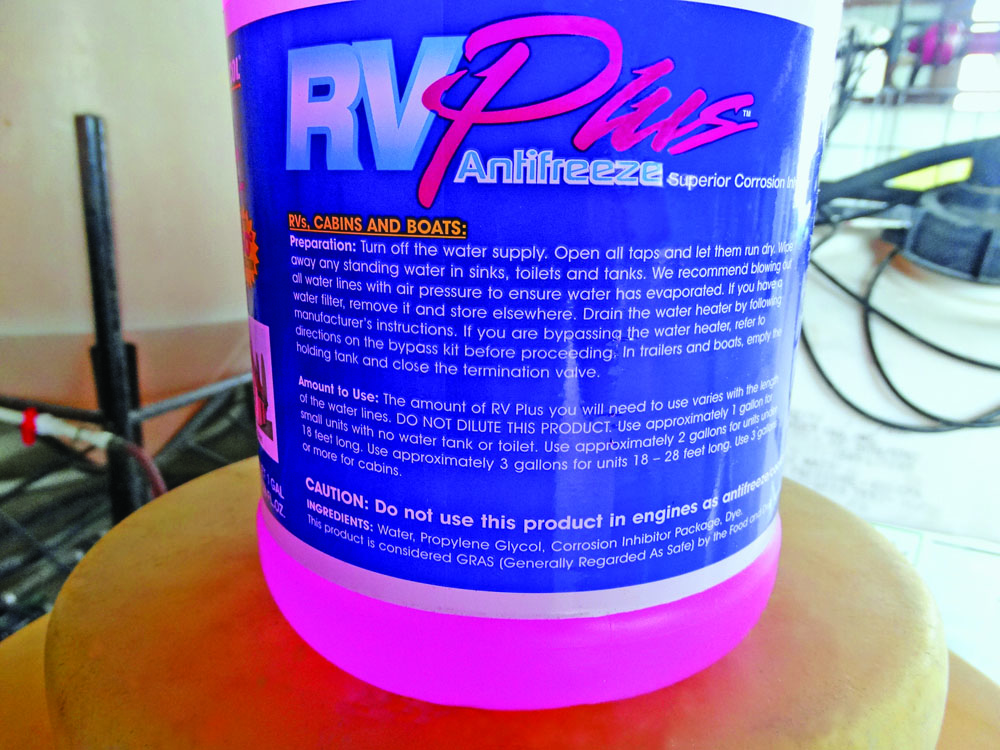
RV antifreeze made from propylene glycol has many positive benefits, including:
• It works well
• It is relatively inexpensive
• It is easy to use
• It is readily available
• It should not damage crops
• It does not damage plastic or metal parts
• It is safe to people, pets, and the environment
However, there are RV antifreezes that contain ethanol glycol. While ethanol glycol is effective at lowering water’s freezing point, there are two concerns for using it. First, it is flammable. Second, in certain situations it can dry out rubber seals, which can cause leaks next season.
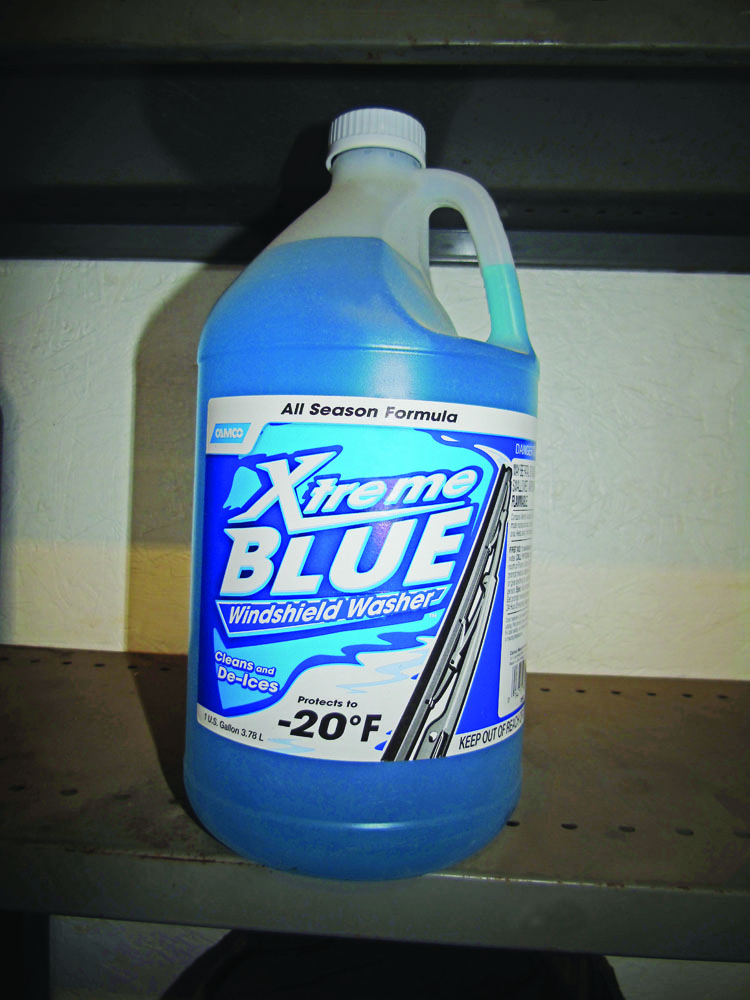
While technically not an antifreeze, people sometimes use windshield washer fluid as a winterizing agent. Windshield washer fluids contain ethyl glycol or methanol, dyes, and soaps. Thus, they may not be the best product to use in your situation. In any case, always check to see if you are buying a winter formulation that will protect equipment at colder temperatures.
Check your sprayer’s operator manual or manufacturer to determine the best winterizing solution for your needs.
CHECK FREEZE AND BURST PRESSURES
Two cold temperature values associated with a winterizing agent (such as RV antifreeze or windshield wiper fluid) are its freeze point and its burst point.
The freeze point is the temperature at which antifreeze begins to form ice crystals and turns slushy.
The burst point is more critical. It is the temperature at which a copper pipe filled with antifreeze will burst. A product’s label will prominently display its burst point. Always check that the burst point temperature on the product’s label will provide the protection you need to prevent the water from freezing in the sprayer you are winterizing.
The Three Steps of Winterizing
As we mentioned, the key point of winterizing equipment is to remove water and prevent any remaining water from freezing. We recommend three steps for winterizing:
1. Clean chemical residues
2. Remove water
3. Add antifreeze
You can winterize all sprayer types using these procedures.
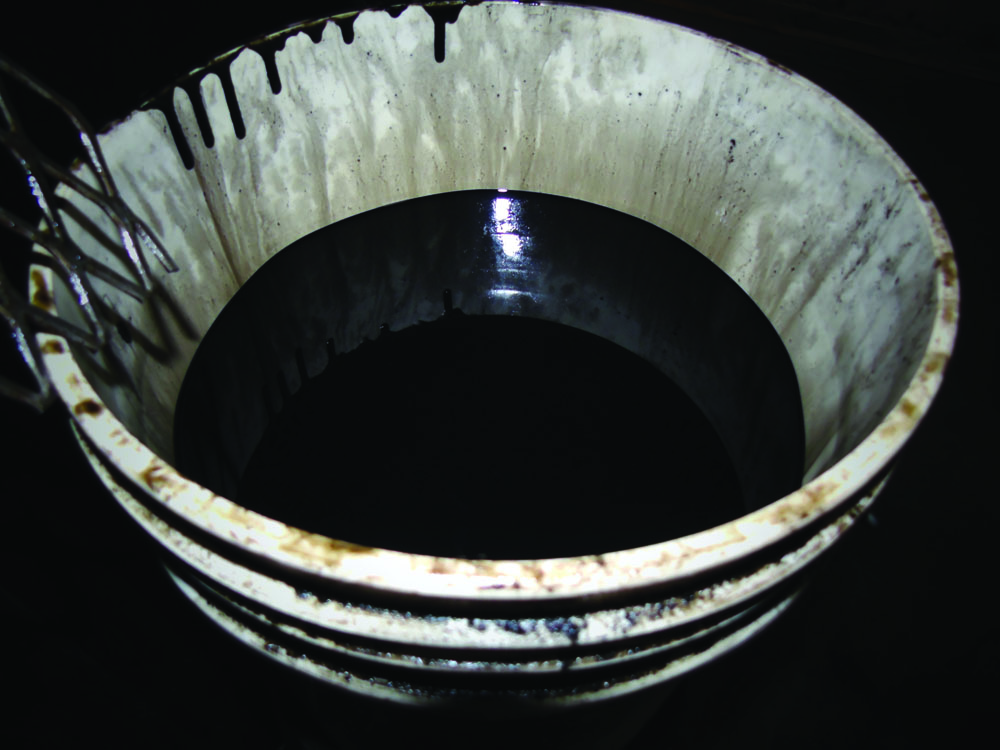
Step 1. Clean Chemical Residues
After you complete the last pesticide application of the year, focus on removing any remaining pesticide residue from the spray system or sprayer itself. As we’ve already discussed, allowing residues to remain in or on the sprayer throughout the winter will only make it harder to remove any of these residues in the spring.
Most pesticides will sink to the bottom of tanks, hoses, and screens after you stop moving or agitating the solution. If you leave any pesticides in the sprayer, they can form a layer of residue on the tank walls, screens, elbows, and corners. These residues can also dry in rubber hoses, which makes them extremely difficult to remove if they remain in the sprayer until spring.
 residues can also dry in rubber hoses, which makes them extremely difficult to remove if they remain in the sprayer until spring.
  Pesticide residues can get trapped in screens and dry on the walls of poly tanks.
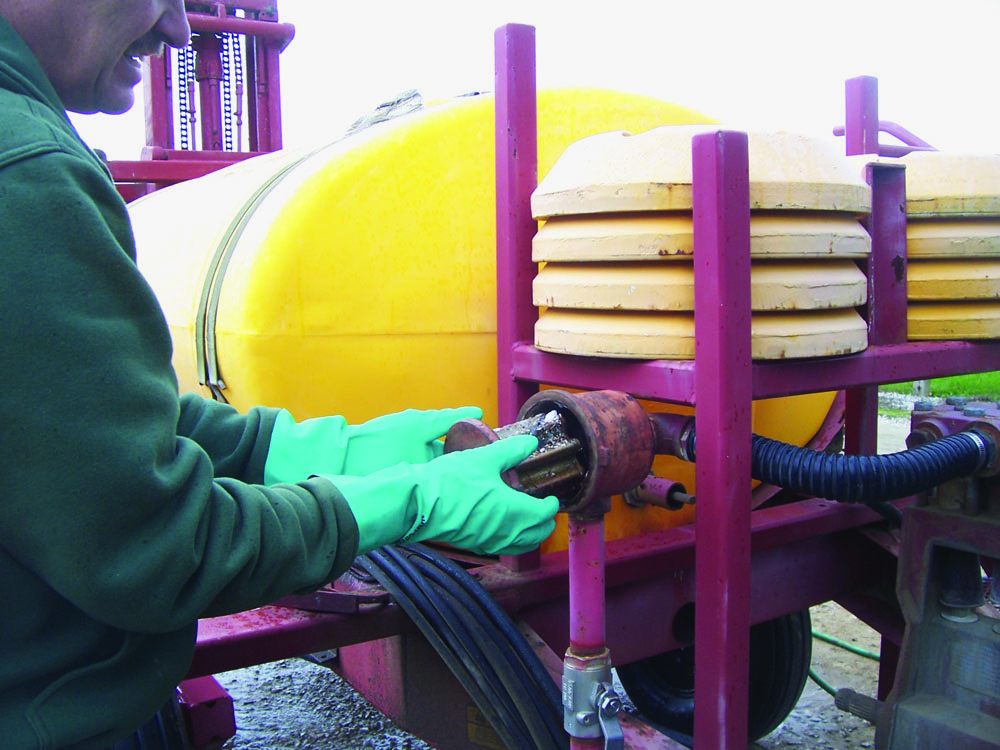
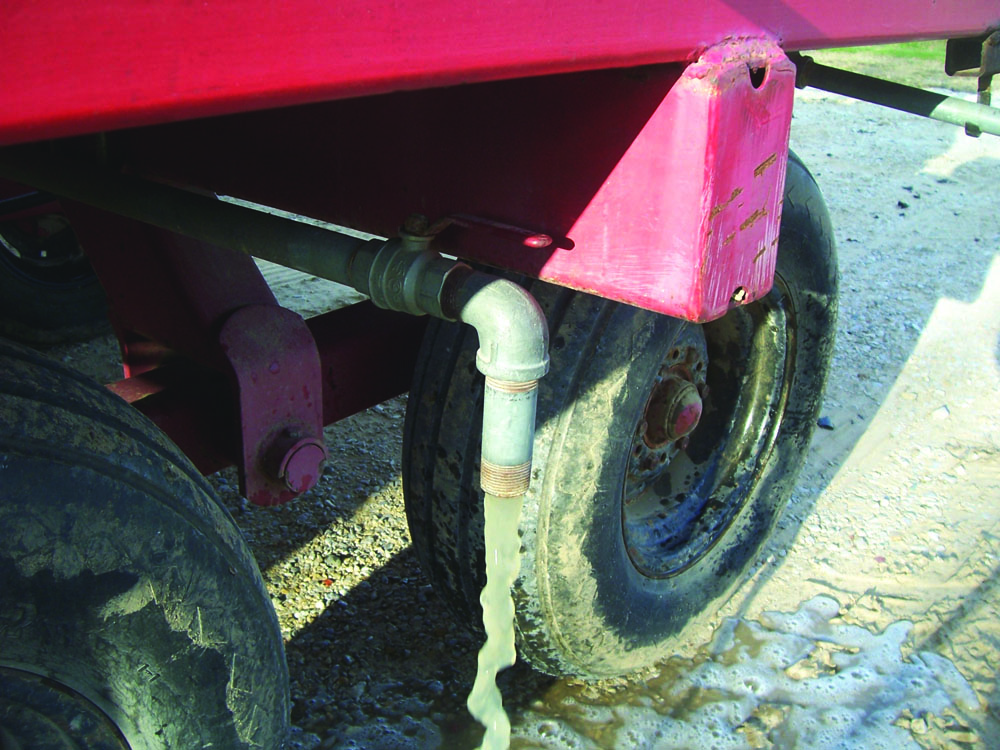
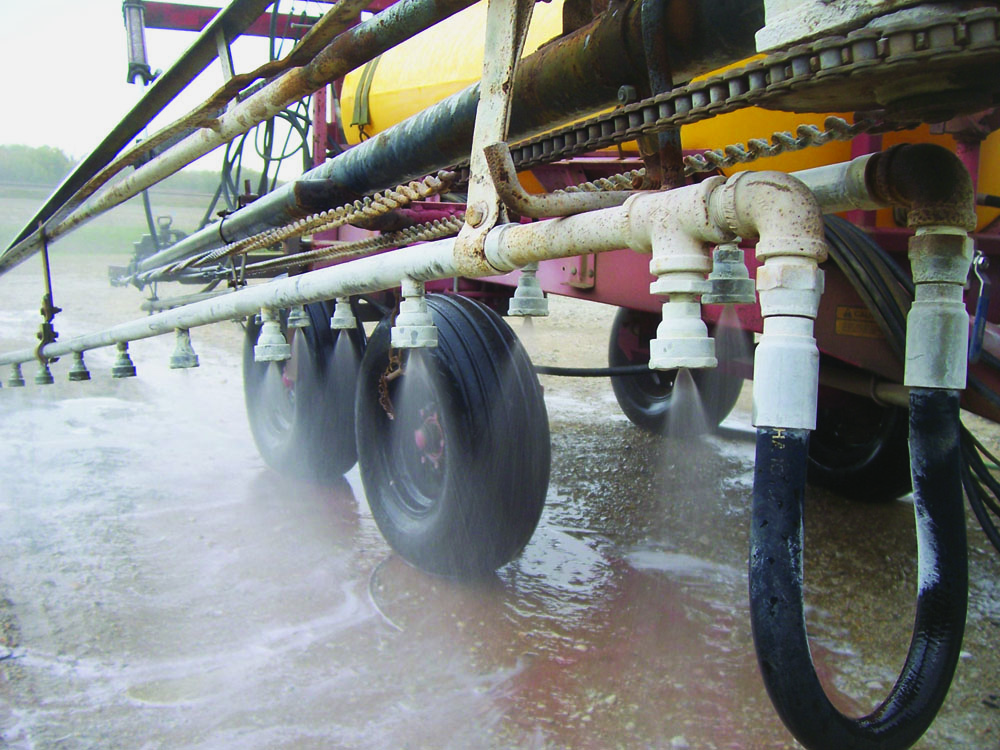
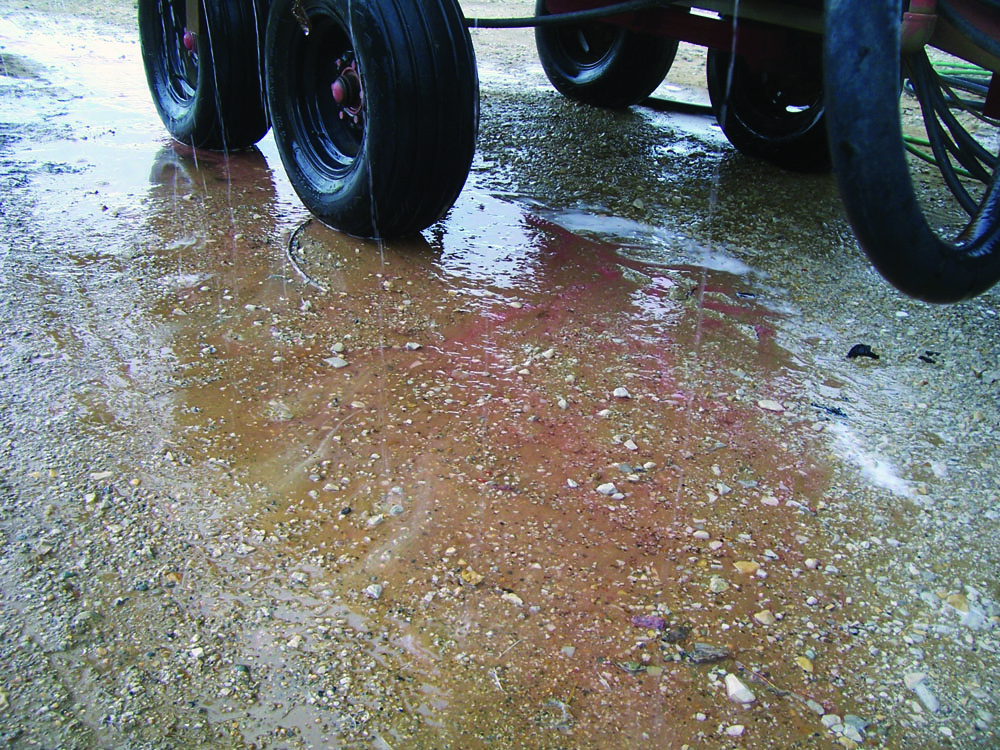
Step 2. Remove Water
Water can get trapped in many places in a sprayer including the tank, hoses, screen bodies, tips, and many other nooks and crannies. In other words, there is always the possibility that there could be water somewhere in the sprayer’s plumbing — from the tank to the nozzle tips.
When removing water from your equipment, follow these five steps:
1. Let the pump push water out of the tank until it loses its prime. Once you clean and flush the spray tank, spray as much of the water out of the system as you can; or, spray until the pump no longer has enough water to push out of the tips.
Even after you have pumped all the water from the tank, water may still remain in the hoses, valves, and screens from the pump to the nozzle tips. Close down or shut some sprayer sections to help force out more water.
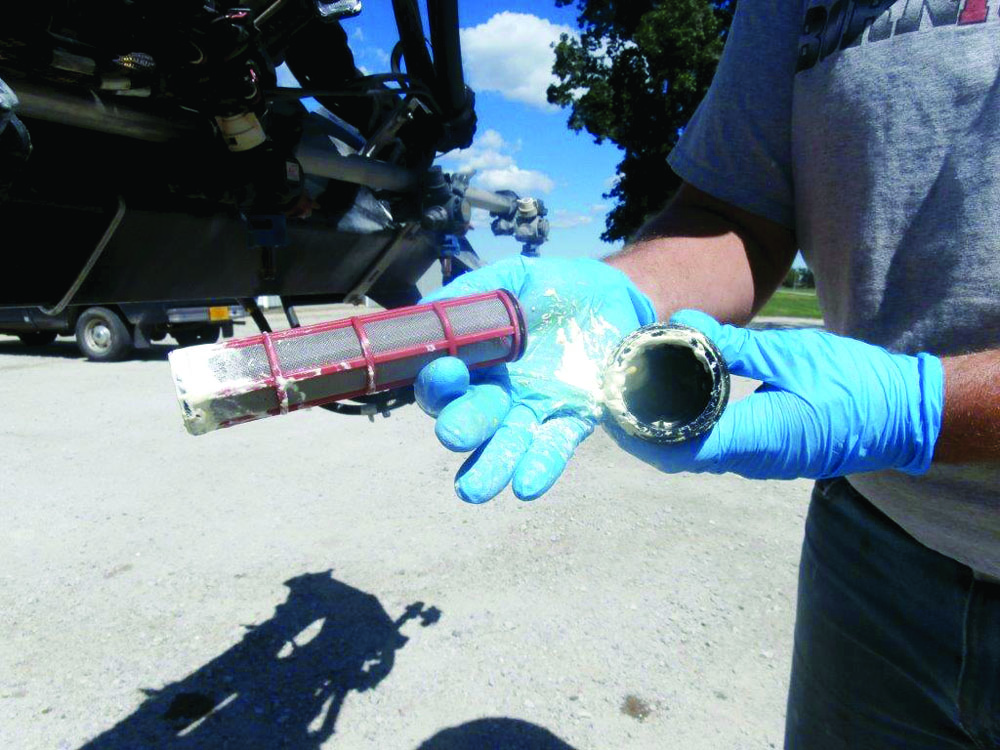
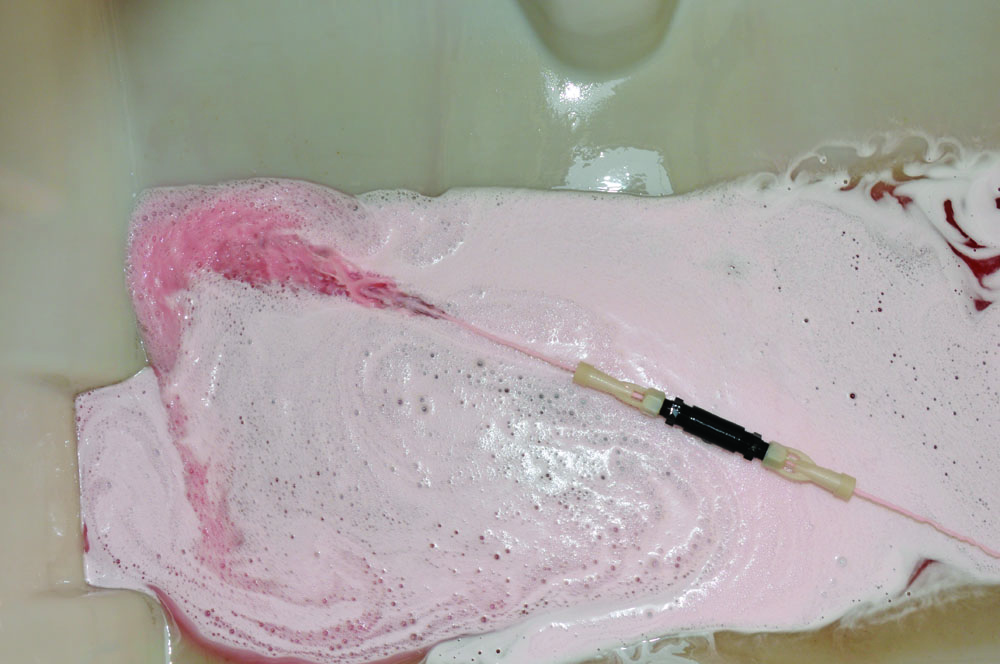
2. Open valves to remove water. Open all valves slowly to allow any remaining water to drain. Make sure to remove and empty all in-line strainers.
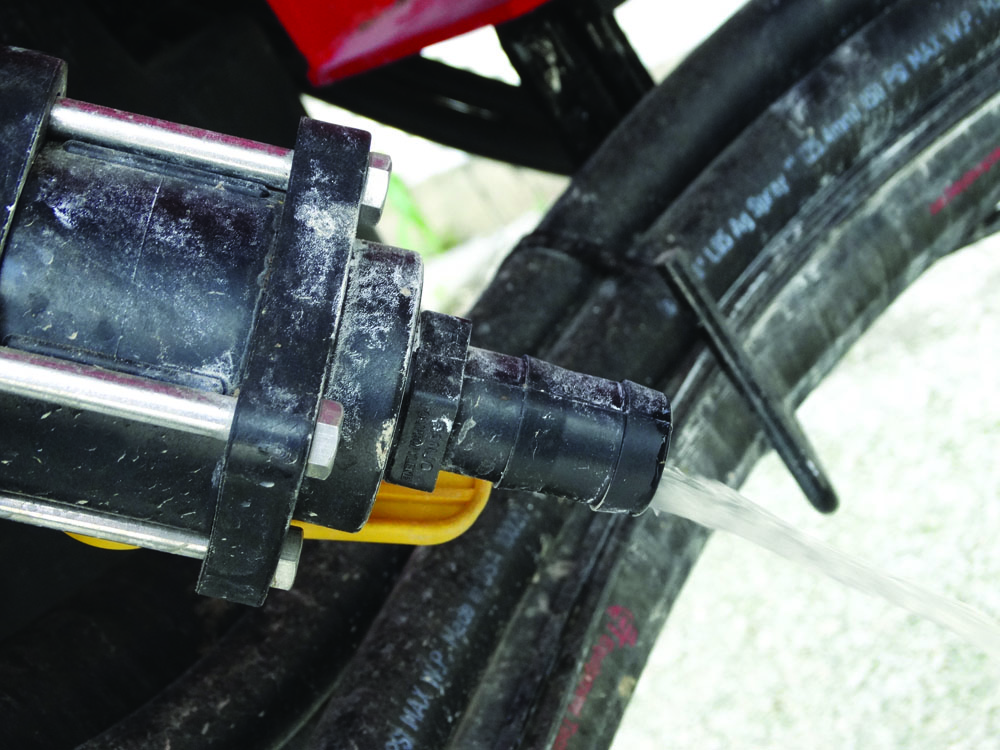 Opening all valves allows more water to be removed.
 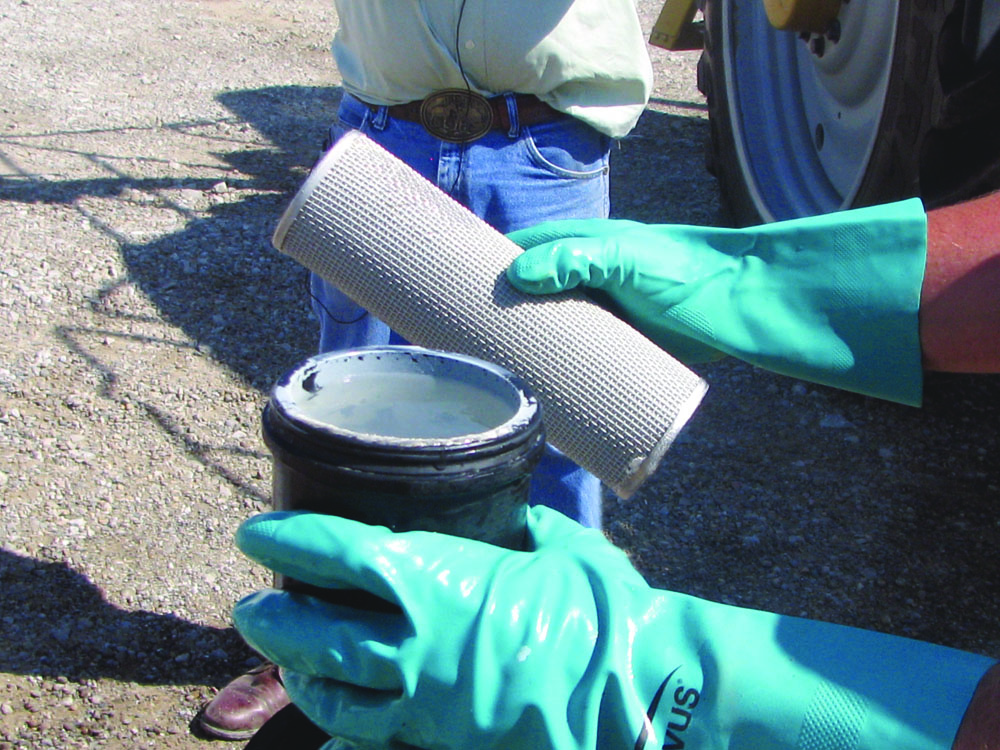 Remove the strainer and empty any water inside.
 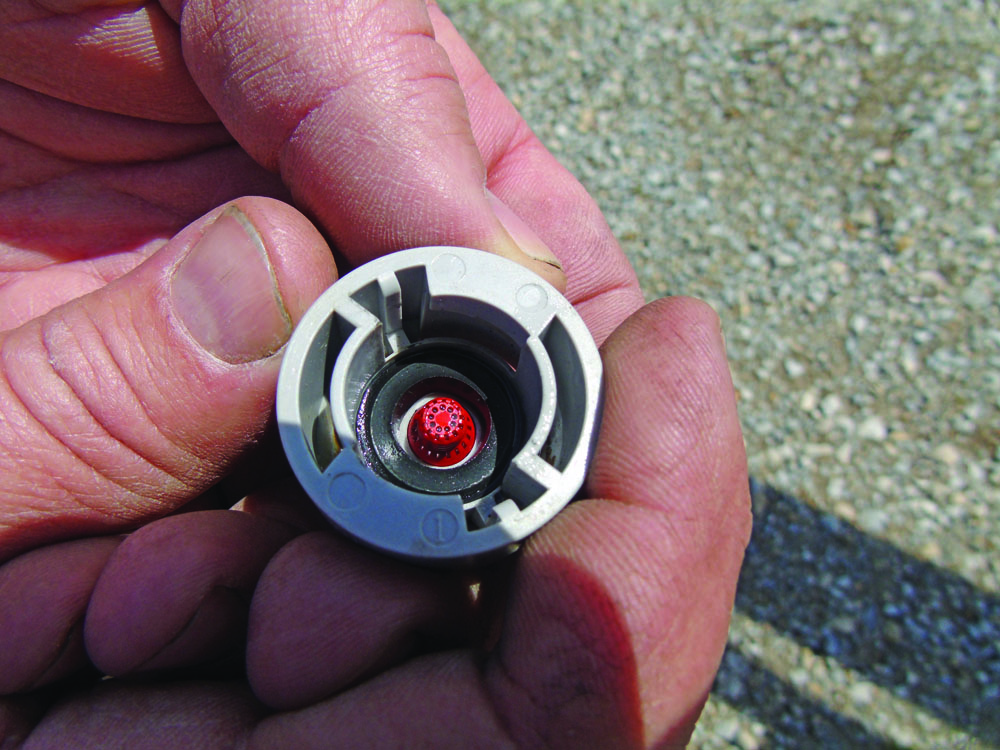 Remove nozzle bodies from the sprayer to protect O-rings. Always use gloves.
 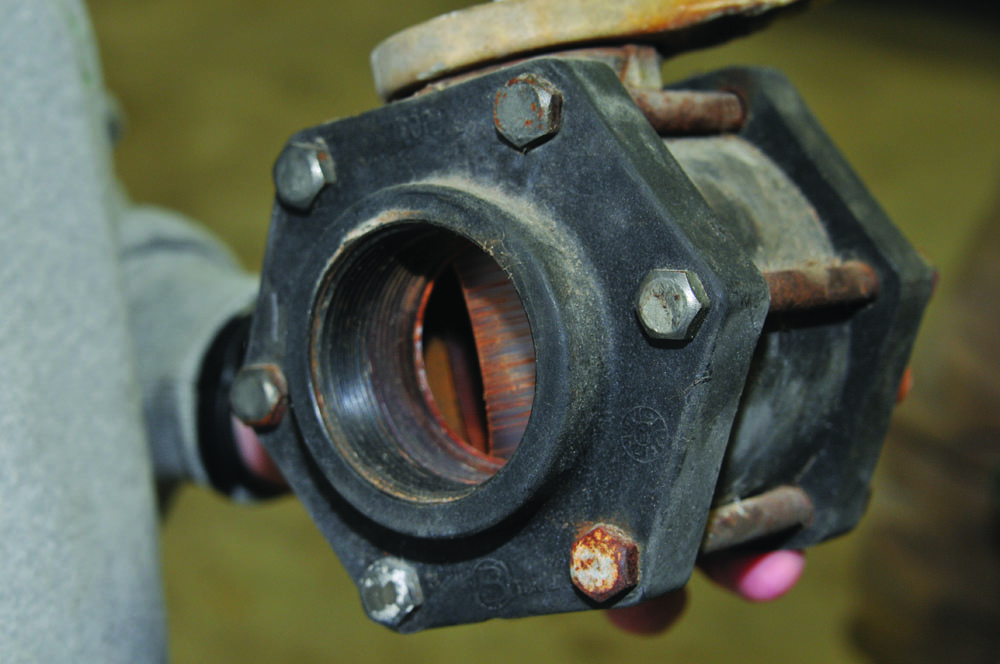 Open valves to allow water that is trapped behind the ball to flow out.
 3. Use air to push water in the lines out toward nozzle tips. Be aware that many air compressors can deliver more than 150 psi of pressure. Exceeding the pressure capacity of the sprayer may damage sensitive components. Check with the manufacturer or the owner’s manual to see if they provide any warnings about excessive pressures.
4. Drain the pump. Your pump may have a plug that you can remove to drain any remaining water within the pump. You can also use this plug to prime a pump if needed.

5. Tip the booms. If possible, tip spray booms at a 45-degree angle to push water from the end of the booms toward the center, or from the center to the boom ends. Take off individual pressure caps to relieve the pressure and allow the water to flow unrestricted.
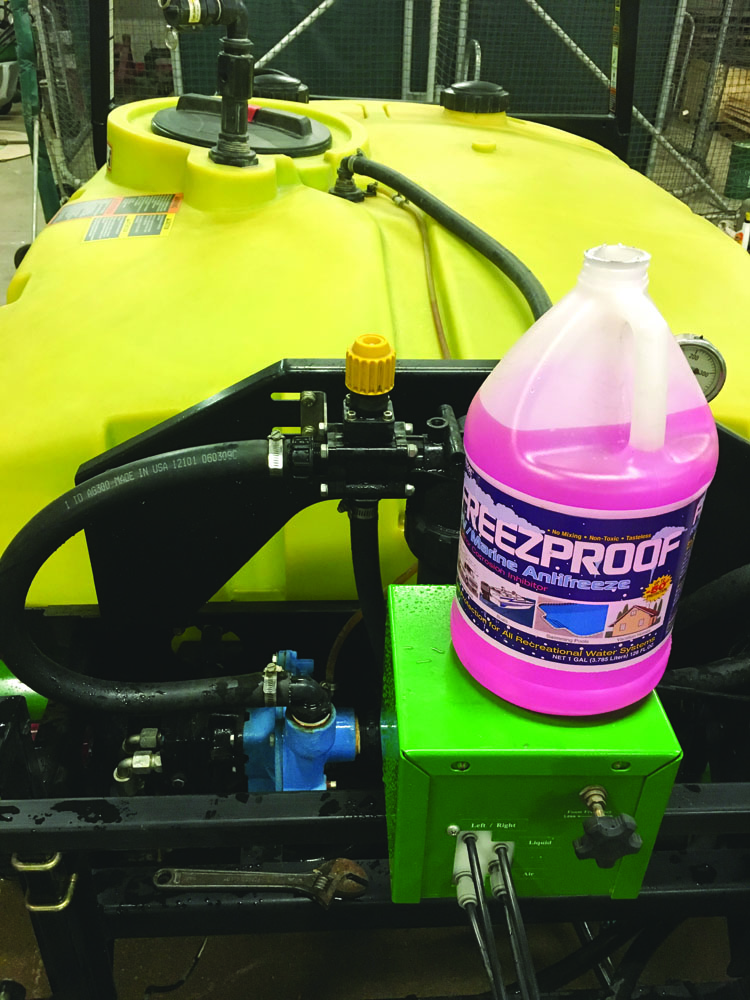
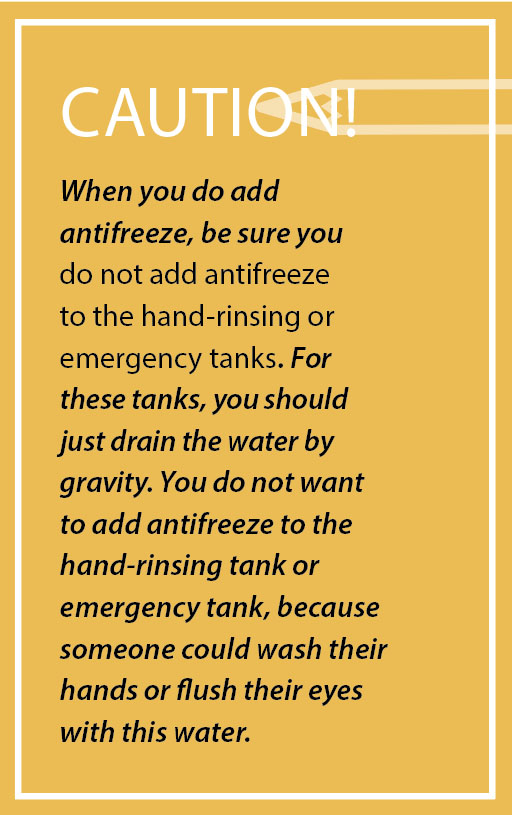
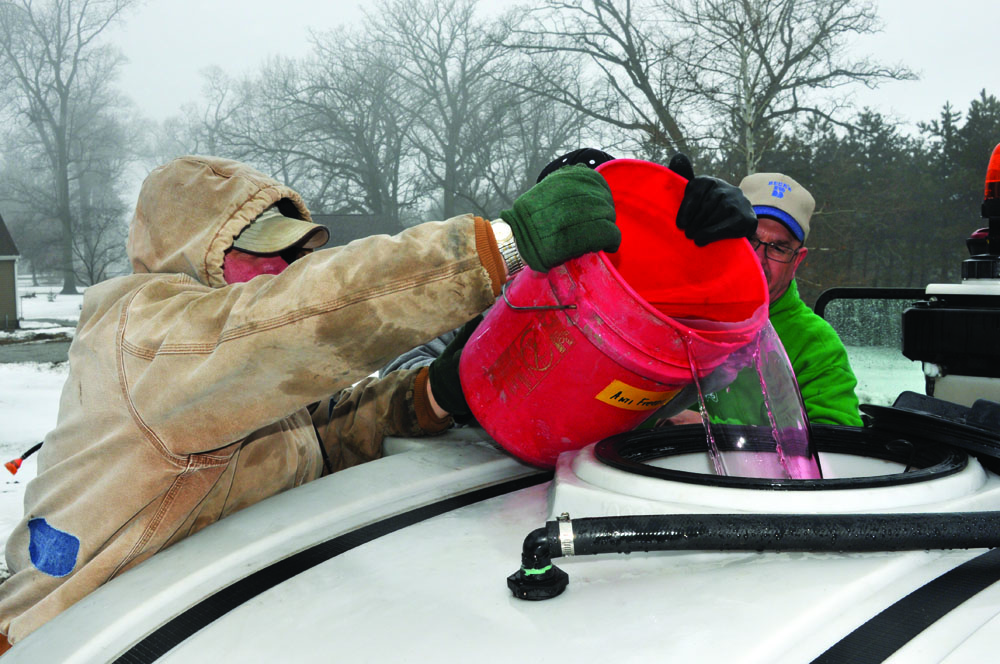
STEP 3. ADD ANTIFREEZE
Despite your best efforts to remove all the water from your sprayer, some water will inevitably remain somewhere in the system. It could be in the bottom of hoses that droop between sections of the boom,
in elbows or valves, or depending on the design, left in the bottom sump of the tank. Keep this trapped water from freezing by mixing it with antifreeze.
Be sure to read the antifreeze label to determine if you need to dilute it or whether it is a ready-to-use product (which requires no dilution). Generally, RV antifreeze and windshield wiper deicers are ready-to-use products.
The question is: “How much antifreeze should I add to the sprayer?”
A general rule of thumb is to add 1.5 to 2 times the capacity of the sprayer’s plumbing. This means you should base the actual gallons of antifreeze you add on the make and model of the sprayer and the length of the spray boom and hoses. You want enough antifreeze to push the water out of the system, and to make sure that any trapped water is thoroughly mixed with the antifreeze.
Here are six steps to follow when adding antifreeze.
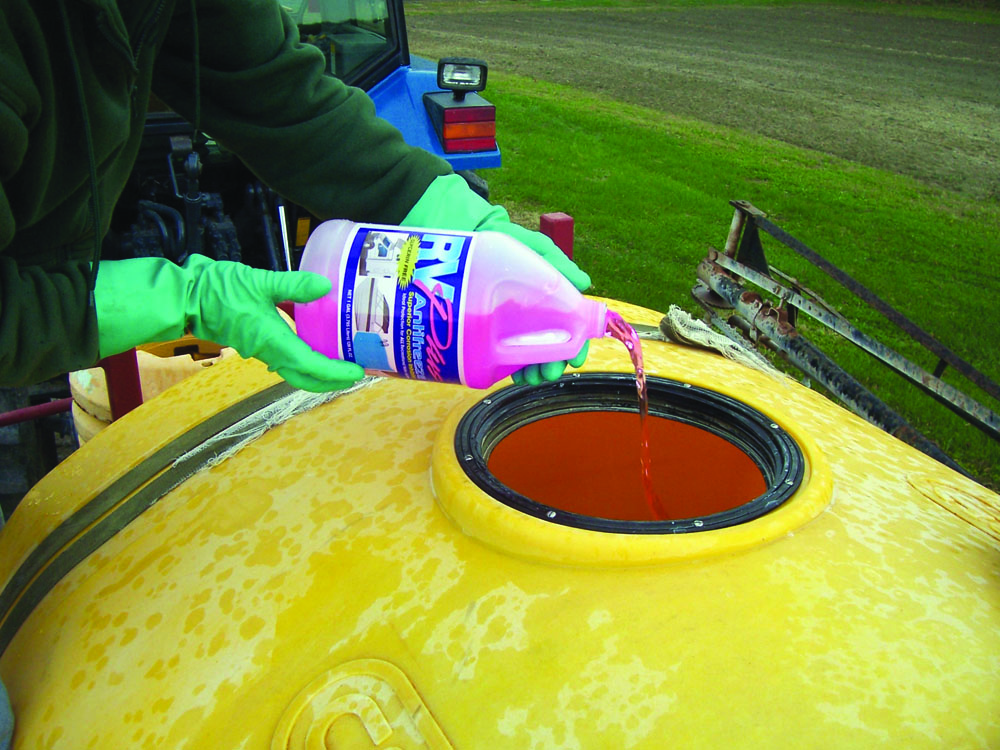
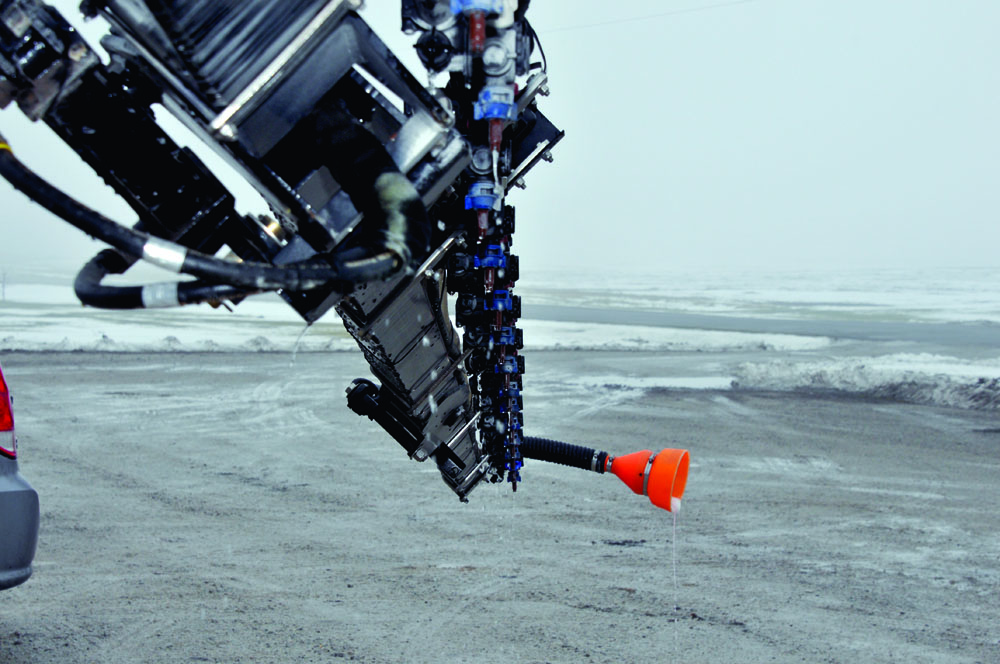
1. Pour antifreeze into the spray tank. Sparge or circulate the antifreeze from the tank to the pump numerous times. Then, by turning on the booms, the antifreeze will move through the hoses and exit the nozzles.
It is also important to winterize the rinse tank if your sprayer is equipped with one. Start by pouring antifreeze solution into the rinse tank. Then, turn on the system to pump antifreeze into the larger spray tank. This will protect the rinse lines from freezing. If your sprayer is equipped with a rinse tank, you may want to start with this step before pumping it through the entire system.
2. Open and close valves while the sprayer is operating. This action will allow the antifreeze to go into inaccessible spots where water might remain trapped. Open bypass valves, product valves, inductor valves, and agitator valves to get the antifreeze into those areas.
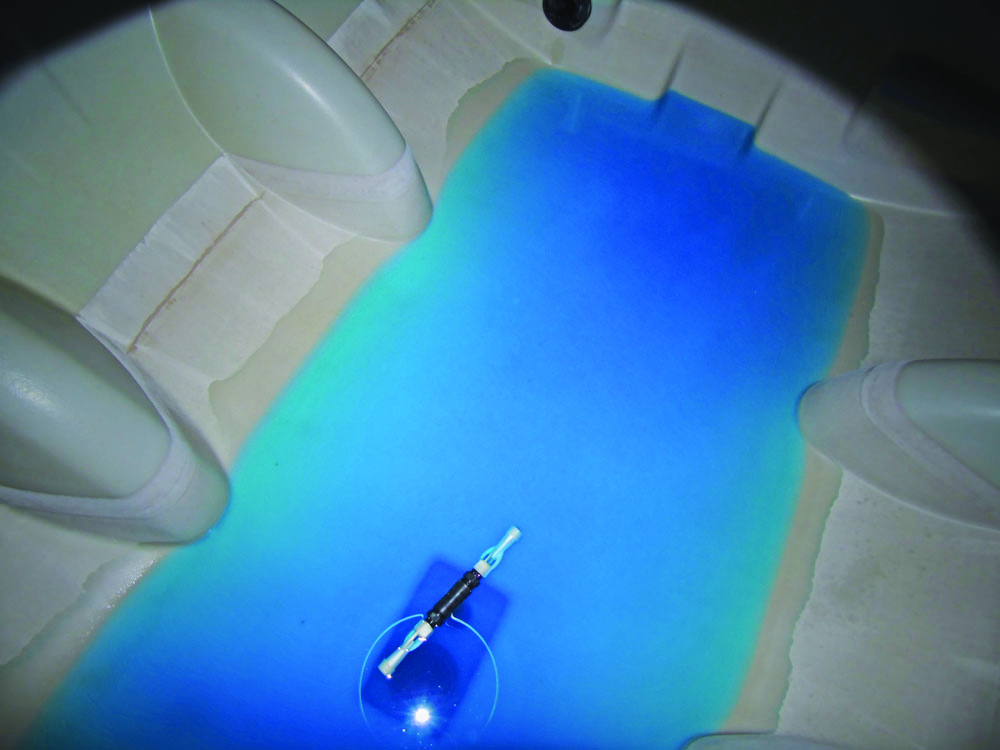
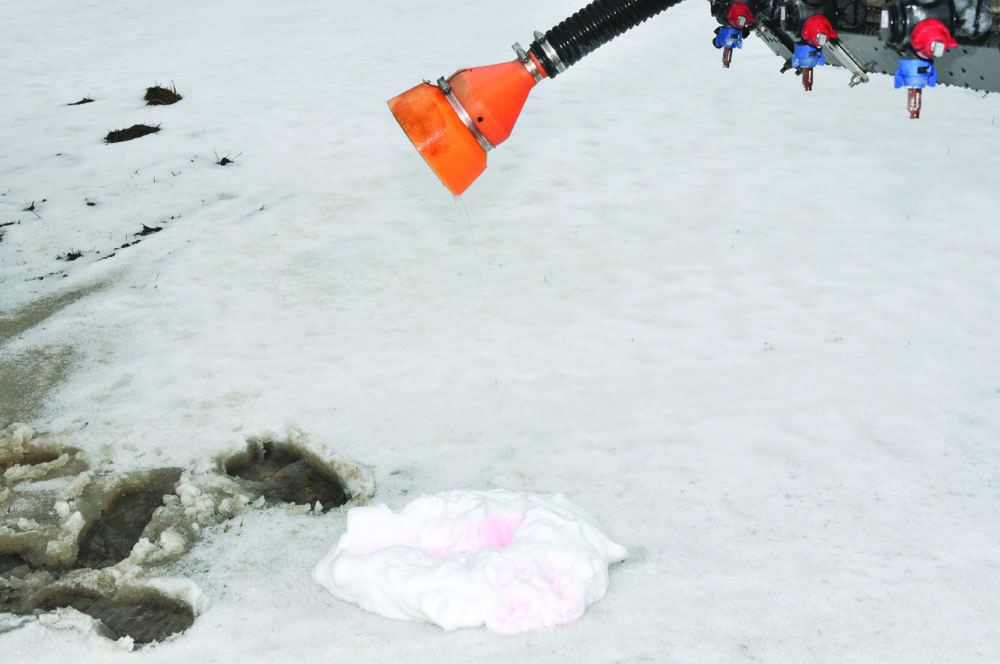
3. Observe the color of the antifreeze as it comes out. At first, the antifreeze coming out of the nozzles will be a lighter color than what you poured in the tank, because it will still be diluted with the water remaining in the system. After a few minutes, you should notice the color of the water coming out of the nozzles to be more consistent with the color you poured into the tank.
Remember, you need enough antifreeze to keep the pump running or primed and to force any remaining water out of the system. One way to gauge this is to make sure the antifreeze coming out of the nozzles or tips is the same color as the color you poured into the tank. Only then will you know that the antifreeze has flowed through the entire underbelly of the sprayer through the pump, screens, flow meter, booms, and nozzle tips.
4. Don’t forget the fence row nozzle circuit. If the machine is equipped with a fence row nozzle at the end of the boom, make sure to open that nozzle when running the antifreeze solution through the booms to allow those lines to flush as well.
5. Record how much antifreeze it took to winterize the sprayer. You can refer to these records the next time you winterize the sprayer.

Be Ready in the Spring
Preparing the sprayer for spring operations is much easier than winterizing the sprayer.Before operating the sprayer in the spring:
• Review the owner’s manual
• Reconnect batteries
• Reinspect belts
• Check oil and coolant levels
• Remove rodent bait stations and inspect for rodent damage
• Inspect the steel on the booms, looking for defective cracks that might need to be welded
• Check tire pressure
• Replace electronic equipment
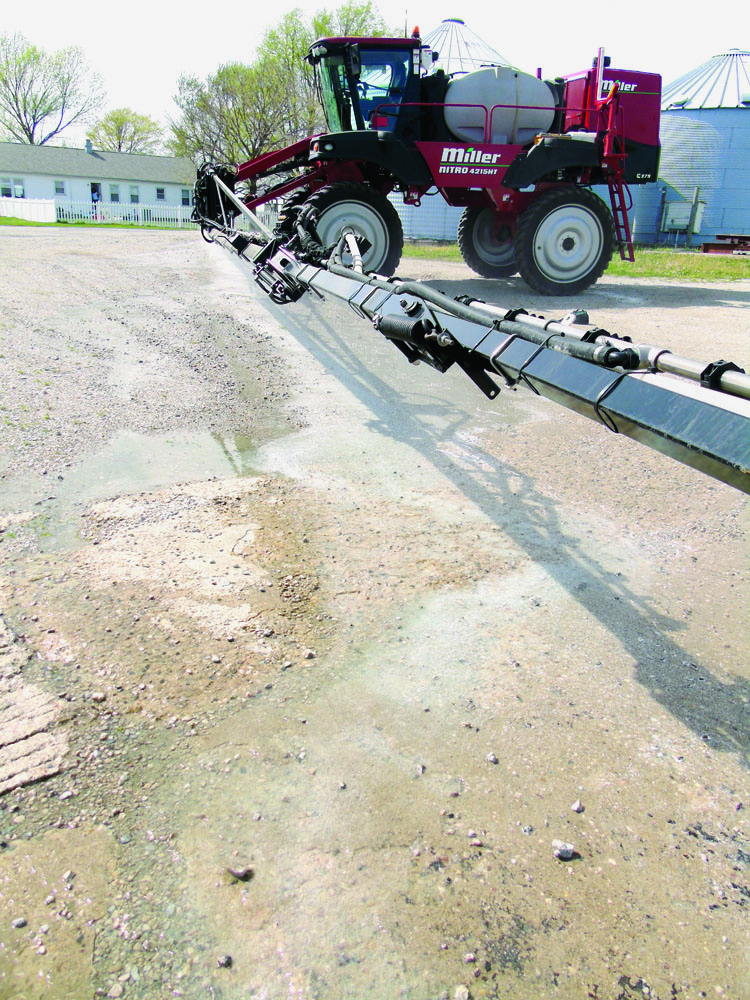
• Run clean water through the lines to remove antifreeze residues
 OLYMPUS DIGITAL CAMERA
 After you check everything, fill the sprayer with enough water to run the pump for fifteen minutes. As the sprayer flushes out the antifreeze, check for leaks in the plumbing.
Look closely for leaks in these locations:
• Nozzle bodies
• Plastic fittings
• Hoses
• Hose clamps
• Tanks
RECYCLING ANTIFREEZE
There are three schools of thought on what to do with leftover antifreeze:
1. Discard it. Since RV antifreeze is nontoxic, some will simply rinse it out of the tank. While this is an acceptable practice, perform this operation a safe distance from any water sources. The rinse water may contain pesticide residues that you do not want to contaminate in any water sources.
2. Collect and dispose of it. A second option is to collect as much of the antifreeze as possible, pour it into a collection drum, and then have a legally licensed firm collect and dispose of it at a later date.
3. Collect and reuse it. A third option is to collect as much of the antifreeze as possible, store it in an appropriately labeled container, and reuse it the following winter. One concern with this option is that over time, the antifreeze will become diluted and get progressively weaker. At lower concentrations, the antifreeze will be less effective and freeze at a higher temperature. If you do reuse antifreeze, you need to be certain to test it first to ensure it will be effective.
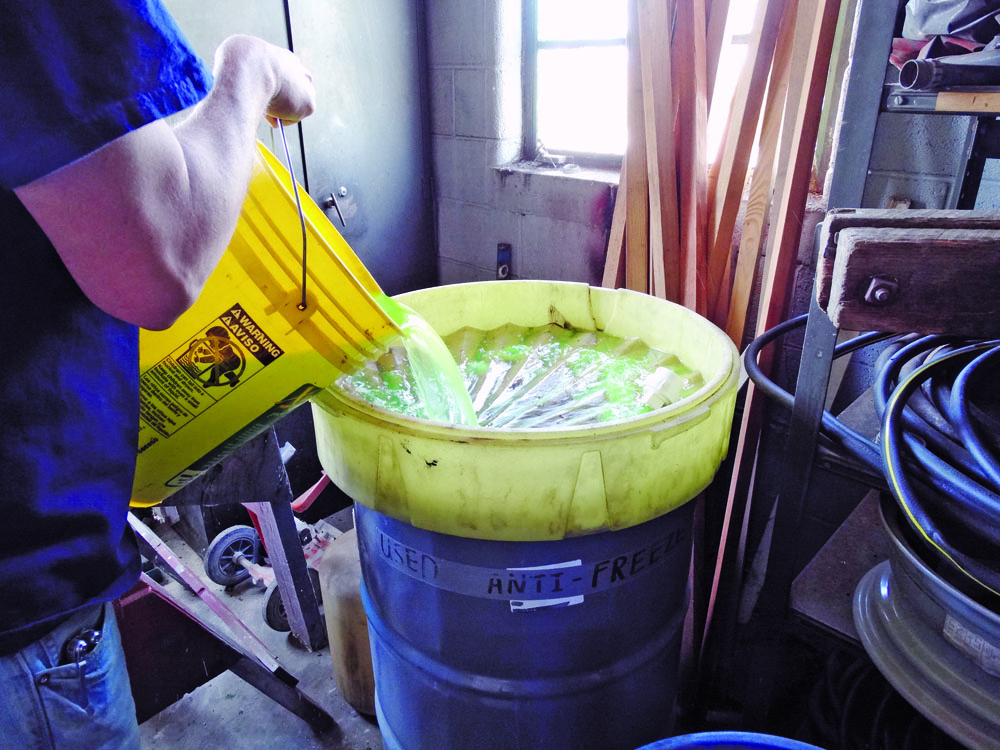
(From left to right) You can collect and dispose of antifreeze, collect and reuse it, or simply rinse it out of the tank away from water sources.
Conclusion
You’ve probably heard the old saying that the job is not over until the paperwork is complete. In the same way, the spray season not over until the spray equipment has been cleaned and winterized. Being proactive with your maintenance during the winter will allow you to bring out the equipment in the spring ready to go.
Although you may not like making repairs, performing such tasks will add longevity to the life of your sprayer. It only makes sense to complete these repairs during the off-season, since time is in such short supply during spring and summer.
If you do not maintain equipment properly, you will experience more problems and less time between sprayer replacement. If you are in the middle ofspraying, and on a tight schedule to complete applications, the last thing you need is a breakdown.
There is nothing worse than waiting on a part to repair your sprayer when daylight is burning or rain is approaching. Daylight will quickly become dark and you’ll miss the opportunity to finish the application if your machine is sitting idle while you wait on parts to repair it. Unless you are fortunate enough to buy or use a new machine every year, the more preventative maintenance you can do in the off-season, the smoother and less stressful the busy spraying season will be.
Thanks to Dawn Minns for graphic design. Thanks also to those who offered constructive comments during the development of this publication.
Disclaimer This publication is intended for educational purposes only. The authors’ views have not been approved by any government agency, business, or individual and cannot be construed as representing a perspective other than that of the authors. The publication is distributed with the understanding that the authors are not rendering legal or other professional advice to the reader, and that the information contained herein should not be regarded or relied upon as a substitute for professional consultation. The use of information contained herein constitutes an agreement to hold the authors, companies or reviewers harmless for liability, damage, or expense incurred as a result of reference to or reliance upon the information provided. Mention of a proprietary product or service does not constitute an endorsement by the authors or their employers. Descriptions of specific situations are included only as hypothetical case studies to assist readers of this publication, and are not intended to represent any actual person, business entity or situation. Reference in this publication to any specific commercial product, process, or service, or the use of any trade, firm, or corporation name is for general informational purposes only and does not constitute an endorsement, recommendation, or certification of any kind by Purdue University. Individuals using such products assume responsibility that the product is used in a way intended by the manufacturer and misuse is neither endorsed nor condoned by the authors nor the manufacturer.
Purdue Pesticide Programs offers many educational resources, including instructional videos about:
• Removing herbicide residues from tanks
• Tire selection and safety
• Extracting stuck equipment
• Hose safety and inspection
• Poly tank care and inspection
• Selecting tractor hitch pins
• Keeping the trailer connected
• Securing the load
Find them on the PPP Publications page on our website: ppp.purdue.edu
It is the policy of the Purdue University Cooperative Extension Service that all persons have equal opportunity and access to its educational programs, services, activities, and facilities without regard to race, religion, color, sex, age, national origin or ancestry, marital status, parental status, sexual orientation, disability or status as a veteran. Purdue University is an Affirmative Action institution. This material may be available in alternative formats.
June, 2018
Order or download materials from Purdue Extension • The Education Store: edustore.purdue.edu