Choosing And Applying Lubricating Grease

FRED WHITFORD, DIRECTOR, Purdue Pesticide Programs
JEREMEY WRIGHT, Chief Executive Office, SERTCO
DENNIS NOWASKIE, Superintendent, Southwest Purdue Agricultural Center
JOHN OBERMEYER, Integrated Pest Management Specialist, Purdue University
STEVE HAWKINS, Director, Purdue Agricultural Centers
PETE ILLINGWORTH, Mechanic, Purdue University
DANIEL ESS, Professor Emeritus of Agricultural and Biological Engineering, Purdue University
KEVIN LEIGH SMITH, Continuing Lecturer and Communication Specialist,
Purdue Agricultural Sciences Education and Communication
Bearing Life and Failure…………………………………………………………………………… 6
Grease Is An Important Machinery Lubricant……………………………………….7
Grease Composition Is Complex ……………………………………………………………. 9
Manufacturer Testing Identifies Grease Properties ……………………………11
Developing a Product Data Sheet………………………………………………………….19
Select a Grease Based on Equipment Needs…………………………………….. 22
1. Follow Specific Brand Recommendations in the Owner’s Manual……… 22
2. Work with a Grease Distributor to Consolidate Inventory………………….. 22
3. Decide for Yourself Using Product Data Sheets ………………………………… 23
The Art and Science of Grease Application……………………………………….. 24
Types of Grease Fittings……………………………………………………………………….. 25
The Inner Workings of a Grease Fitting…………………………………………………. 25
Find Grease Fittings on Equipment………………………………………………………. 27
Types of Grease Guns…………………………………………………………………………… 28
Apply the Right Amount……………………………………………………………………….. 29
Application Frequency…………………………………………………………………………… 31
Load and Apply…………………………………………………………………………………….. 32
Document Applications ………………………………………………………………………… 36
Use Caution with Pressure Washing Equipment…………………………………… 36
Replace Defective Fittings…………………………………………………………………….. 37
Shelf Life of Grease and Sealed Bearings ………………………………………….. 39
Mixing Grease Creates Problems…………………………………………………………. 40
Conclusion…………………………………………………………………………………………………. 41
Acknowledgements and Disclaimer……………………………………………………. 43
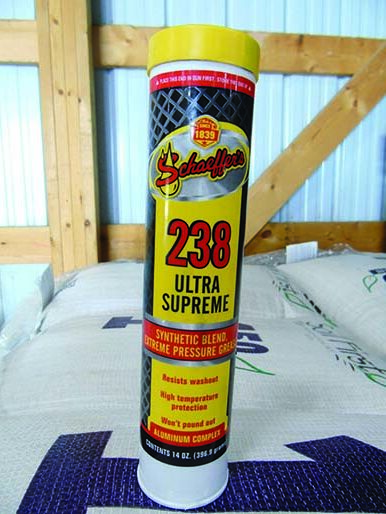
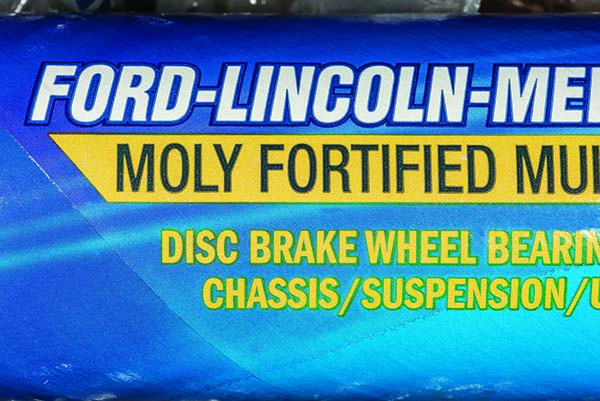
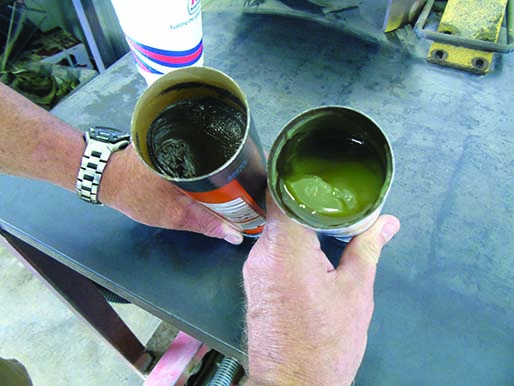
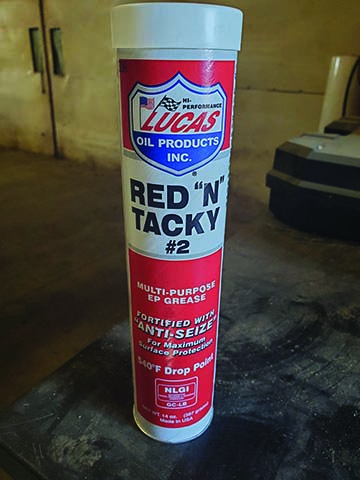
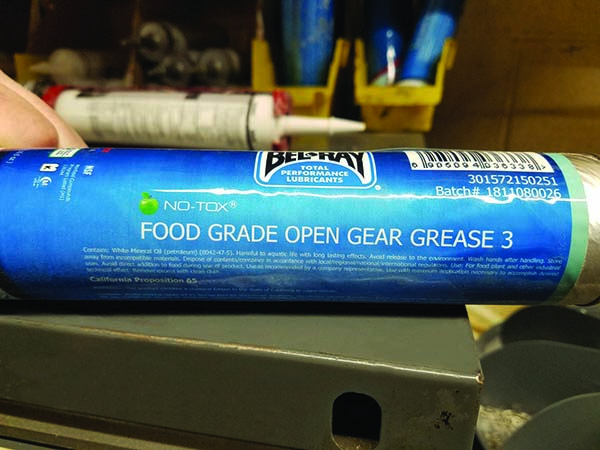
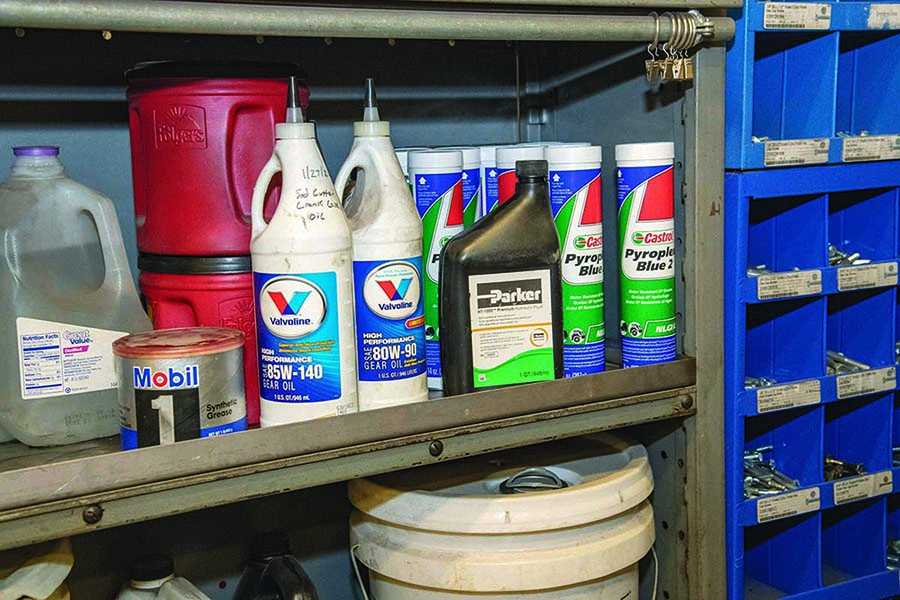
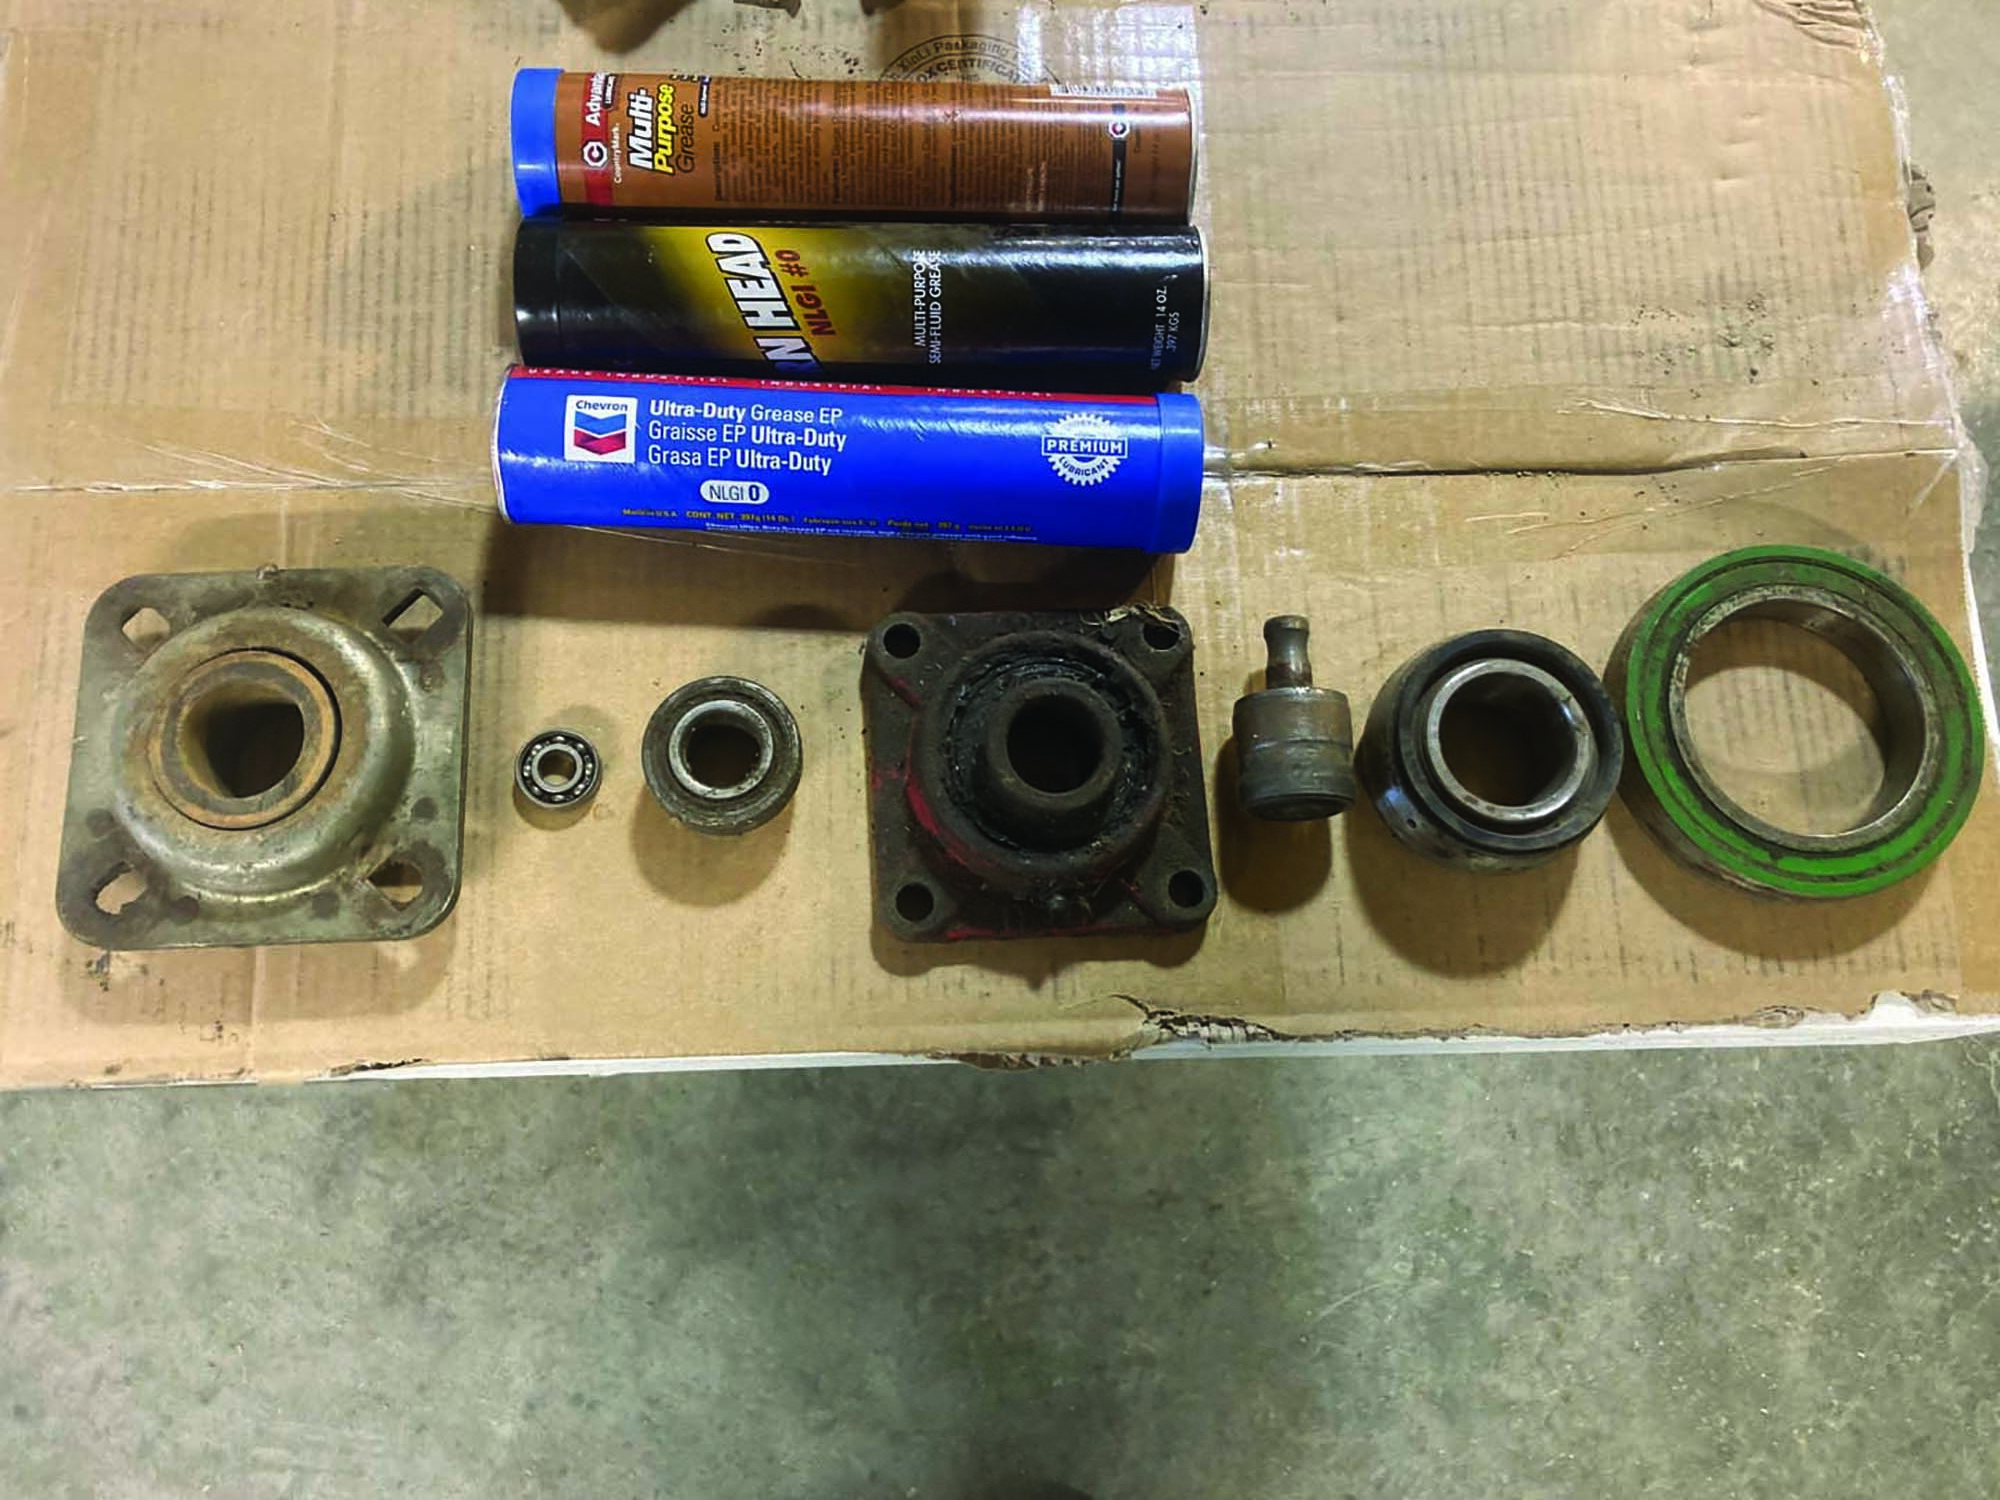
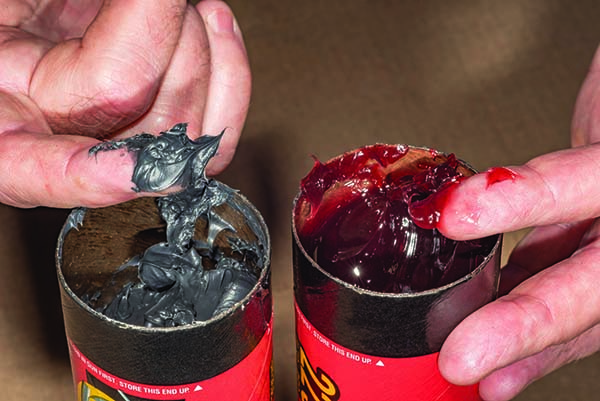 The packages might look similar on the outside; however, the grease inside can look very different depending on what the lubricant was designed to do. Using the wrong grease may lead to equipment failure.
 Owning and operating machinery requires regular maintenance to prolong its life and prevent down-time on a job site. Changing and renewing lubricants (for example, oil and grease) is a critical maintenance step. Many external moving parts have fittings for grease applications, but do you know how much and what grease to apply? When shopping for grease, you undoubtedly will find dozens of different brands on a merchant’s shelf or in anmanufacturer’s product catalog. Other than different tube colors and verbiage, the products appear nearly the same — about twelve inches long with a plastic cap on one end and a metal pull-off› tab on the other. And while the material inside comes in different colors and textures, they are all “greasy” to the touch. Should you choose based on product labels such as “Multi-purpose” or “General-purpose,” or on price alone?
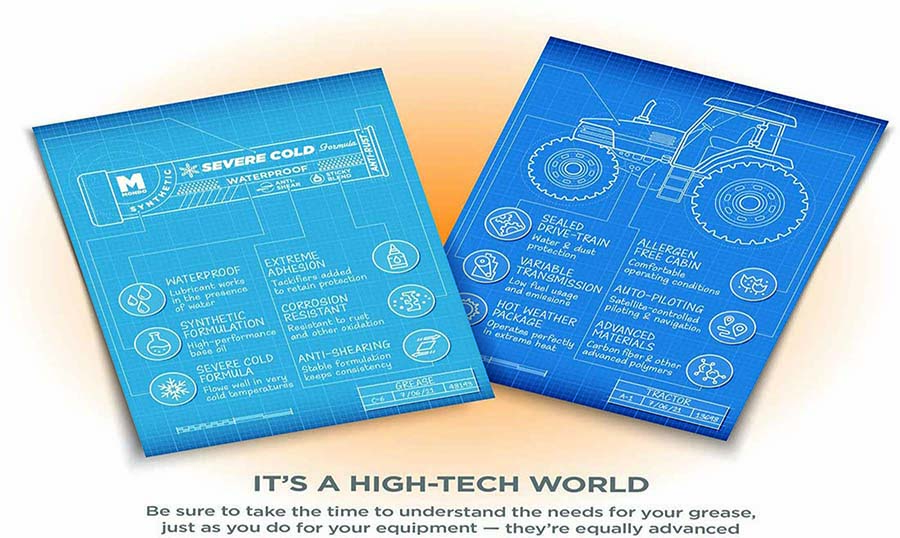
There is much more than one could imagine in selecting the proper grease for a piece of equipment. Outside of the packaging’s appearance and the feel of the material, greases can be as different as night and day — similar to motor oil weights — with variations in the grading and strength of bolts, speed and load ratings on truck and trailer tires, and the dust ratings of air filters. The only way to distinguish differences between greases and how to use them to your advantage is to know something about the technical aspects associated with each product.
This publication will discuss the anatomy of greases, the tests they undergo to determine the conditions in which they best work, how to read a technical data sheet, what to consider when selecting a grease to ensure it meets the lubrication needs of specific equipment, and how to use a lubricating grease in a maintenance program.
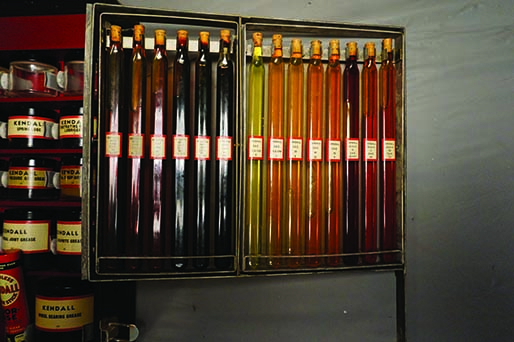
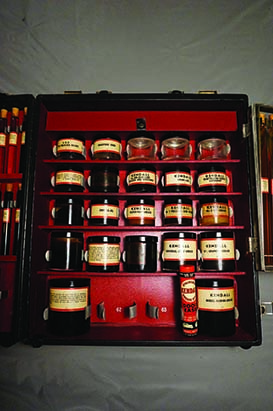
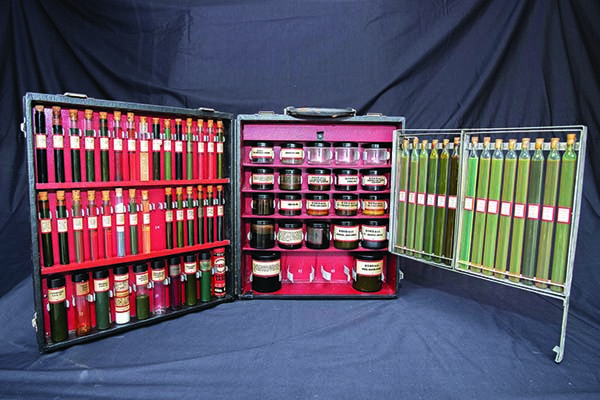
A salesperson’s grease kit from the 1920s shows the importance of the lubricant more than 100 years ago.
Photos provided by Lynn Senesac.
Bearing Life and Failure
Bearing design life is often provided as a percentage of machine life. In many cases, a bearing is intended to last as long as the piece of equipment in which it is mounted. Many of us realize that this intent often does not match reality. Whether you operate a simple machinery trailer or a complex corn and grain combine, it is common to replace bearings. Most of us accept this condition as normal. However, this should not be the case.
Factors that determine bearing life include:
• Bearing type (such as, sealed)
• Bearing size
• The amount of weight (load) on the bearing
• Operating rotational speed
• Environmental conditions (including dust and moisture)
• Maintenance that includes lubrication and cleanup (for example, hours or seasonal)
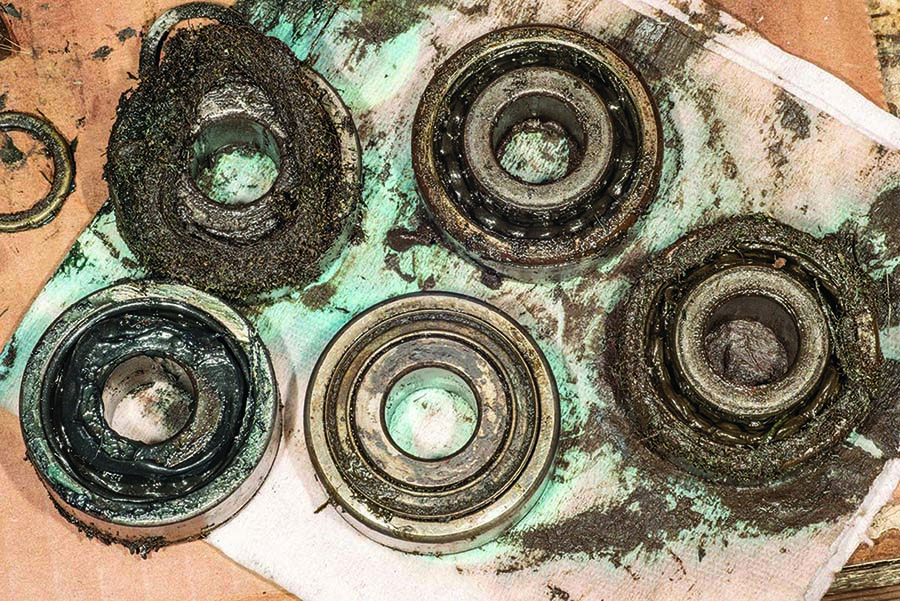
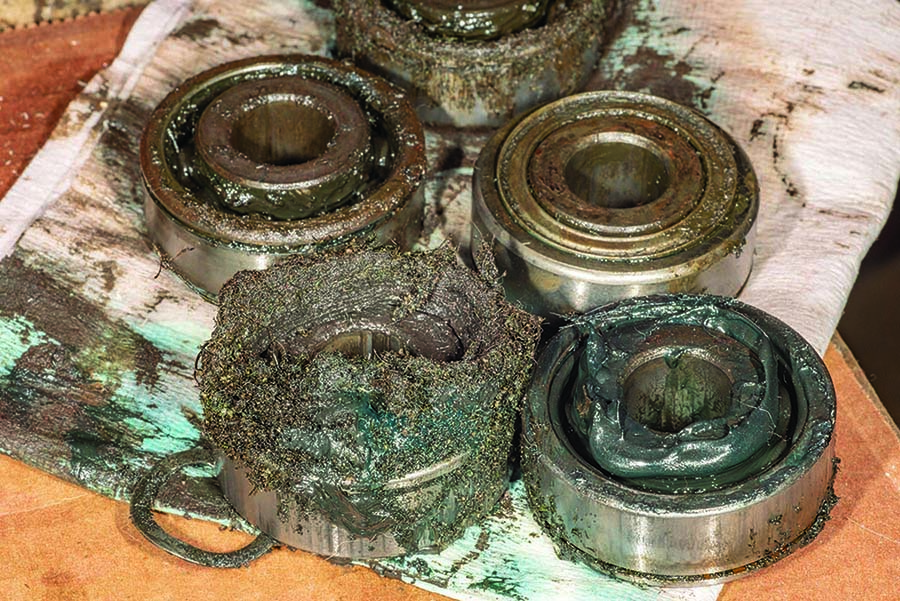
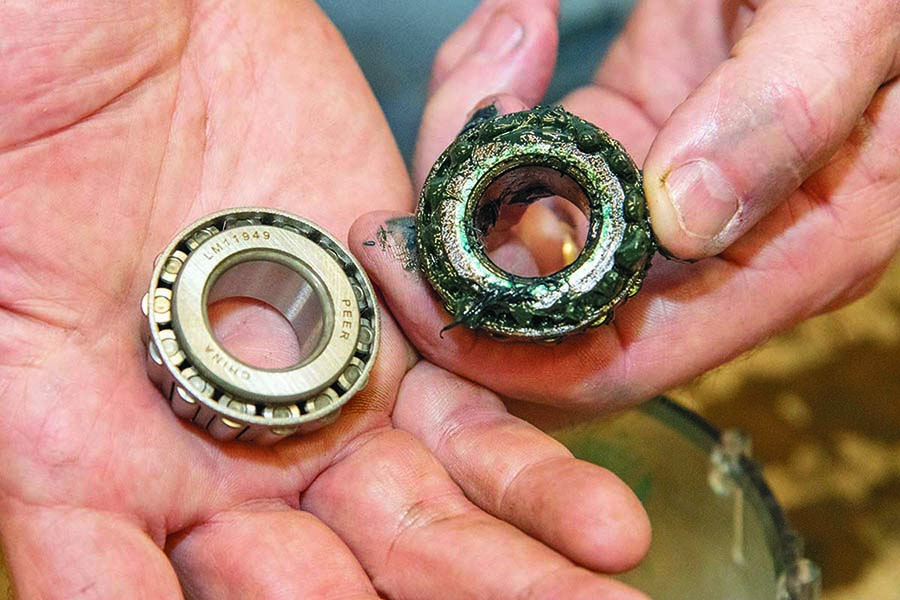
Bearing components are designed to be smooth for uniform load distribution. When contamination enters a bearing, the damage often causes surface roughness and loading on the bearing. Stresses are concentrated in areas of surface roughness and those stresses strain or deform the bearing during repeated load cycles and may eventually lead to breaking the component and premature bearing failure.
GREASE IS AN IMPORTANT MACHINERY LUBRICANT
Grease provides a coating of lubricant between moving parts to keep them from wearing out prematurely, which is very similar to the way oil works to protect moving parts inside an engine or transmission. Grease actually works by physically separating mechanical components with a fluid film (that is, a coating). Without that protective film, metal-on-metal contact can wear out the equipment and cause it to fail prematurely.
What we usually do not appreciate is that equipment needs grease to do more than just keep metal parts separated. Grease may also be needed to:
•Seal out contaminants like dust and water
• Provide properties beyond what the grease can do by itself
• “Bleed” out a specific rate of protective oil film over time
• Inhibit corrosion and rust
• Remain in place when moving parts compress on it
• Keep its consistency under low and high operating temperatures
• Remain in place between lubricating intervals
• Reduce noise from metal-on-metal contact

This partial list clearly indicates that grease performs a variety of tasks that help prevent excess wear and tear on equipment under normal or difficult working conditions. Take a minute to think about how extreme environmental conditions and equipment requirements play a role on the stress placed on grease lubricants. Some greases have to work under extreme hot or cold temperatures, high or low load pressures, slow or fast speeds, and wet or dusty conditions. It is possible, over the course of the year, a single piece of equipment may see all of these conditions. But it’s those specific conditions — high moisture, extreme temperatures, heavy loads, slow speeds, and dusty conditions — that often requires selecting a grease more suited for a specific application than what a general-purpose product can provide.
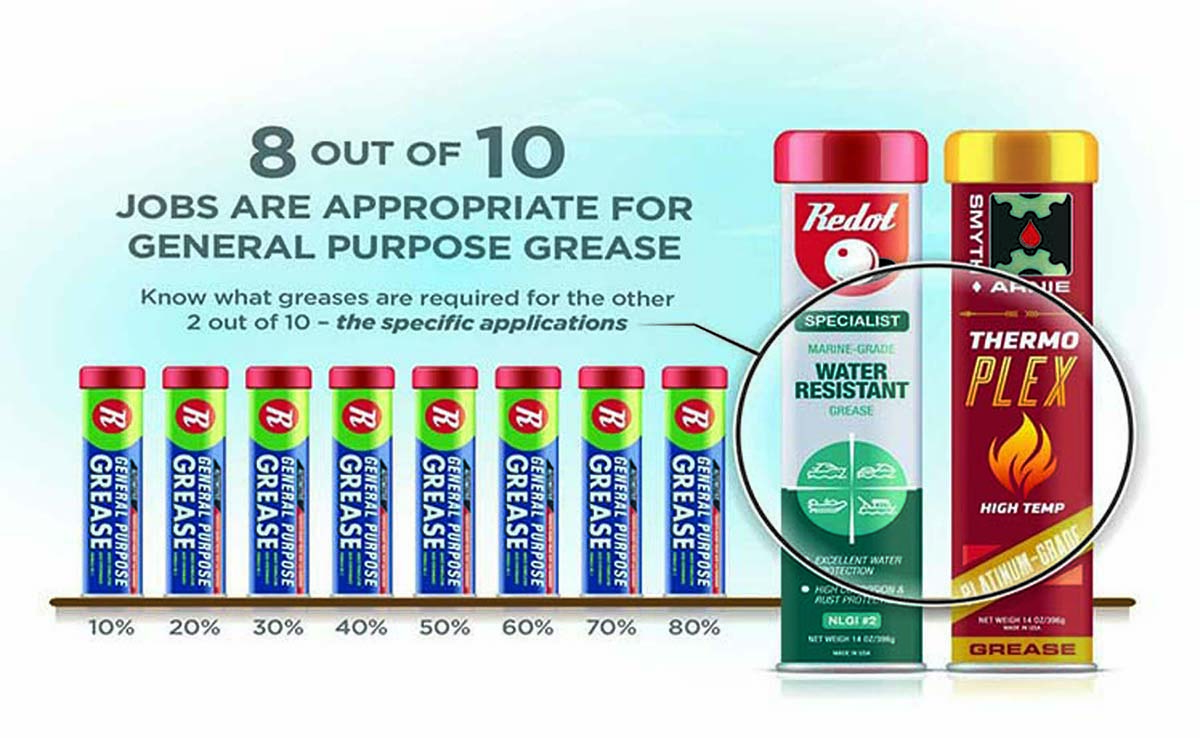
A “general-purpose” grease can deal with 80 percent of the lubrication needs on a wide range of equipment. If that’s the case, then what grease is required for the other 20 percent of lubrication needs? Certain applications might require more specific greases that provide better heat protection, less washout, and higher load protection than just a typical general-purpose grease might be able to provide. Any circumstances outside of the “normal” 80 percent requires a grease to be formulated differently. There can be serious consequences if you select the wrong grease. Using a grease that is unsuited for the application could lead to negative outcomes, including:
• Voiding the manufacturer’s warranty
• Needing to replace equipment prematurely
• Costly repairs
• Extending equipment downtime
• Reducing productivity
Equipment costs for a business or farm are always increasing, so you want to select greases that will maintain the longevity of the equipment and keep it operating well beyond its warranty period. In the long run, the cost of selecting greases that are better suited for the applications, will more than pay for themselves by keeping equipment operating not only today, but well into the future.
GREASE COMPOSITION IS COMPLEX
There are multiple items you need to consider in terms of a grease’s performance properties other than price. In fact, picking the most expensive or the least expensive grease could be financially disastrous, because the properties of that grease might not meet the specific needs of your equipment. This is why it is important to understand the make-up of a lubricating grease.
Price is always important, but using price as the single factor should only happen after you have compared the products for their chemical and physical similarities and dissimilarities — in other words, what greases have the characteristics for the equipment needs. Then price, and possibly the manufacturer, become the deciding factors.
The anatomy of a liquid lubricant (such as, motor oil) blends a base oil with additives. Additives can enhance the properties of the base oil or impart new characteristics that the base oil lacked. Combining the base oil and additives creates a liquid lubricant with specific qualities and properties.
A grease adds an additional component by suspending that liquid lubricant (base oil plus additives) into a sponge-like thickener. Close-up, grease is honeycombed throughout, allowing space to temporarily trap the base oil and the additives within those pores. When a load is placed on a layer of grease, a small percentage of the liquid lubricant is pushed out to coat and protect the interactive metal surfaces. The excess lubricant that is not needed at the time is absorbed back within the grease’s structure, similar to how a sponge absorbs excess water.
The anatomy of a grease consists of three main categories: a base oil, a thickener, and additives, which can collectively represent dozens of chemicals blended together to create the properties needed. The main ingredient of any grease is a base oil refined from petroleum, but laboratory-produced synthetics and plant-based oils can also be used. Remember, the base oil trapped in the grease provides the lubrication that prevents metal-to-metal contact.
The second ingredient in grease is the thickener that traps and retains the base oil and additives. Manufacturers use metals mixed with synthetic fatty acid soaps or non-soap compounds to create the semi-solid condition of grease.
Manufacturers select the compounds used to thicken a grease based on their ability to hold the base oil and additives within the soap, maintain its consistency at high temperatures, and to remain in place without leaking out of the joint or bearing, while allowing grease applications at ambient temperatures during maintenance.
Lithium, or lithium complex thickeners, are commonly used as thickeners. Manufacturers often prefer lithium complex thickeners, because they provide a grease with higher temperature resistance and suspend and hold the base oil and additives better than other metal soaps.
Manufacturers incorporate specific additives into a grease to enhance, expand, and extend the grease’s performance properties — similar to what additives do for engine oils, gasoline, and diesel. Additives can enhance grease performance by:
• Staying in the intended area even under extreme pressures
• Protecting metal against corrosion, pitting, and rusting
• Resisting movement by water
• Protecting the base oil and thickener from aging and oxidation
• Allowing the grease to flow at lower temperatures
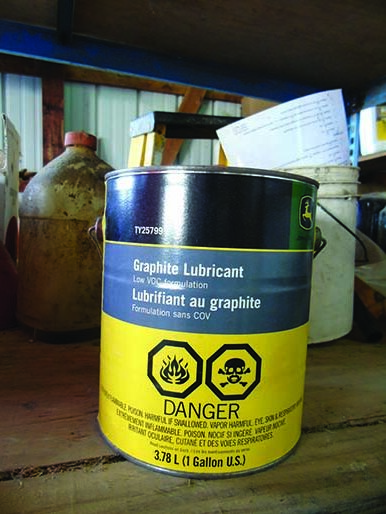 Some equipment with high shock and heat loads requires greases with additives that prevent excessive wear.
 Three of the more important additives are: graphite, molybdenum (moly), and polytetrafluorethylene Teflon (PTFE). Grease impregnated with these solid suspension additives provide additional protection against friction, wear, and fusion of metal surfaces. This is another advantage that grease has over liquid lubricants — grease can hold these materials in suspension, while they would settle out or be removed by a filter (like an engine oil filter) in a liquid lubricant.
Moly and graphite are sacrificial additives that work when the base oil is no longer able to lubricate moving parts (when the lubricant film collapses). New grease will help protect moving components in a machine (for example, gear boxes, joints, and bearings). However, it is possible there may come a point when the grease no longer remains in place. Grease can move when the stress of the equipment is significantly increased, the temperature is severely elevated, or the base oil viscosity becomes too thin that the lubrication film between the parts collapses. When this protective film collapses, moly and graphite will help form a temporary solid suspension film between the moving metal parts. This is why these sacrificial additives are important.
Manufacturer Testing Identifies Grease Properties
Equipment (like tractors, planters, mowers, sprayers, backhoes, bulldozers, and other heavy equipment) can challenge how well a grease performs. There are many rotating parts and oscillation joints on these types of equipment. Often, users operate this equipment in both cold weather during the winter and extreme high temperatures during the summer. These changing conditions can exacerbate heavy shock loads on the equipment you are trying to protect. Conditions can vary from dusty to muddy on any given day. And yet, the grease you selected is expected to work in such diverse mechanical and environmental conditions. These extreme conditions bring us back to the importance of the constituents of a specific grease.
Grease is one of the more complex lubricants you can buy, because each grease has its own set of chemical characteristics and physical properties based on what ingredients were used to formulate the product. Manufacturers can change from one thickener to another, modify the base oil, or add a laundry list of additives to get a new set of properties.
This is why grease manufacturers off›er several types of grease in order to meet the specific needs of equipment. Lubricant manufacturers want to test grease formulations to ensure that the base oils, thickeners, and additives are working well together, meet the intended goals for the lubricant product, meet equipment requirements, and are not antagonistic under varying conditions.

Lubricant manufacturers have a lot more on the line than just maintaining their reputations when they advertise through product packaging, catalog descriptions, sales brochures, and advice from sales representatives. When products fail to deliver on their advertised promises, equipment may need expensive repairs or replacements. Such problems can lead to protracted legal arguments and lengthy lawsuits against manufacturers and distributors by dissatisfied customers whose equipment components failed due to poor grease performance.
This is why a grease undergoes significant evaluation before manufacturers release it in the marketplace for consumer use. Manufacturers back their performance claims by evaluating their products by using testing protocols developed by the American Society for Testing and Materials (ASTM) and the National Lubrication Grease Institute.
At a minimum, ASTM testing includes evaluations and measurements to examine these criteria:
• Base oil viscosity
• Consistency
• Dropping point
• Water resistance
• Load carrying ability
• Shear stability
• Compatibility
• Pumpability
• Oil separation
As an organization, ASTM makes it possible to develop a set of standardized methods to test grease under the same conditions. Performance properties determined by following ASTM protocols will ensure the tests are performed the same way in Michigan as they are in California. ASTM outlines how each test should be conducted for manufacturers that want to list those standards on their technical data sheets.
From a user’s perspective, standardized testing allows you to evaluate and compare different products since they were tested in the same manner; in other words, you are comparing “apples to apples” when you judge different product characteristics. While users do not have to understand the details of how ASTM tests are conducted, it is important for users to know what is being measured and listed on each product’s technical sheet.
 Behind these descriptions of what a grease can do should be test data to support the manufacturers' claims.
 Below, we outline details about 11 tests and why those tests matter.
1. Base Oil Viscosity Test
The base oil viscosity test literally measures how fast the base oil flows over a flat surface for a given time. Imagine pouring the same amount of honey and water in two identical circles on your desk. It will take a lot longer for the honey to get to the outside of the circle than it will take the water.
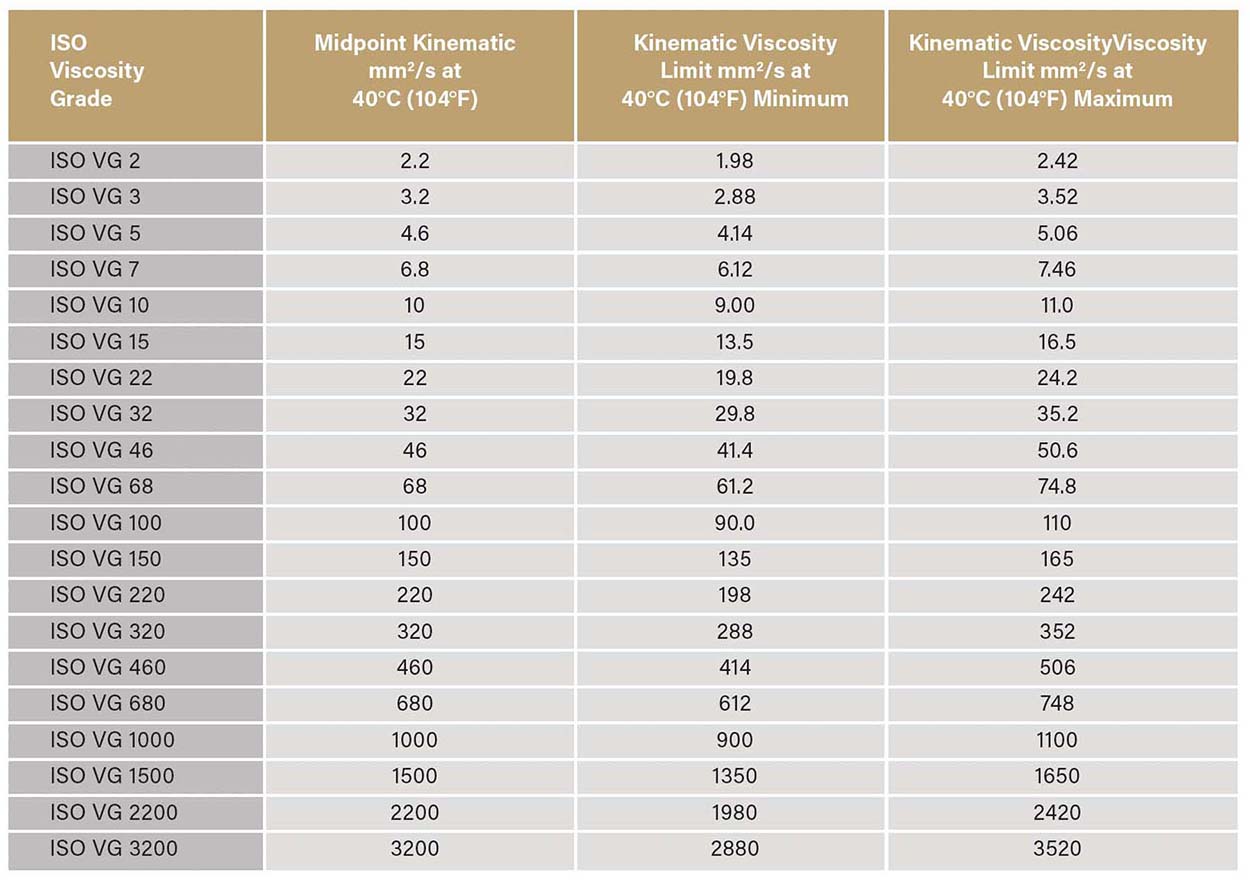
The test measures flow rate in a unit called a centistoke (cSt), which equates to a square millimeter per second. For comparison, water flows at 1 cSt, while honey flows at 1,000 cSt. The lower the cSt, the thinner the base oil. With this test, the base oil is assigned a viscosity grade (VG) category as shown in this table.
The Science of Tribology
Tribology is the study of friction, wear, and lubrication. It is the science of interacting surfaces in relative motion. The backbone of this science revolves around speed, load, and viscosity. If we have enough speed and the right viscosity, we can carry a proper load. That is lubrication and the lubricant at the most basic fundamental level — speed, load, viscosity. As you increase the speed, you need to use a lower viscosity that will pull the lubricant into the load zone at a much faster rate.
If the speed is incorrect (or you don’t have the right viscosity), you cannot carry the same load. Under these conditions, the film collapses leading to metal-to-metal contact and moving parts wearing out prematurely.
Manufacturers list the centistokes midpoint at 40°C (104°F), which is intended to represent a typical working temperature of a machine. The standard allows manufacturers a 10 percent allowance below and above the midpoint if it wants to assign the base oil to a viscosity grade. For instance, a base oil with a VG 100 means it has a viscosity grade of 100 cSt ±10% from the midpoint (the last two columns in the table).
Why This Test Matters: The single most important property of a grease is how slowly or quickly the base oil flows. Most grease products used in industry are formulated with a base oil having a VG around 220 cSt. If you choose a base oil that flows too fast, it will not have the film strength to separate moving components at higher loads or slower speeds. Conversely, a grease that flows too slowly will have better film strength, but the lubricant might remain too thick at colder temperatures.
2 Cone Penetration Test
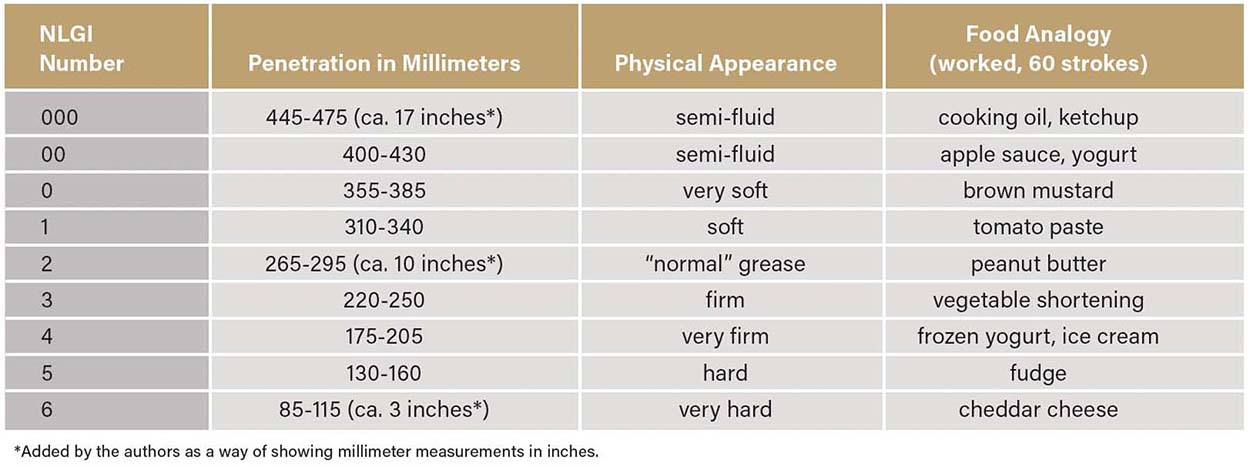
The cone penetration test measures a grease’s relative consistency. To determine a grease’s consistency, testers place a grease sample into a piston cup (called a grease worker), which is then pushed and pulled 60 times (much like a piston moves up and down in an engine cylinder). This “worked” grease ensures the base oil, thickener, and additives are well mixed.
Next, the testers release a weighted cone at a specific height above the cup filled with the worked grease. Testers measure how deep the cone penetrated into the grease in tenths of millimeters (about 0.004 inches). The thinner the grease, the further the cone will penetrate, and vice versa for thicker products.
After performing the consistency test using the standards published by the National Lubricating Grease Institute (NLGI), testers then assign a grease to one of nine categories. See the table below.
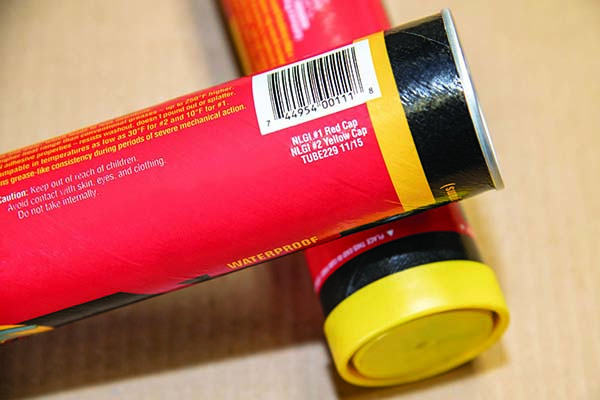
Grease containers may look the same, but the contents can be very different. Two tubes of grease may appear identical, except the endcaps might differ in color. The manufacturer uses the same tube for two grades of grease, but use different cap colors. The month and year of manufacture is also shown for inventory control purposes.
Why This Test Matters: A higher consistency grease will remain in place better under a heavy load, but it is harder to pump and push through a grease fitting or line at colder temperatures. A grease with a lower consistency is easy to pump, but doesn’t stay where it is needed as well under heavy loads or slower speeds.
3 Shear Stability Test or Roll Stability Test
The shear stability test (also called the roll stability test) measures consistency after mechanical shearing. For this test, it’s useful to revisit the analogy of a thickener being a sponge that holds the liquid lubricant.
A grease that is repeatedly called upon to lubricate a bearing or joint is like physically chopping the sponge-like matrix as it is being worked. This test is like the cone penetration test, but the grease has been worked 10,000 or 100,000 times through the grease worker to determine if mechanical shearing changes the thickener’s consistency. The NLGI table is then used to reclassify the grease after it has been worked.
Why This Test Matters: What is important to know at the end of the day is that the grease can change its consistency after it has been used. It could or might be expected that a “worked grease” may drop one NLGI category as it is mechanically sheared over time.
4 Dropping Point Test
The dropping point test measures resistance to high temperatures by determining the melting point of the thickener. Testers find the melting point by putting a small sample of grease into a cup that has a hole in the bottom. The cup is then heated to the point that the first drops of grease leak out of the hole. The test helps manufacturers determine whether the product has been properly blended to reach a certain dropping point.
Why This Test Matters: This test has little value to end users. Simply put, most greases (including those using lithium complex thickeners) can have dropping points between 300°F and 500°F. If you have a piece of equipment that operates near those temperatures, you will have more problems to worry about than the grease’s dropping point, considering that most equipment usually operates at less than 150°F. If the grease is getting hot enough that it converts to liquid, check the equipment for possible failures.
5 Oil Separation Test and Wheel Bearing Leakage Test
The oil separation test and wheel bearing leakage test measure how thickeners hold the liquid lubricant. Testers place grease into an apparatus that spins at a certain speed, time, temperature, and pressure. The test measures how much of the liquid lubricant under a centrifugal force actually separates out of the grease thickener. It is normally measured in percent loss by weight.
Why This Test Matters: It is important to know that the liquid lubricant will migrate out at a constant, but slow, rate.
But you don’t want a grease to bleed out too quickly under high pressures and/or under extreme temperature swings. Additionally, the lubricant has to remain in place without leaking out of the seals or thrown away from the desired bearing surface that you want to lubricate and protect. The results of this test are especially important for determining the lubrication intervals. For instance, an equipment manufacturer might indicate a bearing or joint only be greased at six-month intervals or after a certain number of hours of use. But if the liquid lubricant is gone after two months (or less hours than suggested), waiting for the recommended interval would lead to metal-on-meal contact as the grease has already “played out.”
6 The U.S. Steel Mobility Test and Ventimeter Test
The U.S. Steel mobility test and ventimeter test measure the impact of cold temperatures on pumpability. Testers cool a tube of grease down to a specific temperature. Then, they apply a specific amount of pressure to the grease gun for 5 minutes while collecting the grease in a cup. Testers then weigh the grease in the cup. By continually lowering the temperature, manufacturers can determine the lowest temperature a grease can be pumped.

Why This Test Matters: We want to know the lowest temperature that the grease can practically be pumped or pushed through a grease gun, fittings, and into bearings. If the grease is not delivered to the desired surface, equipment will fail.
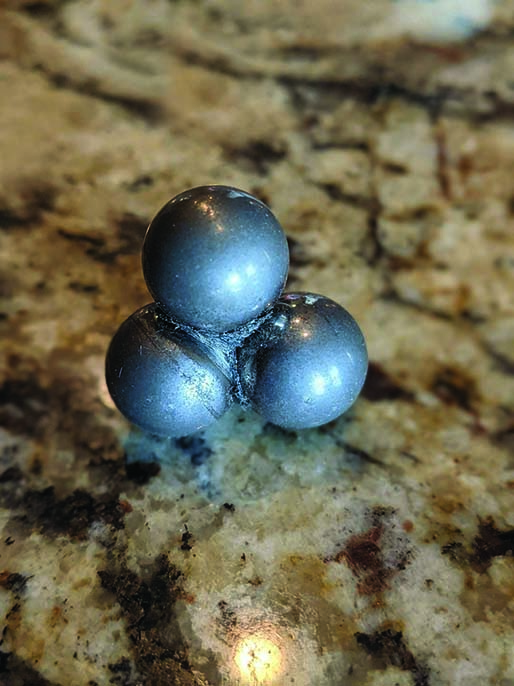
7 4-ball Weld Test
The 4-ball weld test measures wear protection under heavy loads. The test measures how much load a grease can take before it is pushed out, causing the bearings in the experiment to seize and weld together by friction and heat. Three balls are locked within a device and the grease applied to the cup. A fourth ball is placed in a chuck that rotates over the bottom three bearings to form a pyramid.
During the test, downward pressure is applied from the top ball onto the bottom three until the lubricant film fails under the load. It is at this point that ingredients like moly, graphite, and other extreme pressure and anti-wear additives are activated. However, the continuous downward pressure will cause these additives to fail, too. Eventually, increasing the load will weld the four balls to one another.
Testers calculate the weld load in kilograms, which means the higher the number, the more weight the grease can carry before major wear starts to degrade the parts.
Why This Test Matters: This is a real-world test that shows how the grease protects under extreme pressures and loads. The greater the weld load, the higher the pressure the lubricant will continue to work and prevent metal-to-metal contact.
8 4-ball Wear Scar Test and Falex Continuous Load Test
The 4-ball wear scar test and Falex continuous load test measure wear protection under heavy loads. This test uses the same apparatus as the 4-ball wear test. But instead of running until the failure or seizing point, this test will take the balls out of the test rig to measure the scars made under certain pressures.
It measures how much of the metal is wearing out under certain pressures. Testers remove the bearings and evaluate the length of the scars and the depth of the gouging under a microscope. They repeat this process over a number of different pressures up to the weld point.
Why This Test Matters: We want to be able to compare the performance properties of a grease and its liquid lubricant at higher pressures. For instance, if we need a grease to perform at a high load and slow speed, we want to make sure the product has a high score in these two categories.
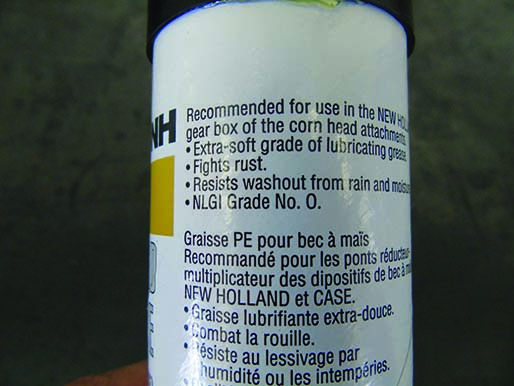
9 Water Washout Test and Water Spray Off
The water washout test and water spray off› measure a grease’s resistance to water. Testers apply grease around a bearing at temperatures of 100°F or 175°F. Testers apply a steady stream of water across the rotating bearing. After a set amount of time, testers remove the remaining grease, dry the grease, and weigh it. Testers subtract the weight of the grease remaining at the end of the test from the weight at the beginning of the test to determine how much grease was washed o›ff, which is reported as a percentage loss.
Why This Test Matters: It is important to select the proper grease if there is ever a possibility that your equipment may be submerged in water — for example, the wheel bearings on a boat trailer.
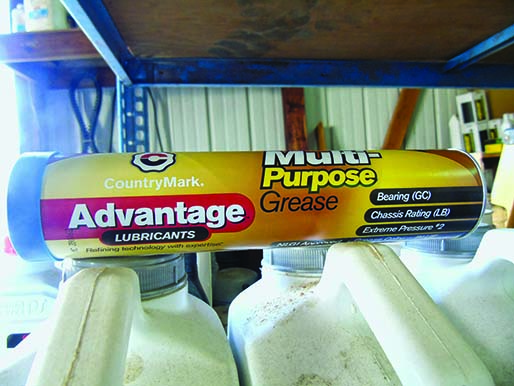
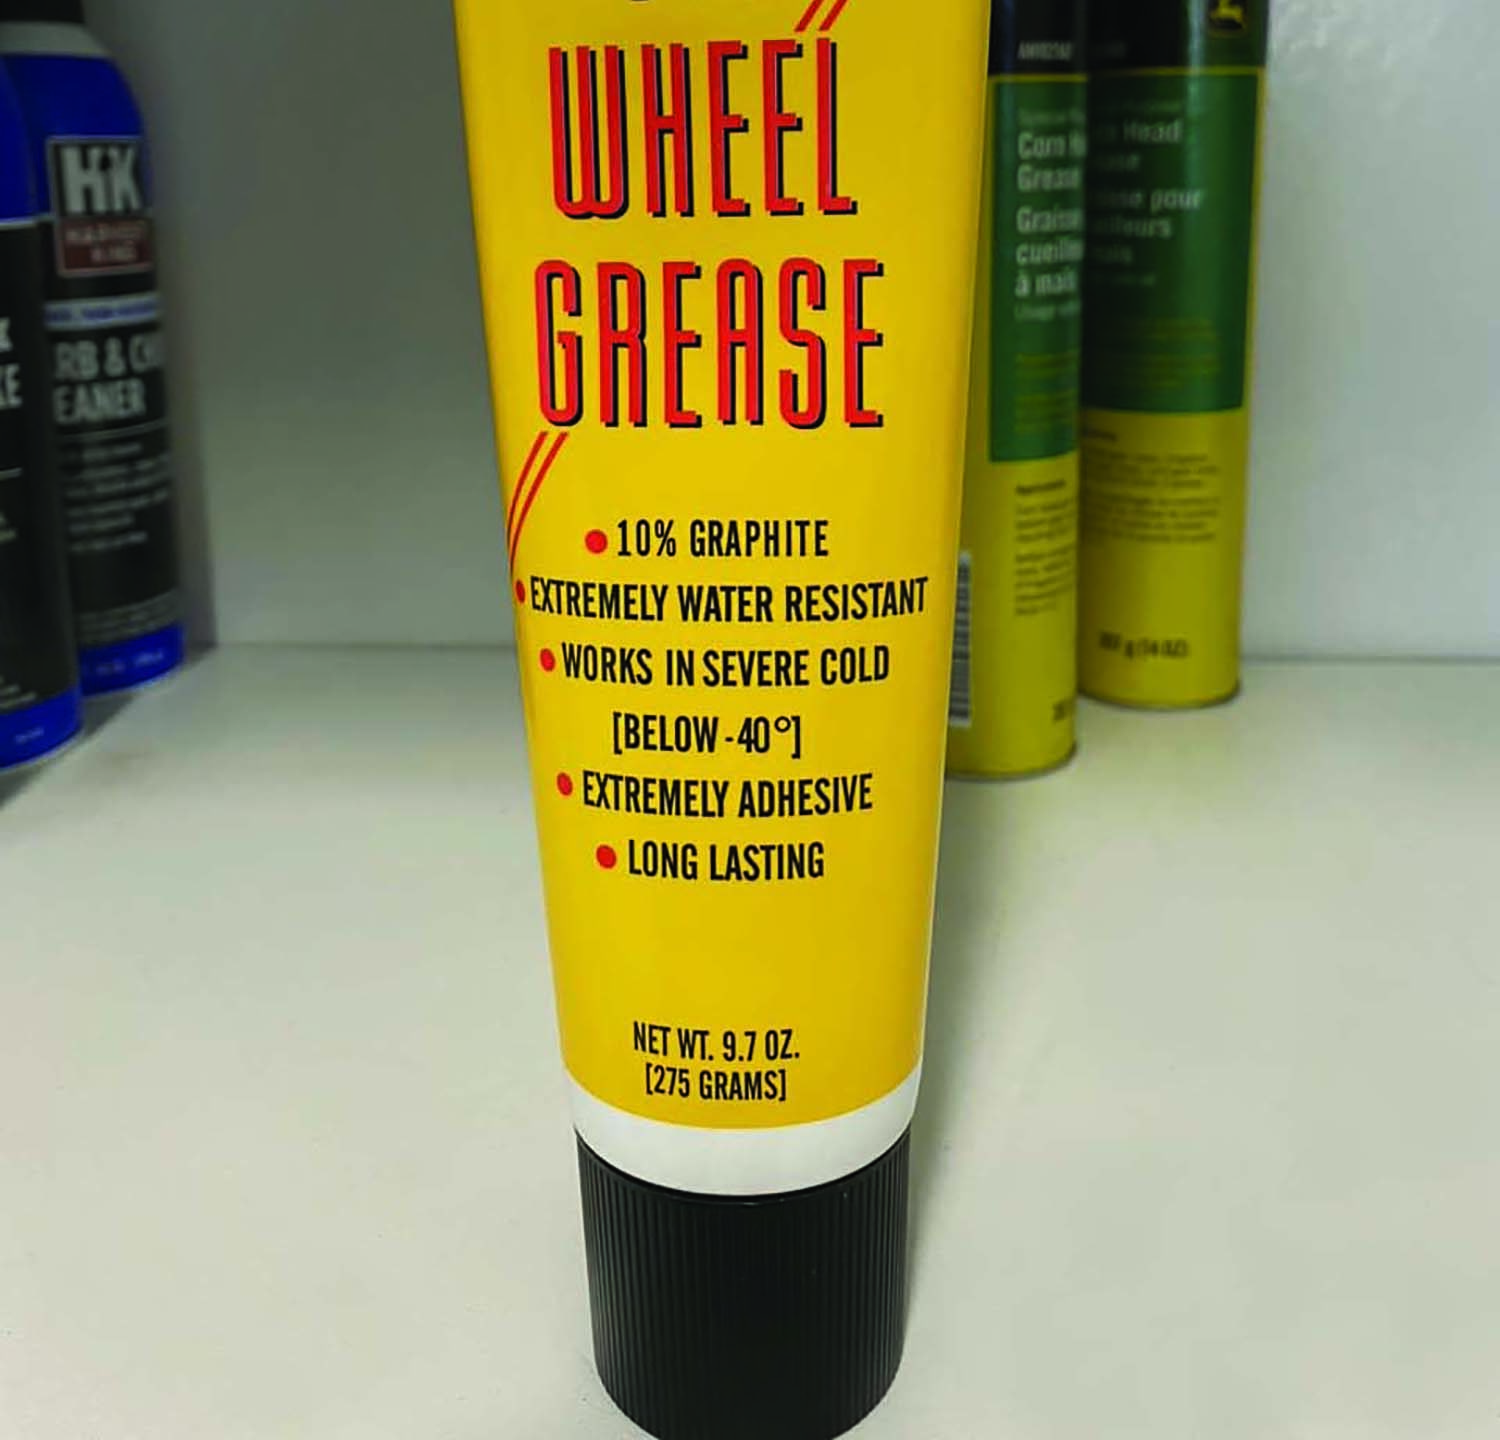
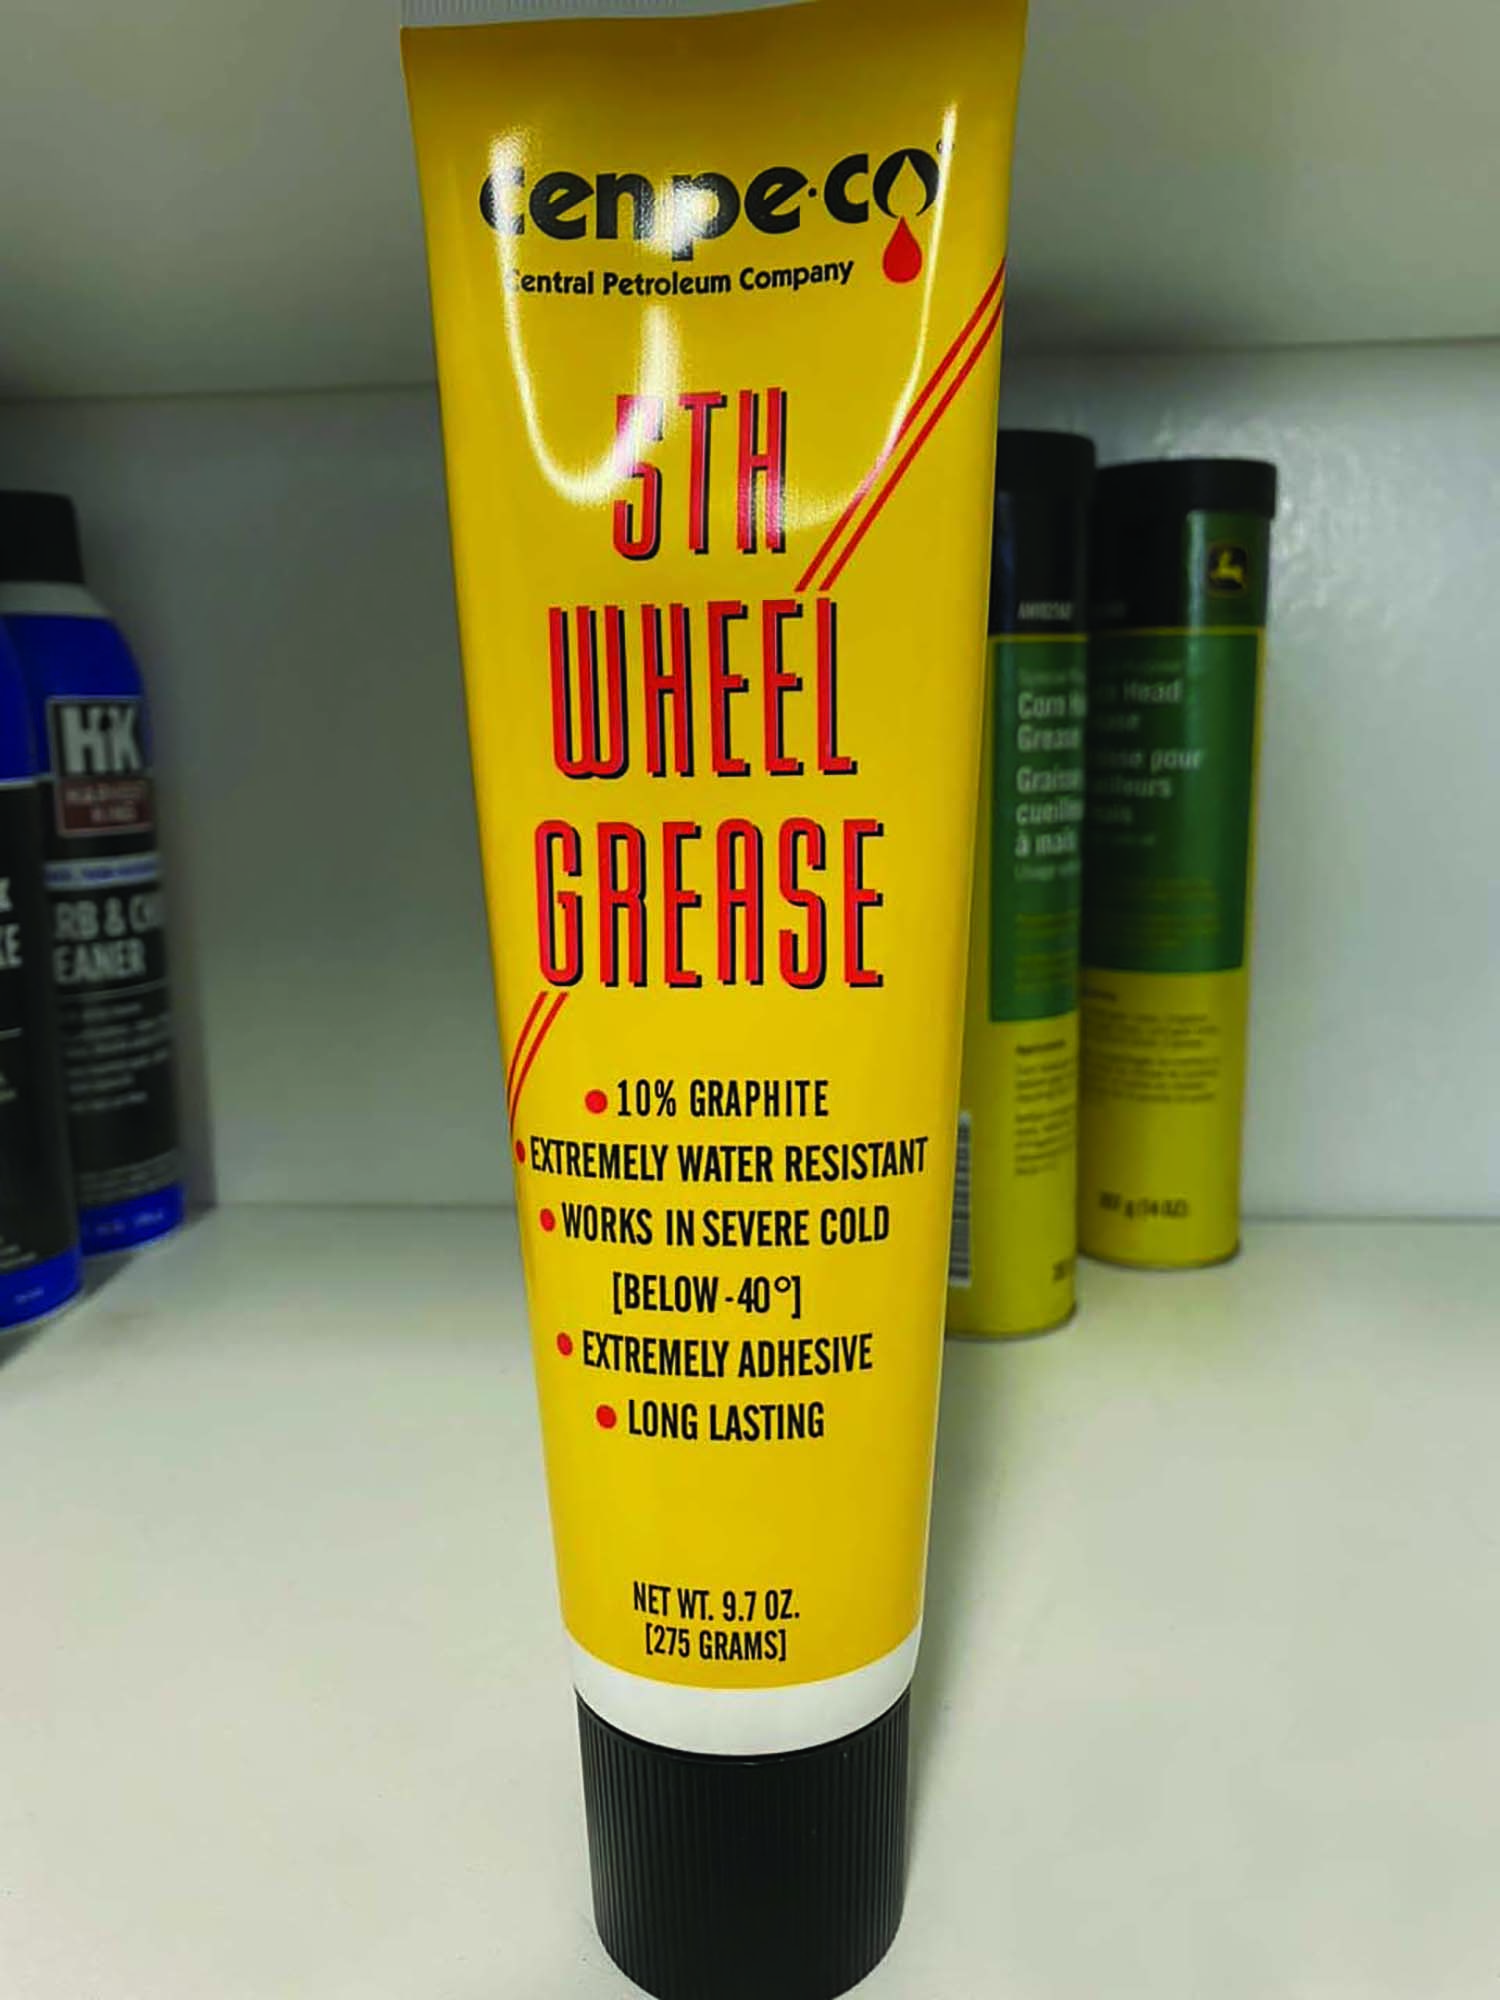 This grease product is being sold as "extremely water resistant." Can you also describe what other characteristics the grease offers?
 10 Copper Corrosion Prevention Test
The copper corrosion prevention test determines whether the grease will deteriorate copper. Testers place a rectangular piece of copper into the grease for 24 hours at 100°F. Testers remove the copper plate, wipe o›ff the grease, and wash the copper. They then visually compare the surface of the copper to a color chart to describe any observed effects.
Why This Test Matters: Many components are made with copper or copper alloys. This is an important test to determine if the grease will harm yellow metals.
11 Oxidation Stability Test
The oxidation stability test measures how well steel is protected against aging. Oxidation is the reaction of oxygen with the ingredients in a grease. The negative byproducts of oxidation with grease results in the buildup of sludge, tar, and varnish on metals. Once a lubricant oxidizes, its ability to protect equipment decreases. It may no longer have the film strength it requires, and it won’t be able to separate surfaces as well. The results from the oxidation stability test are scored as pass or fail.
Why This Test Matters: It is important to know about oxidation, because it can greatly influence lubrication intervals. For instance, a lubricant may oxidize at one-third the rate of another grease, which means the first grease could have a lifespan three times longer than the second one under the same conditions.

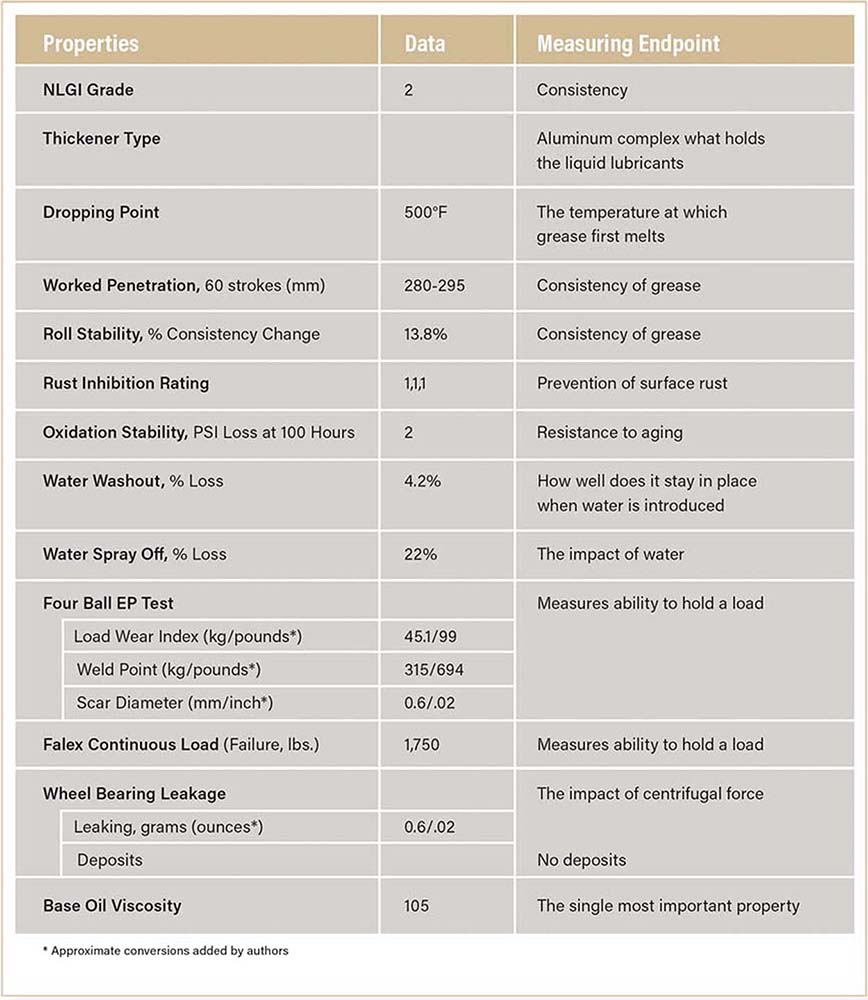
Developing a Product Data Sheet
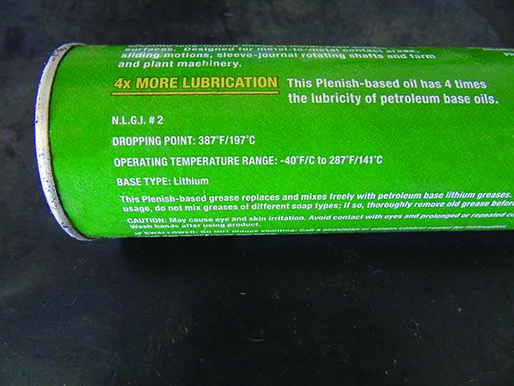
Manufacturers do an excellent job of describing the properties of their greases in product data sheets. The data from their testing is readily available through websites, catalogs, advertisements, or packaging.
Select a Grease Based on Information, Not Packaging Advertisement
The data derived from grease testing reaffirms our comments at the very beginning of this publication about how complex the decision of selecting the best lubricant can be. However, just a basic understanding of some of the most important tests allows you to be better informed when selecting the most appropriate grease for your equipment. This is where the Product Data Sheet becomes such an important document for you to read.
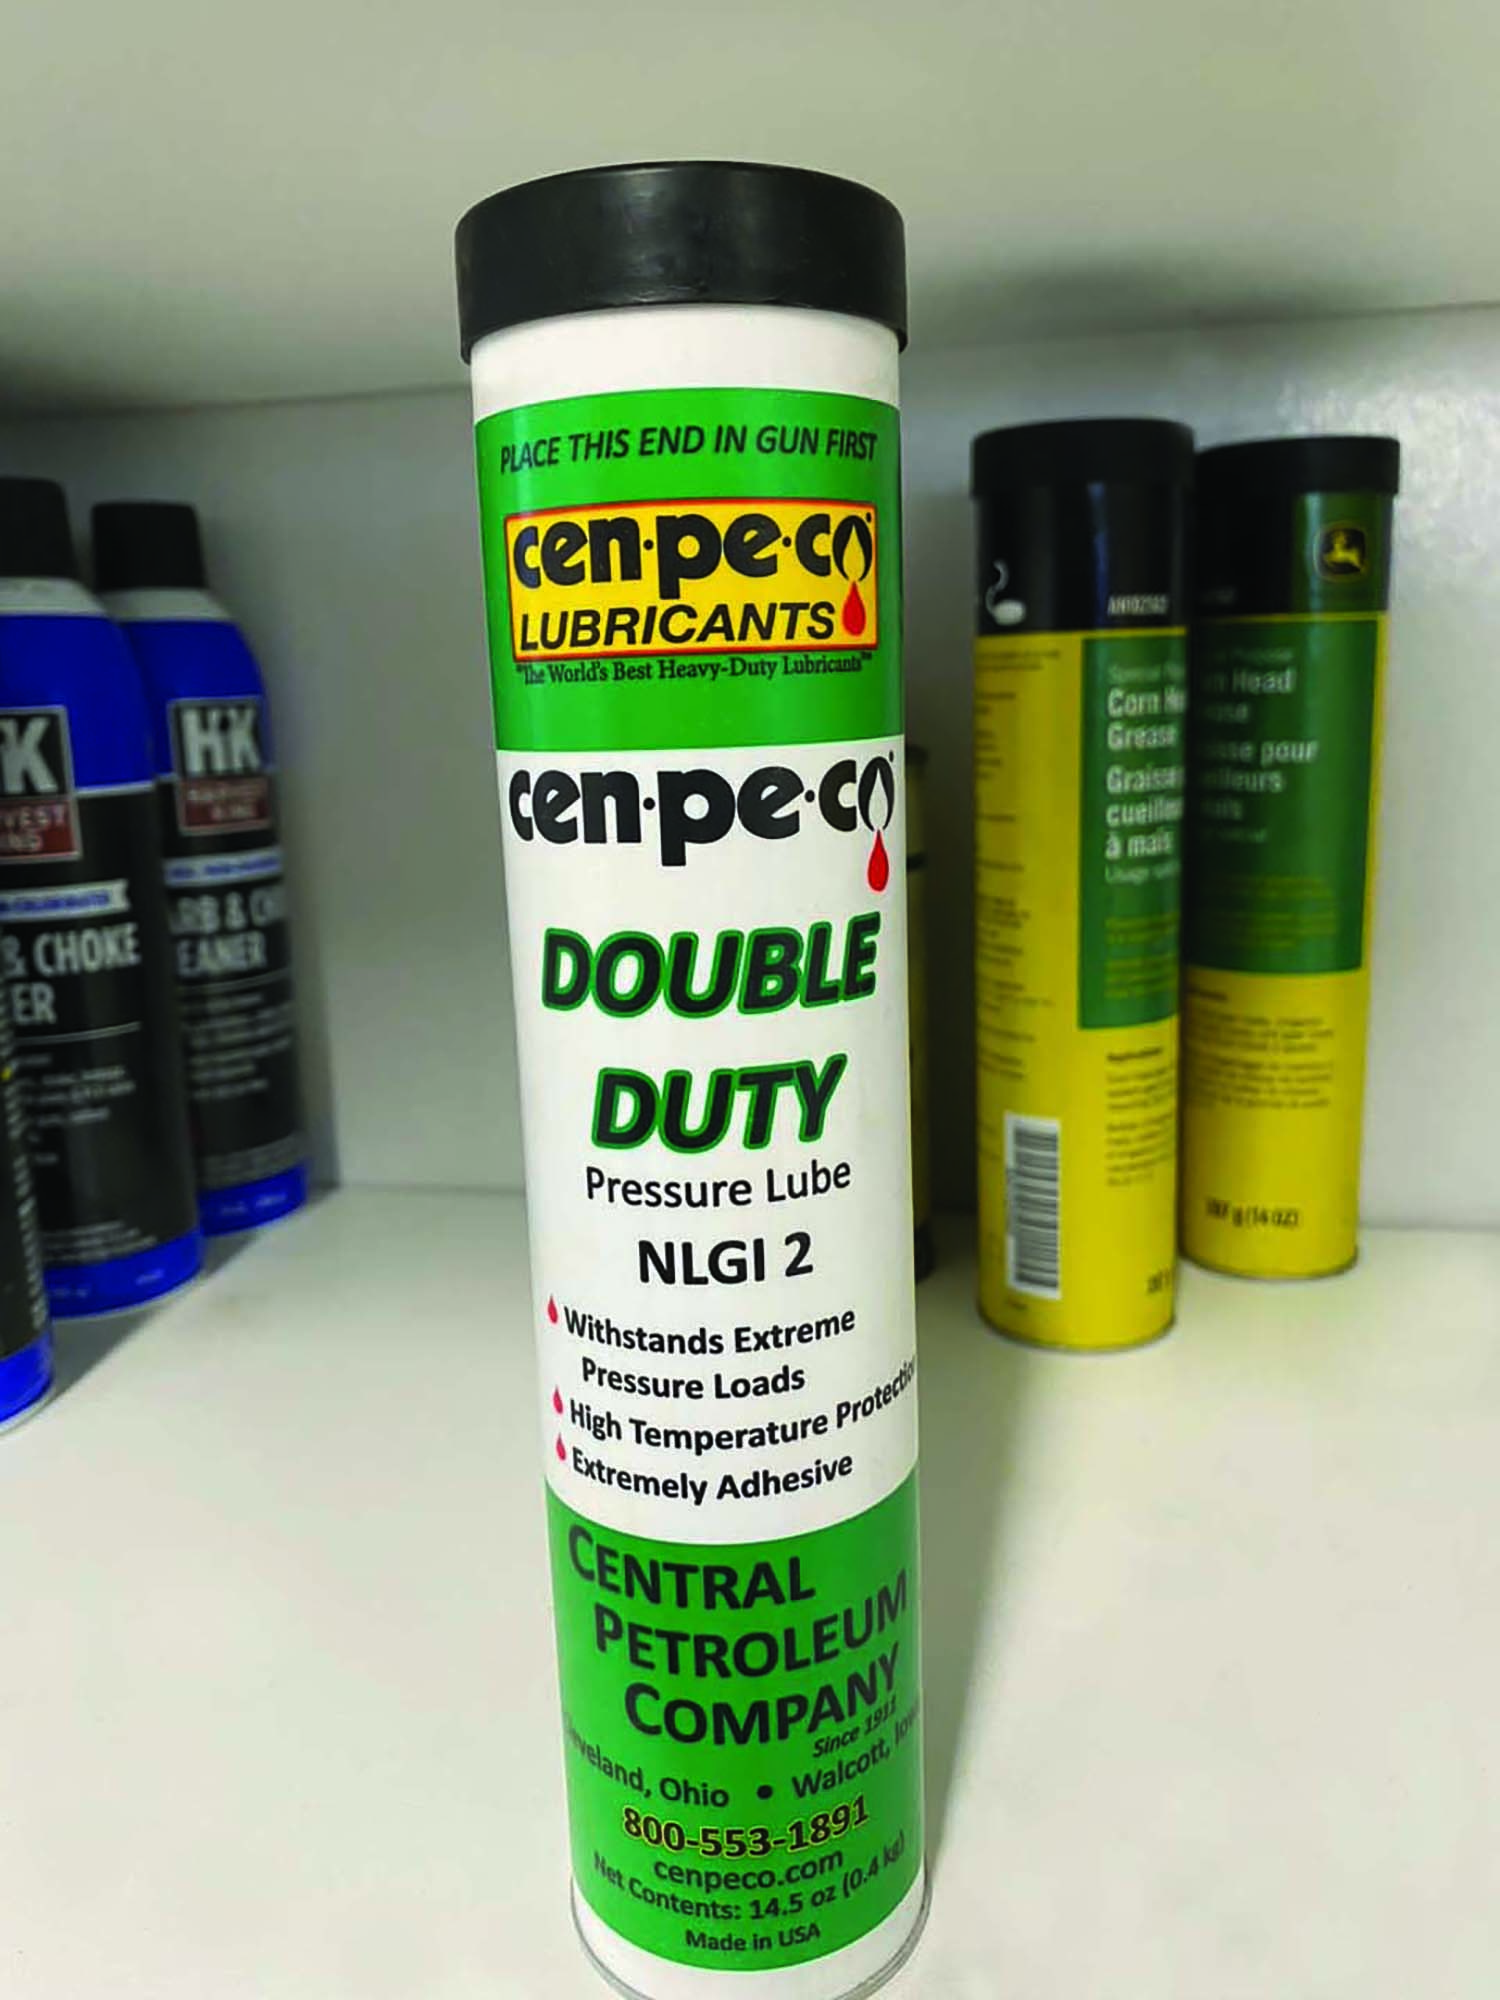
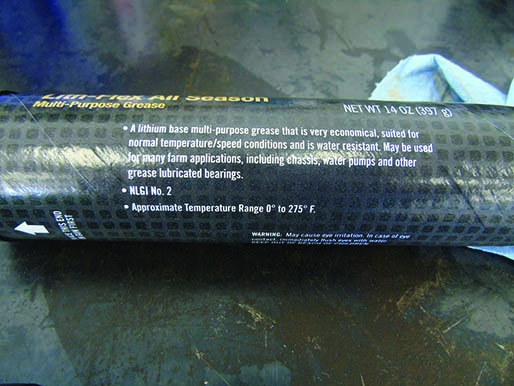
Grease labels, pamphlets, and websites often use descriptive phrases to communicate with the customer.
Common phrases include:
• Anti-seize
• Maximum surface protection
• Extreme pressure additives
• Good temperature stability
• Water resistant
• Extreme pressure grease
• Resist washout
• High-temperature protection
• Won’t pound out
• Withstands extreme pressure loads
• Extremely adhesive
• Long-lasting
• Works in severe cold
These phrases show us why product data sheets are so important when evaluating grease products — do the data support the claims? Product data sheets provide the numbers that underpin those very general statements.
And for sure, two products can say “Withstands extreme pressure loads,” but test results may show that one product is superior to the other. The test results found on product data sheets also allow end users to rely on data instead of guesswork and marketing lingo to select greases that better meet the needs of their equipment and intended use. An example of a product data sheet is presented below with a general description of what is being measured.
Food Grade Grease
Grease used around equipment that handles fresh and processed foods needs to be certified as a food grade, nontoxic product by NSF International, which adheres to Food and Drug Administration and Environmental Protection Agency regulations. Depending on its use and potential contact with food products, a grease may need to have a food grade certification under these conditions:
1. The grease comes in direct contact with food, whether in the field at harvest or when processed.
2. The grease has the potential for incidental contact (like a bearing on a conveyor above another conveyor moving food products). If you over-grease the one on top, some grease could fall onto the lower conveyor.
3. No possible contact, but housed within a facility where food ingredients are stored or processed.
Select a Grease Based on Equipment Needs
What is the best method to choose a grease for equipment? There are three approaches you can use to select the best grease for an application, each with its own strengths and weaknesses. We describe these approaches below.
1. Follow Specific Brand Recommendations in the Owner’s Manual
Equipment manufacturers use theoretical calculations and engineering principles to determine the best grease and additive combination for each equipment type. Next, they test and evaluate those greases in working equipment. Based on the evidence they collect from the equipment trials, manufacturers may modify the grease specifications and retest.
Grease Recommendations Based on Normal Use
Grease recommendations from equipment manufacturers are based on many factors, including load, speed, use, and working environment. Manufacturers are guided by an understanding of how their equipment is normally used to make their grease recommendations in owner’s manuals. When equipment operates outside of “normal” — in colder or hotter environments, at higher or lower speeds, in drier or wetter conditions — then those “normal” use recommendations may not be the most appropriate grease to use.
There is a lot of work behind the scenes to support the grease types that manufacturers recommend. The main upside of using the specific brand manufacturers recommend is that you know it will work to protect the equipment. The downside is that those proprietary greases may not be locally available and they often cost significantly more.
Do I Have to Use the Recommended Grease to Keep the Warranty?
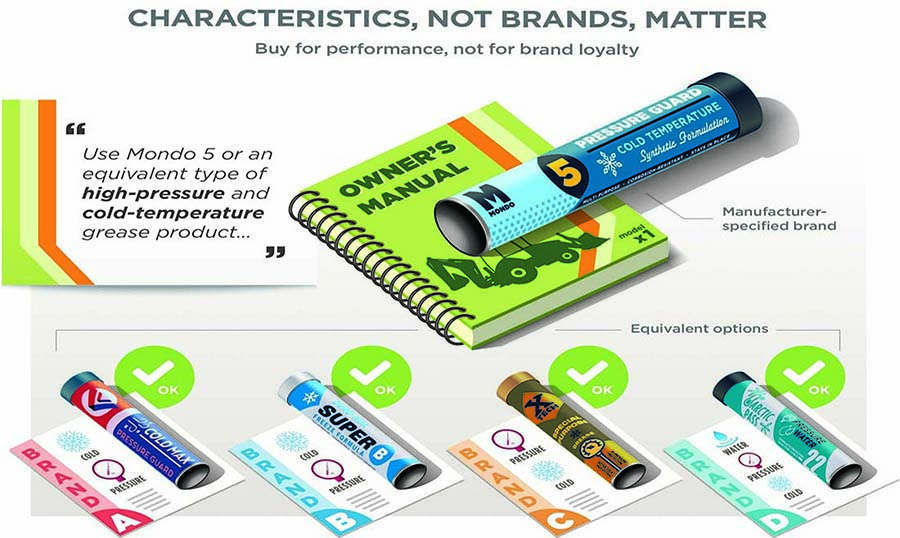
Owner’s manual recommendations often list a specific brand of grease with certain specifications. However, the Magnuson-Moss Warranty Act of 1975 prevents manufacturers from voiding warranties when end users apply a different brand than what is recommended as long as the substituted grease has the characteristics specified in the recommended product. It is the characteristics of the grease that matters the most, not the brand.
2. Work with a Grease Distributor to Consolidate Inventory
Imagine having ten pieces of equipment, and for each one, the manufacturer suggests their proprietary grease. Having so many different grease types in inventory can create problems with incompatibility among the products, the need for more than one grease gun, and higher costs associated with proprietary products. Most farmers and industry professionals would rather manage fewer than more grease products in inventory.
One method for selecting the right grease is to work with a local or regional grease distributor to help you consolidate grease products. Make sure to have copies of the grease recommendations from the various owner’s manuals and a list of the current greases being used, so the distributor can compare their products. The upside beyond having fewer products is that the greases may be readily available.
3. Decide for Yourself Using Product Data Sheets
This method of selecting the right grease requires you to develop a working knowledge of what the results printed on product data sheets mean. You need to understand how the tests are performed (as described earlier in this publication), what the values mean, and something about the chemical makeup of the grease. When you have concluded your evaluation, it would be wise to contact the manufacturer of the grease you selected to make sure they also agree with your decision.
Better to Do Nothing Than to Grease Machinery Wrong
You might be surprised to learn that case studies clearly point out that using a grease improperly can create more problems than if you did nothing at all. Tests often reveal surprising results when two identical pieces of equipment are compared — one incorrectly greased and the other not lubricated at all. It is often the case that the one that is not lubricated can last longer than an identical piece of equipment that was improperly greased. An application that over-greases or uses the wrong grease can hasten how quickly a piece of equipment wears and breaks down.
The Art and Science of Grease Application
Choosing a grease with characteristics that protect equipment long-term is obviously an important first step. However, that “perfect” tube of grease is of little value if you do not use it properly. This is why it is equally important to better understand how grease fittings work, how to properly use a grease gun, the amount of grease to add, and how often you need to grease fittings.
 Over greasing bearings can cause grease to build up on the outside of the bearing, which attracts dirt and grime. Excessive dirt in the inner parts of a bearing will cause the bearing to wear prematurely. Review equipment service manuals and perform the scheduled maintenance on your equipment so you know when bearings should be serviced, lubricated, or replaced. Some bearings operate in dirty environments and require frequent lubrication to maintain the function of the equipment.
 Types of Grease Fittings
The external designs of grease fittings have many variations, including:
• Metric vs standard
• Straight tip vs angled tip
• Straight body vs tapered body
• SAE thread vs NPT
• Thread lengths
• Steel vs brass
• Threaded vs pressed-in fittings
However, you can assign all of these design variations and combinations (more or less) to two common styles in agricultural equipment and the commercial pesticide application industries: grease nipples and button-head fittings.
The most common fitting, by far, is the grease nipple (generically called a Zerk fitting), which has a protruding nipple. The grease nipple represents about three-quarters of what is commonly used to grease equipment.
A second type of grease fitting is the button-head fitting, which accounts for much of the remaining market. Manufacturers use button-head fittings when high volumes of grease are needed.
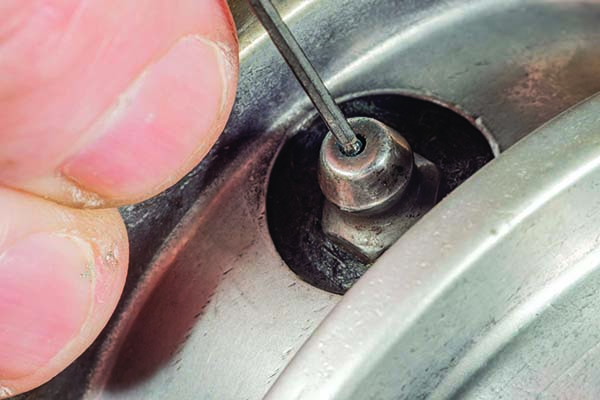
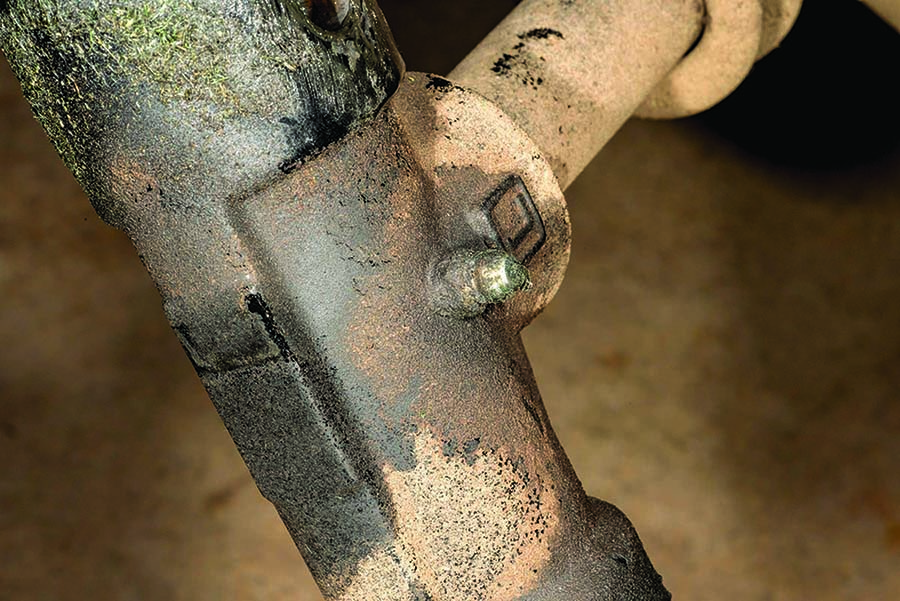
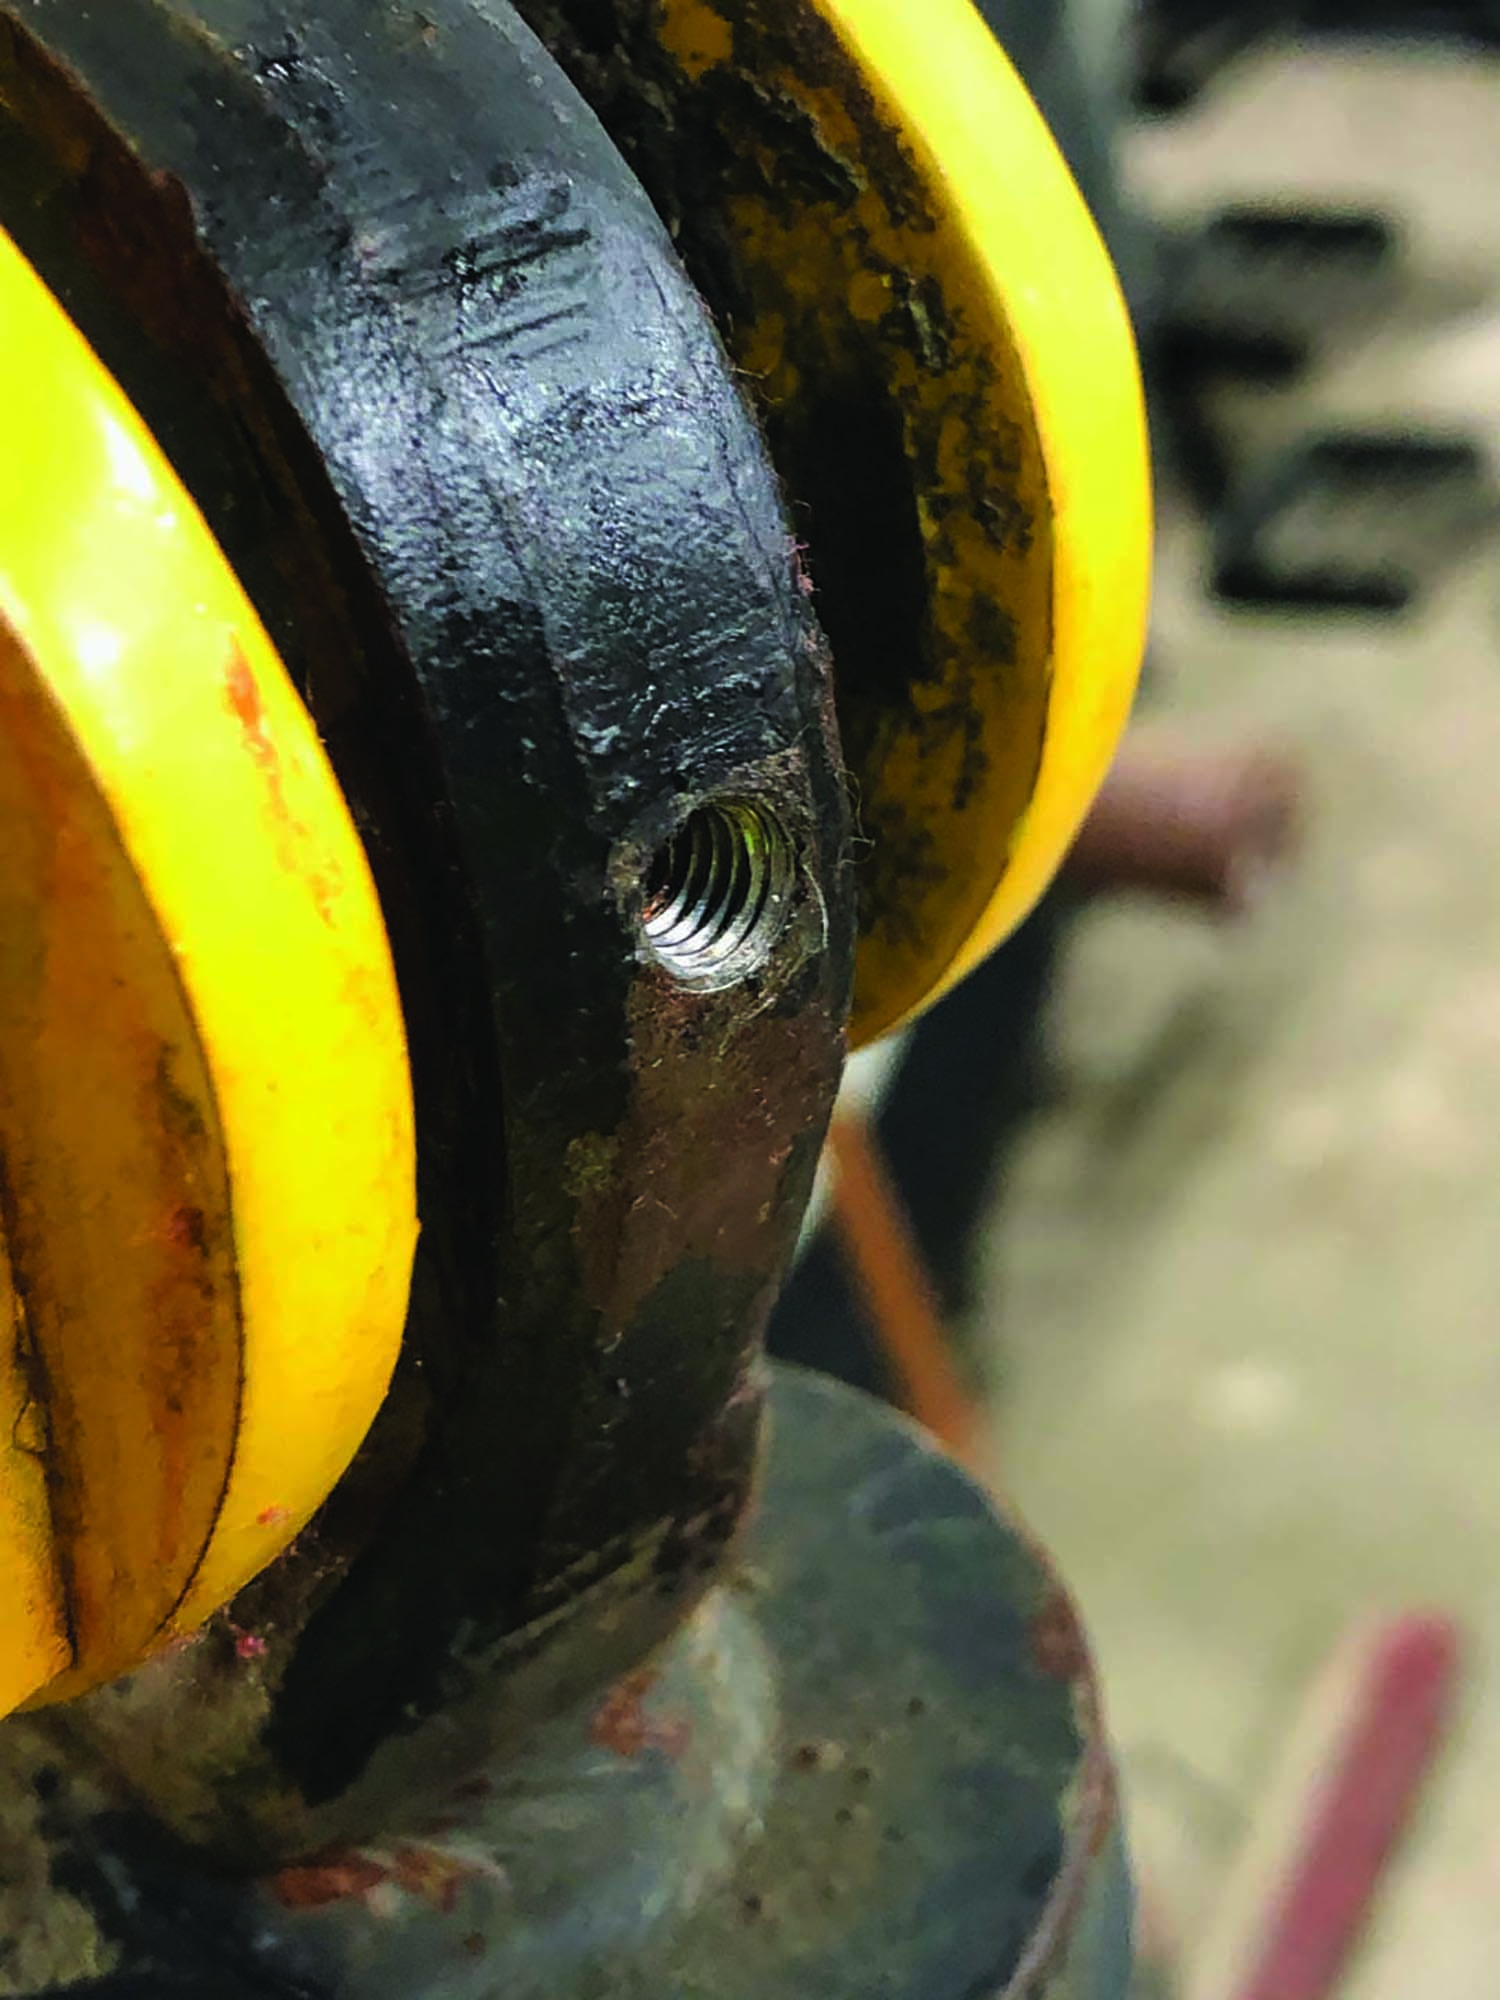
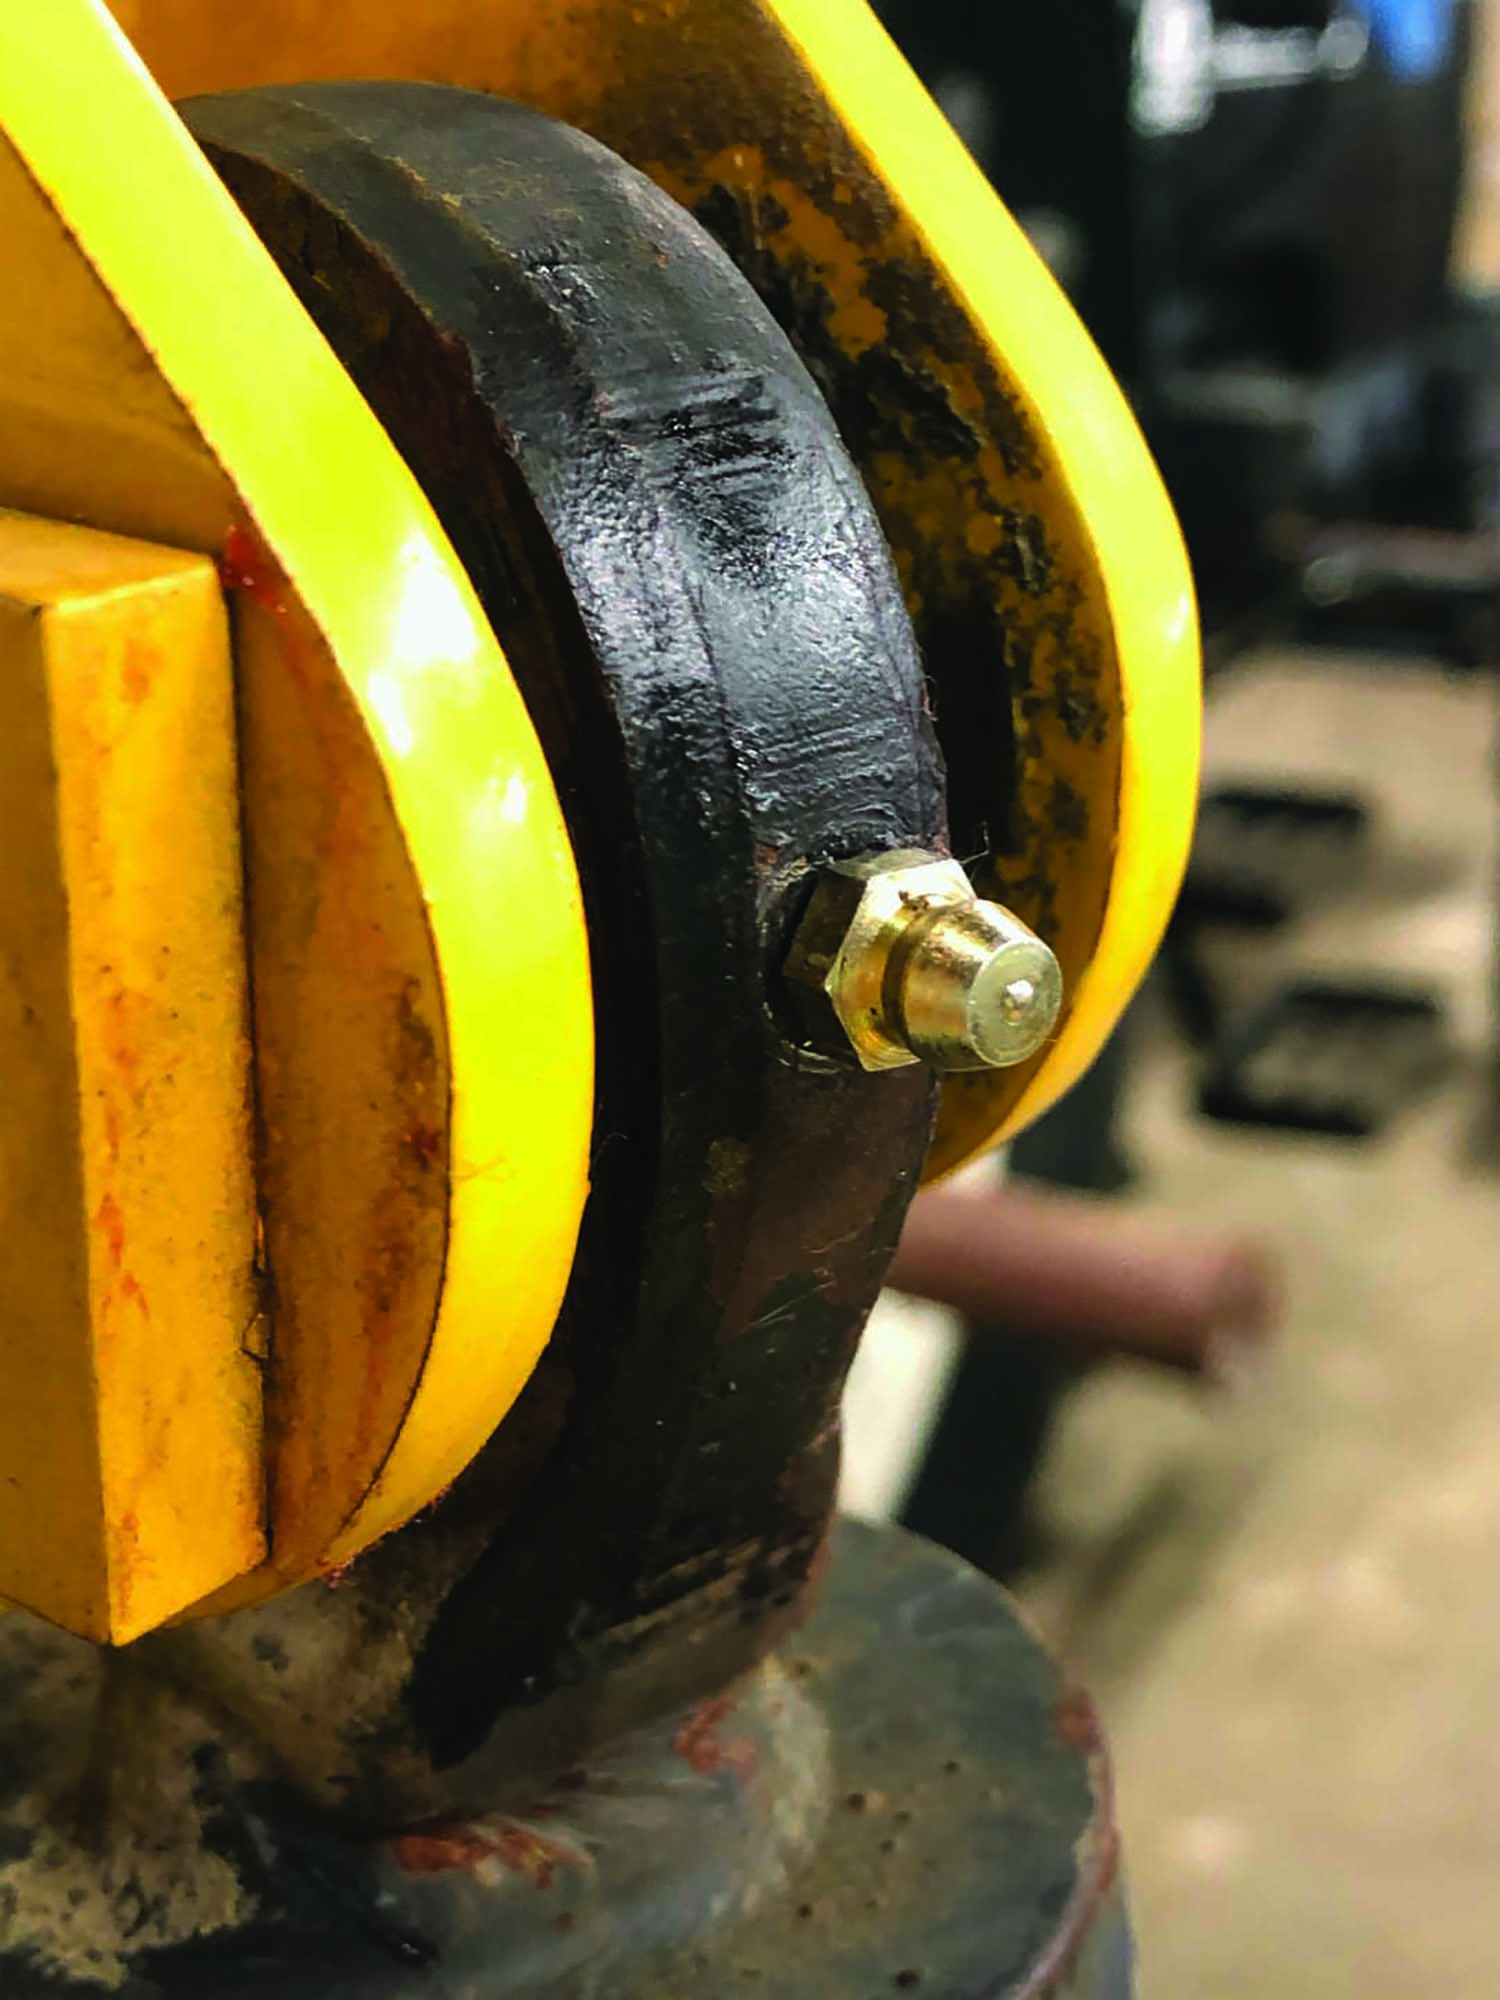
The Inner Workings of a Grease Fitting
A fitting is a permanent (but replaceable) fixture that provides a direct channel for grease to access internal machinery parts. When you apply a grease gun to the outside nipple and activate the lever, the pressure from the grease gun forces down a ball that sits on a spring. The new grease is then pushed into the channel. Once you remove the pressure (as when you remove the hose from the nipple), the spring pushes the ball back to its original closed position, much like how a check valve operates. The internal spring and ball work together to serve as a mechanical shield to keep dirt and water out of the channel and keep the grease inside.
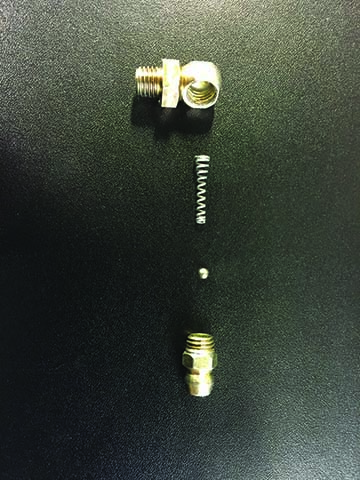
Grease nipples (also called Zerk fittings) are spring loaded to allow forced grease in, while preventing contaminants from reaching the bearings. The spring-loaded ball seals the fitting in most situations until the next time you add grease with a grease gun. The design is also more adaptable to various angles, straight, 45- and 90-degree to name a few. This allows easier access in many applications.
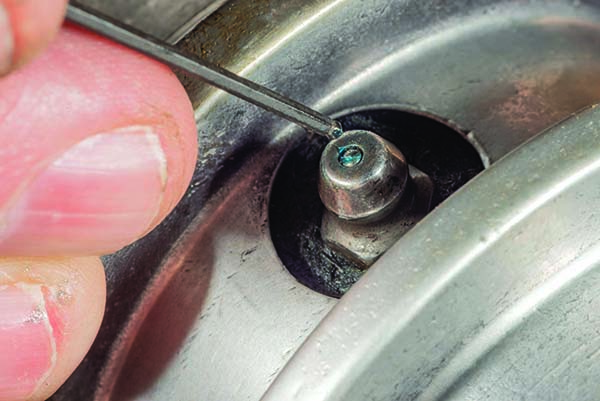
Understanding how the spring and ball operate as a unit, makes it clear that dirt and debris can prevent the opening from sealing completely. If you place a grease gun over a dirty fitting, the pressure from the gun can force the debris into the channel and cause significant wear problems for moving parts.
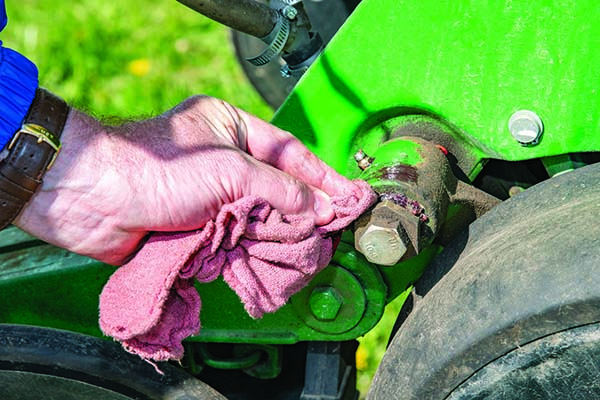
To prevent unwanted contaminants from getting inside the grease channel, you should always clean each fitting before placing the grease gun on the Zerk. You can easily clean the fitting with a clean rag or shop towel.
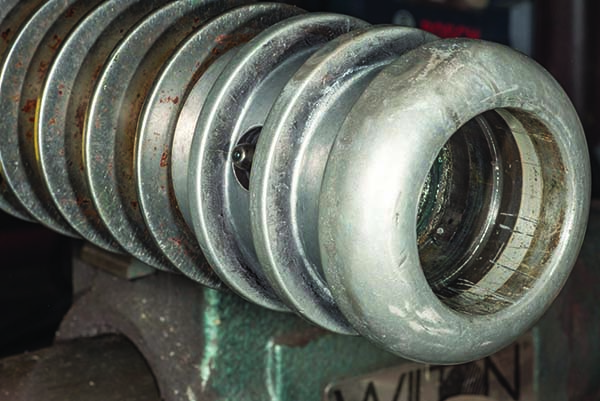
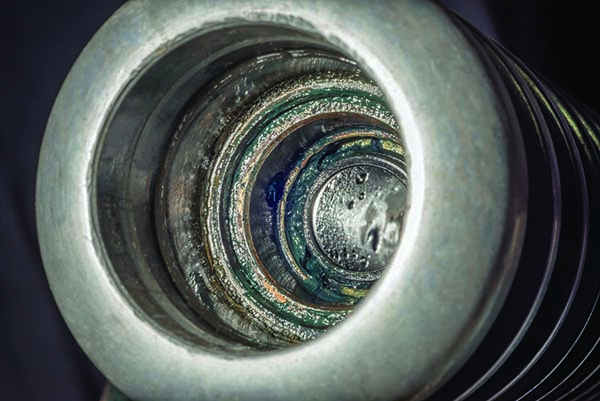
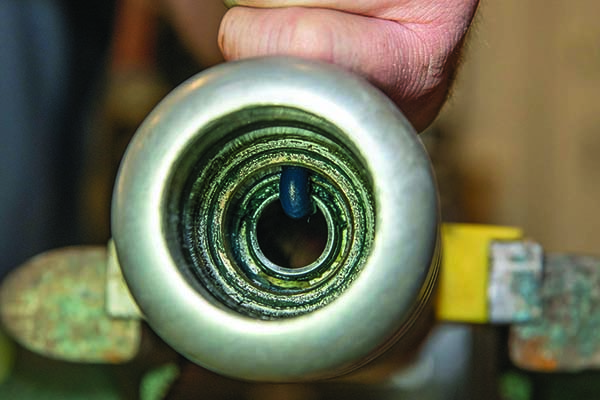
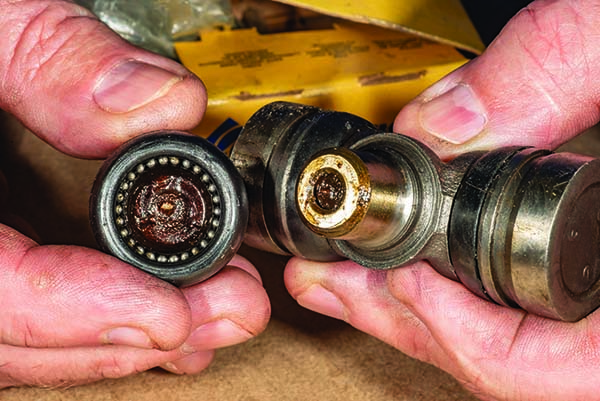
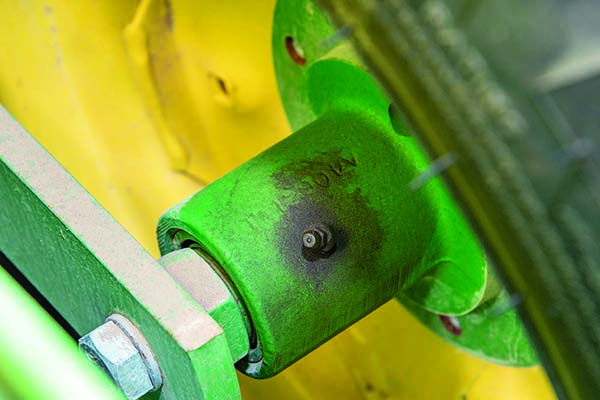
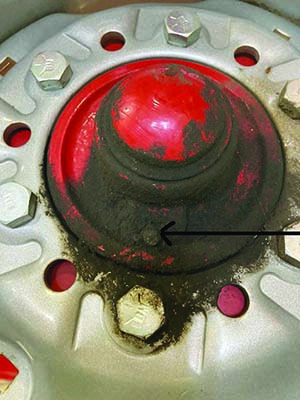
The bearing has been removed from this turf mower roller to show (top) the nipple on the outside, (middle) the hole on the inside, and (bottom) the grease entering the cavity where the bearing would sit.
Find Grease Fittings on Equipment
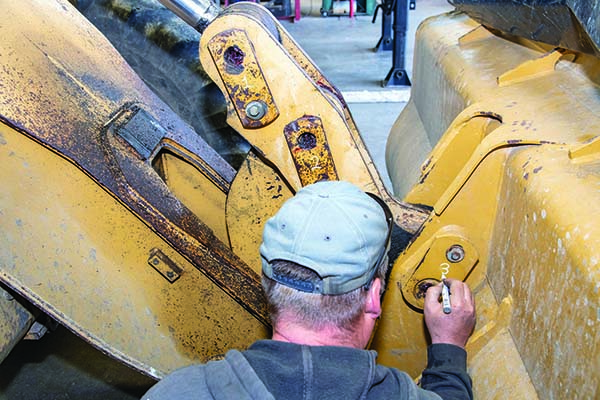
A person can routinely lubricate the same piece of equipment, over and over without realizing that there are possibly “hidden” fittings that they missed until a joint or bearing freezes up or fails. Many times, it is easy to overlook or skip lubricating one or two grease fittings when the equipment has dozens of fittings.
To reduce the likelihood that you miss a fitting and not grease it, it is helpful to make a copy the diagram from the owner’s manual that shows the locations of each fitting. Keep in mind that not all grease fittings need to be lubricated the same. For instance, one part of the machine operates all the time, while another only operates part of the time. Be sure to check the manual to correctly lube the Zerks that need lubricated (that includes how often and how much).
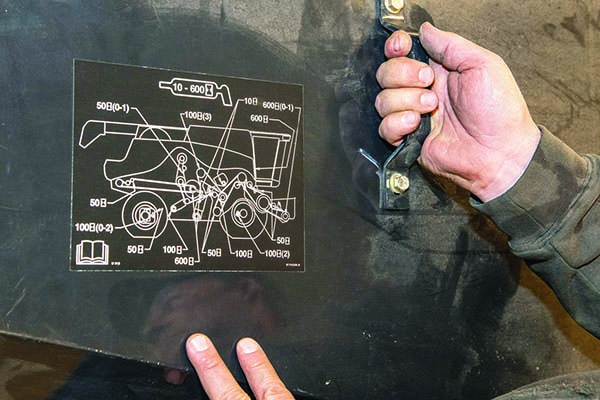
In some cases, manufacturers permanently stamp a diagram on the equipment. Each time you grease the fittings, simply record the day you greased them and place a check box next to each fitting to ensure you do not miss any. You can also use this dated diagram in case warranty issues arise at a later date.
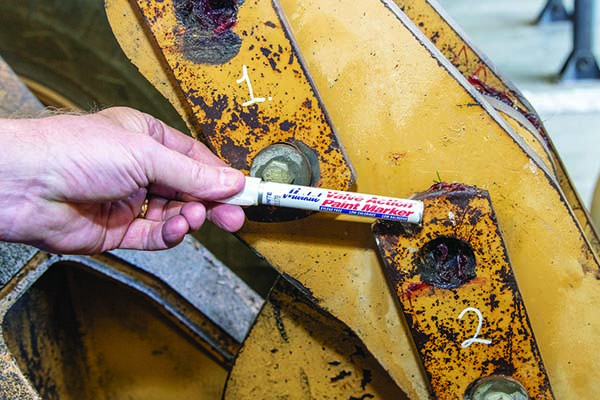
One can also paint or use a marker pen to highlight the Zerks to find them more easily. You could also use a numbering system, starting on one side of the piece of equipment and working around to the other side. That will also help you from missing or skipping one or two Zerks.
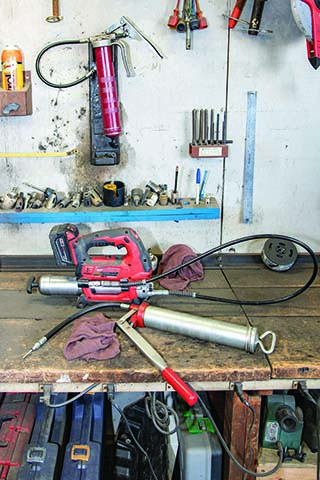
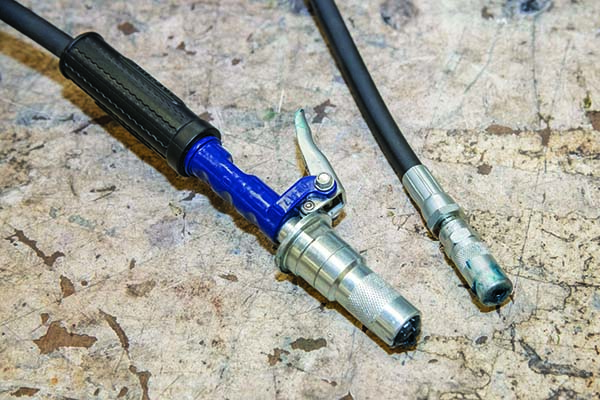
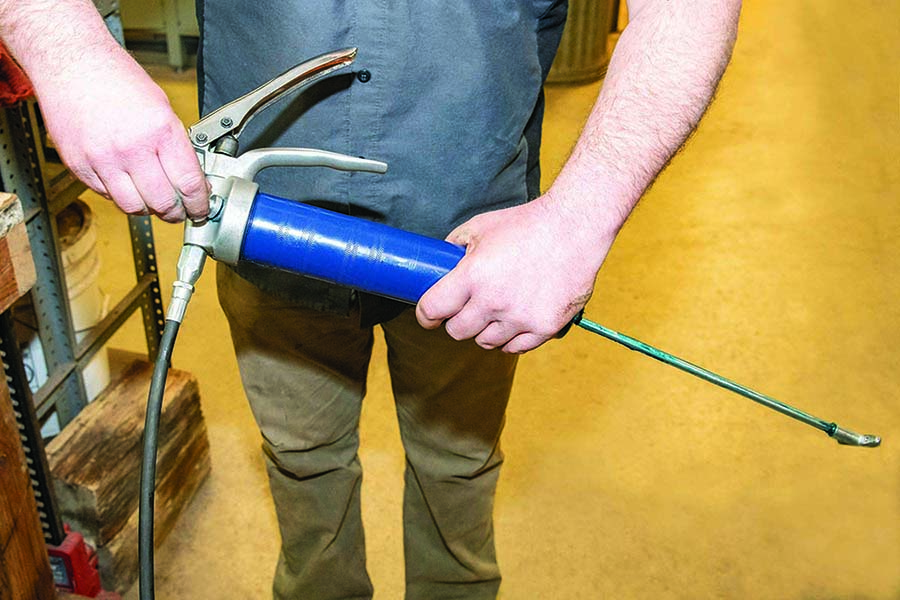
(Top) Grease guns can be manual, electric, or air-powered. Two different style fittings. A locking mechanism connects to the Zerk without using hand pressure (top right, bottom let). A traditional fitting requires hand pressure to keep it connected to the Zerk (bottom right).
Types of Grease Guns
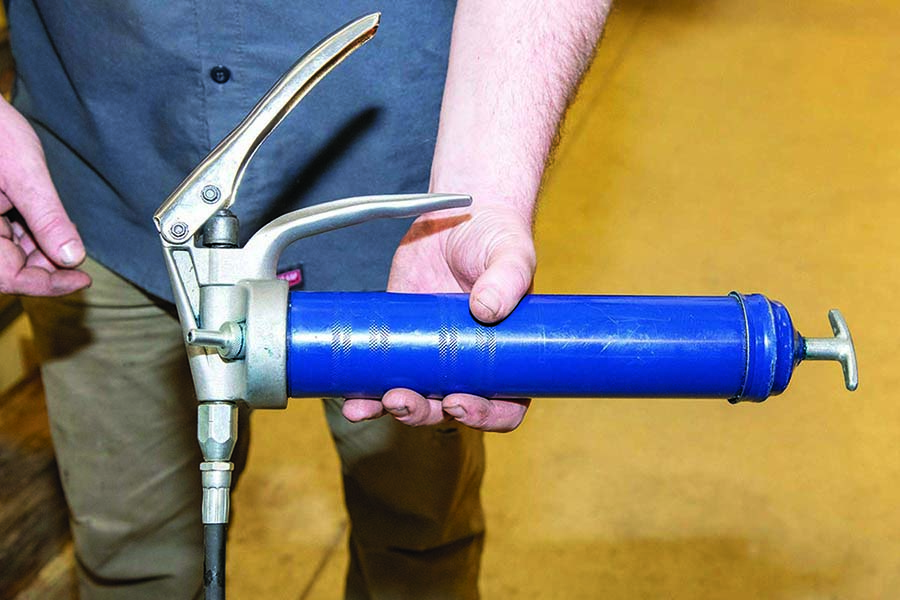
There are several different types of grease guns available, but they are similar in that they all use pressure to force grease out of the tube and into the fitting. Two common manually operated grease guns include the lever gun and the pistol-grip gun. There are also power-equipped guns that use batteries and pneumatic compressed air.
Apply the Right Amount
“How much grease is too much?”
It is important to answer that question before pumping grease into any fitting. The answer on how much to apply largely depends on how much grease does the gun apply and whether the grease is being put into a bushing, fitting, or an unsealed bearing assembly.
“How much grease should I put into a bushing or a steel pin in a sleeve?” is a much easier question to answer.
How Much Grease to Use?
Your father or grandfather may have taught you to pump enough grease so that it comes out of a bushing or seal. If we are discussing a pivot point or a pin and bushing, then putting in enough to force out any excess grease works well. If the application in question is a rotating bearing, filling the entire space with grease can lead to serious problems including churning, increased friction and heat, and blowing out the seal or shield. Once the seal is damaged, it no longer prevents water and dirt from penetrating the inside of the bearing assembly.
Overfilling an unsealed bearing assembly, in the view of many, is just as bad as not greasing the bearings at all.
 In with the new, out with the old.
 Bushings typically have limited range of motion. You should pump grease until the lubrication is pushing out from the edges — meaning that the space within the bushing is filled near capacity. Other than wasting a little grease, contaminating the outside of the bushing, and cleaning off› the excess, you literally cannot over lubricate most bushings.
 1. Always start with a clean Zerk. Clean the Zerk fittings, pins, and bushing area.
 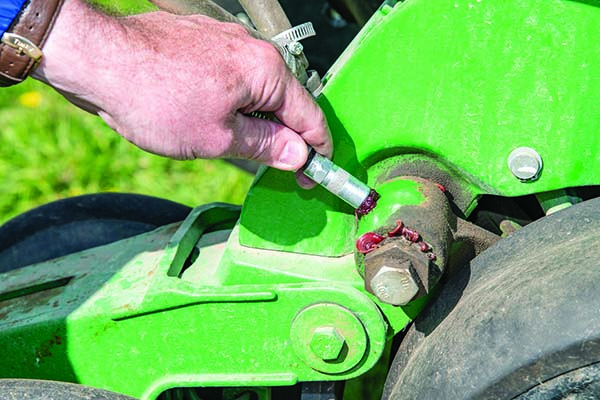 2. Apply the grease to push out the grease and dirt.
 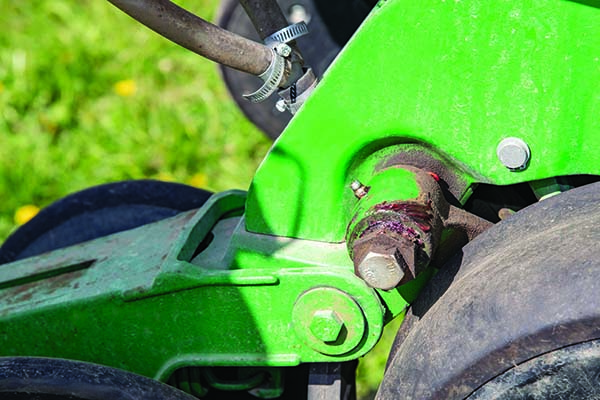 3. Wipe off old and excess grease to avoid attracting contaminants.
 With unsealed bearings, the amount of grease to add becomes a more critical and complicated question to answer. These bearings have higher revolutions per minute, more motion, work under higher temperatures, and deal with many other working issues that bushings don’t deal with.
Do not throw away the manual that comes with a grease gun, because it may indicate how many strokes of the lever are needed to get 1 ounce of grease.
It is important to understand that a bearing assembly should not be completely filled with grease. It requires a little math and following a two-step procedure to put the right amount of grease into a bearing assembly.
First, calibrate the output of a grease gun so you know how much grease (by weight) it expels with each full squeeze of the lever. To determine this, all you need is a scale and a grease gun.
Place a small cup on a scale and zero out its weight. Then, in the cup collect the grease pushed out from one full squeeze of the grease gun lever and record the weight. For example, one squeeze from a gun collected 0.00170 pounds of grease in a plastic cup. Next, convert the pounds into ounces — 16 ounces per pound x 0.00170 pounds is 0.027 ounces of grease per squeeze of the lever.
Next, take two measurements from the bearing assembly:
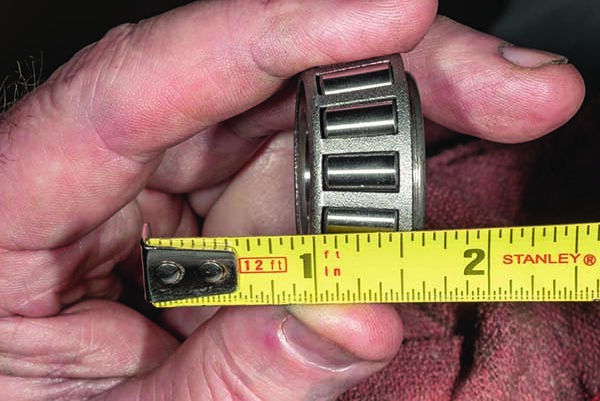 1. Measure the outside width of the bearing assembly in inches.
 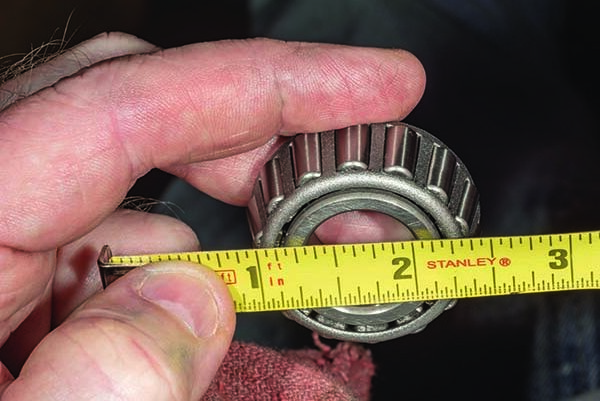 2. Measure the outside diameter of the bearing assembly in inches.
 An Alternative Method
Place a container on scale and tare. Slowly pump grease into the container, and count the full number of strokes required to get 1 ounce of grease. Divide 1 by the number of full strokes to get the amount per stroke.
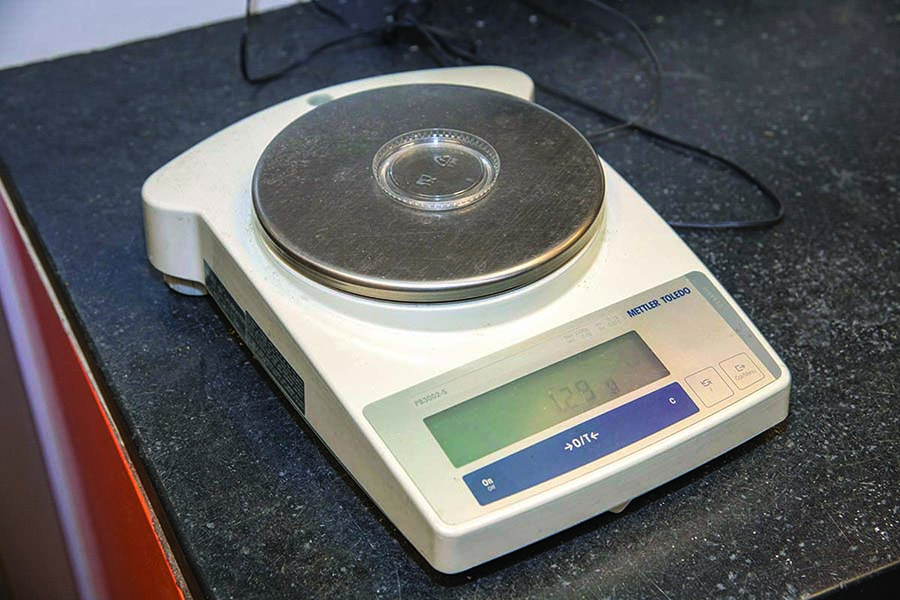 1. Scale with cup weight removed.
 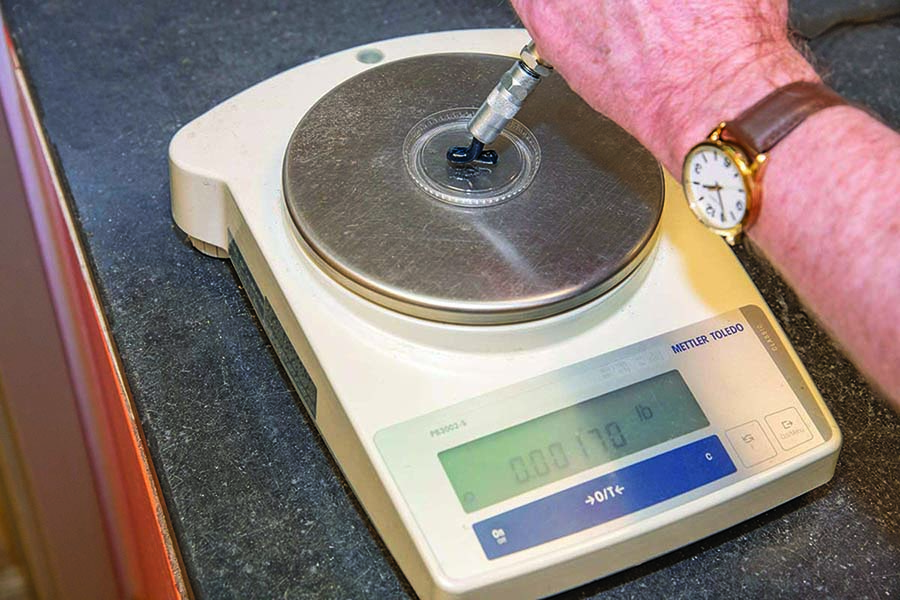 2. Pump one full squeeze of the grease gun into the cup.
 With these two measurements, you can use the following formula to calculate how much grease you need for that assembly unit:
0.114 x assembly unit diameter x assembly unit width = quantity of grease (in ounces) needed
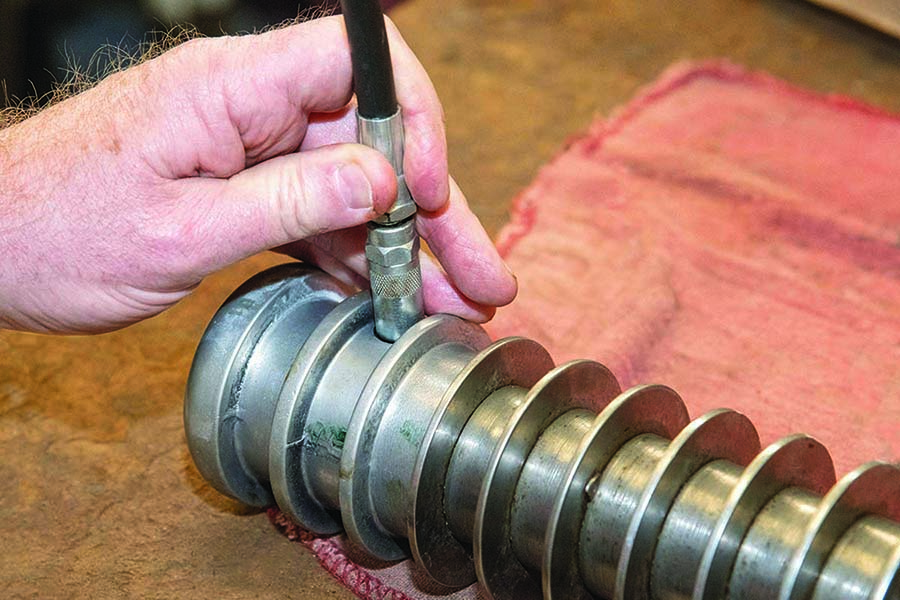
The bearing pictured on this page has a diameter of 1.2 inches and a width of 0.572 inches. Using the formula:
0.114 x 1.2 x 0.572 = 0.07 ounces of grease needed
The last step to determine how much grease to apply to a bearing or fitting is to compare the output of the gun to the amount needed in the assembly. The formula showed us that this specific bearing needs 0.07 ounces. The grease gun puts out 0.027 ounces per squeeze, so it takes about three squeezes to put in the right amount of grease (0.07 ÷ 0.027 = 2.59 — or about 3). Write this down for future reference.
Application Frequency
There are many factors involved in answering how often a bearing or bushing needs to be greased. Timing often depends on these variables:
• Size — the larger the component, the more frequently it needs to be greased
• Speed — the faster the operating speed, the more frequently it needs to be greased
• Temperature — the hotter the operating temperature is, the more frequently it needs to be greased
• Contaminants — the more dust and dirt in the operating environment there is, the more frequently it needs to be greased
• Moisture — the more water in the operating environment there is, the more frequently it needs to be greased
• Vibration — the more vibration in the operating environment there is, the more frequently it needs to be greased
Engineers will consider these and other variables to estimate how frequently a fitting needs to be greased and list it in the operator’s manual. However, the manufacturer recommendations are based on the average use for a piece of equipment. It is up to you to determine if you are working the equipment under extreme weather conditions (as you might find, for example, in Texas, Montana, Arizona, or Alaska). If you are working your equipment in more extreme conditions, then you will need to shorten the intervals between the recommended greasing times.
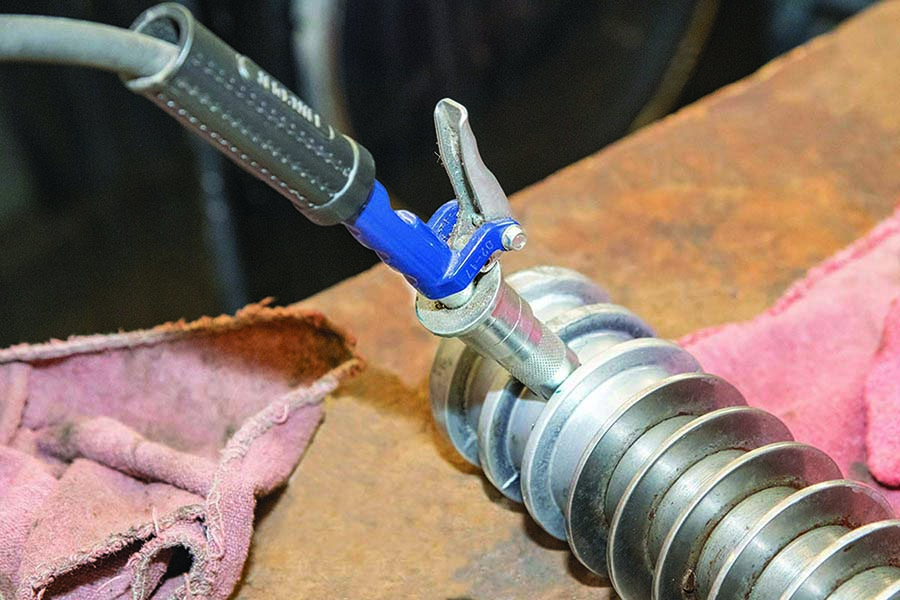
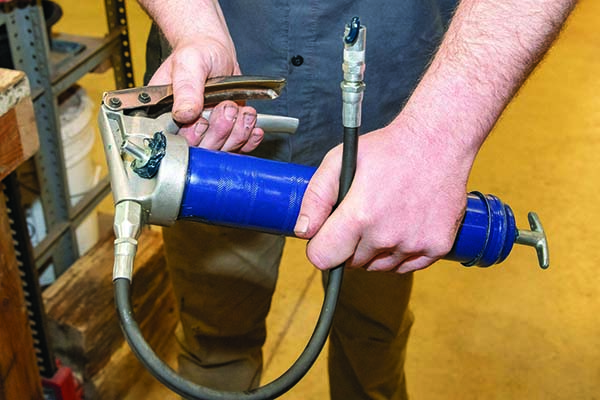
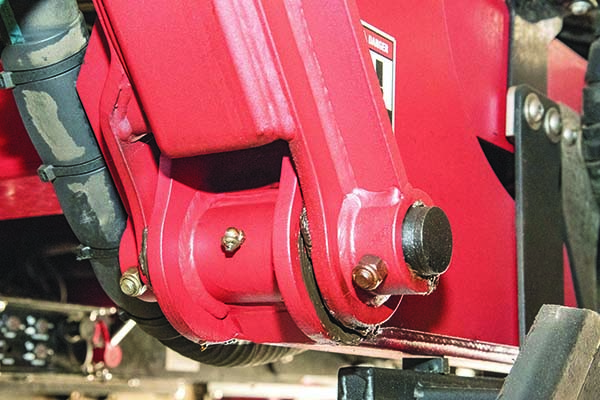
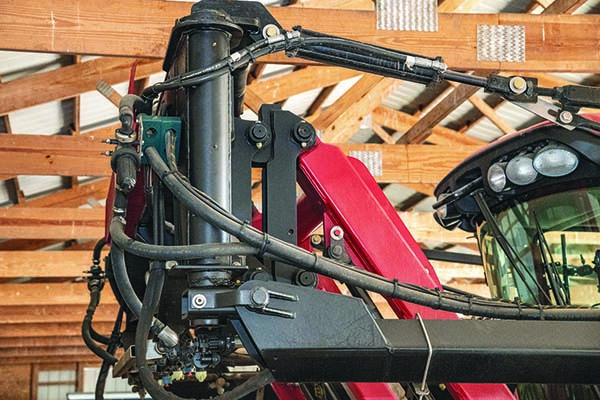
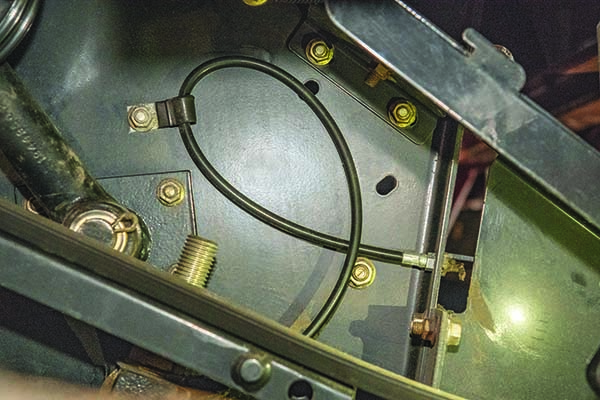 Some bearings are difficult to access for routine lubrication. High pressure hoses, similar to those found on grease guns, and a remotely mounted Zerk fitting make it easier to apply grease.
 Load and Apply
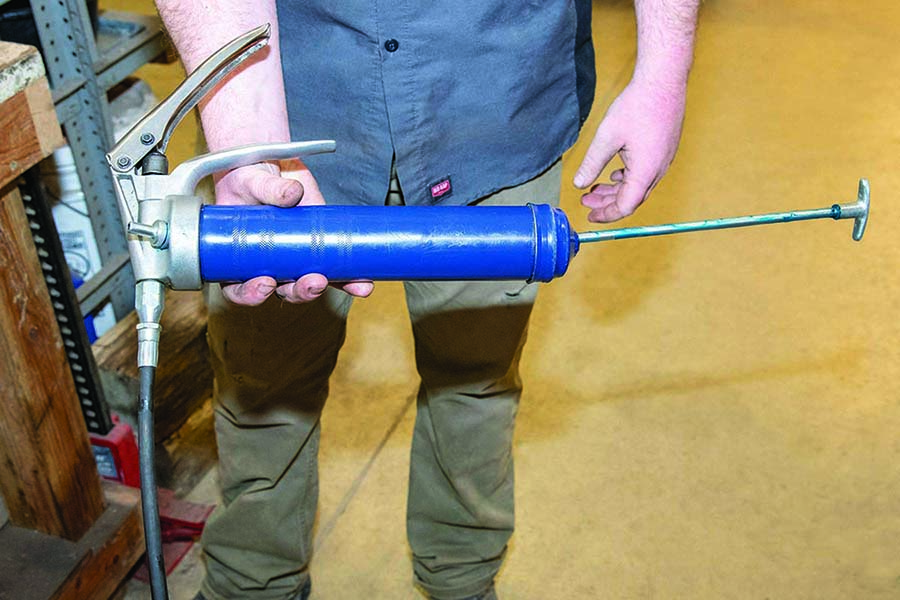
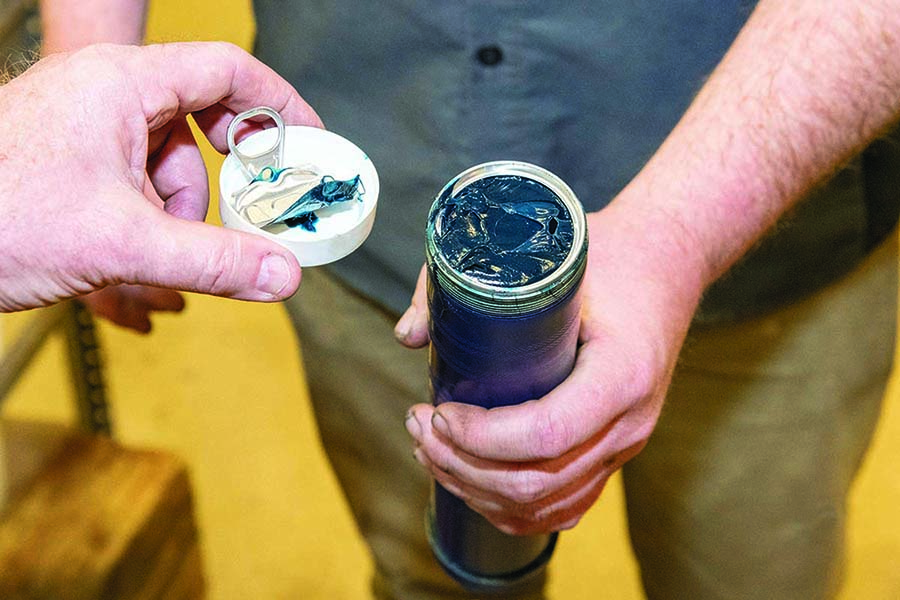
Loading a grease gun is fairly straightforward. Pull the plunger out toward you to lock the spring in place, and then unscrew the head of the gun. Pushing the plunger back in the barrel will usually partially pop the tube up so that it can be easily grabbed and removed. If the tube remains seated, grab and remove the tube with needle-nose pliers. Again, pull out and lock the plunger.
Just Shoot It Up!
Pushing dirt, dust, and water into a fitting and assembly is about as bad as it can get. Those contaminants get pushed right to the metal-to-metal contact area, which will reduce the remaining life of the bushings and bearings. You would be better off to let it run without grease until it dies than to introduce dirt and debris into the moving parts.
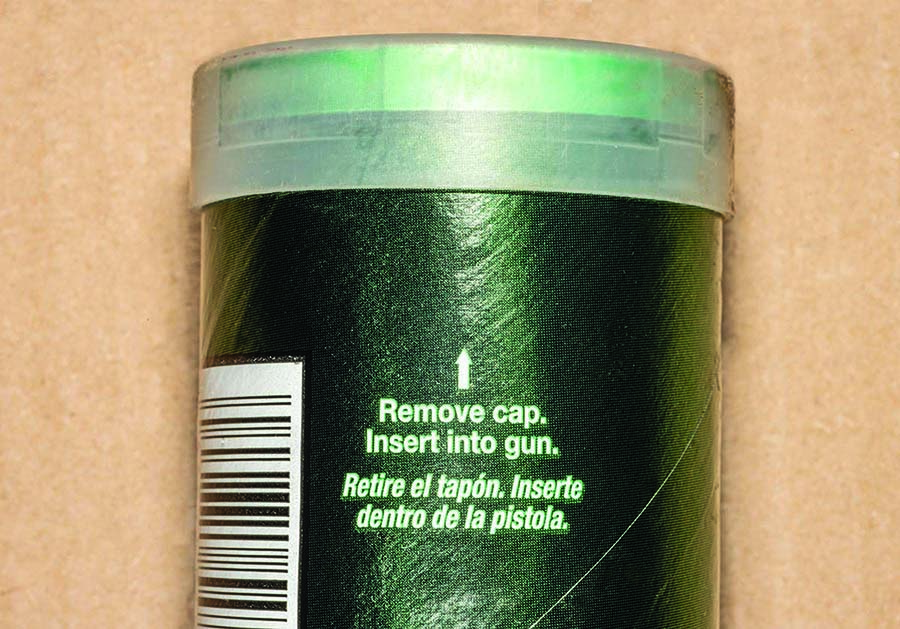
Remove the plastic cap off the end of the new tube of grease and slide it in the grease gun barrel first. Once in the gun, pull the tab off› the other end, being careful not to cut yourself on the sharp edges. Scrape off› any excess grease from the tab into barrel, then place the tab into the plastic lid to prevent someone else from cutting themselves.
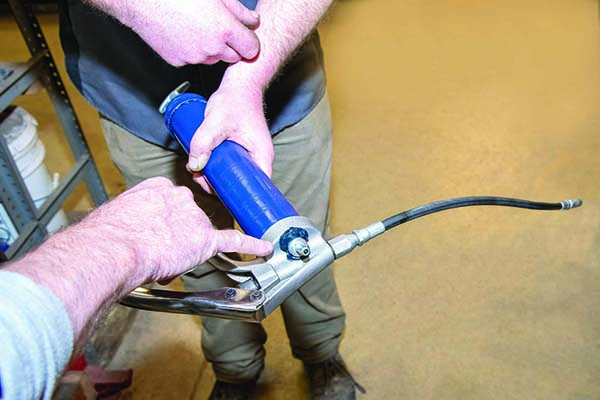
Screw the barrel back onto the head of the grease gun, making sure not to overtighten it at first. Push the plunger in as far as it will go to push trapped air through the release valve. Once grease starts coming out of the release valve, you can then fully tighten the barrel. You may have to squeeze or pump the gun several times to get the air completely out of the tub and hose.
Steps for Filling Standard Grease Guns
1. Grease gun prior to replacing grease tube
2. Pull the plunger back and lock it in place
3. An old grease tube in the gun
4. Pull the plastic cap off the new tube
5. Slide the new tube into the grease gun
6. Remove the metal tab from the new tube
7. Place the metal tab inside the plastic tube
8. Reassemble the grease gun with new tube inside
9. Push trapped air out of the release valve
10. Squeeze the lever until grease comes out of the gun
Grease Before Installing
Never install a new bearing dry without grease, especially tapered bearings. Always pack the bearing with grease before you install it. If you install the bearing dry, you will never be able to get enough grease into the center of the race and roller bearings through the Zerk before the bearing gets too hot and fails.
 1. The new bearing on the left requires grease before installing in equipment.
 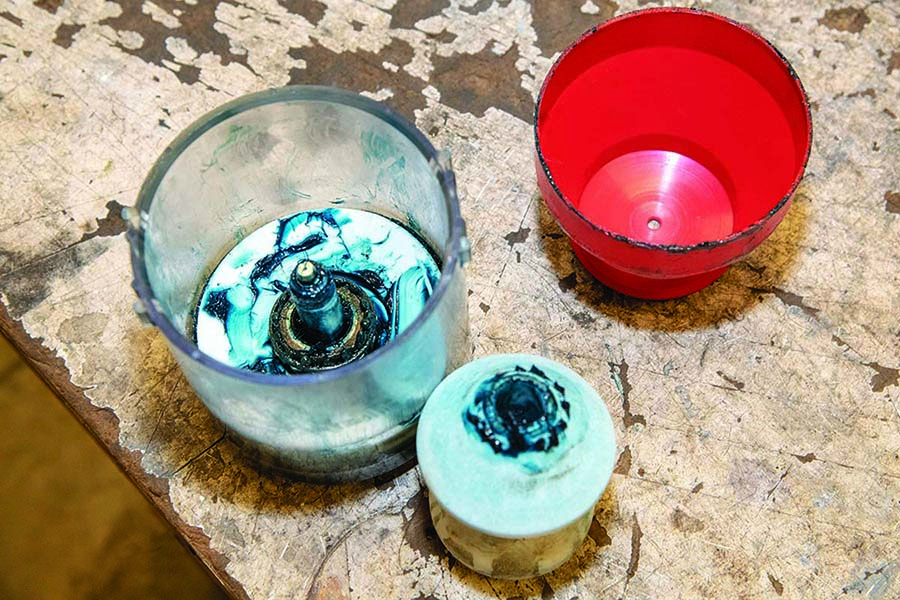 2. This unit helps to pack the grease into the bearing.
3. Place a bearing inside the unit.
2. This unit helps to pack the grease into the bearing.
3. Place a bearing inside the unit. 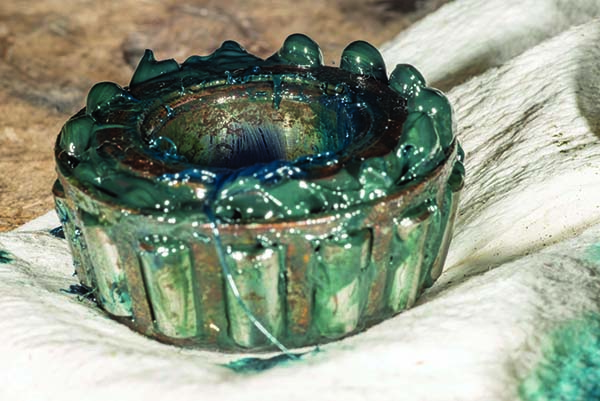 4. A bearing packed with new grease.
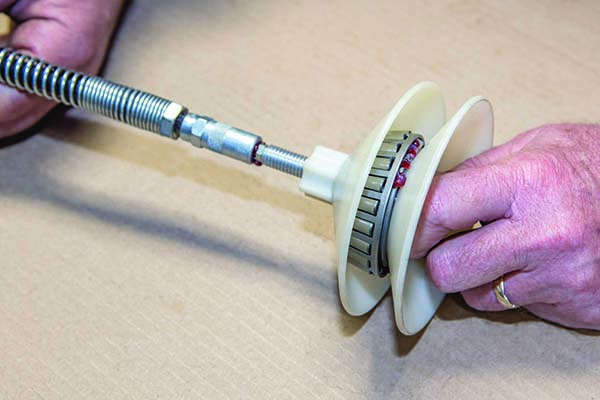
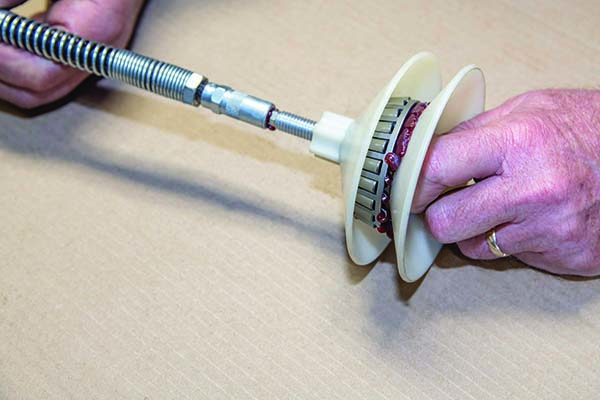

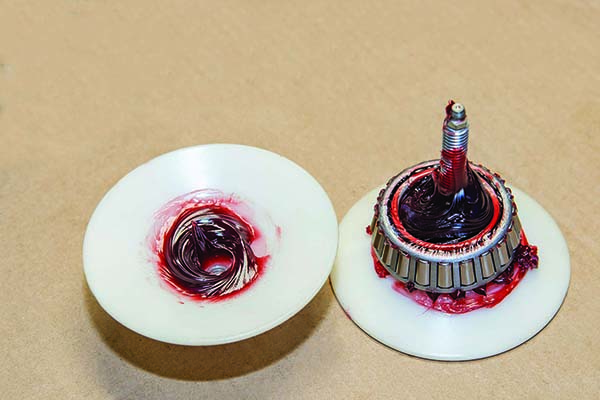
This bearing packing device allows you to pump grease into the center of the dry bearing before you install it. You can work the additional grease in the center of the fixture into the outer area of the rollers and cage of the bearings. It is best to immediately install the bearings to prevent contamination. Remember to wipe the device clean and store it in a clean plastic bag or case for future use.
Before pumping grease into the fitting, use a lint-free rag to wipe away any dirt, debris, or old grease from around the fitting and from the end of the hose. The last thing you want to do is push contaminants into the bushing or bearing you are trying to lubricate. Then, gently roll the coupler onto the fitting until they lock.
When greasing unsealed bearings, you might use another tactic. If it can be safely done, let the equipment run for a few minutes. Then, apply half of the calculated volume of grease the part needs and give it a chance to “rest” for a few minutes. Providing this rest period will better allow the grease to displace out of the channel and into the unsealed bearings.
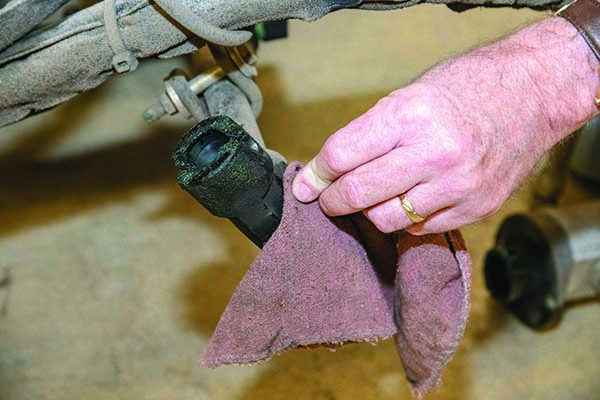
Clean grease fittings and the surrounding area before applying new lubricant. Do not let the act of lubrication introduce additional dirt and debris into the machine. Wipe off excess grease after application to avoid dirt and debris from adhering to the outside surface.
Pumping grease in a fitting when the equipment is “cold” can sometimes destroy seals prematurely.
After the rest period, see if any grease came out of the seal. If it didn’t, then apply the remainder of the grease. If you notice grease being pushed out, then stop greasing. Make a note in your records for the next time that bearing needs greased. Your last step is to clean the area around the fitting and wipe o› any excess grease. Excess grease will only allow more dirt and grime to be collected around the area.
Document Applications
It is always a good practice to have a checklist to follow and document what you do. Your records might provide valuable clues if the equipment fails down the road. Your records might indicate that you were not lubricating enough, too much, or using the wrong grease. It’s a way of determining the root cause of problems so you do not repeat them later. Documentation also becomes important if any questions are raised related to the warranty. In discussions with the manufacturer, be ready to answer these questions:
• Did you grease them?
• What type of grease did you use?
• How often did you grease them?
Most people don’t understand that manufacturers want to determine if any measures were being taken or if something was being done that caused any failures. By understanding your case, manufacturers also can educate others not to do things that might cause premature failures. At the end of the day, manufacturers may have to change the protocols they list in their operating manuals to prevent the problem from reoccurring.
Use Caution with Pressure Washing Equipment
We have seen an explosion in the use of pressure washers in cleaning machinery. Always consider the impact of power washing on bearing longevity. In most cases, the pressures from power washing equipment exceed even compressed air. Using a high-pressure system to clean equipment can generate 1,000-3,000 PSI; whereas, air pressure rarely exceeds 125 PSI.
Under these pressures, it is easy to wash the grease out of bearings. Remember two points when you use a high-pressure washer to clean equipment.
First, never direct high-pressure wash water toward a bearing parallel to the shaft on which its mounted. In other words, wash a machine down its sides, not into its sides.
Second, remember that high-pressure water can breach even sealed bearings. Such breaches shorten bearing life by introducing water and contaminants into the bearing, corroding the contact surfaces or creating surface roughness.

REPLACE DEFECTIVE FITTINGS
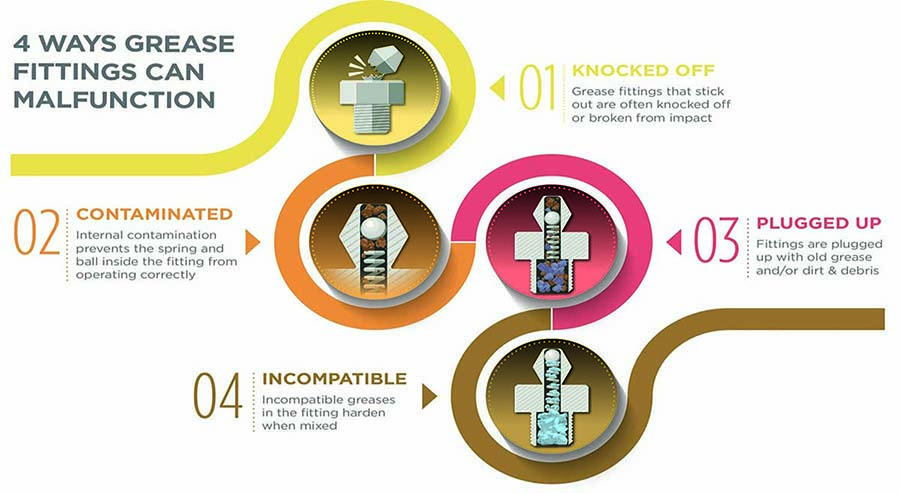
There are at least four common ways that grease fittings can malfunction.
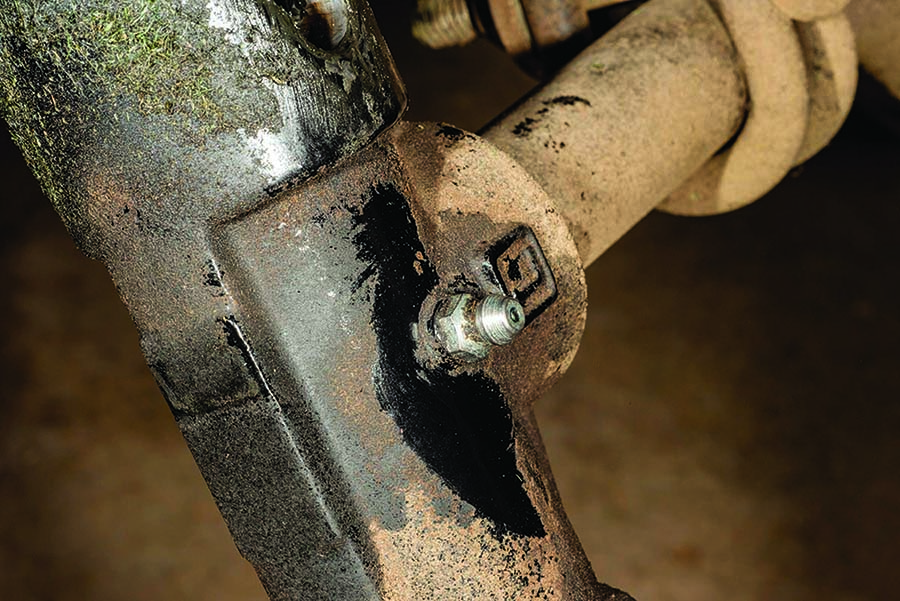
- Grease fittings can be broken or knocked off› from impact, because they stick out of equipment.
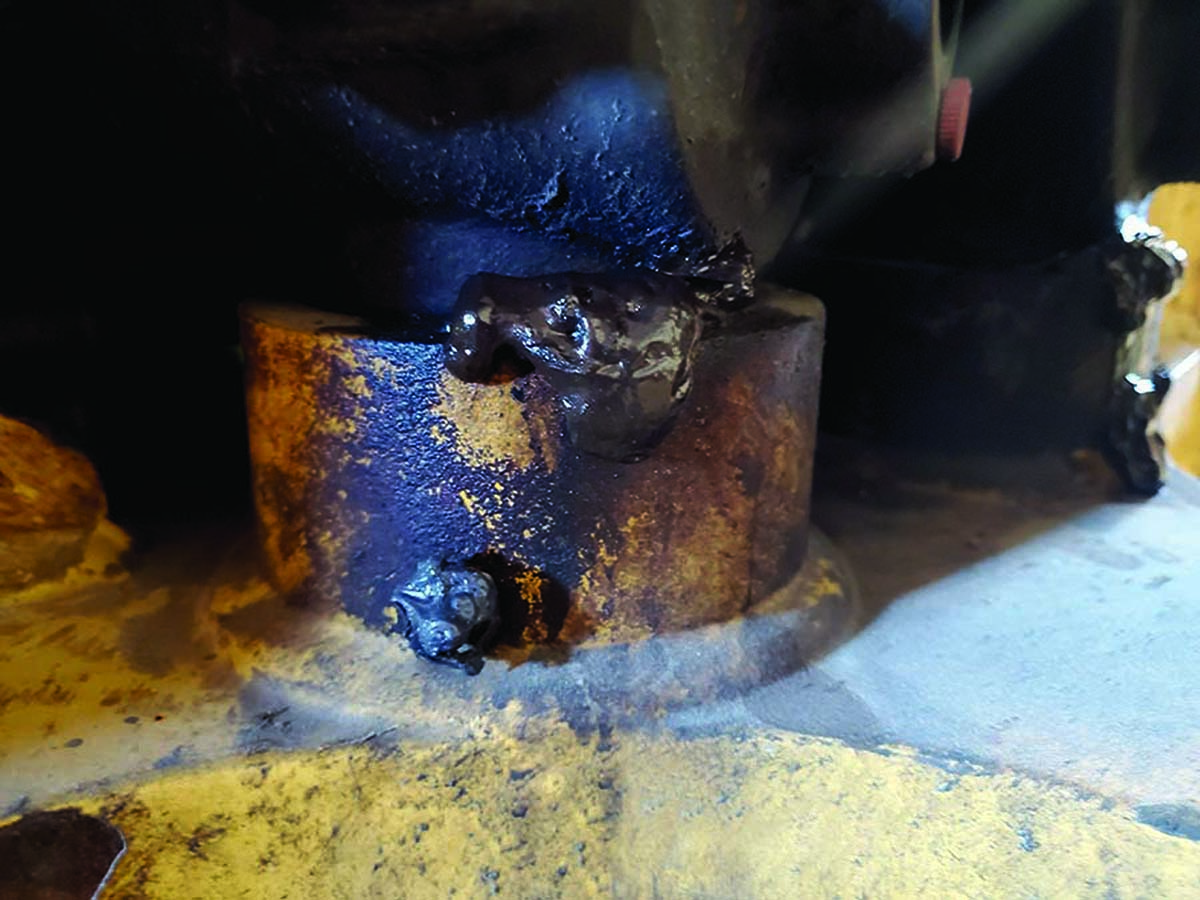
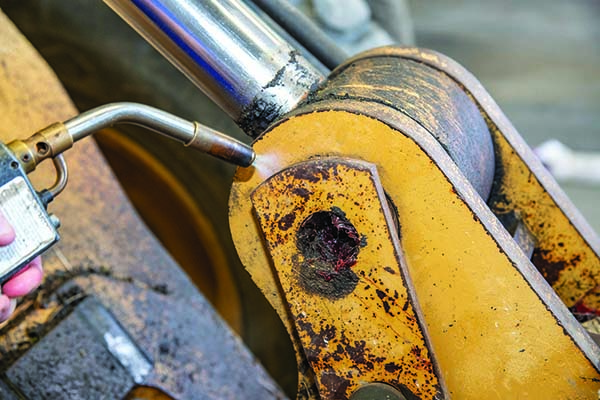
- Fittings can become plugged with old grease, dirt, or other foreign objects that prevent them from accepting new grease. You may ask, “Can old grease plug a Zerk?” Yes, and it occurs when the oil separates from the thickening agent, which then dries into a solid obstacle in the channel. This can happen when you extend lubrication intervals, which can lead to hardened material packing the channel.
- Internal contamination prevents the spring from pushing the ball tightly against the opening.
- Incompatible greases were used that hardened when they were mixed together.
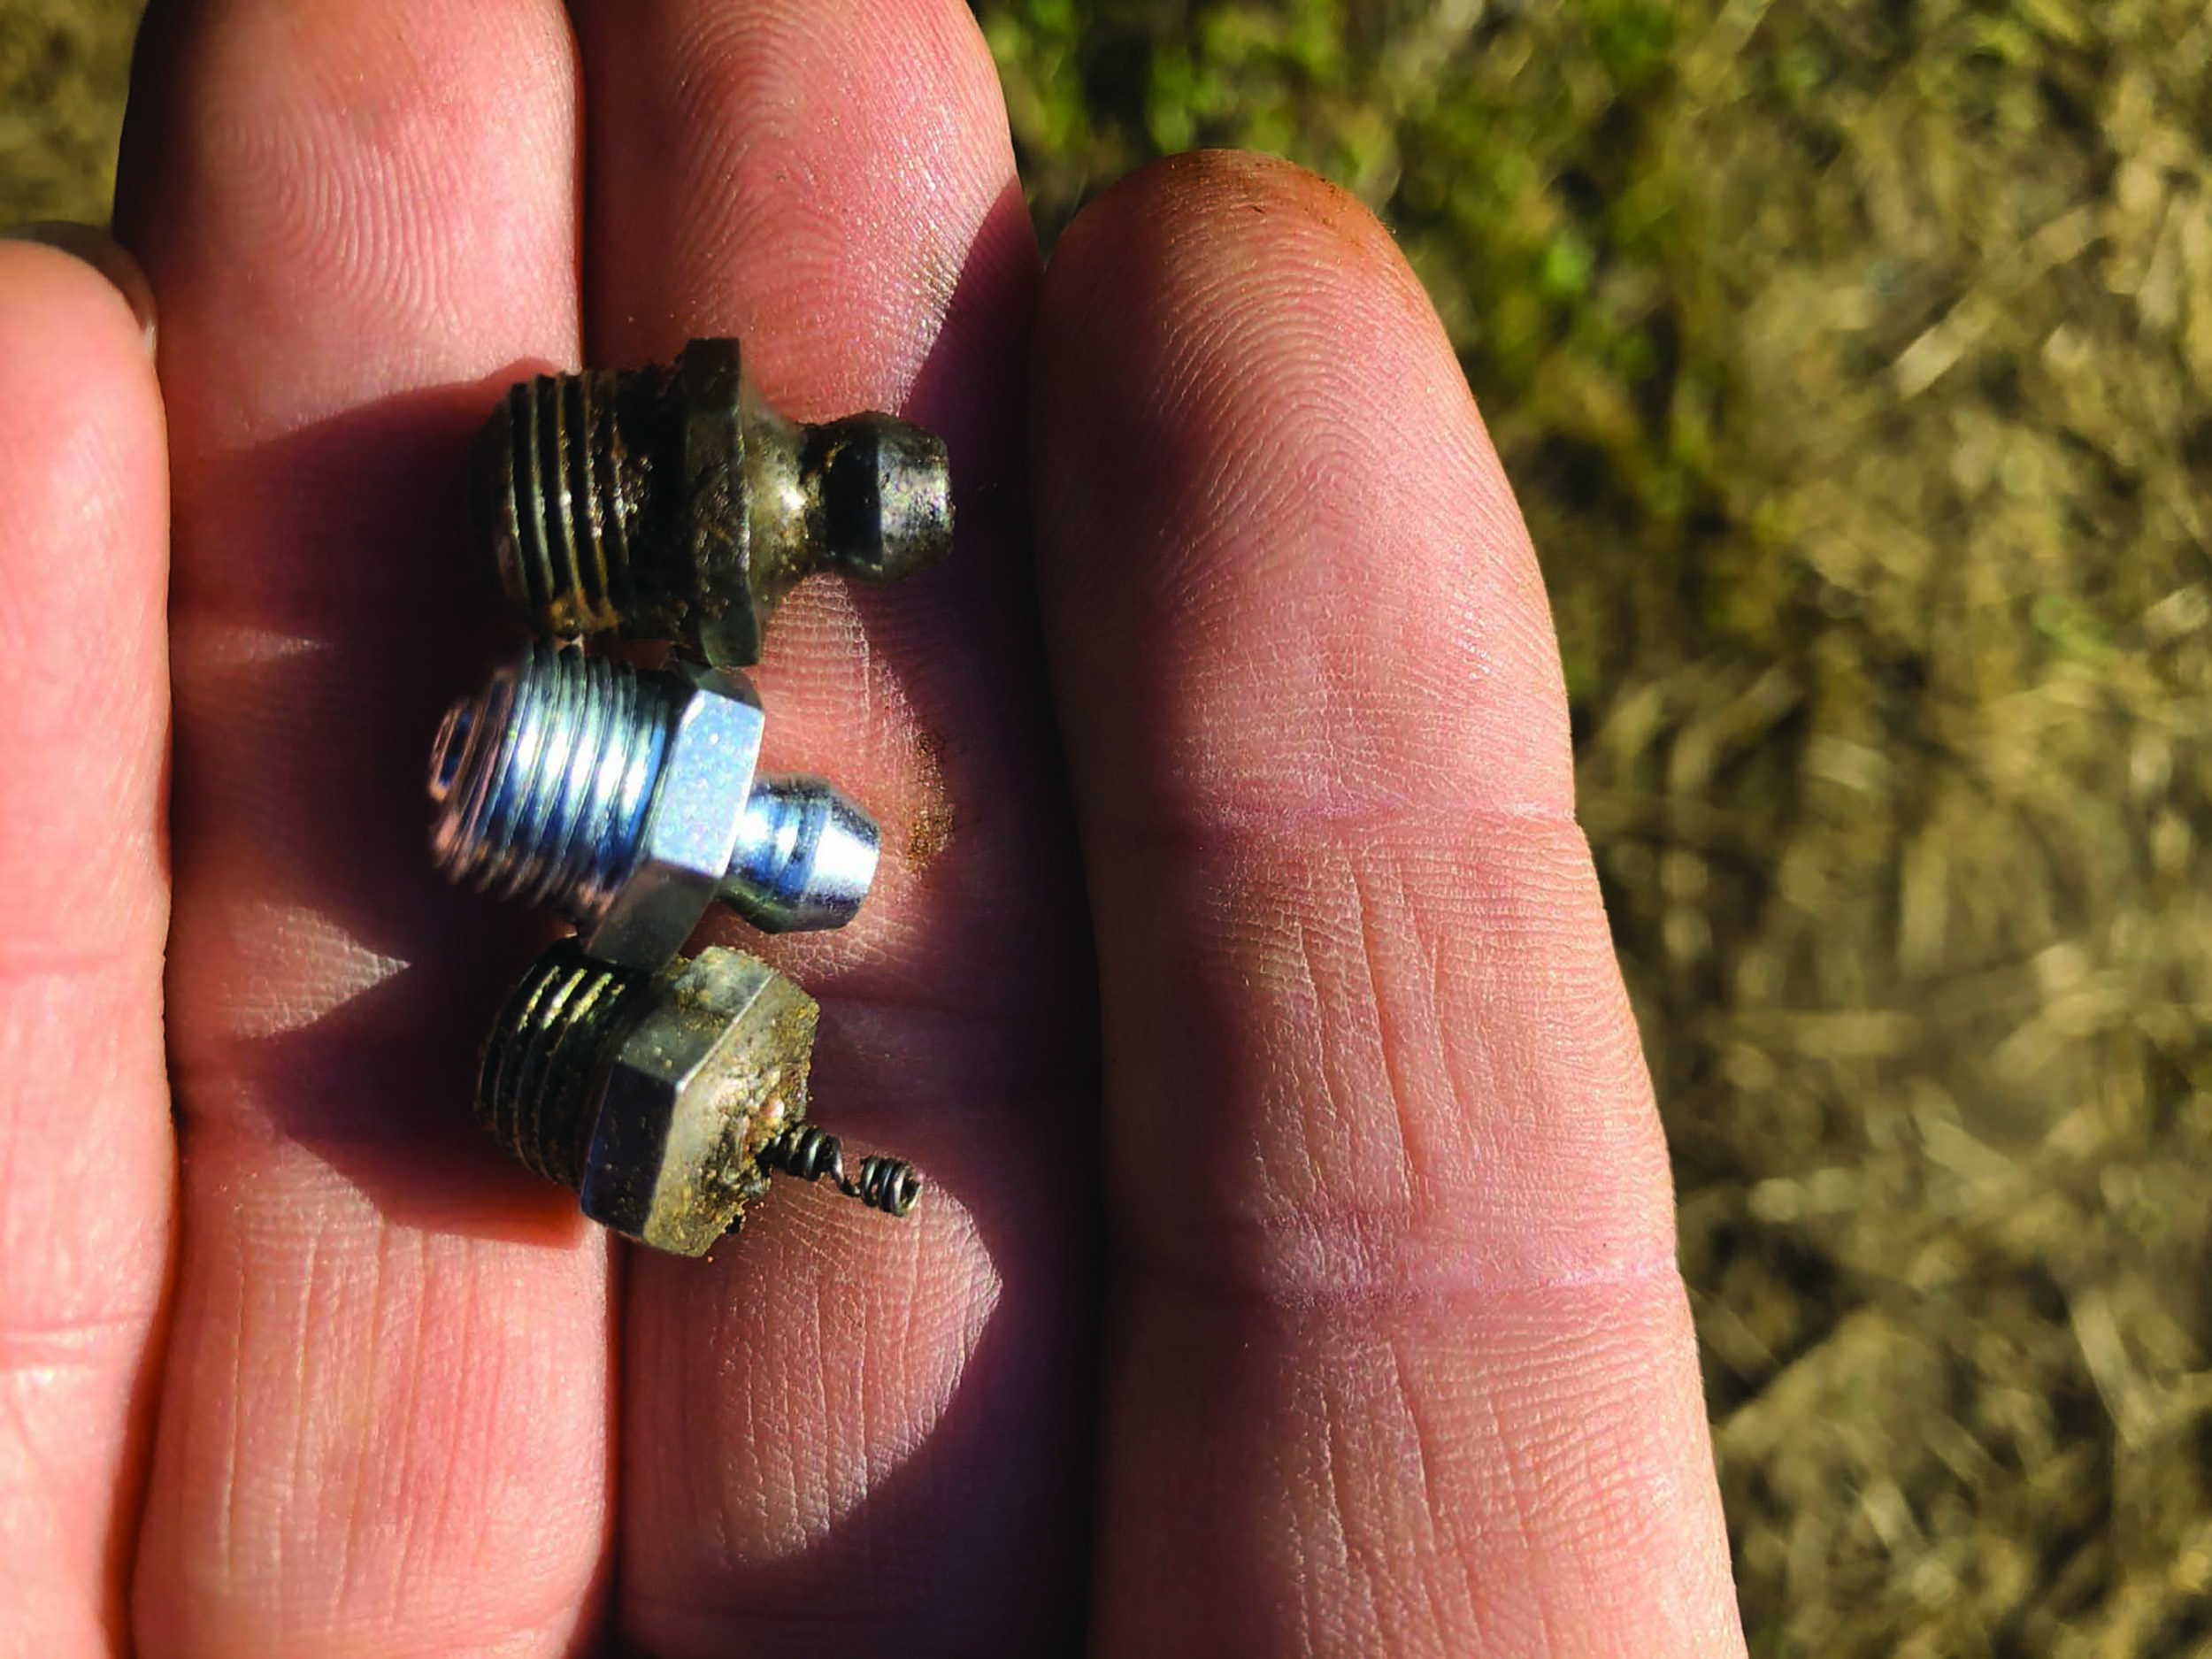
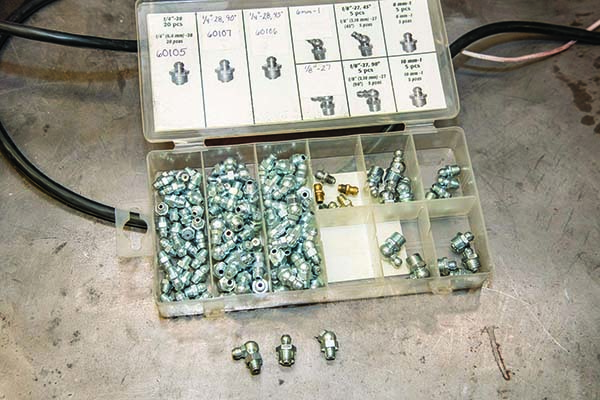
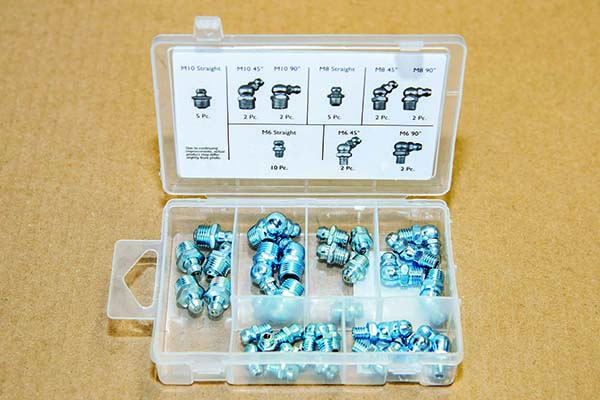
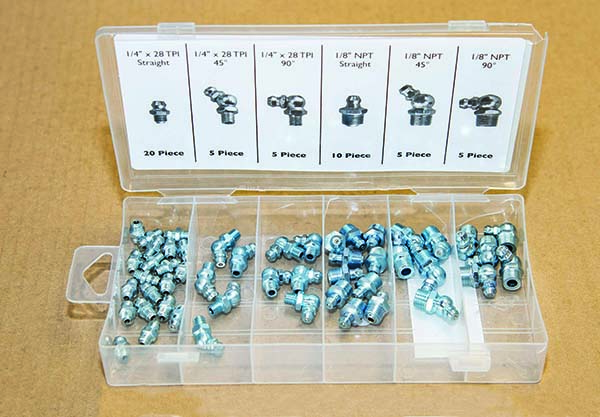
If a grease fitting fails for any of these reasons, replacing the Zerk is actually easier and less time-consuming than trying to clean it. While replacing a grease fitting is easy, getting the right one can be difficult.
Typically, you want to replace a grease fitting with an exact copy. You can find an exact match using a grease fitting thread gauge that you put in your fitting — just like you can use a bolt guide to select the correct bolt. Thread gauges have standard and metric sizes, along with thread types:
• American Society of Engineers (SAE)
• UNF (Fine Pitch Thread)
• UNC (Coarse Pitch Thread)
• National Pipe Thread (NPT)
• British Standard Pipe Fine Thread (BSF)
• British Standard Whitworth (BSW)
• British Standard Pipe Taper (BSPT)

Shelf Life of Grease and Sealed Bearings
A general rule of thumb is that sealed bearings last up to five years. The limiting factor on the life of a sealed bearing that is sitting on a shelf is that the internal lubrication will eventually go bad. The process by which grease ages is called oxidation. It is the same process that describes how rust breaks down iron metal. In the case of a lubricant, oxygen and moisture at the molecular level in the grease eventually form insoluble byproducts such as sludge, tar, and varnish.
Manufacturers will often tell you that the shelf life of a drum or tube of grease is 12-24 months. They generally do not include shelf life on the tube because there are conditions that can increase or decrease that one- to two-year shelf life. For instance, every 18°F change in temperature can cut in half or double the life of a lubricant, whether it is sitting on a shelf or in a machine.
Likewise, opening the drum or tube begins the oxidation process, which can shorten the life of the product.
The key to maximizing a grease’s shelf life is to purchase only the amount you can use within two years. You can also protect the shelf life of a grease in a sealed bearing, tube, or drum by first rotating the grease stock, and secondly, storing the grease in a controlled environment.
 Stored greases deteriorate over time. Do not store grease below freezing at 32°F or above 86°F. Your storage area should have low humidity and should not expose the tubes to sunlight. Store cartridge tubes upright at all times as indicated by the box they were delivered in. If you store a tube of grease with the plastic cap down, the oil can leak out of the container.
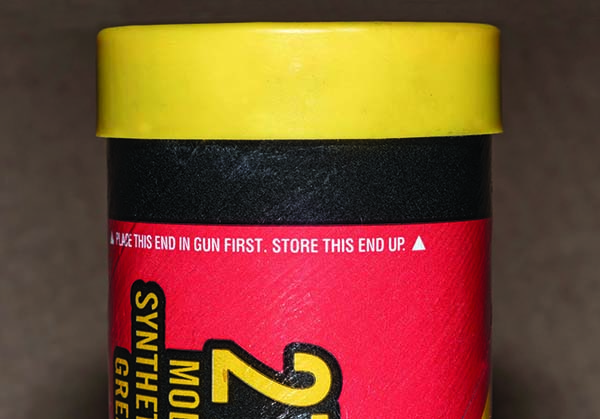
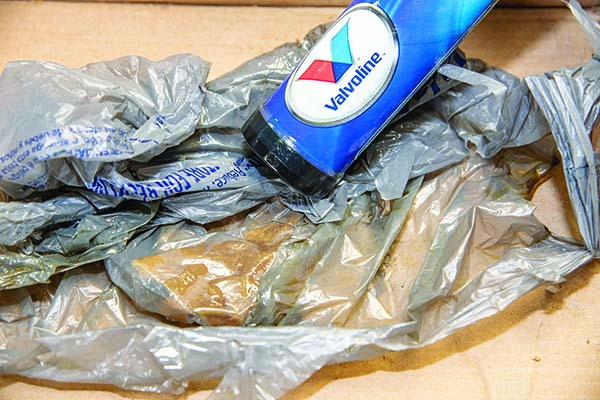
As the tube says, store grease tubes with the plastic cap up (left). Failure to do so can result in an oily mess (right).

Mixing Grease Creates Problems
It is in your best interest to use the types of grease that equipment manufacturers recommend to help keep the warranty intact. Once the warranty period ends, you may want to switch over to another type of grease that meets the original specifications.
However, mixing greases can create unintended problems. Manufacturers design each grease product with a specific application in mind. If you mix one grease with another that is incompatible, it can cause more harm than good.
It is best to assume that if you switch from one grease to another, it will lead to compatibility problems. In most cases, your assumption will be the correct one. If you want to switch to another grease, be sure to call the manufacturer of the grease you want to purchase and ask them: first, if their product is compatible with the one you are currently using, and second, recommended for the equipment application or manufacturer.
Major grease manufacturers and distributors have their own sales representatives who routinely answer questions about compatibility. The representatives will know what is and what is not compatible with their products. Although they want to sell you a product, representatives do not want to be on the hook for recommending an incompatible grease. This is why it is important to develop a relationship with a grease expert, because their knowledge will help you eliminate making mistakes and causing additional or unwanted problems.
Conclusion
Calling someone a “grease-monkey” is often considered derogatory, implying that it does not take any skill to put grease into a fitting. But nothing can be further from the truth. This publication demonstrates that selecting and using the correct grease for each application is, if anything, a highly technical science that requires skilled decision-making.
Selecting the right grease for the right situation isn’t as simple as choosing rye versus wheat bread. Technology has changed not only the design of much of the equipment we use, it has also changed the formulation of greases.
Greases, just like oils, have come a long way since the times of Henry Ford. No longer do we have to use the vice and hammer method to determine if a grease is tacky enough to stay where you want it.
The vice and hammer method required users to place grease on a vice and smack it with a hammer. If all the grease shot out and none was left on the vice or hammer, then it probably wasn’t a very good grease. But if some stayed on the vice and on the head of the hammer, it would probably hold up under extreme conditions.
Appreciate that there is so much more than just “shooting” grease into a fitting. At its core, a grease is a unique blend of base oils, thickening agents, and additives that dictate the properties of each formulation. Grease manufacturers make these properties available through technical datasheets that allow you to become a more informed consumer of grease products.
Properly lubricated equipment stands a better chance of standing up to the uses it was manufactured for. It is vital to find the right grease for your equipment, because not all greases work in all situations.
Manufacturers run multiple tests to give you information, so it is easier for you to decide which grease is best suited for your applications. Buying grease used to be easy, but has become more complicated. That is why it has become so important for us to educate ourselves about what greases are the best one to protect our investments for the long haul.
Understand what lubrication manufacturers are telling you about the lubrication in their catalogs and on their product labels. You also need to read and understand the operator and service manuals for your equipment to know what greases to use. It’s true that most of us don’t have the scientific background that engineers have, but that doesn’t mean we can’t properly lubricate equipment.
 A bigger hammer is not always the solution. The right lubricant, at the right time, and in the right amount is key to remaining operational.
 Acknowledgements
Thanks to Dawn Minns for graphic design, Adduci Studios for illustrations, and Lynn Senesac for select photos. Thanks also to the following individuals who provided valuable comments and suggestions that improved this publication:
David Hinkle, Purdue University
Paul Howard, Purdue University
Dennis Mungle, CountryMark
Brad Shelton, Purdue University
Tristand Tucker, Purdue University
Disclaimer
This publication is intended for educational purposes only. The authors’ views have not been approved by any government agency, business, or individual and cannot be construed as representing a perspective other than that of the authors. The publication is distributed with the understanding that the authors are not rendering legal or other professional advice to the reader, and that the information contained herein should not be regarded or relied upon as a substitute for professional consultation. The use of information contained herein constitutes an agreement to hold the authors, companies or reviewers harmless for liability, damage, or expense incurred as a result of reference to or reliance upon the information provided. Mention of a proprietary product or service does not constitute an endorsement by the authors or their employers. Descriptions of specific situations are included only as hypothetical case studies to assist readers of this publication, and are not intended to represent any actual person, business entity or situation. Reference in this publication to any specific commercial product, process, or service, or the use of any trade, firm, or corporation name is for general informational purposes only and does not constitute an endorsement, recommendation, or certification of any kind by Purdue University. Individuals using such products assume responsibility that the product is used in a way intended by the manufacturer and misuse is neither endorsed nor condoned by the authors nor the
manufacturer.